Showing posts with label cake. Show all posts

Wednesday, September 11, 2013

Naturally Gluten-Free: Coconut Cassava Bars

Hello world! These are my baby steps back into the food blogging/photography world. A little scared...a lot clumsy (I swear I've somehow forgotten even the basics of how light works! =X)...and learning things again bit by bit (I hope) with each attempt!

Coconut Cassava Bars
For today's shoot, I chose coconut cassava bars inspired by one of my favorite nutrition blogs, Nutrition to Kitchen. Similar versions of this cake can be found in Vietnamese and Filipino cuisine. These bars are mildly sweet and just a little bit salty (partly due to the addition of cheddar cheese!); soft and chewy in a way that's reminiscent of mochi cake (not surprising once you learn cassava is used to make tapioca); rich with coconut flavor (from the milk as well as sweetened coconut strings known as macapuno); naturally gluten-free; and ab-so-lute-ly addicting to nibble on. Please do give it a go, and let me know what you think!

Monday, February 25, 2013

Wheek Wheek! (Guinea Pig Cake Tutorial)

Guinea Pig Cake Process
I had a Work Hard, Play Hard kind of weekend and I'm gonna be honest with you, my body just can't bounce back like it used to in college! In fact my head's pretty mad at me right now for not going to bed 2 hours ago lol. But I had to type up this post now 'cause I couldn't wait another second to share my first carved cake with you! My good friend E is a guinea pig lover (and proud mama to 6 adorable lumps of flesh and fur piggies), so I volunteered to make a guinea pig-shaped cake for her big 3-0 party this weekend. I was pretty scared to carve a cake for the first time, but I'm so glad I went for it because (with P's help) I was able to make something we all found super-cute. I looked at a LOT of cake versions of this adorable rodent and EVEN MORE photos of real pigs before settling on my own path. Kinda really hoping not to see another guinea pig photo for a few months, as cute as they may be...

Nonetheless, I wanted to share some notes (before I forget!) on how I made this cake in case any of you have pig-lovers as friends/family/clients/selves. Wish I'd thought to document the initial cake carving/spackling process, but I'm hoping the 3 pre-buttercream shots below are still helpful. If you have any additional questions about how I made this Wheek-tastic cake, don't hesitate to leave a comment or shoot me an email!

Guinea Pig Carved Cake
Makes one approximately 11 x 5 x 5-inch cake

12 or 14-inch Cake Drum (sturdy base board)
Three 8-inch square cake layers 
***I made 1.5x batch of my favorite chocolate cake with 1 extra egg and 1/3 cup less coffee
Chocolate Buttercream
Vanilla Buttercream
Black, Brown, Yellow, Pink and Green gel OR powdered food coloring
Spatula (for frosting between cake layers)
Sharp Knife for Carving
Piping Bags (optional)
Medium Paintbrush (used for food ONLY, with coarse bristles for best texture)
LOTS of Paper Towels
Gumpaste (for eyes, ears, and nose)
Vegetable Oil (for painting the eyes)
Smaller Paintbrush (for painting the eyes)
Wilton Tip #233 (or other grass piping tip)

I started off by cutting, filling, and stacking my cake layers with chocolate frosting to make a 10 x 5 x 4-inch rectangular cake. Crumble any leftover cake into crumbs and combine with enough frosting to make an easily moldable material for spackling the cake. (If you've ever made a cake pop, this is essentially what goes into cake pop fillings.). Chill rectangular cake for at least 30 minutes, then start carving! Use back and forth motions with a sharp knife to cut away small pieces of cake at a time. I just looked at a LOT of photos of guinea pigs (including my friend's actual pigs) and became familiar with their shape from different sides. To start with, you'll want to smooth out all the top corners and carve more toward the middle to create a subtle "waist" between the main guinea pig body segments. I'm not great at thinking in 3D, so this part was nerve-wracking when I thought I could only cut away. BUT (and you can call this cheating but I won't care =p) once I started using the mixed paste of cake crumbs and frosting as spackle, both building up the shape and cutting it away, I was able to just have fun. The angle, size, and shape of the head also stumped me for quite a while, so I just kept building up the cake "butt" with more spackle haha. So if you noticed that this (pig) baby's got some back, the credit/blame falls squarely on these here shoulders...**cheeeeeesy grin** 

Guinea Pig Cake Process
If you find the cake getting too soft to carve well, simply stick it back in the fridge for 10 minutes to firm up again and then continue working. When you're happy with the shape, chill the cake again to set the shape. While you're waiting on that, reserve about 1/2 cup of vanilla buttercream, then divide up and color the remaining chocolate and vanilla frostings to make the shades you want for the fur. I used black gel food coloring to darken chocolate buttercream and a mixture of vanilla frosting, chocolate frosting, and brown and yellow gel colors to create the lighter shade of brown fur on the pig. 

Now's also a good time to color the 1/2 cup of vanilla buttercream reserved above a vibrant grass green for later. I used a combination of gel and powdered food coloring. Cover and set aside for later.

Guinea Pig Cake Process
Once the cake has been chilled enough, it's time to add the fur-textured buttercream. I spent as much time figuring out the best way to do this as I did studying guinea pig shapes (is it just me or do those both make me sound ultra cool?? and not weird at ALL). The keys to getting a fur-like look with buttercream are (1) to use a paintbrush (one reserved for FOOD use ONLY) with somewhat coarse bristles, (2) to apply the different-colored sections from the back of the cake toward the head, and (3) to wipe your brush off VERY well whenever it touches more than one color at once.

Guinea Pig Cake Process

Wednesday, February 13, 2013

A Day Late OR 364 Days Early? (King Cake Cake Pops!)

King Cake Cake Pops
I know Mardi Gras was technically yesterday, but can you really blame me for wanting to keep the party going? I made these King Cake^2 Pops for a birthday celebration at work today. And based on 100% statistically sound exit polling, these treats would be a welcome offering year-round =p. The filling is a 6 Bittersweets original cake full of sour cream, raisins, cinnamon, nutmeg, and cream cheese. Dressed up in a slim candy coat and sparkly colors, these are my most party-ready cake pops yet! I suggest you grab on to any excuse you get to make these, whether it's Mardi Gras, a birthday, or even just Hump Day =).

Wednesday, January 30, 2013

A Taste of New Orleans! (Sucré King Cake GIVEAWAY)

Sucré King Cake
New Orleans has always intrigued me with it vibrant culture, dynamic music, and flavorful foods. And quickly approaching is one of the times of year that the city shines its brightest -- Mardi Gras!  Sadly I won't be able to make it down this time 'round, but I was delighted to hear that I could experience at least one integral part of the tradition right here in my home. And so can one of you! =D
Sucre King Cake 2
It turns out that Sucré, whose French macarons I've been coveting for quite some time, also makes a killer King Cake (a must at any Mardi Gras celebration!). It's gotten praise from The Times Picayune, Washington Post, and New York Times, among others. If you're among the uninitiated, a King Cake consists of buttery sweet danish pastry filled with cinnamon and cream cheese then topped off with a vibrant array of colored sugar. A trinket (usually a small plastic baby) is also put in each cake. The person who finds it is then dubbed King or Queen for the day and said to receive good fortune for the year! That person then has the duty to pay it forward by throwing another party and serving a King Cake. How. Fun. Is. That?! So the point of all this is that Sucré has generously offered to provide one of their award-winning King Cakes (feeds 8-10) to one lucky 6 Bittersweets reader just in time to throw your own local mini-Carnival!

This giveaway will remain open for 5 days and is limited to addresses in the continental US. To enter, do as many of the following as you want and leave a separate comment for each thing you do! Please also make sure to leave me your email address to contact you if you win. The giveaway will close on Tuesday, February 5, at midnight, and the winner will be announced shortly thereafter!  This giveaway has ended -- thanks to all who entered!
  • Tell me your favorite New Orleans, Mardi Gras, or King Cake experience if you've had one.
  • Visit Sucré's online store, and share your favorite treat in the comments.
  • Like Sucré on Facebook, then leave a comment telling me you did so.
  • Follow Sucré on Twitter, then leave a comment telling me you did so.
  • Subscribe to this blog, then leave a comment telling me you did or already do.
  • Follow 6 Bittersweets on Twitter, then leave a comment telling me you did or already do including your Twitter name.
  • Tweet about this giveaway including a link to this post and tagging @6bittersweets, then leave a comment telling me.
P.S. - Don't like relying on the whims of Lady Luck? Sucré will take/ship out orders of King Cakes until February 11, and don't forget to check out their nommy macaron selection too while you're there!

Thursday, October 11, 2012

Celebration Cake (Yellow Layer Cake with Milk Chocolate Ganache)

When it comes to yellow cake, fluffy and moist are where it's at in my book. But sometimes I just can't deal with all the crumbs that break off the second I apply frosting. Especially in planning my first ever multiple-tiered cake, I knew I'd need a yellow cake endowed with a touch more strength and structure than my current go-to. I get enough baking anxiety without adding collapsing cake tiers to the not-so-little list of horrors! Luckily my favorite white cake recipe had a yellow cake (egg yolk) variation built right in! A double batch was just right for the 2 tall tiers pictured above (5 x 4 inches and 8 x 5 inches), and the cake came out nicely firm without sacrificing moistness or flavor.

SMS Cake
Yellow Cake with Milk Chocolate Ganache and Covered in Fondant

Surrounding each cake layer was a generous coating of milk chocolate ganache (I used Trader Joe's Pound Plus bars, which are just $5 for 17.6 oz. and taste seriously amazing). I recommend a milk chocolate-to-heavy cream ratio of 2.8 or 2.9 to 1 so that the ganache will set up firmly and provide a sturdy, smooth (and decadent) base for your fondant covering. And I calculated the total amount of ganache needed using this awesome tool called The Ganacherator. Now if you've read anything about fondant, you'll have heard that a cake covered in fondant will only look as good (read: smooth and straight) as the buttercream or ganache underneath. This is absolutely true, and ganache is much easier to learn with as it will set really firm at room temperature (unlike buttercream). Making celebration cakes is really an art-form and I've got a long long ways to go (as evidenced by the elephant skin, not-quite-straight sides, and drooping of the corners in the above cake). But for anyone interested in going down the rabbit hole, I've shared some of my favorite video tutorials below of ganaching, covering, and smoothing the fondant to get a clean professional look to your fondant cakes. I hope this helps the other beginners out there, and I'd love to get feedback on improving my fondant work from any cake experts out there! Cheers!

Making Ganache for Decorating Cakes by Inspired by Michelle
Covering a Cake in Ganache with Smooth and Straight Sides by Inspired by Michelle
Rolling out Fondant, Covering, and Smoothing a Ganached Cake by Planet Cake
Smoothing Cake Covered in Fondant to Get Sharp Edges by Inspired by Michelle

Monday, July 30, 2012

Monday Favorites


Hi guys -- I'm still here! Sorry to be MIA again lately, but it's a bit of an understatement to say that my life has been kuh-ray-zeeeee lately! It's gonna be at least another few days before I can return with my first recipe in who knows how long, but I thought I'd go ahead and share the food photography and music favorites I've nonetheless been saving up in my spare moments here and there. Below you can also find a quick phone snapshot of a strawberry and vanilla cake I baked this week for a Hello Kitty fan's 7th birthday this week! I didn't have the chance to meet Kara directly, but I sure hope she liked her strawberry-loving kitty ^-^.

How've you all been? I've really missed our interactions and can't wait til things calm down to get back on track.


Hello Kitty Strawberry Cake for Kara
Ampersand Mosaic Wedding Cake by Blissfully Sweet Cakes
1 BlissfullySweet-Ampersand Cutout Fondant Decoration Mosaic Wedding Cake Idea
Basil for Snickerdoodle Cookies from Desserts for Breakfast
2 Stephsus-Basil Herb Close-up Ingred Idea
Nautical Wedding Cake by City View Bakehouse
3 CityViewBakehouse-Nautical Zigzag Gold Rope Gumpaste Flower Anchor Fondant Wedding Cake Idea
4 IndianSimmer-Cherries Ingred
Ombre Buttercream Wedding Cake with Bird Toppers by Sugar High Inc.
5 SugarHighInc-Bird Topper Ombre Buttercream Wedding Cake Idea
Roasted Peach Sherbet Cones from Always with Butter
6 AlwayswithButter-Roasted Peach Ice Cream Cones Scoop Propwish Idea

Monday, July 9, 2012

Sweet Baptism Treats for Baby Warren!

Photo of Cake Close-up by John Manansala
Moon, Stars, Angel, and Lamb Baptism Cake for Baby W's Christening
Inspired by This Cake by PhoebeCakes
Photography by John Manansala
Hi there! Hope you all have been keeping cool if your area's as hot as our's (up to 108 degrees F at one point this weekend!). My new smartphone keeps buzzing me with heat advisory alerts. Even without any heat from baking, AC on full blast, everything dark, and 3 fans on, we were sweating like crazy. Please (oh please) do tell me that the summer heat's simply peaked early. Because if it turns out summer hasn't even brought out its big guns yet, I may not last the season =p. *Starts hummin' tell me lies, tell me sweet little lies...

The actual point of this post isn't actually to whine about a little temperature hike but to share some treats I made for an actual baby =p: my very first fondant cake as well as pistachio French macaron pops and decorated cookies to celebrate the christening of my friend P's little boy! I'm absolutely delighted for his entire family and can't wait to see how quickly Baby W grows in the coming year.

Photo of Macaron Pops by John Manansala
Pistachio Macaron Pops for Baby W's Christening
Photography by John Manansala
The inside of the cake consisted of 3 moist coconut cake layers, freshly chopped mango and mango curd filling, and silky coconut Swiss meringue buttercream. But to tell the truth, most of my attention fell to its outside. Covering my first-ever fondant cake was both exciting and a bit terrifying! I'm quite happy with how everything turned out, but I did have some issues with cracking and definitely have a lot to learn about handling fondant. Now that I've worked with it myself, I'm doubly impressed with all the smooth-sided, straight-edged cakes I see online! Even though I've watched just about every Youtube video that exists on covering cakes with fondant, I think it's one of those things that you have to learn by doing to a large extent. With my first wedding coming up soon, I've already ordered more fondant to practice with.

Hope you enjoy seeing my first fondant effort and other baptism treats and would welcome any tips or favorite fondant brand/recipe recommendations you might have to share!


Photo of Macaron Pops and Decorated Cookies by John Manansala
Angel, Cross, and Sweet Lamb Decorated Cookies for Baby W's Christening
Photography by John Manansala

Friday, April 27, 2012

Tart Lemon Cake for Mother's Day (Guest Post for Pure Joy Events)

Tart Lemon Layer Cake for Mother's Day Craft Photo Shoot
I'm lucky to live near 2 fabulously talented food and party blogger friends, Christine of Pure Joy Events and Heather of Chickabug. It was such a pleasure to collaborate with the 2 of them previously, so I was excited when Christine suggested we team up again for a special Mother's Day project! For our latest undertaking, Christine made this fabulous memo board of colorful clothespins to provide the perfect setting to show off memo to Mom cards custom-designed by Heather. And I added a measure of sweetness with my Tart Lemon Cake! Please head over to Pure Joy Events for the full cake recipe and to Chickabug for the Mother's Day memo board tutorial, FREE memo to Mom printable, plus the lemon cake recipe card. You can also find a plain-text printable version of just the cake recipe here.

Tart Lemon Layer Cake for Mother's Day Craft Photo ShootClothespins and Memos DARKER TEXT

Thursday, March 29, 2012

WANTED: The Perfect Carrot Cupcake (Round 2)

Back in November of last year, I shared with you that P's cousin K had offered me the honor of baking cupcakes for her wedding in October. I decided to start testing recipes almost a year early 'cause I'm sometimes *cough* be a bit *cough* of a procrastinator O=). While I enjoyed the simplicity of the first batch and had a LOT of fun fashioning realistic carrot toppers out of marzipan, the flavor of the cake itself didn't have quite as much OOMPH as I wanted. It was inevitable that there would be a Round 2...I did declare after all that "I [wouldn't] rest until [I'd] found the perfect carrot cupcake for K's wedding day!"

Round 1 had covered the plain and simple end of the Carrot Cake Spectrum, so the goal for Round 2 was to really explore the options when it came to add-ins and alternative prep methods. Early on I was intrigued by a unique recipe from The Silver Palate Cookbook that called for steamed and pureed carrots rather than raw, shredded ones! But what I wasn't taken with were the copious amounts of sugar, oil, and sweetened coconut in the original. Being the irrepressible tweaker you should know me as, I went directly to the cutting board and I think it's accurate to say I went BIG. By the end of this surgical session, I'd cut 1/3 of the sugar, 1/2 the fat, and 1/2 the coconut along with pinches of salt and baking soda.


Carrot Cake Cupcakes (Round 2!)
Having wrapped up Round 2, I can now declare these to be The Best Carrot Cupcakes I've Ever Eaten =D. A feast of flavors from freshly mashed carrot and crushed pineapple to toasted nuts and (subtly) textured coconut. Dense and moist but absent any oily mouthfeel or excessive calories. I credit the texture in no small part to the pureed carrots, and that's not the only benefit to this unusual way of preparing them. Even if there were no benefit as to taste, I'd pick pureed carrots for my cake anyday for the time it saves me from slaving over the box grater!

It's pretty obvious I'm really taken with this recipe, right? But the funny thing with The Best anything is that there might always be an even better version out there -- and you'll never discover it unless you keep an open mind! So if anyone's convinced their mom/granddad/friend/neighbor's carrot cake is the best thing since the invention of cake, please DO shoot me a message and I may test it out! I certainly have time for Round 3 as K's wedding's not for 6 months 8).

Sunday, March 25, 2012

November Wedding Photo Shoot with Janice Cui

Wedding Photo Shoot 1
Today it's my delight to finally be able to share a few of the gorgeous photos from a wedding photo shoot to which I contributed desserts. I'm always trying to expand my repertoire, so I jumped at this chance to make ruffled gumpaste flower cake/cupcake toppers inspired by My Cake School. Thanks to wedding photographer Janice Cui for capturing everything wonderfully (I can't get over the bokeh in that first photo of the bride, can you?) and for getting me involved with this project to begin with. All the vendors involved did a splendid job, and I encourage you to check out their sites (linked below). Hope everyone had a nice weekend!
Wedding Photo Shoot 2
VENDOR CREDITS
Event Coordinator: Elegant Party Plans
Photographer: Janice C Photography
Flowers: J. Morris Flowers
Bridal Gown and Accessories: Layne Corban Bridal
Cake and Cupcakes: 6 Bittersweets
Hairstyle: A Cut To Dye For

Saturday, March 10, 2012

Rediscovering "Booze Cake" (Black Russian Bundt Cake with Homemade Kahlua)

Phew, I've done it -- I've jumped back onto the blog-wagon! Alright...so maybe it's a bit premature to celebrate when it's my first recipe post in weeks. But I'm the kind of writer who considers the first page the hardest. So let's just say I have good reason to expect smoother sailing from here on out 8).


Part of the delay lay in the history behind this unassuming cake. It was, in fact, the first cake I fell in love with. We met freshman year of college, when my roommate brought her mom's famous "booze cake" back to our dorm. Dense and unbelievably moist, every bite of it brought a warm kick of coffee liqueur against a milder backdrop of chocolate. It was pure heaven. But alas, this was before I started baking, blogging, or even drinking alcohol [legally at least *cough* haha], so I didn't think to ask for the recipe.

Seven (yes, seven) years and countless Google searches for "booze cake" later, I asked my friend on a whim if her mom still had the recipe. Within a few days, there it was! Just sitting in my inbox (like magic)! I suppose that was my rather drawn-out lesson that I should just try to ask when I really want something ^_^.


My work wasn't done yet, though. It turned out that the (ultimately not that) elusive "booze cake," better known online as "Black Russian Cake," required not only a lot of the "good stuff" (i.e., coffee liqueur and vodka), but also cake mix and instant pudding mix. It's a personal commitment of mine to make my desserts from scratch whenever possible. Thus, with the virtual guidance of like-minded bakers, I successfully reverse-engineered a from-scratch version of my First (Cake) Love. I hope you'll find it as unforgettable as I did!

Black Russian Chocolate Kahlua Cake (From Scratch!) [Printable Recipe]
Cake adapted from Rum Cake from Always Order Dessert

XIAOLU'S NOTES: I actually made a 1/2 batch of this recipe using an 8-inch wide Bundt pan. Aside from halving all the ingredients, the only change I made was to reduce the baking time to 35 to 45 minutes, or just until a toothpick inserted in the cake comes out mostly clean (a few moist crumbs are fine).

1 3/4 cup all purpose flour
1/2 cup cornstarch
1/3 cup dry milk powder
6 Tbsp Dutch-process (dark) cocoa powder
Scant 1 Tbsp baking powder
1 tsp salt
2 cups granulated sugar
1/4 cup (1/2 stick) unsalted butter, softened
3/4 cup PLUS 2 Tbsp canola OR vegetable oil
3/4 cup milk [NOT skim]
1 Tbsp pure vanilla extract
4 large eggs, room temperature
1/4 cup vodka
1/3 cup coffee-flavored liqueur (such as Kahlua OR Homemade Recipe below)

3 Tbsp unsalted butter
2 Tbsp water
6 Tbsp granulated sugar
Pinch of salt
6 Tbsp coffee-flavored liqueur (such as Kahlua OR Homemade Recipe below)
***you can use up to 1/2 cup liqueur if you like your booze cakes to be well-soaked
Sifted powdered sugar, to garnish


Preheat oven to 325 degrees F. Grease a 10 to 15-cup Bundt pan and dust with cocoa powder; set aside.

In a large bowl, sift together the flour, cornstarch, dry milk powder, cocoa powder, baking powder, salt, and white sugar. Add the butter, oil, milk, and vanilla to the dry ingredients and beat with an electric mixer on medium the batter is smooth and uniform. Add the eggs, and continue beating until well incorporated (no more than 1 minute). Finally, add the vodka and coffee liqueur, then mix until evenly combined.

Pour into the prepared Bundt pan and bake for 50 to 60 minutes, or until a tester inserted in the cake comes out clean. Let cool in pan for 25 minutes, then invert onto a wire rack. Let cool for 30 more minutes.

While the cake cools, wash and thoroughly dry the Bundt pan then prepare the syrup. In a large saucepan with high sides, combine the butter, water, granulated sugar, and salt. Cook over medium heat until the butter completely melts and the sugar dissolves. Let reduce slightly, keeping an eye on it so it doesn’t boil over. Remove from the heat and stir in the coffee liqueur (it may bubble).

Quickly place the clean pan over the cool cake and invert the cake back into the pan. While the syrup is still warm, poke holes across the top of the cake with a toothpick or fork and brush/pour the syrup evenly over the cake. Let soak for at least 4 hours (ideally, overnight), then invert the cake back onto a serving platter, sift powdered sugar on top (if desired), and dig in! Keeps covered for about 1 week at room temperature.

Homemade Coffee Liqueur
Adapted from Liv Life
Makes about 5 1/2 cups

2 cups water
3 1/4 cups granulated sugar
1 tsp molasses
3/4 cup instant coffee OR espresso powder
1 split vanilla bean OR 2 1/2 tsp pure vanilla extract
2 1/4 cups good quality vodka

Stir water, sugar, molasses, and coffee powder together in a medium to large saucepan. Bring to a boil and boil for 5 minutes, stirring frequently to ensure the sugar and instant coffee powder dissolve completely. Remove from heat and let cool to room temperature, being careful to stir as it’s cooling to avoid crystallization of the sugar. Add vanilla and vodka. If you notice any grains of undissolved sugar, you can strain them out using a fine-mesh strainer. Bottle and cap tightly, then store in a cool, dry place. If using the vanilla bean, allow the liqueur to develop for 3 to 5 weeks, then strain out the bean, re-bottle, and enjoy straight or in recipes calling for coffee liqueurs such as Kahlua. If using vanilla extract, let the liqueur rest for at least 1 full day to allow the flavors to meld before drinking.

Sunday, January 29, 2012

Yuzu Mango Coconut Cake Shooters

What can I say, but that the generosity of my blogger friends continues to amaze me! Right now I'm speaking of Joyti of Darjeeling Dreams, one of the sweetest, brightest girls I know. Though we've been online buddies for a while, it wasn't until last August that I finally got to meet her (and her husband) while visiting San Francisco. Let me just tell you this, she's even sweeter in person than on her blog (and so pretty, too). Joyti blew me away again with her generosity when she recently sent me some fresh yuzu fruit after hearing my lament not having access to it. Not only that, she also sent me a bounty of other citrus, including Meyer lemons! We also decided it would be fun to post our yuzu recipes on the same day. Thanks for the lovely package, Joyti! I can't wait to see what you've made =D.

Yuzu Lemon Mango Cake Shooters
Lately I've been really into the idea of layered cake and other dessert shooters. They're such a lovely way to fit in multiple light desserts at the end of a party...even when you're mostly stuffed ;p. Especially having just added dessert shooters to my menu, I was excited to have this opportunity to test out a different flavor.

The results were delicious but I unfortunately didn't have enough juice to make the curd from entirely yuzu. Subbing in lemon juice to make up the remainder resulted in a curd that, while delicious, tasted as much of lemon as of yuzu. So if, unlike me, you have regular and abundant access to fresh yuzu, I recommend you use it and only it for the curd so that its delicate flavor and floral aroma is allowed to shine.

P.S. - I've finally submitted my graduate school application! Sorry for the long lull between new recipe posts -- I'm finding my way back slowly and surely =D.

Tuesday, November 29, 2011

Washi Tape Holiday Photo Shoot with Pure Joy Events

Candy Cane Macarons
I know I've mentioned before that I'm lucky to be able to work with talented local party stylist and my friend, Christine of Pure Joy Events. Well I was impressed anew by her creativity when we got together 2 weeks ago to shoot these fun DIY holiday craft ideas using pretty Japanese washi tape! Not only did Christine provide me with my first paying photo shoot, but she also pushed my dessert-crafting boundaries again by ordering cake balls (more squares hehe) decorated to match the washi tape and candy cane macarons (I used this recipe but added crushed candy canes to the buttercream).

It all turned out quite well, if I do say so myself =p, and I'm delighted to announce that our shoot's been featured today on The Sweetest Occasion! Trust me, you don't want to miss this post as it includes FREE downloadable gift tags from Frog Prince Paperie, plus a fabulous washi tape GIVEAWAY from Cute Tape. Thanks to Christine and all the contributing vendors for making this shoot a success! I've included some of my favorite photos from the shoot below (several of which didn't make it into the feature) -- enjoy!

Concept + styling: Pure Joy Events / Venue: The Pear Tree Cottage / Washi tape + boxes: Cute Tape / Stationery + printables: Frog Prince Paperie / Sweets + photography: me / Hanging wreath design: The Knock-Knock Factory

Holiday Washi Tape Photo Shoot

Wednesday, November 23, 2011

A Pretty Sweet (Potato) Cake for Thanksgiving!

Woohoo! Thanksgiving break is finally here and my bags are already packed for the long weekend of great food n' family ahead. Still, I just couldn't duck out without sharing one more fun, festive fall dessert for any of you still needing a last-minute Thanksgiving dessert.
Happy Thanksgiving!
I love sweet potatoes in just about any form. And I'm betting that many of you feel the same...especially around this time of year! Which is why I simply couldn't resist making this richly flavored sweet potato cake this Thanksgiving. You'll love how quickly this comes together. Plus it only dirties up a bowl and measuring cup. It's also quite friendly to guests on restrictive diets, since the cake is already egg and dairy-free. If any dairy is an issue, simply swap dairy substitutes into the frosting to make this a welcome Thanksgiving dessert for all =).

P.S. - I want to thank Oh Nuts! for the wonderful Jumbo Raw Georgia pecans they sent me for free to use in my holiday baking. These pecans were so fresh and yummy. I sampled one as I was measuring them out for this cake and ended up eating so many I had to get more for the recipe O:-). They're big, as the name suggests, and have a wonderful subtle sweetness that made them downright addictive.

Sunday, September 25, 2011

Under the Sea! (Little Mermaid Birthday Treats)

Under the Sea!
Hey there! I'm taking a little break from studying to share these "Under the Sea" cupcakes I made for a birthday order. They're s'mores-flavored with a graham cracker crust, chunks of Hershey's milk chocolate, chocolate cake, toasted marshmallow frosting, graham cracker "sand", and sea creature marshmallow fondant toppers I made! I also made the cupcake wrapper using the shape I bought online, an image from the movie, card stock paper, and double-sided tape. The birthday girl, Alaina, is turning 6 and loves The Little Mermaid, so of course these and all other desserts were ocean and mermaid themed =). I had a lot of fun with this order -- so fun to get a chance to be creative!

A Little Mermaid Birthday!DSC_0011-e copy EDIT
Photos of Entire Dessert Tower Taken by My Mom =)

Monday, August 22, 2011

Cookies N' Cream Cake Pops (Guest Post for White Magazine)

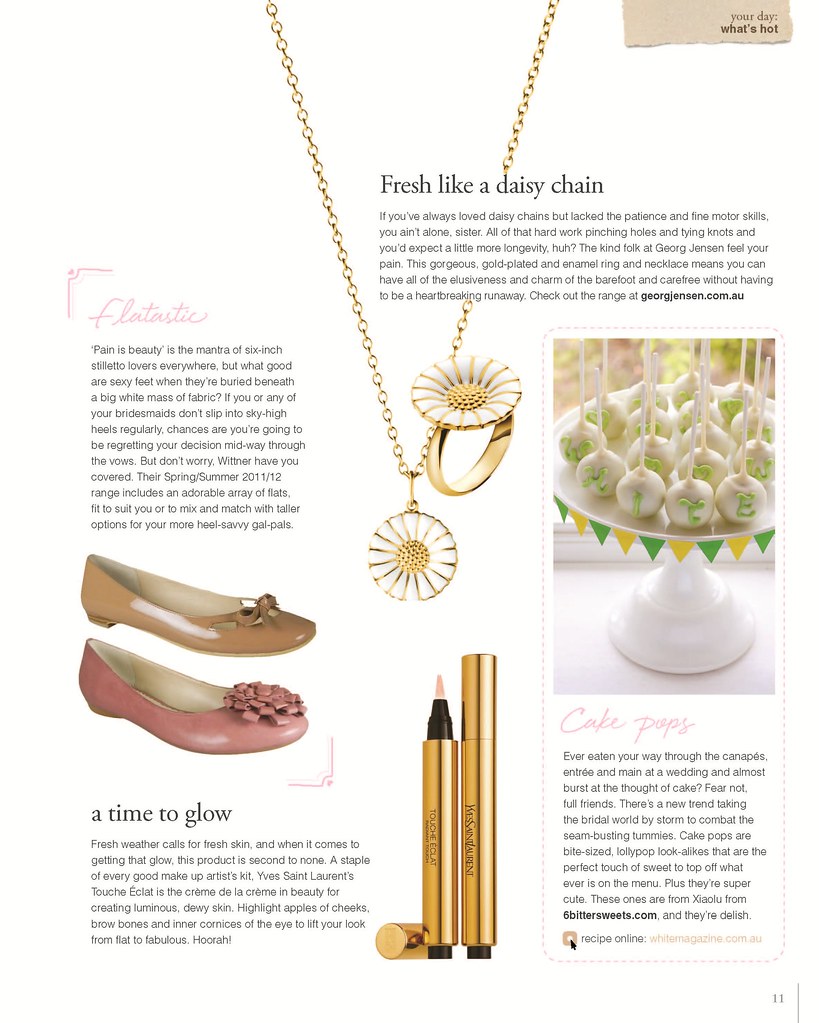
UPDATE: I just received a scan of my photo and mention in the hard copy of White Magazine! This is the first time I've been published anywhere, and I keep having to pinch myself. Here's the proof that it's really happening =D!

Cookies N' Cream Cake Pops
Months ago, I was stunned to receive in my inbox a request to guest post for the gorgeous Australian wedding magazine, White. Of course I eagerly accepted and decided to share not only the recipe for my popular Cookies N' Cream Cake Pops...but also a little peek into the role of food in my relationship with P. Now that White's latest issue is out, I'm happy to finally be able to debut my guest post =D. Please head over to White's Facebook page to check out my full Cookies N' Cream Cake Pops post with recipe! If you need to jump straight to the recipe, you can find it here.

Cookies N' Cream Cake Pops

Tuesday, July 26, 2011

Sew Sweet! Spools of Thread Cake Pops (Guest Post for Pure Joy Events)

Cake Pops for a Sewing Themed Party
Last week I shared the happy news with you that I'd gotten to contribute treats to the beautiful and imaginative Vintage Sewing Party that Christine of Pure Joy Events threw for her daughter's 7th birthday...and then I promised you a lesson in making your very own edible spools! Well today I'm delighted to unveil my tutorial for these fanciful cake pops as a guest post over on the Pure Joy Events blog. We'd love for you to come join the fun and why not stick around a little longer to browse through the other inspiring party ideas and tutorials available there? If you're in a rush and just want to grab the printable tutorial, you'll find it here.

Thursday, July 21, 2011

Vintage Sewing Party by Pure Joy Events

UPDATE: This party was also chosen for an Amy Atlas feature here. Hooray!

My Spool Cake Pops and Raspberry Macarons
I'm honored to have 2 treats of mine (spool-shaped cake pops and raspberry French macarons) featured today over on Christine's Pure Joy Events as part of the amazing Vintage Sewing Party she created for her daughter's birthday. Please stop by her blog to get all the lovely details, and look out for a tutorial to come soon showing you how to create your own Spools of Thread Cake Pops!
My Spool Cake Pops and Raspberry Macarons 2
All Photography by Rebecca Watkins Photography; Styling by Pure Joy Events

A Lotta Chocolate Part 5: Bruléed Mocha Crepe Cake with Chocolate Liqueur Sauce

First of all, this is completely unrelated to food, but my friend R just took me to see the musical, Wicked, as a belated birthday gift, and it was AMAZING! I'd always found the idea of approaching the Wizard of Oz story from a different perspective intriguing. But I'm pretty sure I'd never have taken the initiative to see it where it not for my friend. Wicked was funny, exciting, and heart-warming throughout its 2 1/2 hours. And when it ended I could swear only 15 minutes had passed (I'd been so engrossed). If this show comes near you or vice versa, I strongly recommend getting tickets!

Now let's return to our regularly scheduled programming... Today's post is the 5th and last in my A Lotta Chocolate series. When we started down this road I promised you chocolate treats that would be less conventional, though no less delicious. A French toast, macaron, chestnut cake roll, and couscous salad later, it's my hope that you consider that promise fulfilled. For our last outing I decided to also make good on another promise. One that I made to myself when I started this site: to make my own crepe cake one day! (Is it just me or is this series getting a bit French food-centric? 8p)

Bruleed Chocolate Mocha Crepe Cake
Well folks, I made it! And not just any crepe cake, but a bruléed mocha crepe cake with homemade chocolate liqueur sauce! There's no getting around the fact that all these delicate crepes take time to cook and layer up. Yet you'd be hard-pressed to find any cake that slices as prettily or embraces chocolate as thoroughly as this one. Not only is dark mocha ganache spread between 15+ crepe layers, each slice of this cake is served with a generous pouring of chocolate liqueur sauce.

A rich and decadent chocolate treat worthy of closing out a chocolate series? Check! Thanks for joining me on this ride -- I sure hope you had as much fun as I did! If you missed any of the previous stops, you can still check them out right here: Chocolate Chunk Challah Bread French Toast, Snickers Macarons, Chocolate Cake Roll with Chestnut Cream, and Cherry Pistachio Orange Cocoa Couscous.

Bruléed Mocha Crepe Cake [Printable Recipe]
Adapted from Homelife and The Essence of Chocolate
Serves 8

XIAOLU'S NOTES: The chocolate liqueur recipe obviously makes much more than you need for the crepe cake, but it's so easy to make and so delicious in cocktails or sipped with whipped cream that I'd just go ahead and make the whole batch :).

For crepes
5 large eggs, lightly whisked
1 cup all purpose flour
1 1/2 cups milk
3 Tbsp white sugar [preferably fine/caster]
2 tsp vanilla bean paste OR pure vanilla extract
2 Tbsp melted butter, plus more to grease

For filling and topping
8 oz. dark chocolate, coarsely chopped
3/4 cup light cream
1/3 cup espresso
6 to 8 Tbsp white sugar [preferably fine/caster], divided

For sauce
4 oz. dark chocolate, chopped
3 Tbsp light cream or half and half
3 Tbsp espresso
3 Tbsp chocolate liqueur (Recipe below)
3 Tbsp brown sugar
2 tsp honey (optional)

Blend all the crepe ingredients just until smooth. Set aside for 30 minutes to rest.

Heat an 8-inch non-stick frying pan over medium heat. Brush with melted butter. Pour in enough batter to coat the base of the pan (swirl the pan to coat it evenly with batter immediately). Cook for 1 minute or until lightly golden and just set. Use a spatula to turn and cook for a further 30 seconds or until golden. Transfer to a plate. Repeat with remaining batter, reheating and greasing pan between batches.

To make filling, place chocolate, cream, coffee, and 4 tablespoons of sugar in a heatproof bowl over a small saucepan of simmering water. Use a spatula or heatproof spoon to stir for 5 minutes or until chocolate melts and mixture is smooth. Taste a tiny bit and add up to 2 more tablespoons of sugar if desired. If more sugar was added, heat the mixture until new sugar has dissolved. Remove from heat; cover with plastic wrap. Place in the fridge, stirring occasionally, for 30 minutes or until mixture cools and thickens.

Line a 6 to 7-inch springform pan with plastic wrap. Place a crêpe in the pan. Spread with a little filling. Continue layering with crêpes and filling, finishing with a crêpe. Cover with plastic wrap and place in the fridge until chilled and set (at least 3 hours and up to 1 day).

To make chocolate mocha sauce, combine chocolate, cream, coffee, liqueur, sugar, and honey in a heatproof bowl over a small saucepan of simmering water. Stir for 5 minutes or until sauce is smooth.

Turn the cake out onto a clean serving platter. Sprinkle the top of the cake evenly with the remaining 2 tablespoons of white sugar. Then melt the sugar evenly with a kitchen torch to form a crisp caramel topping. Allow to sit at least 5 minutes before serving. Use a sharp knife to cut into wedges. Place on serving plates and drizzle with hot sauce.

Chocolate Liqueur
Makes 3 1/2 cups

5 Tbsp unsweetened cocoa powder
1 cup boiling water
1 cup sugar
3/4 cup water
1 cup vodka
3/4 cup heavy cream, for optional topping
Cocoa nibs or chocolate shavings, for optional garnish

In a bowl, dissolve cocoa powder in boiling water. In a saucepan, bring sugar and 3/4 cup of water to a simmer, stirring until sugar is dissolved. Add sugar syrup to cocoa syrup. Strain through a fine-mesh sieve into a jar with a lid. Add the vodka, cover and refrigerate overnight. (It will keep up to 1 month, but will lose potency over time.).

If serving on its own, stir well and strain again through a fine-mesh sieve into a glass until 2/3 full. Top with lightly-sweetened whipped cream, or float heavy cream on top (by holding a spoon with the bowl down and the edge almost touching the liqueur in the glass then pouring cream slowly over the back of the spoon until a layer (1/8 to 1/4-inch deep) floats on top of the liqueur). Garnish with cocoa nibs or chocolate shavings.

Monday, June 27, 2011

6 Bittersweets Turns 2! (Raspberry Tres Leches Cake and Mango Mascarpone Macarons)

I can hardly believe it, but it's been 2 years to the day since I made my first food blog post. 174 posts later, my passion for cooking, blogging, and photography continues to grow with no bounds in sight. Equally important is that I've been able to connect with hundreds of incredible people (you!), without whose support this fledgling blog would have faded into oblivion long ago. In fact, you guys gave me an amazing 26th birthday gift last week of seeing my subscriber count surpass 1,500! Almost a week later I'm still pinching myself to confirm if it's real. Thank you, thank you, THANK YOU to all my readers old and new!

Raspberry Tres Leches Birthday Cake
I've never been one to make much ado over my birthday, but I do like to gather friends around for a fun and relaxing evening. Plus, any opportunity to bake a celebration cake is not to be missed...especially on the one day of the year when I have full control over the menu (mwahaha! ^_^). And what a menu it turned out to be! P and I prepared the main dishes and desserts, while friends contributed the rest. Not having set a theme for the meal, we got quite an eclectic mix of dishes but all so yummy that I wouldn't have done it any other way.

For the curious among you, here's what we ate: Spinach Salad with Strawberries and Candied Pecans (even better with mandarin oranges instead of strawberries), Baked Pizza Dip, Grilled Chicken Yakitori Skewers, Spicy Sriracha-Grilled Tofu, Otsu Sesame Noodle Salad with Grilled Eggplant, Mapo Tofu, and Dirty Rice from Bojangles (yes, very random). As scrumptious as all that was, my favorite part of the meal was its sweet ending.

As a kid I hated having a summer birthday because all my school friends would be on family vacations by the time I threw my party. Now that I'm all grown up, I've done quite the 180°, delighting in all the fresh fruits and veggies available this time of year. Nothing speaks summer! louder to me than fresh fruit and cream. As proof you can find my previous iterations of this divine combination here, here, and here.

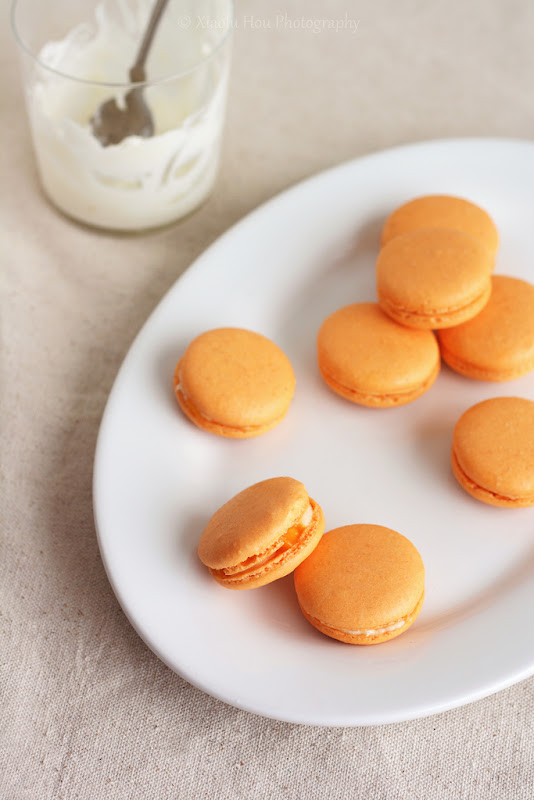
Mango Mascarpone Macarons
To mix it up this year, I expanded on the "cream" portion with not only heavy cream but a trifecta of cream, sweetened condensed milk, and caramelized cinnamon evaporated milk in this irresistable Tres Leches Cake. The filling of sugared raspberries is a fresh twist on the Spanish classic, adding just the right amount of tartness to counter the sweet n' creamy sauce.

Knowing certain guests didn't fancy raspberries, I made a second dessert of Mango Mascarpone-Filled Macarons. This was my first time filling macarons with mascarpone and I must say I love it! Not only did it taste fantastic but it was fantastically easy to prepare: just whisk with fork...no mixer required! When you then add in a topping of juicy, ripe diced mangoes, how could it not be good? And as far as I'm concerned, it was ALL good: the food, the company, the beginning of my 27th year of life... Thank you, my lovely readers, for adding to the wonder of it all!

P.S. - I'm submitting these macarons to this month's MacTweets challenge: Fruit!

Tres Leches Cake with Raspberries
[Printable Recipe]
Adapted from Sunset
Makes 10 to 12 servings

XIAOLU'S NOTES: Evaporated goat milk (Meyenberg is a popular brand) is sold in many grocery stores. I couldn't find it in mine, however, so I substituted regular evaporated milk and the cake was still fabulous. Look in the baking aisle, near the condensed milk. The cake and tres leches sauce (prepare while cake bakes) can both be made a day ahead; reheat tres leches sauce before drizzling over cake. You can chill the completed cake for up to 3 days (garnish with raspberries just before serving).

Cake
1 1/3 cups all purpose flour [stirred, spooned, and leveled to measure]
1 tsp baking powder
1/4 tsp salt
6 large eggs
1 cup granulated sugar
6 Tbsp (3/4 stick) unsalted butter, melted

Tres Leches Sauce
1 can (12 oz.) evaporated goat milk (see Notes)
1/4 cup sugar
1 stick cinnamon (about 2 inches)
1/8 tsp baking soda MIXED WITH 2 tsp water
2/3 cup canned sweetened condensed milk
1 1/4 cups light cream
2 Tbsp rum [optional]

Filling and Frosting
2 cups fresh raspberries, divided
1 1/2 Tbsp granulated sugar
2 cups whipping cream
2 tsp pure vanilla extract
6 Tbsp powdered sugar, sifted

Preheat oven to 350 degrees F; position rack in center of oven. Cut a large parchment circle about 13 inches in diameter and place it atop the base of a 9-inch springform cake pan (at least 2 inches deep). Place the pan's rim back on top of the base and lock it in, securing the edges of the parchment paper. Now butter and flour the bottom and sides of the pan, and set aside.

For cake: Sift flour, baking powder, and salt together; set aside. Select a large stainless steel bowl (at least 10-cup capacity) that can nest comfortably in a large pot. Fill pot halfway with water and bring to a boil over high heat, then reduce heat to a gentle simmer. In bowl, combine eggs and sugar. Set bowl over water; with a handheld mixer, beat eggs and sugar at high speed until pale and thick enough to fall from a spoon in a wide ribbon, about 10 minutes. [If you have a stand mixer but no handheld, combine eggs and sugar in your metal mixer bowl. Set bowl over water, and whisk continuously by hand until the mixture is very warm and foamy. Then remove the bowl from heat and attach it to your stand mixer. Mix until pale and thick enough to fall from a spoon in a wide ribbon, about 10 minutes.]

Remove bowl from heat. Add sifted flour mixture to egg mixture and immediately fold in gently but quickly. Add melted butter and fold in gently until no streaks remain. Scrape batter into prepared pan. Bake on center rack until cake is evenly browned, just begins to pull from pan sides, and springs back when lightly touched in the center, about 35 to 40 minutes. Set pan on a cooling rack and let cool 5 minutes. Run a thin knife between pan and rim. Remove rim and let cake cool completely.

For tres leches sauce: In a large pot (at least 6-qt. capacity) over high heat, combine goat milk, sugar, and cinnamon stick. Bring mixture to a boil. Stir in baking soda mixture (sauce will foam up) and reduce heat to medium. Simmer, stirring occasionally, until sauce turns a caramel color and reduces to 3/4 cup, 10 to 12 minutes.

Remove sauce from heat; discard cinnamon stick, and stir in condensed milk, whipping cream, and rum. Use warm.

With a long, serrated knife, cut cake in half horizontally. Lift off cake top and set, cut side down, on a flat plate.

Transfer cake bottom off the pan base onto a cake stand or other serving platter. Poke cake bottom all over with a toothpick, being careful not to poke all the way through. Slowly spoon enough warm tres leches sauce (slightly less than 1 cup) over cake bottom to saturate well but not cause it to ooze. Let stand until cool, about 10 minutes.

For filling: Reserve 1/2 cup of raspberries to go on top of the cake, then put remaining fruit in a bowl and mix gently with granulated sugar. Set aside. In a chilled bowl, use a mixer to whip cream until it holds medium stiff peaks and is thick enough to spread. Add vanilla and powdered sugar; mix well.

Scoop about 1 2/3 cups whipped cream onto cake bottom and spread evenly, leaving a 1/2-inch border around the edge. Dot with sugared raspberries, pushing them down into cream. Carefully transfer the cake top, cut side down, onto the base and make sure they are aligned. Poke top all over with a toothpick as before, then slowly spoon slightly less than 1 cup of sauce evenly over cake top to saturate.

Now smoothly frost top and sides of cake with remaining whipped cream, then use a clean towel to wipe any stray frosting or sauce from around the base. Cover cake without touching (invert a large bowl over it) and chill at least 2 hours. Cover and chill reserved raspberries if held longer than 2 hours. Cover and chill remaining tres leches sauce.

Uncover cake and decorate with reserved raspberries. Serve with remaining tres leches sauce.

Mango Mascarpone Macarons [Printable Recipe]
Makes about 25 to 30 macarons

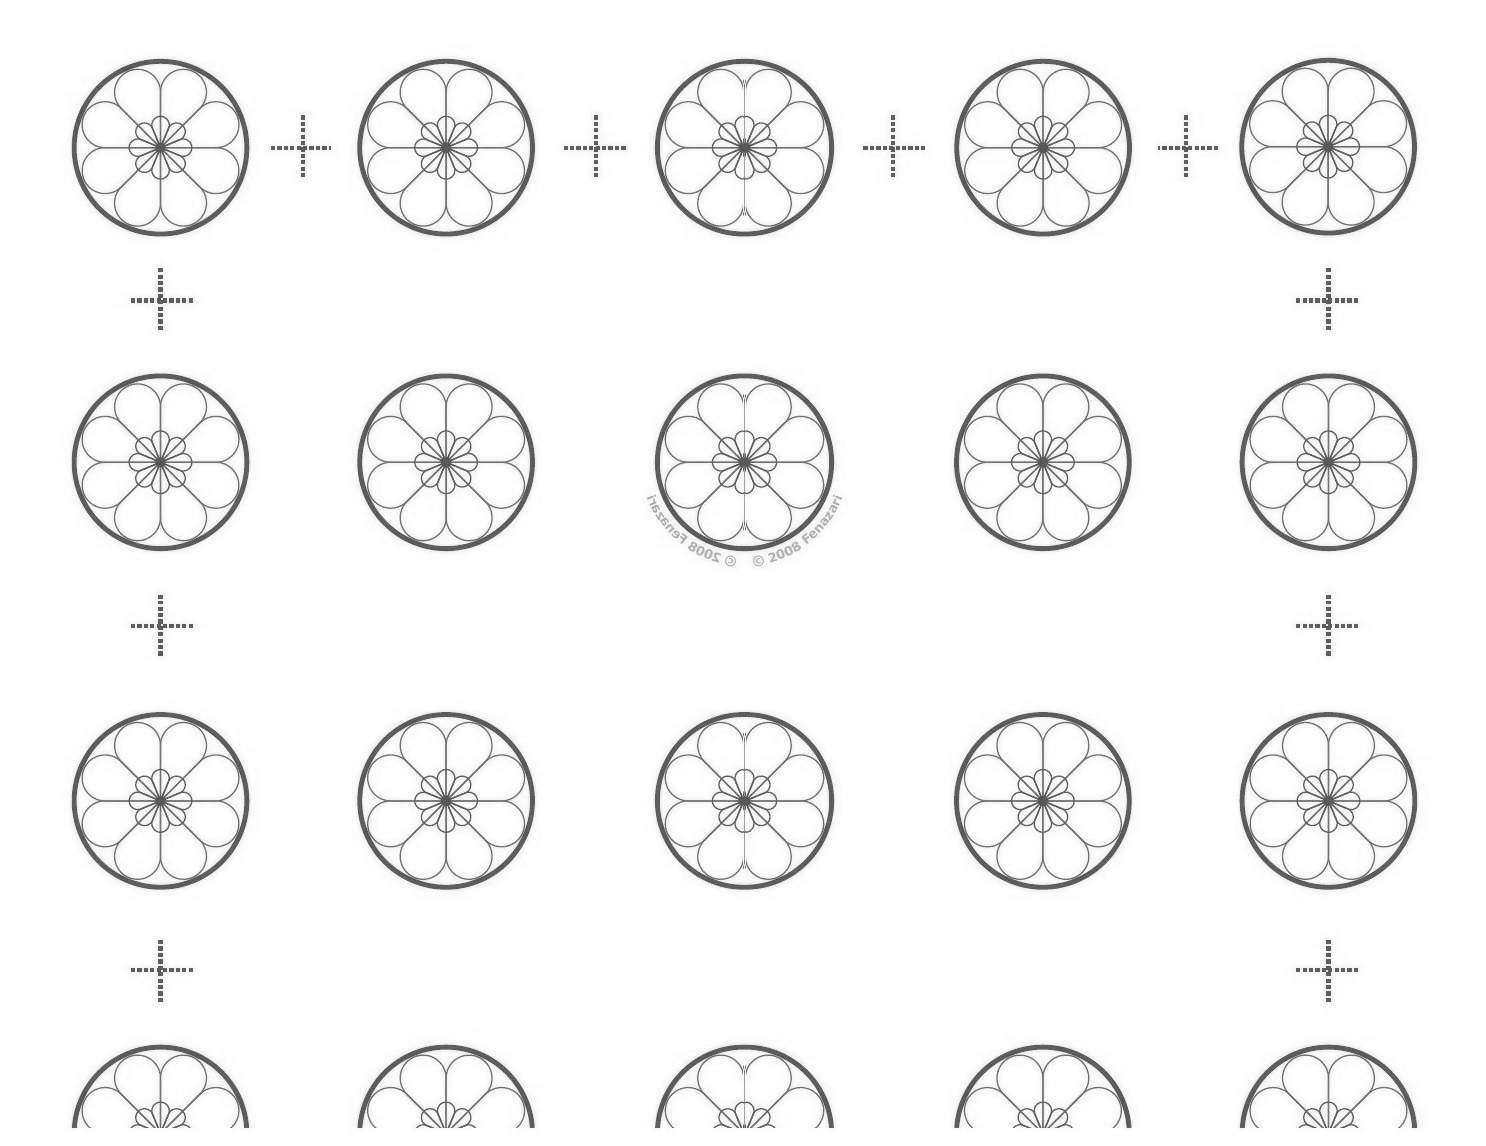
XIAOLU'S NOTES: Please do not try to convert this recipe to volume measurements if you don't have a scale (I use and love this one). This recipe is very sensitive and will not work if the measurements are not exact. Please also note that every oven is different and you'll figure out what works best for yours over time (see this post for great information on ovens and macarons). Since mine has major hot spots, I bake on 2 stacked pans for insulation if using parchment paper. If you're uncertain of your ability to pipe uniformly-sized macarons, like me, simply trace 1 1/4-inch circles on your parchment paper, flip the paper over, and pipe on the other side, using the outlines as your guide OR print (choose "fit to page") and slide this template under your parchment as a guide but don't forget to remove before baking! See my first macaron post for helpful videos of the whole macaron-making process!

125 g almonds [not roasted or salted]
170 g powdered sugar
1/4 tsp amchoor (Indian dried green mango) powder [optional]
Large pinch of salt
35 g granulated sugar
2 g egg white powder [optional, to stabilize batter in humid weather]
Splash of white or cider vinegar [to clean utensils/stabilize meringue]
90 to 95 g egg whites [about 3 large egg whites]
Orange food coloring (powder or gel) [optional]

5 oz. mascarpone cheese, cool room temperature
1 Tbsp heavy cream
2 Tbsp powdered sugar, sifted
1/2 cup finely diced ripe mangoes

Microwave fresh egg whites 10 to 15 seconds in the microwave on medium-low heat (I set my microwave to 40%).

Combine the almonds, powdered sugar, mango powder, and salt in a food processor, and pulse on and off until the nuts are finely ground (about 1 to 2 minutes). Sift the powder to remove any large chunks that remain. Put those chunks back into the food processor and pulse again for another 30 to 60 seconds. Sift again. You will probably have some slightly chunkier almond bits. Hopefully they're no more than a tablespoon or so, in which case you can throw them out.

Weigh out and mix your granulated sugar and egg white powder in a small bowl until uniform; set aside. Add splash of vinegar then a splash of water to the bowl that will be used for whipping the egg whites. Swirl liquid around the bowl, then use a clean paper towel to wipe the bowl dry. Use the same paper towel to wipe down your beaters. Now using a handheld or stand mixer, whip the egg whites on medium-low speed until foamy, then turn the speed up to medium to medium-high and gradually add the sugar mixture. Now add orange food coloring, if using, until the desired shade is reached (color will lighten once fully whipped). Continue whipping until you obtain a glossy meringue (it'll look like shaving cream, hold stiff peaks, and stay in place if you turn the bowl upside-down; but don't overbeat your meringue or it will be too dry).

Add all of the nut mixture to the meringue and fold together. Use both a folding motion that scrapes the bottom of the bowl (to incorporate the dry ingredients) and a gentle pressing motion, to deflate the meringue against the side of the bowl. Slow down after all the dry ingredients have been incorporated, and continue folding the mass carefully until you obtain a batter that looks somewhat glossy and flows from the spatula in a thick ribbon. Test the batter by spooning a small amount of the batter on a plate: if the top flattens on its own within about 20 seconds, it’s ready to pipe. If there is a small peak, give the batter 2 to 3 more folds and test again. The peak shouldn’t disappear immediately either or it’s already overmixed.

Fill a pastry bag fitted with a 1/3 to 1/2-inch wide plain tip (I like Ateco #805 or 806) with half of the batter. (When your bag is too full, the pressure causes the batter to rush out in a way that’s difficult to control, making for sloppy macarons.) Pipe tiny blobs of batter onto the 4 corners and center of 2 baking sheets, then line baking sheets with parchment paper OR line with silicone mats. Pipe small rounds (slightly larger than 1 inch wide) straight down and about 1 inch apart onto the baking sheets. Pick up each sheet with both hands and slam it firmly straight downward on the counter 2 to 3 times. This will to force out any large air bubbles. Immediately pop any bubbles that rise up but don't break with a toothpick. Do NOT do this once a few minutes have passed because you'll mess up the shell that's forming.

Preheat the oven to 285 to 300 degrees F. Let the macarons sit out for 25 to 90 minutes to harden their shells a bit (to prevent tops from cracking during baking). Test if they're ready by touching the top and side of one shell lightly. It should feel dry and not stick to your finger at all. Bake one pan at a time for 15 to 25 minutes, depending on the size of the macarons. After the first 10 minutes of baking, rotate the pan and place a large piece of foil loosely over the macarons to prevent browning (If I’m baking on 2 stacked pans, I also remove the bottom pan at this point to make sure the macarons will be completely cooked on the bottom and not sticky). Let cool completely before trying to move the shells.

Once cool, remove the shells from the silicone mat or parchment and flip them over. If you have trouble removing them, freeze the macarons for about 10 minutes, then quickly peel them off before they have a chance to warm up and get sticky again.

To prepare the filling, combine the mascarpone, powdered sugar, and heavy cream and mix well. To fill, spoon or pipe about 1 teaspoon of mascarpone mixture onto half the macaron shells, sprinkle with diced mangos, then top with a similarly-sized top shell. For the best flavor and texture, store in the refrigerator for at least 1 hour before eating so flavors are allowed to mature, but they are best if eaten within 2 days. Bring to cool room temperature before eating.