I can hardly believe it, but
it's been 2 years to the day since I made my first food blog post. 174 posts later, my passion for cooking, blogging, and photography continues to grow with no bounds in sight. Equally important is that I've been able to connect with hundreds of incredible people (you!), without whose support this fledgling blog would have faded into oblivion long ago. In fact,
you guys gave me an amazing 26th birthday gift last week of seeing my subscriber count surpass 1,500! Almost a week later I'm still pinching myself to confirm if it's real. Thank you, thank you, THANK YOU to all my readers old and new!
I've never been one to make much ado over my birthday, but I do like to gather friends around for a fun and relaxing evening. Plus,
any opportunity to bake a celebration cake is not to be missed...especially on the one day of the year when I have full control over the menu (mwahaha! ^_^). And what a menu it turned out to be! P and I prepared the main dishes and desserts, while friends contributed the rest. Not having set a theme for the meal, we got quite an eclectic mix of dishes but all so yummy that I wouldn't have done it any other way.
For the curious among you, here's what we ate: Spinach Salad with Strawberries and Candied Pecans (even better with mandarin oranges instead of strawberries),
Baked Pizza Dip,
Grilled Chicken Yakitori Skewers,
Spicy Sriracha-Grilled Tofu,
Otsu Sesame Noodle Salad with Grilled Eggplant, Mapo Tofu, and Dirty Rice from
Bojangles (yes, very random). As scrumptious as all that was, my favorite part of the meal was its sweet ending.
As a kid I hated having a summer birthday because all my school friends would be on family vacations by the time I threw my party. Now that I'm all grown up, I've done quite the 180°, delighting in all the fresh fruits and veggies available this time of year.
Nothing speaks summer! louder to me than fresh fruit and cream. As proof you can find my previous iterations of this divine combination
here,
here, and
here.
To mix it up this year, I expanded on the "cream" portion with not only heavy cream but
a trifecta of cream, sweetened condensed milk, and caramelized cinnamon evaporated milk in this irresistable Tres Leches Cake. The filling of sugared raspberries is a fresh twist on the Spanish classic, adding just the right amount of tartness to counter the sweet n' creamy sauce.
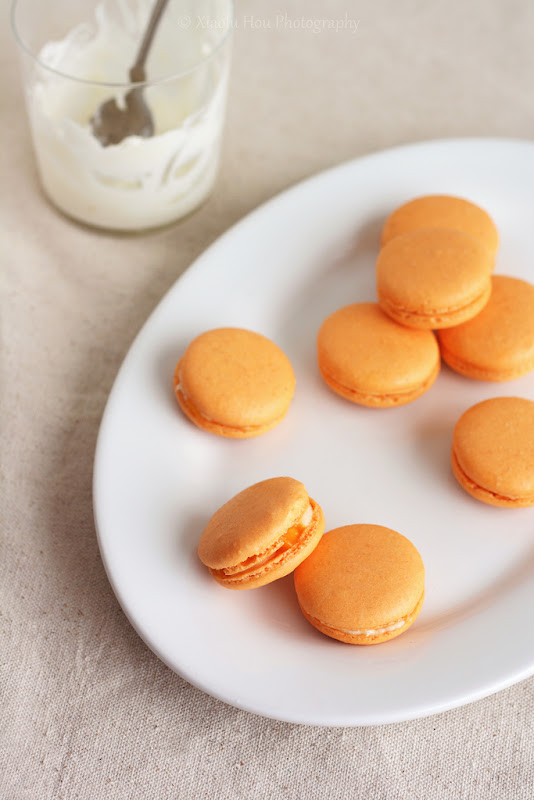
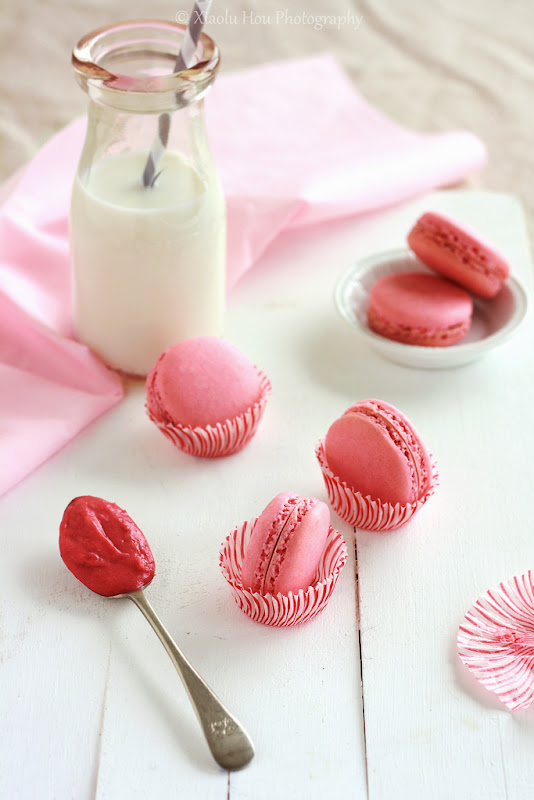
Knowing certain guests didn't fancy raspberries, I made a second dessert of Mango Mascarpone-Filled Macarons.
This was my first time filling macarons with mascarpone and I must say I love it! Not only did it taste fantastic but it was fantastically easy to prepare: just whisk with fork...no mixer required! When you then add in a topping of juicy, ripe diced mangoes, how could it
not be good? And as far as I'm concerned,
it was ALL good: the food, the company, the beginning of my 27th year of life... Thank you, my lovely readers, for adding to the wonder of it all!P.S. - I'm submitting these macarons to this month's MacTweets challenge: Fruit!
Tres Leches Cake with Raspberries [Printable Recipe]Adapted from
SunsetMakes 10 to 12 servings
XIAOLU'S NOTES: Evaporated goat milk (Meyenberg is a popular brand) is sold in many grocery stores. I couldn't find it in mine, however, so I substituted regular evaporated milk and the cake was still fabulous. Look in the baking aisle, near the condensed milk. The cake and tres leches sauce (prepare while cake bakes)
can both be made a day ahead; reheat tres leches sauce before drizzling over cake. You can chill the completed cake for up to 3 days (garnish with raspberries just before serving).
Cake1 1/3 cups all purpose flour [stirred, spooned, and leveled to measure]
1 tsp baking powder
1/4 tsp salt
6 large eggs
1 cup granulated sugar
6 Tbsp (3/4 stick) unsalted butter, melted
Tres Leches Sauce1 can (12 oz.) evaporated goat milk (see Notes)
1/4 cup sugar
1 stick cinnamon (about 2 inches)
1/8 tsp baking soda MIXED WITH 2 tsp water
2/3 cup canned sweetened condensed milk
1 1/4 cups light cream
2 Tbsp rum [optional]
Filling and Frosting2 cups fresh raspberries, divided
1 1/2 Tbsp granulated sugar
2 cups whipping cream
2 tsp pure vanilla extract
6 Tbsp powdered sugar, sifted
Preheat oven to 350 degrees F; position rack in center of oven. Cut a large parchment circle about 13 inches in diameter and place it atop the base of a 9-inch springform cake pan (at least 2 inches deep). Place the pan's rim back on top of the base and lock it in, securing the edges of the parchment paper. Now butter and flour the bottom and sides of the pan, and set aside.
For cake: Sift flour, baking powder, and salt together; set aside. Select a large stainless steel bowl (at least 10-cup capacity) that can nest comfortably in a large pot. Fill pot halfway with water and bring to a boil over high heat, then reduce heat to a gentle simmer. In bowl, combine eggs and sugar. Set bowl over water; with a handheld mixer, beat eggs and sugar at high speed until pale and thick enough to fall from a spoon in a wide ribbon, about 10 minutes. [
If you have a stand mixer but no handheld, combine eggs and sugar in your metal mixer bowl. Set bowl over water, and whisk continuously by hand until the mixture is very warm and foamy. Then remove the bowl from heat and attach it to your stand mixer. Mix until pale and thick enough to fall from a spoon in a wide ribbon, about 10 minutes.]
Remove bowl from heat. Add sifted flour mixture to egg mixture and immediately fold in gently but quickly. Add melted butter and fold in gently until no streaks remain. Scrape batter into prepared pan. Bake on center rack until cake is evenly browned, just begins to pull from pan sides, and springs back when lightly touched in the center, about 35 to 40 minutes. Set pan on a cooling rack and let cool 5 minutes. Run a thin knife between pan and rim. Remove rim and let cake cool completely.
For tres leches sauce: In a large pot (at least 6-qt. capacity) over high heat, combine goat milk, sugar, and cinnamon stick. Bring mixture to a boil. Stir in baking soda mixture (sauce will foam up) and reduce heat to medium. Simmer, stirring occasionally, until sauce turns a caramel color and reduces to 3/4 cup, 10 to 12 minutes.
Remove sauce from heat; discard cinnamon stick, and stir in condensed milk, whipping cream, and rum. Use warm.
With a long, serrated knife, cut cake in half horizontally. Lift off cake top and set, cut side down, on a flat plate.
Transfer cake bottom off the pan base onto a cake stand or other serving platter. Poke cake bottom all over with a toothpick, being careful not to poke all the way through. Slowly spoon enough warm tres leches sauce (slightly less than 1 cup) over cake bottom to saturate well but not cause it to ooze. Let stand until cool, about 10 minutes.
For filling: Reserve 1/2 cup of raspberries to go on top of the cake, then put remaining fruit in a bowl and mix gently with granulated sugar. Set aside. In a chilled bowl, use a mixer to whip cream until it holds medium stiff peaks and is thick enough to spread. Add vanilla and powdered sugar; mix well.
Scoop about 1 2/3 cups whipped cream onto cake bottom and spread evenly, leaving a 1/2-inch border around the edge. Dot with sugared raspberries, pushing them down into cream. Carefully transfer the cake top, cut side down, onto the base and make sure they are aligned. Poke top all over with a toothpick as before, then slowly spoon slightly less than 1 cup of sauce evenly over cake top to saturate.
Now smoothly frost top and sides of cake with remaining whipped cream, then use a clean towel to wipe any stray frosting or sauce from around the base. Cover cake without touching (invert a large bowl over it) and chill at least 2 hours. Cover and chill reserved raspberries if held longer than 2 hours. Cover and chill remaining tres leches sauce.
Uncover cake and decorate with reserved raspberries. Serve with remaining tres leches sauce.
Mango Mascarpone Macarons [
Printable Recipe]
Makes about 25 to 30 macarons
XIAOLU'S NOTES: Please do not try to convert this recipe to volume measurements if you don't have a scale (I use and love
this one). This recipe is very sensitive and will not work if the measurements are not exact. Please also note that every oven is different and you'll figure out what works best for yours over time (see this post for great information on ovens and macarons). Since mine has major hot spots, I bake on 2 stacked pans for insulation if using parchment paper. If you're uncertain of your ability to pipe uniformly-sized macarons, like me, simply trace 1 1/4-inch circles on your parchment paper, flip the paper over, and pipe on the other side, using the outlines as your guide OR print (choose "fit to page") and slide
this template under your parchment as a guide but
don't forget to remove before baking! See
my first macaron post for helpful videos of the whole macaron-making process!
125 g almonds [not roasted or salted]
170 g powdered sugar
1/4 tsp amchoor (Indian dried green mango) powder [optional]
Large pinch of salt
35 g granulated sugar
2 g egg white powder [optional, to stabilize batter in humid weather]
Splash of white or cider vinegar [to clean utensils/stabilize meringue]
90 to 95 g egg whites [about 3 large egg whites]
Orange food coloring (powder or gel) [optional]
5 oz. mascarpone cheese, cool room temperature
1 Tbsp heavy cream
2 Tbsp powdered sugar, sifted
1/2 cup finely diced ripe mangoes
Microwave fresh egg whites 10 to 15 seconds in the microwave on
medium-low heat (I set my microwave to 40%).
Combine the almonds, powdered sugar, mango powder, and salt in a food processor, and pulse on and off until the nuts are finely ground (about 1 to 2 minutes). Sift the powder to remove any large chunks that remain. Put those chunks back into the food processor and pulse again for another 30 to 60 seconds. Sift again. You will probably have some slightly chunkier almond bits. Hopefully they're no more than a tablespoon or so, in which case you can throw them out.
Weigh out and mix your granulated sugar and egg white powder in a small bowl until uniform; set aside. Add splash of vinegar then a splash of water to the bowl that will be used for whipping the egg whites. Swirl liquid around the bowl, then use a clean paper towel to wipe the bowl dry. Use the same paper towel to wipe down your beaters. Now using a handheld or stand mixer, whip the egg whites on medium-low speed until foamy, then turn the speed up to medium to medium-high and gradually add the sugar mixture. Now add orange food coloring, if using, until the desired shade is reached (color will lighten once fully whipped). Continue whipping until you obtain a glossy meringue (it'll look like shaving cream, hold stiff peaks, and stay in place if you turn the bowl upside-down; but don't overbeat your meringue or it will be too dry).
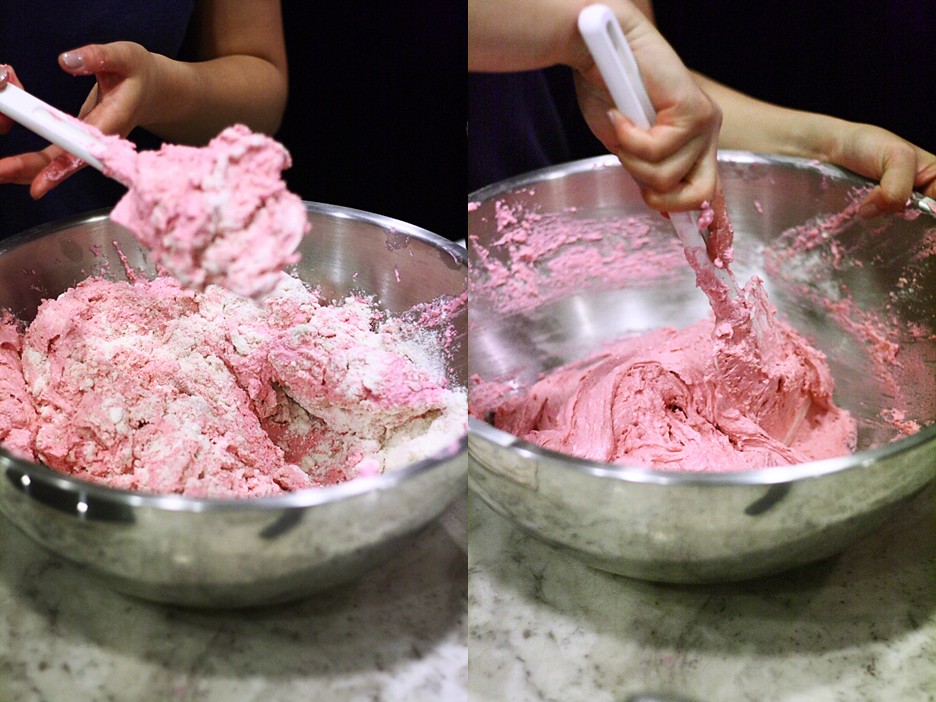
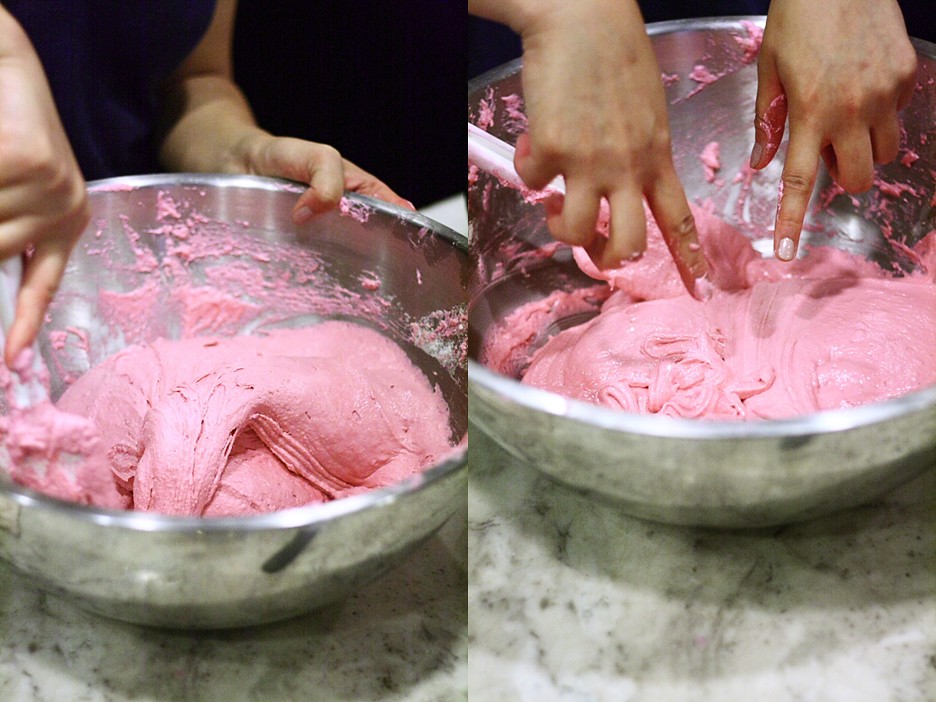
Add all of the nut mixture to the meringue and fold together. Use both a folding motion that scrapes the bottom of the bowl (to incorporate the dry ingredients) and a gentle pressing motion, to deflate the meringue against the side of the bowl.
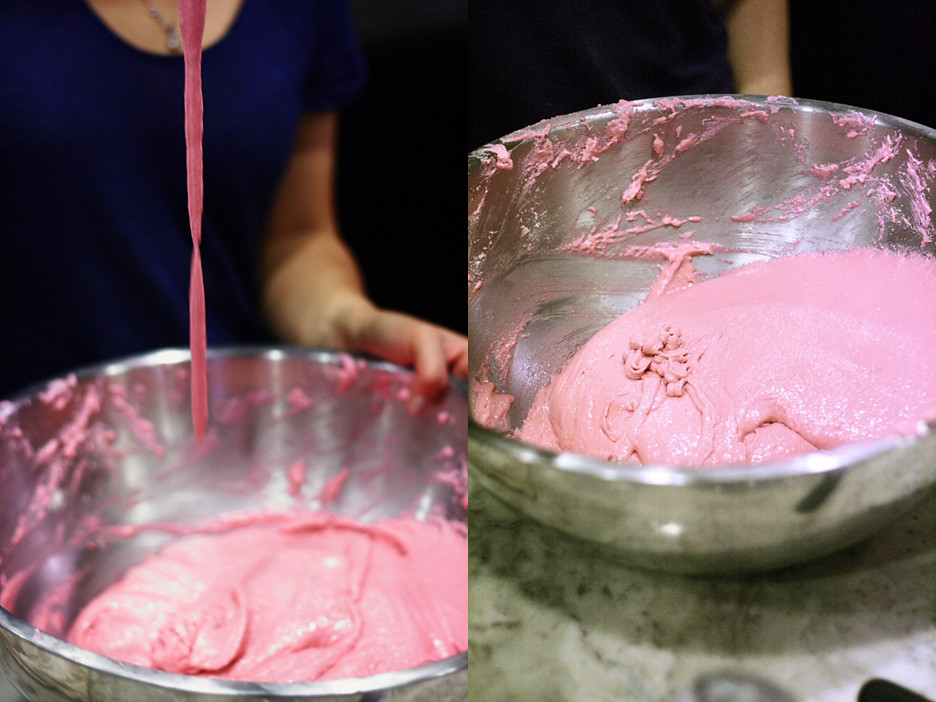
Slow down after all the dry ingredients have been incorporated, and continue folding the mass carefully until you obtain a batter that looks somewhat glossy and flows from the spatula in a thick ribbon.
Test the batter by spooning a small amount of the batter on a plate: if the top flattens on its own within about 20 seconds, it’s ready to pipe. If there is a small peak, give the batter 2 to 3 more folds and test again. The peak shouldn’t disappear immediately either or it’s already overmixed.
Fill a pastry bag fitted with a 1/3 to 1/2-inch wide plain tip (I like Ateco #805 or 806) with half of the batter. (When your bag is too full, the pressure causes the batter to rush out in a way that’s difficult to control, making for sloppy macarons.) Pipe tiny blobs of batter onto the 4 corners and center of 2 baking sheets, then line baking sheets with parchment paper OR line with silicone mats. Pipe small rounds (slightly larger than 1 inch wide) straight down and about 1 inch apart onto the baking sheets. Pick up each sheet with both hands and slam it firmly straight downward on the counter 2 to 3 times. This will to force out any large air bubbles.
Immediately pop any bubbles that rise up but don't break with a toothpick. Do NOT do this once a few minutes have passed because you'll mess up the shell that's forming.
Preheat the oven to 285 to 300 degrees F. Let the macarons sit out for 25 to 90 minutes to harden their shells a bit (to prevent tops from cracking during baking). Test if they're ready by touching the top and side of one shell lightly. It should feel dry and not stick to your finger at all.
Bake one pan at a time for 15 to 25 minutes, depending on the size of the macarons. After the first 10 minutes of baking, rotate the pan and place a large piece of foil loosely over the macarons to prevent browning (If I’m baking on 2 stacked pans, I also remove the bottom pan at this point to make sure the macarons will be completely cooked on the bottom and not sticky).
Let cool completely before trying to move the shells.Once cool, remove the shells from the silicone mat or parchment and flip them over. If you have trouble removing them, freeze the macarons for about 10 minutes, then quickly peel them off before they have a chance to warm up and get sticky again.
To prepare the filling, combine the mascarpone, powdered sugar, and heavy cream and mix well. To fill, spoon or pipe about 1 teaspoon of mascarpone mixture onto half the macaron shells, sprinkle with diced mangos, then top with a similarly-sized top shell. For the best flavor and texture,
store in the refrigerator for at least 1 hour before eating so flavors are allowed to mature, but they are best if eaten
within 2 days. Bring to cool room temperature before eating.

 At least that's how it used to be until an unassuming slice from the aptly named Dangerously Delicious Pies (DDP) in DC blew me away at first bite. Its name was The Baltimore Bomb, and I guarantee it's like no pastry you've ever tasted. DDP created The Bomb especially for the city of Baltimore, Maryland, using their famous Berger cookies, which are equal parts vanilla cookie and chocolate fudge. The inspired twist was to suspend these decadent cookies in a traditional Southern chess filling. The fudge melts down to bestow its gooey goodness to the entire pie, while the tangy custard reigns in the richness of the chopped Berger's. I strongly encourage everyone in the DC area to experience the real deal at DDP, but I think this recipe hits pretty close to the mark and captures all the elements that make the Baltimore Bomb Pie so exceptional and addictive =D.