Showing posts with label birthday. Show all posts

Monday, February 25, 2013

Wheek Wheek! (Guinea Pig Cake Tutorial)

Guinea Pig Cake Process
I had a Work Hard, Play Hard kind of weekend and I'm gonna be honest with you, my body just can't bounce back like it used to in college! In fact my head's pretty mad at me right now for not going to bed 2 hours ago lol. But I had to type up this post now 'cause I couldn't wait another second to share my first carved cake with you! My good friend E is a guinea pig lover (and proud mama to 6 adorable lumps of flesh and fur piggies), so I volunteered to make a guinea pig-shaped cake for her big 3-0 party this weekend. I was pretty scared to carve a cake for the first time, but I'm so glad I went for it because (with P's help) I was able to make something we all found super-cute. I looked at a LOT of cake versions of this adorable rodent and EVEN MORE photos of real pigs before settling on my own path. Kinda really hoping not to see another guinea pig photo for a few months, as cute as they may be...

Nonetheless, I wanted to share some notes (before I forget!) on how I made this cake in case any of you have pig-lovers as friends/family/clients/selves. Wish I'd thought to document the initial cake carving/spackling process, but I'm hoping the 3 pre-buttercream shots below are still helpful. If you have any additional questions about how I made this Wheek-tastic cake, don't hesitate to leave a comment or shoot me an email!

Guinea Pig Carved Cake
Makes one approximately 11 x 5 x 5-inch cake

12 or 14-inch Cake Drum (sturdy base board)
Three 8-inch square cake layers 
***I made 1.5x batch of my favorite chocolate cake with 1 extra egg and 1/3 cup less coffee
Chocolate Buttercream
Vanilla Buttercream
Black, Brown, Yellow, Pink and Green gel OR powdered food coloring
Spatula (for frosting between cake layers)
Sharp Knife for Carving
Piping Bags (optional)
Medium Paintbrush (used for food ONLY, with coarse bristles for best texture)
LOTS of Paper Towels
Gumpaste (for eyes, ears, and nose)
Vegetable Oil (for painting the eyes)
Smaller Paintbrush (for painting the eyes)
Wilton Tip #233 (or other grass piping tip)

I started off by cutting, filling, and stacking my cake layers with chocolate frosting to make a 10 x 5 x 4-inch rectangular cake. Crumble any leftover cake into crumbs and combine with enough frosting to make an easily moldable material for spackling the cake. (If you've ever made a cake pop, this is essentially what goes into cake pop fillings.). Chill rectangular cake for at least 30 minutes, then start carving! Use back and forth motions with a sharp knife to cut away small pieces of cake at a time. I just looked at a LOT of photos of guinea pigs (including my friend's actual pigs) and became familiar with their shape from different sides. To start with, you'll want to smooth out all the top corners and carve more toward the middle to create a subtle "waist" between the main guinea pig body segments. I'm not great at thinking in 3D, so this part was nerve-wracking when I thought I could only cut away. BUT (and you can call this cheating but I won't care =p) once I started using the mixed paste of cake crumbs and frosting as spackle, both building up the shape and cutting it away, I was able to just have fun. The angle, size, and shape of the head also stumped me for quite a while, so I just kept building up the cake "butt" with more spackle haha. So if you noticed that this (pig) baby's got some back, the credit/blame falls squarely on these here shoulders...**cheeeeeesy grin** 

Guinea Pig Cake Process
If you find the cake getting too soft to carve well, simply stick it back in the fridge for 10 minutes to firm up again and then continue working. When you're happy with the shape, chill the cake again to set the shape. While you're waiting on that, reserve about 1/2 cup of vanilla buttercream, then divide up and color the remaining chocolate and vanilla frostings to make the shades you want for the fur. I used black gel food coloring to darken chocolate buttercream and a mixture of vanilla frosting, chocolate frosting, and brown and yellow gel colors to create the lighter shade of brown fur on the pig. 

Now's also a good time to color the 1/2 cup of vanilla buttercream reserved above a vibrant grass green for later. I used a combination of gel and powdered food coloring. Cover and set aside for later.

Guinea Pig Cake Process
Once the cake has been chilled enough, it's time to add the fur-textured buttercream. I spent as much time figuring out the best way to do this as I did studying guinea pig shapes (is it just me or do those both make me sound ultra cool?? and not weird at ALL). The keys to getting a fur-like look with buttercream are (1) to use a paintbrush (one reserved for FOOD use ONLY) with somewhat coarse bristles, (2) to apply the different-colored sections from the back of the cake toward the head, and (3) to wipe your brush off VERY well whenever it touches more than one color at once.

Guinea Pig Cake Process

Monday, April 9, 2012

P's Birthday Treats (Chocolate Peanut Butter Rice Krispies Bars)

Chocolate Peanut Butter Rice Krispies Bars
My boyfriend P's attitude towards food is often, in his own words, "Yea well...it's a food...you can eat it..." -_-... So when he praises (or even remembers) any food past the day he consumes it, I take notice and usually try to recreate it. For years now P's expressed a fondness for a rice krispies bar he used to buy in college. But he wasn't referring to just any plain rice cereal bar...

The Jones' on Easter Sunday
Lexington, Virginia -- where P and I grew up and eventually met
The rice krispies layer was just one of 3 essential components in the treat P described -- the others being almighty chocolate and peanut butter ;p. It wasn't hard to see that a light, crunchy cereal base would be the perfect foil for rich layers of peanut butter and chocolate. If you love the combination of chocolate + PB as much as we do, you'll now understand our interest in recreating this heavenly slice.

Chocolate Peanut Butter Rice Krispies Bars 2
Speaking of recreating this bar of lore, I actually made one previous attempt over 3 years ago. Let's just say there was some yelling and a pan full of sweetened bricks where there should've been bars =X. Despite that, um, incident...I gave it another shot for P's birthday this year and they turned out much better this time. In fact P kept threatening to eat the entire tray, which is his special way of telling me I done good =).

I bet you guys have some beloved schoolgirl/boy treats of your own that you've been dying to bring back. I'd love to hear about them in the comments below!


Chocolate Peanut Butter Rice Krispies Bars 3

Sunday, September 4, 2011

Hellooo Fall! (Irresistible Spiced Pumpkin Cupcakes)

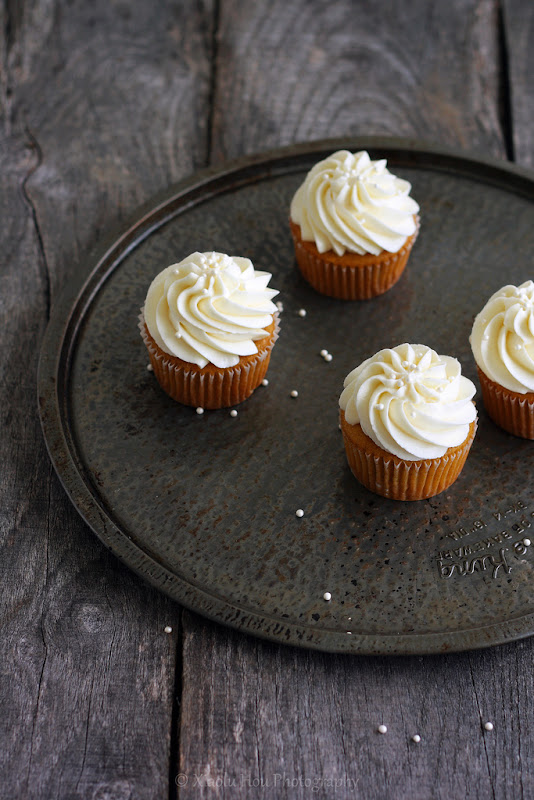
My friend C's birthday is in just a few days. Never one to miss a chance to bake, I offered her a dozen cupcakes in any flavor she wanted. Now had I been in her shoes I would've thrown out something crazy...like passionfruit mousse cupcakes with macarons on top! But C is apparently too sweet to do that. Well actually...she can be pretty hilariously snarky when she wants to be. So the truth is just that C really really loves pumpkin cake and asked me for exactly that. Too easy, right?

Pumpkin Cupcakes for Christin's Birthday
Well actually...there's no such thing as too easy when the results taste this fantastic! I immediately turned to Tartelette's delicious spiced pumpkin cupcake recipe, which I'd tried and loved before. It's got just the right amount of cinnamon and other fall spices to make me want the leaves to hurry up and reveal their glorious colors. I topped off these autumn beauties with generous swirls of my signature not-too-sweet cream cheese frosting. Happy (almost) Birthday, C!

Isn't fall baking just great? I want to hear all about what you can't wait to bake in the coming months! And my friends in the Southern Hemisphere, feel free to share your favorite spring treats, too!

P.S. - Since I've talked about the importance of analyzing your work and having others critique it, I'm going to share my thoughts about the above photo. My hope with the background and tray was to add additional texture and layers to the photo. Plus their cooler tones were meant to tone down the warmer orange of the pumpkin. An issue I had with this shoot was with trying to even out the lighting. Even in the final photo, the light coming from my window to the right is too strong. So the frosting of the bottom-most cupcake ended up a bit bright. To prevent this, I should have reflected more light from the left and/or used a black board to reduce the light from the window. Agree with me? Disagree? I'd love to hear it!


Spiced Pumpkin Cupcakes [Printable Recipe]
Cake slightly adapted from Tartelette
Makes 12 to 14 cupcakes

XIAOLU'S NOTES: I always use canned pumpkin for my baking due to its smooth texture and consistent thickness. If you really want to use a homemade puree, I recommend you drain it using cheesecloth or a coffee filter to ensure that it doesn't add too much liquid to the batter. This frosting recipe makes enough to frost 12 cupcakes fairly generously. If you prefer a thin layer of frosting, feel free to scale the recipe down by 1/3 or even 1/2.

1 cup PLUS 2 Tbsp all-purpose flour
1/2 tsp ground cinnamon
1/4 tsp ground ginger
1/8 tsp ground nutmeg
1 tsp baking powder
3/4 tsp baking soda
1/4 tsp salt
1 scant cup canned unsweetened pumpkin puree [1/2 of a 15 oz. can]
1/2 cup milk
1 tsp pure vanilla extract
6 Tbsp (3/4 stick) unsalted butter, softened
3/4 cup PLUS 2 Tbsp sugar
1 large egg, room temperature
1 large egg yolk, room temperature

Pipeable and Not-too-sweet Cream Cheese Frosting (Recipe below)

Preheat the oven to 350 degrees F. Grease the top of a standard 12-cup muffin pan (in case you get some “muffin top” action). Line pan with 12 baking liners. Sift the flour, spices, baking powder, baking soda, and salt into a medium bowl; set aside. In a separate bowl, whisk to combine pumpkin, milk, and vanilla; set aside also.

Using an electric mixer on medium-high, cream butter and sugar together until light in color and fluffy. Turn mixer down to low, and add egg and yolk. Beat well to combine. Next, add 1/3 the flour mixture, then 1/2 the pumpkin mixture, another 1/3 of the flour mixture, the remaining pumpkin mixture, and the last 1/3 of the flour mixture, mixing to combine after each addition. Fill baking liners about 3/4 full (I always use my large cookie scoop for this). If you've filled all 12 baking liners and still have more batter, you can fill standalone baking cups 1/2 full with batter. Bake 20 to 27 minutes OR until a toothpick inserted in the middle comes out clean (a few tiny crumbs are OK but there should be NO wet batter). Cool 3 minutes in pan, then remove from pans to wire racks to finish cooling completely. Pipe or spread on cream cheese frosting, and enjoy!

Pipeable and Not-too-sweet Cream Cheese Frosting
3/4 to 1 cup (1 1/2 to 2 sticks) unsalted butter, room temperature
Pinch of salt
1 1/4 to 2 cups (5 to 8 oz.) powdered sugar
1 tsp pure vanilla extract
8 oz. (1 block) cream cheese, cold and cut into 6 to 8 chunks

Sift powdered sugar into a small bowl. In a larger mixing bowl, cream the butter, salt, 1 1/4 cups of powdered sugar, and vanilla until thoroughly blended and fluffy. Add the cream cheese, a chunk at a time, beating after each addition (just enough to work it in until it’s smooth). Taste the frosting, adding and beating in more sugar as needed. Be careful to avoid overbeating or the cream cheese may start to break down and become gloppy. If not using immediately, chill until needed, then beat again until smooth just before using.

This recipe has been submitted to Happy Post Pumpkin Recipes over at Family Fresh Cooking.

Monday, June 27, 2011

6 Bittersweets Turns 2! (Raspberry Tres Leches Cake and Mango Mascarpone Macarons)

I can hardly believe it, but it's been 2 years to the day since I made my first food blog post. 174 posts later, my passion for cooking, blogging, and photography continues to grow with no bounds in sight. Equally important is that I've been able to connect with hundreds of incredible people (you!), without whose support this fledgling blog would have faded into oblivion long ago. In fact, you guys gave me an amazing 26th birthday gift last week of seeing my subscriber count surpass 1,500! Almost a week later I'm still pinching myself to confirm if it's real. Thank you, thank you, THANK YOU to all my readers old and new!

Raspberry Tres Leches Birthday Cake
I've never been one to make much ado over my birthday, but I do like to gather friends around for a fun and relaxing evening. Plus, any opportunity to bake a celebration cake is not to be missed...especially on the one day of the year when I have full control over the menu (mwahaha! ^_^). And what a menu it turned out to be! P and I prepared the main dishes and desserts, while friends contributed the rest. Not having set a theme for the meal, we got quite an eclectic mix of dishes but all so yummy that I wouldn't have done it any other way.

For the curious among you, here's what we ate: Spinach Salad with Strawberries and Candied Pecans (even better with mandarin oranges instead of strawberries), Baked Pizza Dip, Grilled Chicken Yakitori Skewers, Spicy Sriracha-Grilled Tofu, Otsu Sesame Noodle Salad with Grilled Eggplant, Mapo Tofu, and Dirty Rice from Bojangles (yes, very random). As scrumptious as all that was, my favorite part of the meal was its sweet ending.

As a kid I hated having a summer birthday because all my school friends would be on family vacations by the time I threw my party. Now that I'm all grown up, I've done quite the 180°, delighting in all the fresh fruits and veggies available this time of year. Nothing speaks summer! louder to me than fresh fruit and cream. As proof you can find my previous iterations of this divine combination here, here, and here.

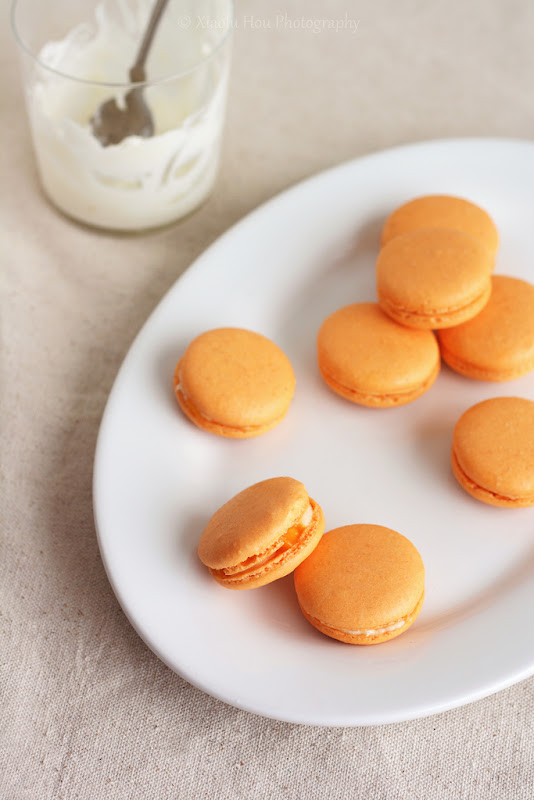
Mango Mascarpone Macarons
To mix it up this year, I expanded on the "cream" portion with not only heavy cream but a trifecta of cream, sweetened condensed milk, and caramelized cinnamon evaporated milk in this irresistable Tres Leches Cake. The filling of sugared raspberries is a fresh twist on the Spanish classic, adding just the right amount of tartness to counter the sweet n' creamy sauce.

Knowing certain guests didn't fancy raspberries, I made a second dessert of Mango Mascarpone-Filled Macarons. This was my first time filling macarons with mascarpone and I must say I love it! Not only did it taste fantastic but it was fantastically easy to prepare: just whisk with fork...no mixer required! When you then add in a topping of juicy, ripe diced mangoes, how could it not be good? And as far as I'm concerned, it was ALL good: the food, the company, the beginning of my 27th year of life... Thank you, my lovely readers, for adding to the wonder of it all!

P.S. - I'm submitting these macarons to this month's MacTweets challenge: Fruit!

Tres Leches Cake with Raspberries
[Printable Recipe]
Adapted from Sunset
Makes 10 to 12 servings

XIAOLU'S NOTES: Evaporated goat milk (Meyenberg is a popular brand) is sold in many grocery stores. I couldn't find it in mine, however, so I substituted regular evaporated milk and the cake was still fabulous. Look in the baking aisle, near the condensed milk. The cake and tres leches sauce (prepare while cake bakes) can both be made a day ahead; reheat tres leches sauce before drizzling over cake. You can chill the completed cake for up to 3 days (garnish with raspberries just before serving).

Cake
1 1/3 cups all purpose flour [stirred, spooned, and leveled to measure]
1 tsp baking powder
1/4 tsp salt
6 large eggs
1 cup granulated sugar
6 Tbsp (3/4 stick) unsalted butter, melted

Tres Leches Sauce
1 can (12 oz.) evaporated goat milk (see Notes)
1/4 cup sugar
1 stick cinnamon (about 2 inches)
1/8 tsp baking soda MIXED WITH 2 tsp water
2/3 cup canned sweetened condensed milk
1 1/4 cups light cream
2 Tbsp rum [optional]

Filling and Frosting
2 cups fresh raspberries, divided
1 1/2 Tbsp granulated sugar
2 cups whipping cream
2 tsp pure vanilla extract
6 Tbsp powdered sugar, sifted

Preheat oven to 350 degrees F; position rack in center of oven. Cut a large parchment circle about 13 inches in diameter and place it atop the base of a 9-inch springform cake pan (at least 2 inches deep). Place the pan's rim back on top of the base and lock it in, securing the edges of the parchment paper. Now butter and flour the bottom and sides of the pan, and set aside.

For cake: Sift flour, baking powder, and salt together; set aside. Select a large stainless steel bowl (at least 10-cup capacity) that can nest comfortably in a large pot. Fill pot halfway with water and bring to a boil over high heat, then reduce heat to a gentle simmer. In bowl, combine eggs and sugar. Set bowl over water; with a handheld mixer, beat eggs and sugar at high speed until pale and thick enough to fall from a spoon in a wide ribbon, about 10 minutes. [If you have a stand mixer but no handheld, combine eggs and sugar in your metal mixer bowl. Set bowl over water, and whisk continuously by hand until the mixture is very warm and foamy. Then remove the bowl from heat and attach it to your stand mixer. Mix until pale and thick enough to fall from a spoon in a wide ribbon, about 10 minutes.]

Remove bowl from heat. Add sifted flour mixture to egg mixture and immediately fold in gently but quickly. Add melted butter and fold in gently until no streaks remain. Scrape batter into prepared pan. Bake on center rack until cake is evenly browned, just begins to pull from pan sides, and springs back when lightly touched in the center, about 35 to 40 minutes. Set pan on a cooling rack and let cool 5 minutes. Run a thin knife between pan and rim. Remove rim and let cake cool completely.

For tres leches sauce: In a large pot (at least 6-qt. capacity) over high heat, combine goat milk, sugar, and cinnamon stick. Bring mixture to a boil. Stir in baking soda mixture (sauce will foam up) and reduce heat to medium. Simmer, stirring occasionally, until sauce turns a caramel color and reduces to 3/4 cup, 10 to 12 minutes.

Remove sauce from heat; discard cinnamon stick, and stir in condensed milk, whipping cream, and rum. Use warm.

With a long, serrated knife, cut cake in half horizontally. Lift off cake top and set, cut side down, on a flat plate.

Transfer cake bottom off the pan base onto a cake stand or other serving platter. Poke cake bottom all over with a toothpick, being careful not to poke all the way through. Slowly spoon enough warm tres leches sauce (slightly less than 1 cup) over cake bottom to saturate well but not cause it to ooze. Let stand until cool, about 10 minutes.

For filling: Reserve 1/2 cup of raspberries to go on top of the cake, then put remaining fruit in a bowl and mix gently with granulated sugar. Set aside. In a chilled bowl, use a mixer to whip cream until it holds medium stiff peaks and is thick enough to spread. Add vanilla and powdered sugar; mix well.

Scoop about 1 2/3 cups whipped cream onto cake bottom and spread evenly, leaving a 1/2-inch border around the edge. Dot with sugared raspberries, pushing them down into cream. Carefully transfer the cake top, cut side down, onto the base and make sure they are aligned. Poke top all over with a toothpick as before, then slowly spoon slightly less than 1 cup of sauce evenly over cake top to saturate.

Now smoothly frost top and sides of cake with remaining whipped cream, then use a clean towel to wipe any stray frosting or sauce from around the base. Cover cake without touching (invert a large bowl over it) and chill at least 2 hours. Cover and chill reserved raspberries if held longer than 2 hours. Cover and chill remaining tres leches sauce.

Uncover cake and decorate with reserved raspberries. Serve with remaining tres leches sauce.

Mango Mascarpone Macarons [Printable Recipe]
Makes about 25 to 30 macarons

XIAOLU'S NOTES: Please do not try to convert this recipe to volume measurements if you don't have a scale (I use and love this one). This recipe is very sensitive and will not work if the measurements are not exact. Please also note that every oven is different and you'll figure out what works best for yours over time (see this post for great information on ovens and macarons). Since mine has major hot spots, I bake on 2 stacked pans for insulation if using parchment paper. If you're uncertain of your ability to pipe uniformly-sized macarons, like me, simply trace 1 1/4-inch circles on your parchment paper, flip the paper over, and pipe on the other side, using the outlines as your guide OR print (choose "fit to page") and slide this template under your parchment as a guide but don't forget to remove before baking! See my first macaron post for helpful videos of the whole macaron-making process!

125 g almonds [not roasted or salted]
170 g powdered sugar
1/4 tsp amchoor (Indian dried green mango) powder [optional]
Large pinch of salt
35 g granulated sugar
2 g egg white powder [optional, to stabilize batter in humid weather]
Splash of white or cider vinegar [to clean utensils/stabilize meringue]
90 to 95 g egg whites [about 3 large egg whites]
Orange food coloring (powder or gel) [optional]

5 oz. mascarpone cheese, cool room temperature
1 Tbsp heavy cream
2 Tbsp powdered sugar, sifted
1/2 cup finely diced ripe mangoes

Microwave fresh egg whites 10 to 15 seconds in the microwave on medium-low heat (I set my microwave to 40%).

Combine the almonds, powdered sugar, mango powder, and salt in a food processor, and pulse on and off until the nuts are finely ground (about 1 to 2 minutes). Sift the powder to remove any large chunks that remain. Put those chunks back into the food processor and pulse again for another 30 to 60 seconds. Sift again. You will probably have some slightly chunkier almond bits. Hopefully they're no more than a tablespoon or so, in which case you can throw them out.

Weigh out and mix your granulated sugar and egg white powder in a small bowl until uniform; set aside. Add splash of vinegar then a splash of water to the bowl that will be used for whipping the egg whites. Swirl liquid around the bowl, then use a clean paper towel to wipe the bowl dry. Use the same paper towel to wipe down your beaters. Now using a handheld or stand mixer, whip the egg whites on medium-low speed until foamy, then turn the speed up to medium to medium-high and gradually add the sugar mixture. Now add orange food coloring, if using, until the desired shade is reached (color will lighten once fully whipped). Continue whipping until you obtain a glossy meringue (it'll look like shaving cream, hold stiff peaks, and stay in place if you turn the bowl upside-down; but don't overbeat your meringue or it will be too dry).

Add all of the nut mixture to the meringue and fold together. Use both a folding motion that scrapes the bottom of the bowl (to incorporate the dry ingredients) and a gentle pressing motion, to deflate the meringue against the side of the bowl. Slow down after all the dry ingredients have been incorporated, and continue folding the mass carefully until you obtain a batter that looks somewhat glossy and flows from the spatula in a thick ribbon. Test the batter by spooning a small amount of the batter on a plate: if the top flattens on its own within about 20 seconds, it’s ready to pipe. If there is a small peak, give the batter 2 to 3 more folds and test again. The peak shouldn’t disappear immediately either or it’s already overmixed.

Fill a pastry bag fitted with a 1/3 to 1/2-inch wide plain tip (I like Ateco #805 or 806) with half of the batter. (When your bag is too full, the pressure causes the batter to rush out in a way that’s difficult to control, making for sloppy macarons.) Pipe tiny blobs of batter onto the 4 corners and center of 2 baking sheets, then line baking sheets with parchment paper OR line with silicone mats. Pipe small rounds (slightly larger than 1 inch wide) straight down and about 1 inch apart onto the baking sheets. Pick up each sheet with both hands and slam it firmly straight downward on the counter 2 to 3 times. This will to force out any large air bubbles. Immediately pop any bubbles that rise up but don't break with a toothpick. Do NOT do this once a few minutes have passed because you'll mess up the shell that's forming.

Preheat the oven to 285 to 300 degrees F. Let the macarons sit out for 25 to 90 minutes to harden their shells a bit (to prevent tops from cracking during baking). Test if they're ready by touching the top and side of one shell lightly. It should feel dry and not stick to your finger at all. Bake one pan at a time for 15 to 25 minutes, depending on the size of the macarons. After the first 10 minutes of baking, rotate the pan and place a large piece of foil loosely over the macarons to prevent browning (If I’m baking on 2 stacked pans, I also remove the bottom pan at this point to make sure the macarons will be completely cooked on the bottom and not sticky). Let cool completely before trying to move the shells.

Once cool, remove the shells from the silicone mat or parchment and flip them over. If you have trouble removing them, freeze the macarons for about 10 minutes, then quickly peel them off before they have a chance to warm up and get sticky again.

To prepare the filling, combine the mascarpone, powdered sugar, and heavy cream and mix well. To fill, spoon or pipe about 1 teaspoon of mascarpone mixture onto half the macaron shells, sprinkle with diced mangos, then top with a similarly-sized top shell. For the best flavor and texture, store in the refrigerator for at least 1 hour before eating so flavors are allowed to mature, but they are best if eaten within 2 days. Bring to cool room temperature before eating.

Monday, May 16, 2011

Birthday Rum N’ Raspberry Custard Cupcakes (Guest Post on Joylicious)

Rum N' Raspberry Custard Cupcakes for Joy!
When Joy of Joylicious emailed me some time ago to introduce herself and ask me to prepare a guest post for her birthday, I was beyond honored to accept her invitation. First, because she's an incredibly talented food photographer who's made her passion into a living! Second, because I had just fallen in love with her blog, which is brimming with recipes as fresh and healthy for you as they are delicious and pleasing to the eye. Now months later I'm proud to know Joy as a dear friend. Please join me in celebrating our birthday girl and gorgeous new bride with some Rum N' Raspberry Custard Cupcakes over on Joylicious! You can also get just the printable recipe here. My tutorial for the pom-pom cupcake toppers pictured is now available here.

Rum N' Raspberry Custard Cupcakes

Tuesday, May 10, 2011

Tart and Full of Passion...fruit (Lemon Lilikoi Bars)

I've made no secret of my adoration of the Australian magazine Donna Hay. Well as a result of regularly pouring over issues of DH, the equally gorgeous Aussie mag Gourmet Traveller, and the blogs of my pals from down under, I've also developed quite a fascination with passionfruit. That vibrant sunny color, that unmistakable flavor, those gorgeous little seeds...I can't but sigh with longing every time I come across such recipes! Thus began my quest to find fresh passionfruit in my local Washington, D.C. area.

I searched high...and I searched low. The interwebs told me these little treasures might be hiding in Asian supermarkets, so I scoured half a dozen to no avail, suffering many strange looks from their Korean managers during the process. My next lead took me to a handful of Hispanic groceries, where I'd heard they might be undercover as "Maracuya." But again I was met with only disappointment. Unexpectedly it was Whole Foods where I finally found my beloved passionfruits, but at $3 apiece I had to walk away.

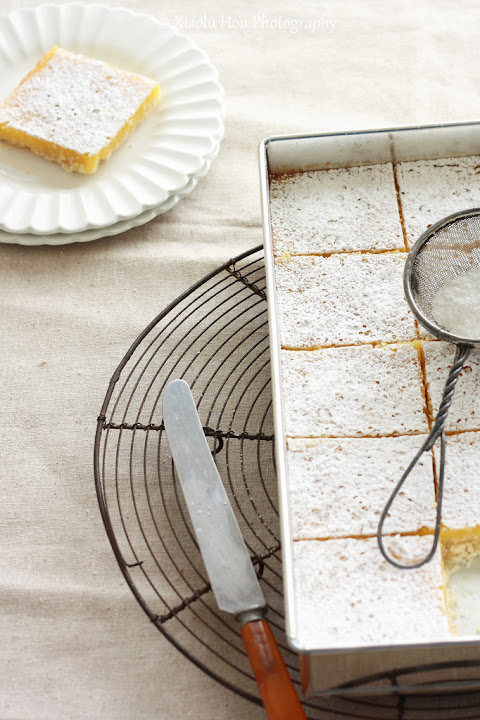
Tart Lemon Lilikoi Bars
Fortunately my visits to the Hispanic stores hadn't been completely in vain. Though the photographer in me demanded the pretty seeds only fresh passionfruit could provide, I found quite a lovely substitute in this frozen passionfruit pulp. It's brought the vibrant tangy-sweet flavor I expect from passionfruit to my orange passionfruit curd mini tarts and now to these lemon lilikoi (yet another name for this fruit) bars.

As much as I enjoy passionfruit, I left some lemon juice in this recipe as I really love it's in-your-face tartness. You should of course feel free to use all passionfruit pulp or even all lemon juice instead. As you might've guessed by now, I like my bars on the tart side, so feel free to be a little more generous with the sugar if you've got a bigger sweet tooth than me ;p.

Tart Lemon Lilikoi (Passionfruit) Bars [Printable Recipe]
Adapted from Donna Hay Magazine Issue 53 and Recipelink
Makes 24 to 32 bars (9 x 13-inch pan)

XIAOLU'S NOTES: I like my lemon bars quite tangy so feel free to add another 1/4 to 1/2 cup of sugar to the filling if you prefer yours sweeter. In case you're worried, the bars should turn out thicker than in my photo. That slice is thin because my oven is lopsided :(.

1 3/4 cups all purpose flour
2/3 cup powdered sugar, plus extra to garnish
1/4 cup cornstarch
2/3 tsp salt
1 tsp finely grated lemon zest
3/4 cup (1 1/2 sticks) unsalted butter, cool room temperature and cut into 1-inch pieces

4 large eggs
2 large egg yolks
1 1/2 cups sugar, or more according to personal taste
1 Tbsp finely grated lemon zest
Pinch of salt
6 Tbsp all purpose flour, sifted
1/3 cup lemon juice (from 2 lemons)
2/3 cup passion fruit puree

Preheat oven to 350 degrees F. Grease the sides of a 9 x 13-inch baking pan, line with parchment paper, then lightly grease parchment.

To make the crust, combine flour, powdered sugar, cornstarch, salt, and lemon zest in the bowl of a food processor. Add butter and pulse until the mixture is pebbly. Press evenly into the bottom of your prepared pan. Refrigerate for 20 to 30 minutes (optional but preferable. Bake until lightly golden, about 18 to 20 minutes. Set aside crust.

To make the filling, place the eggs and yolks in a medium bowl and whisk to combine. In a separate small bowl, combine the sugar and lemon zest and rub them together until fragrant. Now add the sugar mixture, salt, flour, lemon juice, and passionfruit puree to the egg mixture. Whisk until smooth. Pour this filling over the pre-baked crust and bake for another 25 to 30 minutes, or until just set. Let cool to room temperature, then refrigerate for at least 2 hours or until firm. Sift powdered sugar over the top before slicing and serving.

Sunday, April 3, 2011

For My Love: Moist Yellow Caramel Cake and Chocolate Baileys Cupcakes with Liqueur Shots

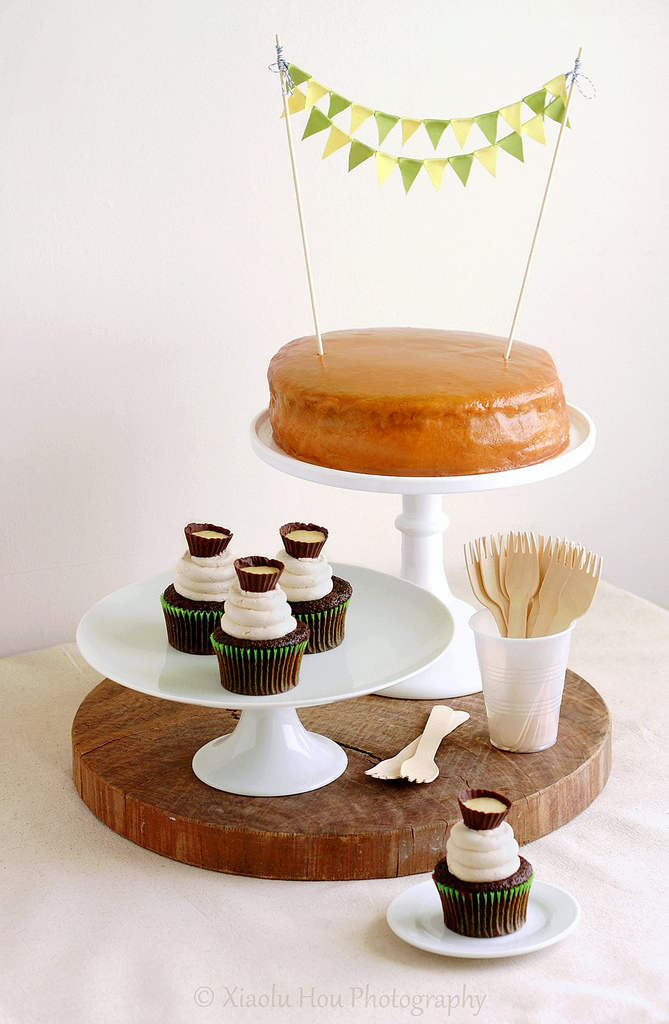
Birthday Dessert Table
It's sometimes funny to me how my views/interests have changed over time. Of course this applies across my life to things both serious and silly, but I bet you can guess which type is on my mind now ;p. For example, if you'd told me just a few years ago that I'd have a blog full of cupcakes (I used to hate this "silly overpriced fad") I'd have been horrified. Perhaps it was going to a "preppy" college, but I really disliked pastel colors, anything "cutesy," and had little interest in things like pretty weddings or party decorations.

Just by looking at this site, you can tell I've changed a bit, no? What started as a subtle shift became a landslide, though, when I discovered some amazing party/style blogs, especially My Sweet & Saucy and Kara's Party Ideas. They're so inspiring I started planning how I'd break the news of my career change to "party planning/catering" to my dad before I knew it. That was just a daydream but with my boyfriend's birthday coming up I had the perfect opportunity to translate all that inspiration into a real party for the love of my life and our friends =).

Pompoms!
From the food to the decorations, my plan for P's birthday party was all about DIY (do-it-yourself). Since P is a pretty down-to-earth guy, I kept things simple using a natural color scheme with accents in green (his favorite color) and yellow. The ribbon cake bunting banner and tissue paper pom-poms (both pictured above) were easy to make using these tutorials: cake bunting and pom-poms. The biggest surprise (and my favorite part of the preparation) was convincing P to help make the pom-poms and discovering that he was a natural at it! On the other hand, mine looked like a dog had chewed on it...=p

We offered our guests a lot to fill their bellies at the party. After munchin' on some store-bought chips and dips, they got to sample P's favorite spiked pasta and customized homemade pizzas at the toppings "bar." There was also plenty to satisfy their sweet tooths. The Boy's favorite cake in the world is his aunt's yellow cake with an amazing caramel frosting. Having tried to recreate it for his last 3 birthdays, I'm happy that's it's finally good enough to be shared! If you've ever had caramel or penuche frosting, you're probably used to it being hard. The beauty of this version is that it stays soft and buttery, a perfect compliment to the oh-so-moist yellow cake.

Patrick's 26th Birthday Party/Cake
Photos from my friend Mimi =D
In honor of P's half-Irish ancestry, I also created some fun chocolate Irish cream cupcakes. To make them as "Irish" as possible, I used my homemade Irish cream 3 ways: in place of milk in the cake batter, to flavor the frosting, and to fill the homemade chocolate cup toppers. The chocolate liqueur "shots" were especially fun -- to make and consume! In case you're wondering about the proper way to eat these, here's how we did it:
  1. Hold the cupcake around its wrapper between your thumb and index finger, then bring it up and toward you so you can drink the Irish cream shot out of the chocolate cup.
  2. Now pick up the empty chocolate cup and gobble it up like a proper chocoholic!
  3. Now eat the remaining cupcake any ole way you want.
I'm happy to report the party was a success! Everyone, including the birthday boy, seemed to have fun and enjoy the food. Like the above-mentioned style blogs inspired me, I hope some of you might be inspired to make your own crafts and treats for your next special gathering!

Moist (Really!) Yellow Layer Cake with Soft Caramel Frosting [Printable Recipe]
Adapted from ChefTalk and from My Yellow Bluff
Makes a 2-layer 9-inch cake (about 10 to 12 servings)

XIAOLU'S NOTES: I think part of the compromise of such a moist, tender cake is that it's quite delicate to handle. I definitely recommend chilling the cakes at least an hour before frosting to firm it up so crumbs won't come off easily. Especially since this frosting is really good at pulling cake bits off hehe. You can't tell in my photo (or at least I hope not!) but a small section of the edge of the cake actually got pulled off by the frosting entirely. So, again, handle with care! Or, if not, it'll be delicious just the same =D.

2 1/4 cups all purpose flour
1 1/2 cups sugar
3 1/2 tsp baking powder
1 tsp salt
1 cup PLUS 1 Tbsp milk
1 tsp apple cider vinegar
1 1/2 Tbsp canola or vegetable oil
1/2 cup (1 stick) unsalted butter, softened
1 3/4 tsp pure vanilla extract
3 large eggs, room temperature
3 large egg yolks, room temperature

Soft Caramel Frosting (Recipe below)

Preheat oven to 350 degrees F. Cut parchment paper to fit the bottom of two 9 x 1 1/2-inch round pans. Grease the pans lightly with oil or cooking spray, then place the paper in the pans and grease the paper.

Sift the flour, sugar, baking powder, and salt into a large mixing bowl. Add the milk, vinegar, oil, butter, and vanilla to the flour mixture and beat with on medium to medium-high speed for 1 to 2 minutes, scraping the sides of the bowl as needed. Add the eggs and yolks and continue beating an additional 2 minutes. Divide batter evenly between the prepared pans.

Bake for 22 to 30 minutes or until a toothpick inserted near the center of a cake comes out clean, or until cake springs back when touched lightly in the center. Cool cakes on wire racks for 15 minutes; remove from pans and cool completely. Frost as desired.

Soft Caramel Frosting
Makes enough to frost a 2-layer cake

XIAOLU'S NOTES: Steph of Cupcake Project also posted an adaptation of this frosting. Though our measurements are different, the technique remains the same. Check out her post for some useful photos of the caramelization process. This frosting doesn’t crust up like many other caramel frostings and retains wonderfully creamy, buttery, and soft. However, it does still become harder to spread as it cools, so you’ll want to have the cake(s) baked, cooled, and ready to frost before making the frosting.

3 cups sugar, divided [save 1/2 cup to brown]
3/4 cup (1 1/2 sticks) unsalted butter
1/2 tsp salt
1 1/4 cups (10 oz.) canned evaporated milk
1 tsp pure vanilla extract
Pinch of baking soda

Mix 2 1/2 cups sugar, 4 tablespoons (1/2 stick) butter, salt, and evaporated milk in a heavy-bottom medium saucepan (at least 3-qt. capacity). Cook over medium heat, stirring periodically until all of the sugar dissolves. Reduce heat to low.

Melt the remaining 1/2 cup of sugar in a small iron skillet, stirring constantly until it turns an even light to medium amber brown color.

Add this caramelized sugar and the remaining stick of butter into the mixture in the pot. Quickly stir everything together thoroughly and continue to cook until “soft ball” stage is reached (about 235 degrees F or when a bit of caramel dropped into cold water forms a soft, malleable ball) – this may take up to 30 minutes. Remove from heat, and let cool and thicken slightly. Add vanilla and baking soda. Use immediately, as the frosting will continue to thicken as it cools.

Chocolate Baileys Cupcakes with Irish Cream Liqueur Shots [Printable Recipe]
Makes 12 cupcakes

1 cup MINUS 1 Tbsp all-purpose flour
3/4 cup PLUS 2 Tbsp sugar
6 Tbsp unsweetened cocoa powder
3/4 tsp baking soda
1/2 tsp baking powder
1/2 tsp salt
1 large egg, room temperature
3/4 tsp instant coffee powder dissolved in 1/2 cup hot water (or 1/2 cup espresso)
1/2 cup Irish cream liqueur (homemade or storebought, like Baileys)
1/4 cup vegetable oil
1 tsp pure vanilla extract

Baileys Swiss Meringue Buttercream (Recipe below)
Irish Cream-Filled Chocolate Shots (Recipe below)

Preheat the oven to 350 degrees F and line a standard muffin pan with paper liners.

In large bowl, stir together the sugar, flour, cocoa, baking soda, baking powder, and salt. Add the egg, Irish cream, coffee (or reconstituted coffee mixture), oil, and vanilla extract. Beat by hand or with an electric mixer on medium speed until well combined (no more than 1 minute).

Pour the batter, which will be thin, to fill the paper liners about 2/3 full. Tap the pan firmly against the counter one time to remove any air bubbles. Bake for 20 to 25 minutes or just until a toothpick inserted into the middle of a cupcake comes out clean. Let cupcakes cool in the pan for 2 minutes, then remove them to a wire rack and let them cool completely there.

Once cupcakes are completely cool, pipe or spread buttercream onto cupcakes and top with Irish cream-filled chocolate shots (be careful to position them securely so they don’t spill). Enjoy!

Irish Cream Swiss Meringue Buttercream
Makes enough to generously frost 12 cupcakes

3 large egg whites
3/4 cup PLUS 2 Tbsp sugar
15 Tbsp unsalted butter, cool room temperature and cut into 10 pieces
1 tsp pure vanilla extract
1/3 to 2/3 cup Irish cream (homemade or storebought, like Baileys)

Combine the sugar and egg whites in the stainless steel bowl of an electric mixer. Bring a large pan of water to a simmer, making sure that the water isn’t high enough that it will not touch the bowl. Set the bowl in the pan of simmering water and whisk constantly until the sugar is completely dissolved and the top becomes foamy. Be careful not to curdle the egg whites. Remove bowl from heat.

Transfer bowl to your mixer and beat on high speed for at least 3 minutes, until the mixture holds glossy, marshmallow-like peaks and the bowl is completely cool (very important -- the frosting's consistency will be off otherwise). If using a stand mixer, switch to the paddle attachment, and add butter to the meringue a tablespoon at a time, beating well after each addition (at least 5 seconds in between). With the mixer on low, add the vanilla and Irish cream, and continue beating 1 minute to incorporate the additions and reduce air bubbles.

Irish Cream-Filled Chocolate Shots

XIAOLU'S NOTES: If you have extra chocolate leftover, you can simply spread it in a layer (about 1/4-inch thick) over some parchment paper or other non-stick flat surface and let it cool completely. Once hard, chop it up to use for chocolate chunks in chocolate chip cookie or other recipes calling for chocolate chips/chunks!

5 to 6 oz. semisweet chocolate, roughly chopped or chipped
1/3 cup Irish cream (homemade or storebought, like Baileys)

I used a mini-sized silicone mold, but mini foil cupcake liners inside of a mini pan should work as well. If using foil liners, be sure to spray the insides with oil first. Bring a small pan of water to a simmer, and set a small heatproof bowl filled with the chopped chocolate on top of the pan. Stir until the chocolate is completely melted. Turn off heat but keep bowl on top of the warm pan. Another option is to microwave the bowl of chocolate at 30 second intervals, stirring in between each, until fully melted and shiny.

Using a small pastry brush, brush the inside of the molds or liners with an even layer of chocolate. Freeze mold or pan for 5 minutes, then brush another layer of chocolate over the first layer. Repeat the previous step one more time (for a total of 3 chocolate layers). Freeze for 20 minutes, then unmold the cups by peeling of one side of the silicone (or foil liner) carefully. Keep cool until ready to use. Fill with 1 teaspoon of Irish cream to serve.

Saturday, August 22, 2009

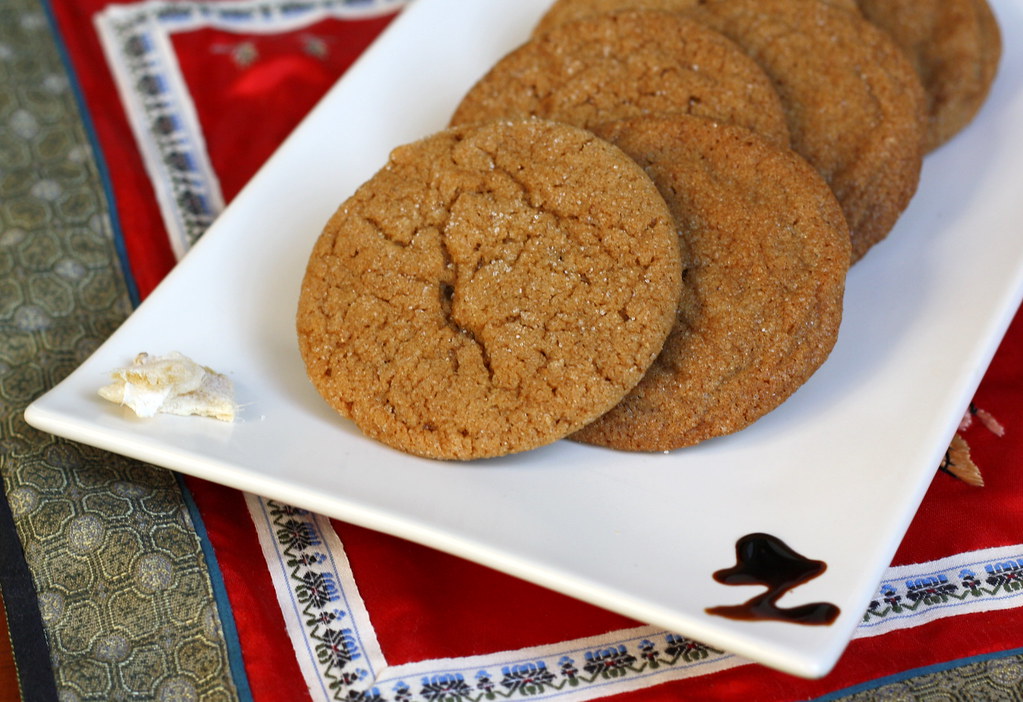
Soft Ginger Cookies


On the same night I made the Peach Crème Fraîche Crumble, I also baked these cookies. No, not (just) because I'm a crazy insomniac baker but because it was my friend and co-worker's birthday the following day. The first thing that came to mind was to bake her a cake, of course. My signature being a deep dark chocolate cake (which I promise to post about down the line) with frosting/filling varied according to each person's preference. But it turned out that she's not a fan of chocolate or even cakes in general. Luckily her enthusiasm for the ginger cookies I'd baked last winter came to mind, so I chose to make her a personal stash.


Truly, these are a delight. Slightly crunchy on the outside with chewy innards (hehe). And don't shy away from the cayenne! It's just a little bit, so trust me, no one will notice other than to note that these cookies have just the right amount of spicy kick.


Soft Ginger Cookies
[Printable Recipe]

Adapted from Cookie Madness
Makes about 34 medium cookies

3/4 cup unsalted butter, cut up, still firm
1 cup granulated sugar
1 large egg
1/2 tsp pure vanilla extract
1/4 cup molasses (not blackstrap)
2 1/2 cups all purpose or white whole wheat flour (11.1 oz) – spoon and sweep
(Increased from the original since I used all butter and the dough was too soft)
1 tsp baking soda
1/4 tsp salt
1/2 tsp cinnamon
2 tsp ground ginger
1/2 tsp ground cloves
1 tsp cocoa powder
1/4 tsp cayenne pepper
1/3 cup sparkly sugar (I just used granulated)

Preheat oven to 350 degrees F. Have ready two or three large cookie sheets lined with parchment or silicone sheets.

Using an electric mixer, beat butter until creamy. Add sugar, 1/4 cup at a time. Continue beating for another minute. Beat in egg, vanilla and molasses.

In a separate bowl, thoroughly stir together the flour, soda, salt and remaining spices. Add the flour mixture to the butter mixture and stir until mixed.

Shape dough into balls approximately 1 inch across. Roll the balls in sparkly (or granulated) sugar. Place 2 inches apart on cookie sheets and bake one sheet at a time on center rack of oven for about 12 minutes. Cookies should appear cracked on top but still slightly soft.

Monday, August 17, 2009

Ferrero Rocher Cupcakes (Baking for Mar Pt. 2)


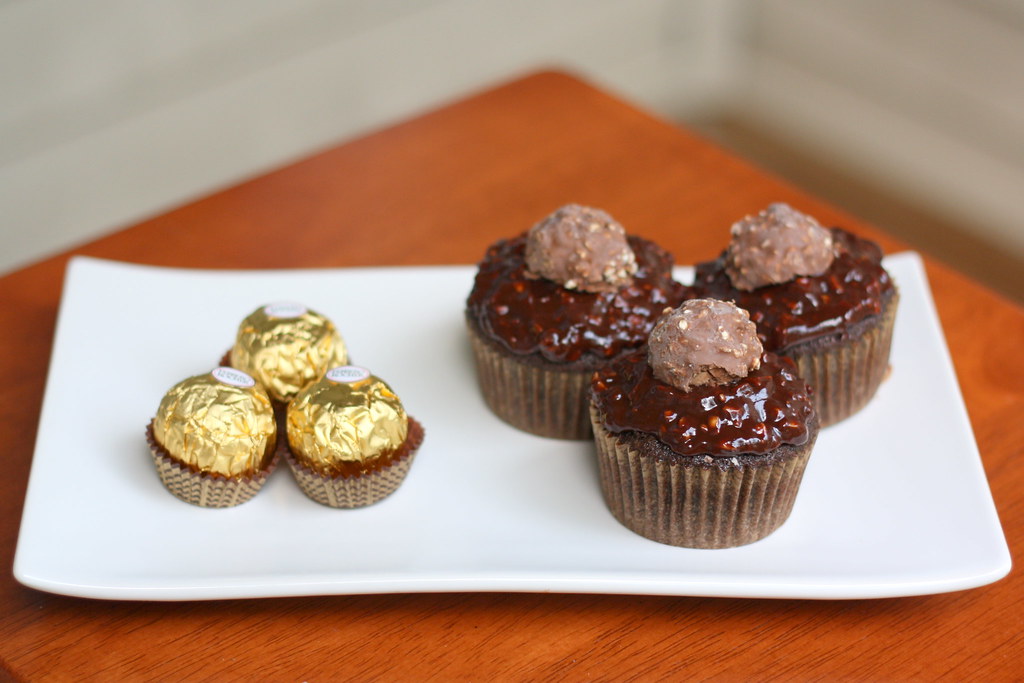
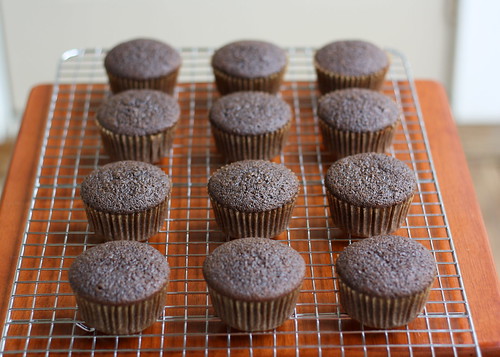
As I mentioned previously, last Friday was my friend Mar's birthday. Since I missed her big day, I decided to do it up and bake her 2 things she'd requested. Funny enough, I'd planned these Ferrero Rocher cupcakes for my own birthday in June, in addition to the amazing strawberry cream cake. See, when I was a kid, dad brought these hazelnut chocolates back to China from a business trip. Just for me. I fell so hard for Rocher right then and never got over him hehe. Fast forward to 2 weeks ago en route to NYC with Mar. I happened to mention these cupcakes, and she immediately knew she wanted them for her birthday. Like the chocolates themselves, these babies turned out to be the perfect little decadent treat. Most importantly, the birthday girl looked mighty happy.


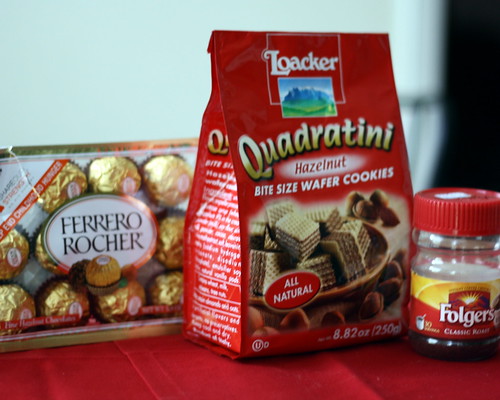
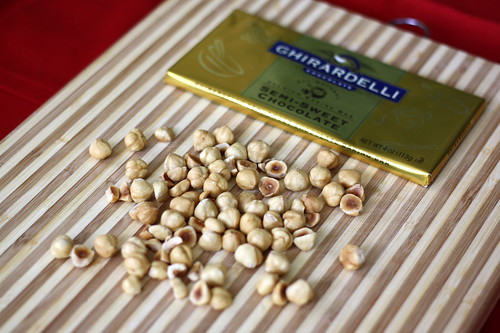
There're some less common ingredients in these cupcakes (like hazelnut extract and edible gold). So check out this Cupcake Project post for some great info on finding them. Also, although hazelnuts can be found in stores, I chose to get mine online and already-roasted from Oh Nuts!. Without the time or supplies to make my cupcakes look exactly Rocher-like, I chose instead to use some actual chocolates as toppers and pumped up the taste with some hazelnut wafer cookies from World Market plus more hazelnuts in the filling. All the recipes are after the jump.

The Star (Ferrero Rocher) and Supporting Cast

There were some other bumps too along the road to chocolate hazelnut bliss. While the cake and ganache recipes worked perfectly, my filling came out like soup (!!). Despite attempts to coax it to "gooey"-ness with powdered sugar and chilling, it refused to thicken more than marginally. It was still fabulous in the end, but if I make it again, I'll use less liquid or even substitute Nutella for the filling.

Ferrero Rocher Cupcakes [Printable Recipe]
Adapted from Cupcake Project
Makes 12 cupcakes

1/2 C boiling water
6 T unsweetened cocoa powder
1/4 C yogurt (not too thick)
1/2 t vanilla extract
1 T hazelnut extract
1/2 tsp molasses
1/2 C unsalted butter, softened
1 C granulated sugar
2 large eggs, room temperature
1 C all-purpose flour
1/2 + 1/8 t baking soda
1/4 t salt

Gooey Chocolate Hazelnut Filling (Recipe below)
Chocolate Hazelnut Ganache (Recipe below)
6 Ferrero Rocher chocolates, halved

Preheat oven to 350F. In a bowl, whisk the boiling water into cocoa until smooth and whisk in yogurt, molasses, vanilla, and hazelnut extracts. In a large bowl, beat together butter and sugar until light and fluffy, about 2 to 3 minutes, and beat in eggs, 1 at a time, beating well after each addition. Into another bowl, sift together flour, baking soda, and salt and add to egg mixture in batches alternately with cocoa mixture, beginning and ending with flour mixture, and beating well after each addition. Fill each wrapper slightly more than 1/2 way. They will rise a lot. Bake in a preheated 350F oven for about 18 minutes. Cool on a wire rack.


Cut a cone in each cupcake. Put a few pieces of the wafers in, followed by 1-2 teaspoons of the filling. Replace the cone. Spread 1-2 tablespoons of the ganache over each filled cupcake. Top them all with one Ferrero Rocher half each. Take a bite and moan in pleasure.

(Supposedly) Gooey Chocolate Hazelnut Filling
1/2 C heavy cream (I'd recommend reducing this to about 1/4 C)
1/2 C semisweet chocolate chips
(I chopped up a bar of semisweet chocolate instead. My consistency problems may have something to do with these changes.)
1 t hazelnut extract
1/2 C hazelnut wafer cookies, cut into 1/2" cubes
1/4 C roasted hazelnuts, chopped fine

Bring heavy cream to a boil. Pour over chocolate to melt it. Add extract. Mix until fluffy (I wasn't sure what this meant...). Let cool. (In my case, add sugar...still soup...repeat 6x...put in freezer...soup 4evarr...)


Chocolate Hazelnut Ganache

1/4 C heavy cream
4 oz good semi-sweet chocolate chunks
1 T light corn syrup
1 t hazelnut extract
1/3 C hazelnuts, chopped fine to medium

Heat the cream on the stove until it boils. Pour over the chocolate and stir to melt, adding the corn syrup and hazelnut extract. Stir in the chopped hazelnuts.

Saturday, June 27, 2009

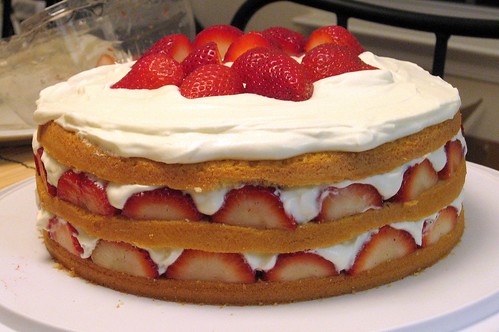
Strawberry Cream Birfday Cake

Food Pr0n, of course

Hewwo there! I realize that I abandoned this blog almost as soon as I'd created it, but what better time than the beginning of another year of my life to give this another shot? The credit really goes to my awesome boyfriend, who not only lent me his camera so I could document my baking but also inspired me to post the results here. Thanks, love!

While I'm at it, I should also mention how grateful I am for the other friends and family who've made me feel so loved during my birthday week. My beautiful Julia deserves a special shout out both for being born on the best.day.evarrr (we're birthday twins if you couldn't tell =p) and for overwhelming me with thoughtful gifts. She is simply amazing. There's no other way to describe this girl, and I'm so lucky to have her in my life.

One of the many awesome things I got this year was this wicked Calphalon Nonstick 6-Quart Dutch Oven (no farting jokes!). It's sure to become a fast partner in soup-making crime, and Ima make a real effort to keep posting about any successful concoctions I come up with. A non-foodie but equally exciting gift was DVDs of Season 4.0 of Battlestar and the pilot for its spin off Caprica. I'll definitely be enjoying these as well as the new season of True Blood in the coming months!


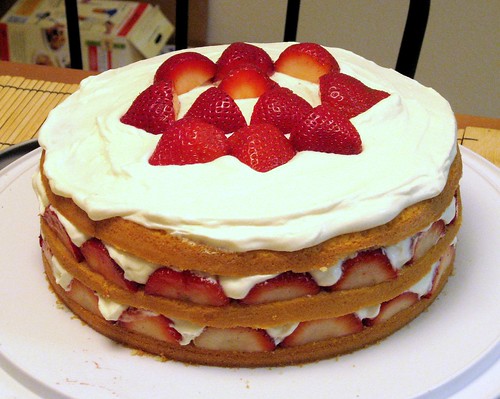
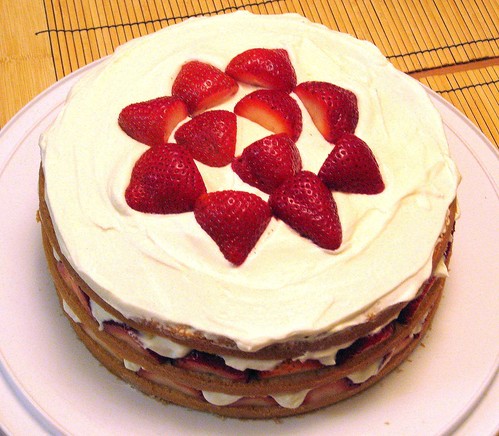
Now for the best part...the nomlicious cake. I know most people would call it dorky or even sad to bake your own birthday cake, but it's actually the one day of the year when I really feel free to make what I WANT (damn all y'all and yer taste buds! ;p). Isn't that what we love about birthdays anyway...complete license to be selfish? But without others' preferences to go by, I had a tough time picking out The One. It came down to a gorgeous strawberry cream layer cake I found on the fabulous vegetarian blog eat me, delicious and cupcake project's clever recipe for Ferrero Rocher cupcakes. The stunning presentation and seasonal appeal of the strawberry cake finally won me over, but I'm making the cupcakes soon too so keep an eye out for that.


I'm glad I chose this cake because it was fun to make and pushed me to try several things for the first time. This was my first sponge cake and what a wonderful introduction it was! Coming out of the oven, it smelled very eggy but I assume this is usual for a cake using 5 eggs. This recipe made for a fairly dense but still moist and flavorful cake. I had trouble comparing photos, but I'm hoping that others who've made this cake could tell me if mine may have risen less from using all purpose flour. This was also my first time whipping heavy cream and it thickened up beautifully in my stand mixer. I gotta agree with eat me, delicious that you MUST try this frosting at the very least. I stopped short of licking the bowl but did wipe it very clean with leftover strawberry pieces (which were then disposed of...in my mouth). But I'd really recommend making the entire cake. The number of components may look daunting, but they aren't too complicated when broken down. I shared this with my coworkers and they all loved it. Just make this once and I promise that, like me, you'll just be looking for an excuse to make it again and maybe to make it even prettier using a cake ring!

Strawberry Cream Cake [Printable Recipe]
Adapted from Cook's Illustrated through eat me, delicious and Simply Recipes
Serves 8 to 12.

*My changes in italics

Cake
1 1/4 cups cake flour
*I used all purpose & replaced 2 1/2 T with cornstarch
1 1/2 teaspoons baking powder
1/4 teaspoon table salt
*I only added a pinch since margarine is salted
1 cup sugar
5 large eggs (2 whole and 3 separated), room temperature
6 Tbsp unsalted butter, melted and cooled slightly
*I was out of butter so I used Earth Balance margarine
2 Tbsp water
2 teaspoons vanilla extract
*I added a few drops of almond extract just for kicks

Strawberry Filling
2 pounds fresh strawberries (medium or large, about 2 quarts), washed, dried, and stemmed
*Local is probably tastiest, but I used organic with great results
4-6 Tbsp sugar
2 T Kirsch
*I used dark rum and added about a tsp of finely minced mint
Pinch table salt

Whipped Cream
8 ounces cream cheese, room temperature
*I used low-fat and it still tasted amazing
1/2 cup sugar
1 teaspoon vanilla extract
*Again, I added a few drops of almond extract
1/8 teaspoon table salt
2 cups heavy cream
*I stabilized the cream with about 3/4 tsp gelatin dissolved in 1-2 T water then microwaved 1 minute on high and cooled

Bake the cake:
1. Adjust oven rack to lower-middle position. Preheat oven to 325°F. Grease and flour round 9-inch springform pan and line with parchment paper. In a large bowl, by hand, whisk flour, baking powder, salt, and all but 3 Tbsp of the sugar in mixing bowl. Whisk in 2 whole eggs and 3 yolks (reserving whites), butter *or margarine, water, and *extracts. Whisk until smooth.

2. Using a mixer fitted with whisk attachment, beat remaining 3 egg whites at medium-low speed until frothy, 1 to 2 minutes. With machine running, gradually add remaining 3 tablespoons sugar, increase speed to medium-high, and beat until soft peaks form, 60 to 90 seconds. Stir one-third of whites into batter to lighten. Add the remaining whites and gently fold into batter until no white streaks remain. Pour batter into prepared pan and bake until toothpick inserted into center of cake comes out clean, 30 to 40 minutes. Cool in pan 10 minutes, then invert cake onto greased wire rack; peel off and discard parchment. Invert cake again; cool completely, about 2 hours.

Strawberry filling:
3. Cut in half 24 of best-looking berries and reserve. *Maybe my berries were super large but I only needed about 20. Slice or quarter remaining berries; toss with 4 to 6 tablespoons sugar (depending on sweetness of berries) in medium bowl and let sit 1 hour, stirring occasionally. The sugar will macerate the strawberries, making them soft, and generating liquid. Strain the juices from berries and reserve (you should have about 1/2 cup *or more). Put the strawberries in a bowl and use a potato masher to mash them; *add minced mint and set aside. In small saucepan over medium-high heat, simmer reserved juices with rum until syrupy and reduced to about 3 tablespoons, 3 to 5 minutes. *This took me over 10 minutes, but I think I had over 1/2 cup of reserved juices. Pour reduced syrup over macerated berries, add pinch of salt, and toss to combine. Set aside until cake is cooled. Whipped cream:

4. When cake has cooled, place cream cheese, sugar, vanilla, and salt in bowl of standing mixer fitted with whisk attachment. Whisk at medium-high speed until light and fluffy, 1 to 2 minutes, scraping down bowl with rubber spatula as needed. Reduce speed to low and add heavy cream in slow, steady stream; when almost fully combined, *add dissolved gelatin and increase speed to medium-high and beat until mixture holds stiff peaks, 2 to 2 1/2 minutes more, scraping bowl as needed (you should have about 4 1/2 cups).

Assemble the cake:
5. Using large serrated knife, slice cake into three even layers. Place bottom layer on cardboard round or cake plate and arrange ring of 12-20 strawberry halves, cut sides down and stem ends facing out, around perimeter of cake layer. Pour one half of mashed berry mixture (about 3/4 cup) in center, then spread to cover any exposed cake. Gently spread about one-third of whipped cream (about 1 1/2 cups) over berry layer, leaving 1/2-inch border from edge. Place middle cake layer on top and press down gently (whipped cream layer should become flush with cake edge). Repeat with 12-20 additional strawberry halves, remaining berry mixture, and half of remaining whipped cream; gently press last cake layer on top. Spread remaining whipped cream over top; decorate with remaining cut strawberries.

Serve immediately, or keep chilled. If the whipped cream warms to room temperature it will be harder to keep stable while cutting. *Stabilizing the whipped cream helps it keep a little longer but still try to keep it cold as much as possible.

Friday, October 19, 2007

Ipod!

I finally bought myself an Ipod. It's a Nano...in silver...holds 4 GB. So apparently it's a brand new model. Too new actually in the sense that I can't even find a case for it =(. I'm quite pleased with the engraving though =D.

Cookie for you if you ID the song...which reminds me...I've been really into Elliott Smith's music again starting about a week ago. Nothing really reminded me to do it, I was just hit with a need to hear Either/Or out of the blue and it only grew from there. I Googled him a few days later only to find out that Sunday marks the 4th anniversary of his death. Man what a coincidence. Rest in peace, Elliott. I really wish you were still around but remain grateful for all the gorgeous pieces that remain.

Finally, after 2 postponements, I baked Richard's belated birfday cake (boston cream pie) plus the pineapple upside-down cake I promised Breeanna from work. Pass the frack out in bed now...