Showing posts with label lemon. Show all posts

Friday, April 27, 2012

Tart Lemon Cake for Mother's Day (Guest Post for Pure Joy Events)

Tart Lemon Layer Cake for Mother's Day Craft Photo Shoot
I'm lucky to live near 2 fabulously talented food and party blogger friends, Christine of Pure Joy Events and Heather of Chickabug. It was such a pleasure to collaborate with the 2 of them previously, so I was excited when Christine suggested we team up again for a special Mother's Day project! For our latest undertaking, Christine made this fabulous memo board of colorful clothespins to provide the perfect setting to show off memo to Mom cards custom-designed by Heather. And I added a measure of sweetness with my Tart Lemon Cake! Please head over to Pure Joy Events for the full cake recipe and to Chickabug for the Mother's Day memo board tutorial, FREE memo to Mom printable, plus the lemon cake recipe card. You can also find a plain-text printable version of just the cake recipe here.

Tart Lemon Layer Cake for Mother's Day Craft Photo ShootClothespins and Memos DARKER TEXT

Monday, June 20, 2011

Cool It! (Spiked Watermelon Cooler)

Watermelon
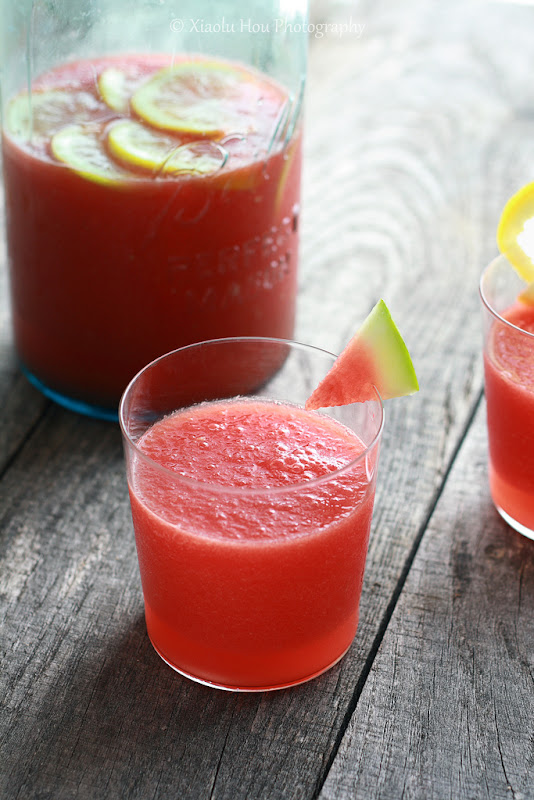
Some of you have been asking for more fast, easy recipes on 6 Bittersweets -- and such you shall receive! Today watermelon cooler is very simple to make and inspired by a favorite childhood drink. Though the term "watermelon juice" will probably just make you furrow your brow in confusion, it's actually a drink widely available in restaurants throughout China. Made purely of blended and strained watermelon chunks, this juice has got to be one of the most refreshing things on a hot summer day.

The major (for serious) heat wave we've had in the D.C. area lately inspired to make this grown-up watermelon juice cooler. Don't tell anyone, but I actually intended this to be a frozen drink (and still included directions in case you prefer it slushy). But alas, I ran out of time and didn't get to fully freeze the melon. Perhaps it was for the best as this version is even closer to the beloved drink of my memories of China. Of course it didn't have vodka back then, but I think spiking this juice only made it better ^__^.

Watermelon Lemon Vodka Cooler
Spiked Watermelon Cooler/Slushie [Printable Recipe]
Serves 4 to 6

6 cups cubed seeded watermelon, 3/4-inch cubes
1 Tbsp freshly squeezed lemon juice
1 tsp freshly grated lemon zest
1 cup tonic water
1/2 cup vodka (optional)
6 Tbsp powdered sugar, or more to taste

If making into a slushie, place chunks side by side on a large baking sheet, so that they're not touching one another. Freeze at least 2 hours. Then puree melon cubes (frozen or not) with the remaining ingredients in a conventional blender or using a stick immersion blender. Taste and add more powdered sugar, if desired. For slushie, pour into glasses or small bottles and serve immediately. For non-frozen drink, pour into a pitcher and chill well before serving.

Saturday, June 11, 2011

When Life Gives You Lemons...It's Time for a Mac Attack! (Lemon Macarons with White Chocolate Ganache)

Guest posts and macarons have become quite the norm recently here, haven't they? I'm actually getting a bit tired of photographing these cookies so much 8p. In fact I'd have waited weeks to post these, except that I've gotten such positive feedback on the taste of them from friends and family alike! Plus, I've been dying to share these adorable lemon shapes with you as soon as I came across the idea on Erica's blog. Believe it or not I actually lost my Mac Mojo a bit this week and had to make these 3 times before they came out to my liking. Not only have I continued to struggle with my hot spot-laden oven but this recipe also added in a new factor of slightly adjusting the shape of the shells.

Fortunately, despite my meekness in dealing with certain issues in life, that's not a problem I have with baking! I simply take each imperfect batch (still delicious,
thankfully) as a challenge to improve myself. And whether you've yet to try your hand at macarons or have failed a few times, let me assure you that the satisfaction of getting them right is so worth it in the end!

As I mentioned before, a lot of my macaron issues have been the result of reducing the sugar in the shells. Because sugar stabilizes the batter, decreasing it compromises the cookie's structure. So if you're new to them, I'd definitely recommend starting with a full sugar recipe. In the continuing evolution of my own shell recipe, I've also decided to add some (but not all) the customary sugar back in, while making other tweaks to reduce the experience of sweetness instead of just the actual amount of sugar.

Lemon Party!
What do I mean? Based on personal experience, perception of sweetness is based both on the objective amount of sugar present AND on the relative strength of salty and sour flavors also present. So how do we use this to our mac-vantage? Well first, we add a healthy pinch of salt to the shells as suggested by my friend/macaron authority, Stella of Bravetart. Other than that there's not too much we can do without upsetting the delicate balance of the batter, so let's turn our attention inward...

The sweetness of the shells can be countered with fillings that can be only mildly sweetened with out losing structural integrity (like Swiss meringue buttercream, mascarpone, or whipped cream). Or why not try a tart fruit curd (like rhubarb raspberry) or dark chocolate ganache with a bitter edge? Plenty of great options there...but being stubborn as I am I was stuck on the idea a lemon white chocolate ganache. So how did I turn an ingredient infamous for being tooth-achingly sweet into a treat even the sugar-shunners in my life loved? I gave it a good sour kick in the arse with a liberal dose of citric acid (a natural powder often used to add sourness to food/drinks)!

Do you have your own way of showing those overly sweet macs who's boss that I haven't mentioned above? Lemme hear 'em, please! =D

Lemon Party Macarons [Printable Recipe]
Lemon-shaping method adapted from Macarons by Erica
Makes 25 to 30 macarons

XIAOLU'S NOTES: I purchased citric acid fairly cheaply from my local Indian store. If you don't have it, you may be able to add 1 to 2 tablespoons lemon juice instead. However I haven't tried this myself and therefore am not certain it won't cause curdling or other problems. Please do not try to convert this recipe to volume measurements if you don't have a scale (I use and love this one). This recipe is very sensitive and will not work if the measurements are not exact. Please also note that every oven is different and you'll figure out what works best for yours over time (see this post for great information on ovens and macarons). Since mine has major hot spots, I bake on 2 stacked pans for insulation if using parchment paper. If you're uncertain of your ability to pipe uniformly-sized macarons, like me, simply trace 1 1/4-inch circles on your parchment paper, flip the paper over, and pipe on the other side, using the outlines as your guide OR print (choose "fit to page") and slide this template under your parchment as a guide but don't forget to remove before baking! Macarons are best after having been refrigerated for 24 to 48 hours, according to French pastry master, Pierre Herme, "An osmosis takes place between the garnish and the biscuit. When freshly baked this is hard and crisp, but it absorbs some humidity from the filling and its inside becomes more tender while the crust on the surface stays intact" (quote via Not So Humble Pie). So even if you accidentally overbake the shells by a few minutes, maturing the macarons in the fridge for at least 48 hours should undo most of the damage =). See my first macaron post for helpful videos of the whole macaron-making process!

125 g almonds [not roasted or salted]
160 g powdered sugar
2 Tbsp lemon zest, air-dried at least 1 hour
Large pinch of salt
35 g granulated sugar
2 g egg white powder [optional, to stabilize batter in humid weather]
90 to 95 g egg whites [about 3 large egg whites]
Pinch of citric acid [optional, to stabilize meringue and add subtle tart flavor]
Tart White Chocolate Lemon Ganache (Recipe below)

Microwave fresh egg whites 10 to 15 seconds in the microwave on medium-low heat (I set my microwave to 40%).

Combine the almonds, powdered sugar, dried zest, and salt in a food processor, and pulse on and off until the nuts are finely ground (about 1 to 2 minutes). Sift the powder to remove any large chunks that remain. Put those chunks back into the food processor and pulse again for another 30 to 60 seconds. Sift again. You will probably have some slightly chunkier almond bits. Hopefully they're no more than a tablespoon or so, in which case you can throw them out.

Weigh out and mix your granulated sugar and egg white powder in a small bowl until uniform; set aside. Using a handheld or stand mixer, whip the egg whites on medium-low speed with citric acid until foamy, then turn the speed up to medium to medium-high and gradually add the sugar mixture until you obtain a glossy meringue (it'll look like shaving cream, hold stiff peaks, and stay in place if you turn the bowl upside-down; but don't overbeat your meringue or it will be too dry).

Add all of the nut mixture to the meringue and fold together. Use both a folding motion that scrapes the bottom of the bowl (to incorporate the dry ingredients) and a gentle pressing motion, to deflate the meringue against the side of the bowl. Slow down after all the dry ingredients have been incorporated, and continue folding the mass carefully until you obtain a batter that looks somewhat glossy and flows from the spatula in a thick ribbon. Test the batter by spooning a small amount of the batter on a plate: if the top flattens on its own within about 20 seconds, it’s ready to pipe. If there is a small peak, give the batter 2 to 3 more folds and test again. The peak shouldn’t disappear immediately either or it’s already overmixed.

Fill a pastry bag fitted with a 1/3 to 1/2-inch wide plain tip (I like Ateco #805 or 806) with half of the batter. (When your bag is too full, the pressure causes the batter to rush out in a way that’s difficult to control, making for sloppy macarons.) Pipe tiny blobs of batter onto the 4 corners and center of 2 baking sheets, then line baking sheets with parchment paper OR line with silicone mats. Pipe small rounds (slightly larger than 1 inch wide) straight down and about 1 inch apart onto the baking sheets. Immediately use a toothpick to pull out points on opposite sides of each round to create the lemon shapes. Then pick up each sheet with both hands and slam it firmly straight downward on the counter 2 to 3 times. This will to force out any large air bubbles. Immediately pop any bubbles that rise up but don't break with a toothpick. Do NOT do this once a few minutes have passed because you'll mess up the shell that's forming.

Preheat the oven to 285 to 300 degrees F. Let the macarons sit out for 25 to 90 minutes to harden their shells a bit (to prevent tops from cracking during baking). Test if they're ready by touching the top and side of one shell lightly. It should feel dry and not stick to your finger at all. Bake one pan at a time for 15 to 25 minutes, depending on the size of the macarons. After the first 10 minutes of baking, rotate the pan and place a large piece of foil loosely over the macarons to prevent browning (If I’m baking on 2 stacked pans, I also remove the bottom pan at this point to make sure the macarons will be completely cooked on the bottom and not sticky). Let cool completely before trying to move the shells.

Once cool, remove the shells from the silicone mat or parchment and flip them over. If you have trouble removing them from parchment paper, freeze the macarons for about 10 minutes, then quickly peel them off before they have a chance to warm up and get sticky again.

Fill the shells (spooning or piping) with 1 1/2 to 2 teaspoons of filling and top with a similarly-sized top shell. For the best flavor and texture, store in the refrigerator for 24 to 48 hours before eating (see notes above for detailed explanation) but they are best if eaten within 6 days. Bring to room temperature before eating.

Tart White Chocolate Lemon Ganache
6 Tbsp heavy cream
1 tsp lemon zest
6 oz. white chocolate, coarsely chopped
1/2 to 3/4 tsp citric acid
Pinch of salt

Heat cream and lemon zest in a small saucepan, and bring to a boil. Slowly pour the cream into a heatproof bowl containing the chopped white chocolate and let sit for 3 to 5 minutes. Stir gently until all of the chocolate is melted and you've obtained a smooth ganache. Sprinkle the citric acid and salt over the ganache and stir in thoroughly. Let cool to a cool room temperature until thickened before filling macarons. (It's fine to speed up the cooling by popping the ganache in the fridge but make sure it doesn't get too hard to pipe/spoon on.)

Tuesday, May 10, 2011

Tart and Full of Passion...fruit (Lemon Lilikoi Bars)

I've made no secret of my adoration of the Australian magazine Donna Hay. Well as a result of regularly pouring over issues of DH, the equally gorgeous Aussie mag Gourmet Traveller, and the blogs of my pals from down under, I've also developed quite a fascination with passionfruit. That vibrant sunny color, that unmistakable flavor, those gorgeous little seeds...I can't but sigh with longing every time I come across such recipes! Thus began my quest to find fresh passionfruit in my local Washington, D.C. area.

I searched high...and I searched low. The interwebs told me these little treasures might be hiding in Asian supermarkets, so I scoured half a dozen to no avail, suffering many strange looks from their Korean managers during the process. My next lead took me to a handful of Hispanic groceries, where I'd heard they might be undercover as "Maracuya." But again I was met with only disappointment. Unexpectedly it was Whole Foods where I finally found my beloved passionfruits, but at $3 apiece I had to walk away.

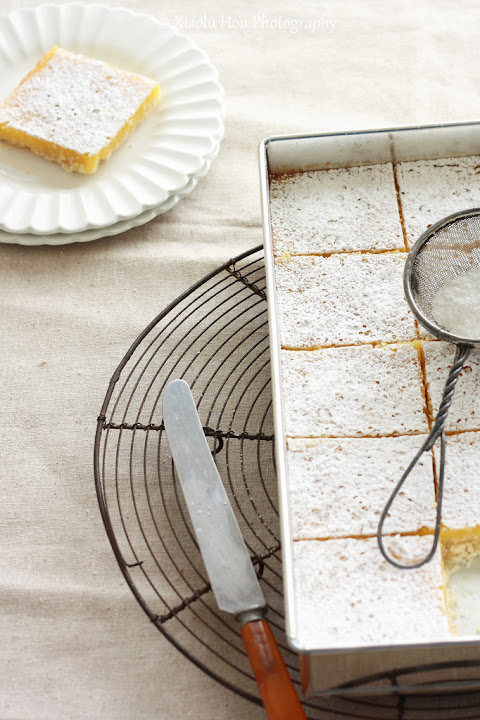
Tart Lemon Lilikoi Bars
Fortunately my visits to the Hispanic stores hadn't been completely in vain. Though the photographer in me demanded the pretty seeds only fresh passionfruit could provide, I found quite a lovely substitute in this frozen passionfruit pulp. It's brought the vibrant tangy-sweet flavor I expect from passionfruit to my orange passionfruit curd mini tarts and now to these lemon lilikoi (yet another name for this fruit) bars.

As much as I enjoy passionfruit, I left some lemon juice in this recipe as I really love it's in-your-face tartness. You should of course feel free to use all passionfruit pulp or even all lemon juice instead. As you might've guessed by now, I like my bars on the tart side, so feel free to be a little more generous with the sugar if you've got a bigger sweet tooth than me ;p.

Tart Lemon Lilikoi (Passionfruit) Bars [Printable Recipe]
Adapted from Donna Hay Magazine Issue 53 and Recipelink
Makes 24 to 32 bars (9 x 13-inch pan)

XIAOLU'S NOTES: I like my lemon bars quite tangy so feel free to add another 1/4 to 1/2 cup of sugar to the filling if you prefer yours sweeter. In case you're worried, the bars should turn out thicker than in my photo. That slice is thin because my oven is lopsided :(.

1 3/4 cups all purpose flour
2/3 cup powdered sugar, plus extra to garnish
1/4 cup cornstarch
2/3 tsp salt
1 tsp finely grated lemon zest
3/4 cup (1 1/2 sticks) unsalted butter, cool room temperature and cut into 1-inch pieces

4 large eggs
2 large egg yolks
1 1/2 cups sugar, or more according to personal taste
1 Tbsp finely grated lemon zest
Pinch of salt
6 Tbsp all purpose flour, sifted
1/3 cup lemon juice (from 2 lemons)
2/3 cup passion fruit puree

Preheat oven to 350 degrees F. Grease the sides of a 9 x 13-inch baking pan, line with parchment paper, then lightly grease parchment.

To make the crust, combine flour, powdered sugar, cornstarch, salt, and lemon zest in the bowl of a food processor. Add butter and pulse until the mixture is pebbly. Press evenly into the bottom of your prepared pan. Refrigerate for 20 to 30 minutes (optional but preferable. Bake until lightly golden, about 18 to 20 minutes. Set aside crust.

To make the filling, place the eggs and yolks in a medium bowl and whisk to combine. In a separate small bowl, combine the sugar and lemon zest and rub them together until fragrant. Now add the sugar mixture, salt, flour, lemon juice, and passionfruit puree to the egg mixture. Whisk until smooth. Pour this filling over the pre-baked crust and bake for another 25 to 30 minutes, or until just set. Let cool to room temperature, then refrigerate for at least 2 hours or until firm. Sift powdered sugar over the top before slicing and serving.

Wednesday, April 13, 2011

Guest Post: Watercress and Avocado Salad

It's probably not showing yet but one of my goals for 6 Bittersweets this year is to post more savory and healthy recipes in light of my plan to become a dietitian one day. But don't you fret...it's not like cupcakes will become scarce around here or anything! =p Anyway, it's just my luck that I recently found a beautiful blog full of healthy, nourishing, and full-flavored sweet and savory foods. It's called Scandi Foodie, and Maria is the talent behind all of it. And by "it" I'm referring to mouth-watering posts like these pear and semolina baked puddings, walnut-crusted chocolate ricotta cups, and roasted brussels sprouts walnut salad. After tweeting a few times, I already felt comfortable asking her to share one of her refreshing dishes with us and she graciously said yes. So now it's time for me to just be quiet and turn the mic over to my gifted friend, Maria!

Watercress Salad 2
Hi friends! I’m so happy to be guest posting here at 6 Bittersweets! Xiaolu and I share a similar food philosophy of healthy, feel-good food and
it is an honour to share this humble salad recipe with you.
Watercress Salad
As the Southern Hemisphere prepares for the cooler seasons ahead, spring is on its way for everyone else. This watercress salad is a colourful reminder of the summery months ahead, but for me it is as welcoming any time of the year. The gorgeous, simple and fresh ingredients make this salad a real favorite!

Watercress Salad Ingredients
Watercress and Avocado Salad [Printable Recipe]
Serves 2

100g watercress [about 3 cups], leaves picked and washed
70g snow pea sprouts (about 2 cups)
4 red radishes, cut thinly into slices
1 avocado, sliced
1/2 cup pumpkin seeds (toasted)
Juice of 1/2 lemon
1 Tbsp flaxseed/linseed oil
Pinch of sea salt

1. Place the watercress and snow pea sprouts into serving bowls.
2. Toss the radishes, avocado slices and pumpkin seeds in a separate bowl.
3. Whisk the lemon juice and flaxseed oil together and season with a pinch of salt.
4. Add the dressing into the mixing bowl and toss to coat.
5. Pour the vegetables on top of the watercress and snow pea sprouts and serve immediately.

Tuesday, April 13, 2010

Lemon Sponge Pie and GIVEAWAY!

Lemon for Lemon Sponge Pie

Certain desserts feel so old-timey they remind me of a childhood spent chasing apron strings in grandma's kitchen, even if it is an imagined memory 8). The fact is that my grandmother survived the Cultural Revolution and raised 6 strong daughters, my mom included. But what she wasn't was an enthusiastic cook, and no baker at all. To this day, you see, it's rare for Chinese homes to have ovens. I hear it's something to do with the expense of heating and that bakeries offer such cheap, fresh, and tasty fare that home baking doesn't seem worth the effort to most (hard to imagine).

To get back on topic, this lemon sponge pie is one of those treats that just seems to turn back the clock. Yet, apart from its vintage charm, its taste makes it truly deserving of being rediscovered and appreciated today. It consists of a luscious, tart sponge pudding sandwiched between flaky pastry and a toasted meringue-like topping. Mine was uber oozy and would've sliced up better with 5 more minutes of baking. But one bite was all it took to wipe away all thoughts but wonderment at such a sublime blend of textures and sweet tart flavors. We're "working hard" to revive this treat -- there's hardly a slice left since it came out of the oven a day ago O=). Join our cause...or tell us of other heirloom desserts that should come back into fashion!

Lemon Sponge Pie

Speaking of my grandmother, I'm actually leaving this Sunday for China to visit her and the rest of my extended family for 2 weeks. I honestly can't wait to see them and catch up on the last 4 years since I was last there. But of course I'll miss P, my friends, and all of you! So when Sean of CSN Stores asked me to host a giveaway on my site, I jumped at the chance to show appreciation to all my lovely readers.

CSN Stores has a lot of sites with fabulous selection, the main ones being Cookware.com, Allbarstools.com, Allchildrensfurniture.com, and Allmodern.com. Plus they have over 200 other sites. Between all of them, I bet you could get nearly anything you'd want for your kitchen, apartment, or house. I even found some cute bunk beds that look perfect for my 2 much younger sisters in the kids beds section.
Okay, now's the time to let your eyes on the prize. CSN Stores has agreed to give this Set of 4 Kaiser Noblesse Mini Springform Pans to one lucky reader. These are so fun and versatile, I had to pick them, and while it's not a requirement ;p, I'd love to see what adorable treats the winner makes with them. Here's how to enter this giveaway:

1. You must reside in the US or Canada (sorry to my overseas readers!)
2. Leave a comment with your e-mail address.
3. For a second entry, become a follower of OR subscriber to this blog (but only if you really are interested in the content ^_^), and leave a comment telling me you became or already were one.
4. For a third entry, link to this giveaway on Twitter, Facebook, or your blog, then leave a comment letting me know.
5. Visit one of these great CSN Stores websites: Cookware.com, Allbarstools.com, Allchildrensfurniture.com, and Allmodern.com.

Easy, right? Just be sure to enter before 12:00 pm on April 20th, which is when I'll randomly select the winner. Good luck!

Lemon Sponge Pie Sliced - slightly less processing

Lemon Sponge Pie [Printable Recipe]
Adapted from from Betty Crocker Baking Classics (out of print) via The Food Librarian

XIAOLU'S NOTE: As I've done before, to bring out the citrus flavor even more, I used a technique from Dorie Greenspan. I rubbed all the zest into the sugar until it was fragrant with orange. I added this where the original recipe says to add sugar.

Your favorite single crust pie crust [I used this one]
3 large eggs, separated
2 T grated lemon peel [I used a microplane to zest the lemons]
2/3 cup regular or Meyer lemon juice [I used regular]
1 cup milk
1 1/4 to 1 1/2 cups sugar, depending on how tart you like things
1/3 cup flour
1/4 tsp salt

Preheat oven to 350 degrees F.

Roll out crust and line pie pan with crust. Leave unbaked and chill in fridge while you prepare the filling.

Beat egg yolks; beat in lemon peel, lemon juice and milk. Add sugar, flour and salt; beat until smooth.

In a separate large bowl, beat egg whites with an electric mixer until stiff peaks form. Add 1/3 of the egg whites to the lemon mixture and beat them together thoroughly.

Fold the lightened lemon mixture into the remaining egg whites, stopping when there are no white streaks remaining. Pour into pastry-lined pie plate. Bake until golden brown, 45 to 50 minutes. (A layer of lemon will settle to the bottom and a soft meringue-like topping to float to the top.) Serve with sweetened whipped cream if desired.

Sunday, March 7, 2010

Raspberry Lemonade Bars

Frozen Raspberries for Raspberry Lemonade Bars
The second I saw these Raspberry Lemonade Bars on Sophistimom, I knew I had to have 'em. Unfortunately, Dell has yet to add the oft-requested (at least by foodies, I imagine) monitor feature wherein I could simply reach in and grab a bite of whatever's on the screen. So put simply, I would have to make these for myself (sigh).

That first encounter was back in fall '09, but the vibrant colors and fun flavors of these bars would continue haunting me until I threw up my white flag and ran straight for the kitchen. Now I promise I won't make any puns about surrender being so (so) sweet. I'm not that cheesy, after all...

Raspberry Lemonade Bars
But in all seriousness, you really should try these for yourself. The vibrant pink color will garner plenty of attention. Then the sweet tart fruity flavors will surely take everyone who tries them back to childhood summers and maybe even running their own lemonade stand. Isn't it interesting that our favorite desserts often have a tie to the past? I'd love to hear if you have one that brings back particularly wonderful memories.

One last thing -- on a completely unrelated note -- I've been searching for a round white tray with raised edge like this, rectangular white tray with no edge like this, and vintage cooling rack like this. I'd be so grateful if someone could point me in the right direction. Thanks in advance!

Lemon for Raspberry Lemonade Bars
Raspberry Lemonade Bars [Printable Recipe]
Adapted from Sophistimom
Makes one 8x8" pan or 16 2" squares

XIAOLU'S NOTES: I iz lazee, so I simply melted the butter and stirred in the dry ingredients. It still tasted great but lacked the pleasant sandiness that I associate with lemon bar bases. Feel free to go either way depending on how much washing you're willing to do afterward 8). A friend made these with lime instead of lemon and reported it was great!

Crust
9 tablespoons unsalted butter (1 stick plus 1 tablespoon)
[I reduced to 1/2 cup and melted it]
1/4 cup (50 g) sugar
1 cup (100 g) unbleached all purpose flour
1/4 teaspoon salt
[I added a few pinches of lemon zest]

Filling
1 1/2 cups (287 g) sugar [I reduced to 1 1/4 cups]
3 large egg whites
1 large egg [I simply used 2 eggs and NO whites]
2/3 cup (150 mL) fresh lemon juice (from 2-3 lemons)
2 tablespoons lemon zest (from 2 lemons)
2/3 cup (65 g) unbleached, all-purpose flour
Pinch of salt
1 cup (150 g) frozen raspberries, defrosted
1 tablespoon powdered sugar [I used a few more]

Preheat oven to 350 degrees F (180 degrees Celsius). Line a 8×8″ square baking pan with a strip of parchment paper (8×14″) that covers the bottom and overlaps on either side. (This is so after it cools, you can pull out the entire pan of bars and cut them neatly. You can omit this step completely, though, in which case you need to butter the pan well.)

Cream butter, sugar, and salt with an electric mixer. Mix in flour until just incorporated. Flour hands and press dough into 8×8″ square baking pan, so that it comes up about a 1/2 inch around the sides.

Bake for 20-25 minutes, or until slightly golden brown. While it cools, prepare the filling.

Whisk sugar, eggs, lemon juice and zest, flour, and salt in a large bowl. Pour raspberries into a sieve and press through to extract all the pulp and juices. Whisk into lemon mixture and pour into crust. Bake for 30-35 minutes until filling is completely set. Let cool completely. (I help mine along in the freezer for about an hour.) Using the overlapping edges of parchment paper, gently lift the dessert from the pan. Cut into 16 squares. Dust generously with confectioner’s sugar.

Thursday, August 6, 2009

Not My Usual Banana Bread


Bananas have become one of my favorite ingredients to bake with in recent years. They're cheap, fairly healthy, and, when allowed to ripen sufficiently, provide amazing flavor. But for years before this, I'd largely avoided banana-flavored treats. Let's just say it took a long time to overcome the trauma of some close encounters with artificial "banana" flavoring. I'm so glad to have gotten over that though, because banana bread done right can do wonders for a bad (or good) day.

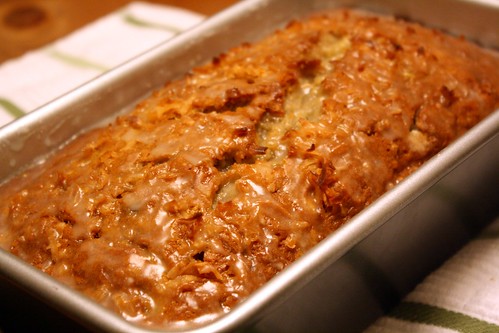
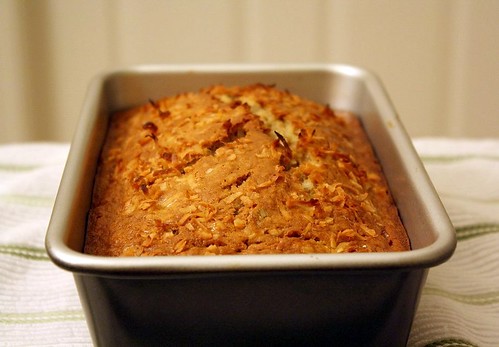
I was lucky enough to find a great banana bread recipe on my first attempt a few years back. The Very Moist Banana Nut Bread recipe (with minor variations) from Recipezaar has since become a regular in my baking repertoire and is always gobbled up wherever I take it. While that remains my go-to recipe, I really enjoyed trying an unconventional twist from Cooking Light. Their Coconut Banana Bread with Lime Glaze has already gotten plenty of coverage in the food blogosphere, but a good recipe deserves all the attention it can get. Plus, I was itching to upload my first photos taken with the new camera. There hasn't even been time for me to try any setting other than full auto, but that's what next week's vacation is for (so close I can taste the freedom!!). But getting back to the food, you can find the full recipe with my notes after the jump.

The key flavors (left) and lemon glaze (right)

Coconut Banana Bread with Lime (or Lemon) Glaze [Printable Recipe]
Adapted from Cooking Light

*My comments/changes in italics

2 cups all-purpose flour
3/4 teaspoon baking soda
1/2 teaspoon salt
1 cup granulated sugar
1/4 cup butter, softened
2 large eggs
1 1/2 cups mashed ripe banana (about 3 bananas)
1/4 cup plain low-fat yogurt
3 tablespoons dark rum
1/2 teaspoon vanilla extract
*I also added 1/4 teaspoon of coconut extract
1/2 cup flaked sweetened coconut
Cooking spray
1 tablespoon flaked sweetened coconut
1/2 cup powdered sugar
1 1/2 tablespoons fresh lime or lemon juice *I used lemon juice and added 1 teaspoon of rum

Preheat oven to 350°.

Lightly spoon the flour into dry measuring cups, and level with a knife. Combine the flour, baking soda, and salt, stirring with a whisk to combine.

Place granulated sugar and butter in a large bowl; beat with a mixer at medium speed until well blended (about 1 minute). Add the eggs, 1 at a time, beating well after each addition. Add banana, yogurt, rum, and vanilla; beat until blended. Add flour mixture; beat at low speed just until moist. Stir in 1/2 cup coconut. Spoon batter into a 9 x 5-inch loaf pan coated with cooking spray; sprinkle with 1 tablespoon coconut. Bake at 350° for 1 hour or until a wooden pick inserted in center comes out clean. *Mine took 65-70 minutes to bake through.

Cool 10 minutes in pan on a wire rack; remove from pan. Combine powdered sugar and juice, stirring with a whisk; drizzle over warm bread. Cool bread completely on wire rack. *I did remove mine from the pan to cool for a while but put it back for lack of a better container.

UP NEXT: Snickerdooooodlez!