Thursday, April 28, 2011

A Lotta Chocolate Part 2: Snickers Macarons

Not sure how many of you follow me on Twitter, but I've been yappin' about macarons a lot lately and posted this teaser image for a future post last week. Little did I know at the time, but successful macarons would elude me for over a week. So those of you who saw that image had plenty o' time to figure it out! If you put 2 and 2 together and guessed my next post would be Snickers macarons, you get brownie points from me today! =D

5th Time's The Charm!
Similar to my first successful souffles, which took me 5 attempts to attain, the 5th time was the charm for my triumph over macarons (Here's some evidence of my failed attempts...I really hope this doesn't become a pattern!). And I must divide credit among my Twitter friends Stella of Bravetart, Kaitlin of Whisk Kid, Josie of Daydreamer Desserts, Steph of Desserts for Breakfast, Mardi of eat.live.travel.write., and of course the Macaron Queen herself, Helene of Tartelette for their invaluable advice helping me to troubleshoot each failed batch until I got it right this morning. Thank you so much, ladies!

While you probably expect I got frustrated with all these failures (and I did at times), I actually got very invigorated by the learning process. The aggravating yet oddly fun thing about macarons is that there are so many ways to go wrong 8). When each batch came out with a new set of problems, (after the initial wailing) it was fun to play detective, teasing out causes to each symptom. I learned a lot, the most important being that 3 factors really make or break French macarons: properly whipping up the egg whites to stiff peaks, knowing when to stop mixing the batter, and knowing your oven (especially any major hot/cold spots). Each of my failed attempts resulted directly from a failure to do one of the above, and once I figured them out I got the results I wanted. On the flip side, humidity and heat are NOT the great saboteurs of macaron success you've heard them to be. It was warm and humid (rainy with no AC!) all 5 times I baked them but hottest and wettest on the day I succeeded 8).

Snickers Macaron Closeup
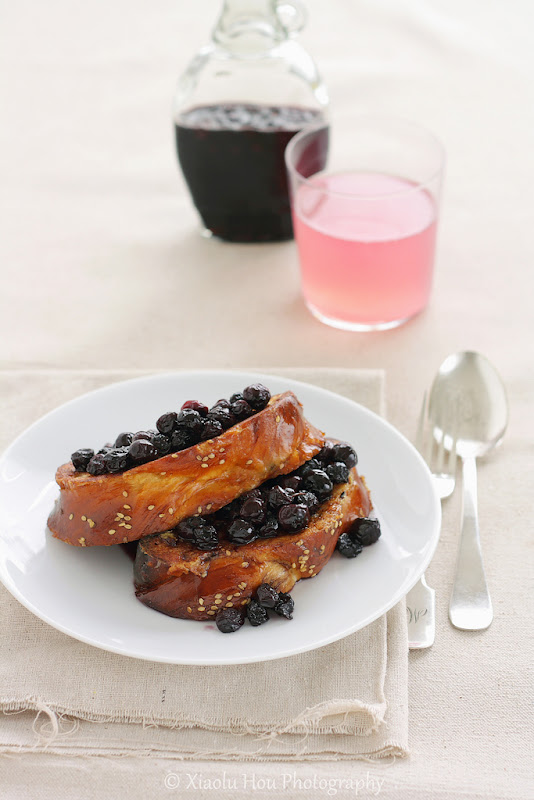
If you'll remember, this is the second in a series of chocolate posts that began with my chocolate chunk challah french toast. Plus I'm submitting these to this month's MacTweets challenge: "Decadently Chocolate." Macarons may not be such an unusual way to feature chocolate, but Tartelette's idea to transform a common candy bar into a fancy macaron drew my curiosity enough to warrant a try (or 5 in this case =p). And in the end, I was very impressed. These adorable treats combine the best of both worlds: the classic taste of Snickers bars with the delicate texture and portion-control (ha!) of macarons. Do you love chocolate, Snickers, and/or macarons? If the answer is yes, I really recommend you try these soon!

Now I've probably scared you with all this talk of failed macarons and the recipe below will look impossibly long at first glance, but please rest assured that it's really not so hard. Macaron-making is simply a process that requires hands-on familiarity to perfect, and if you focus on the 3 key things I listed above, you'll have it down in no time. To give you a head's start, I've included some helpful videos below (not my own!) and lots of useful tips in the body of the recipe (which is why it's so long!). Once you've run through the process once or twice, you won't even look at directions anymore 'cause it'll be second nature. And if you learn anything from my experience, I hope it's to try try and try again! While I'm a beginner myself, I'd be happy to answer any macaron questions you may have via Twitter or email.

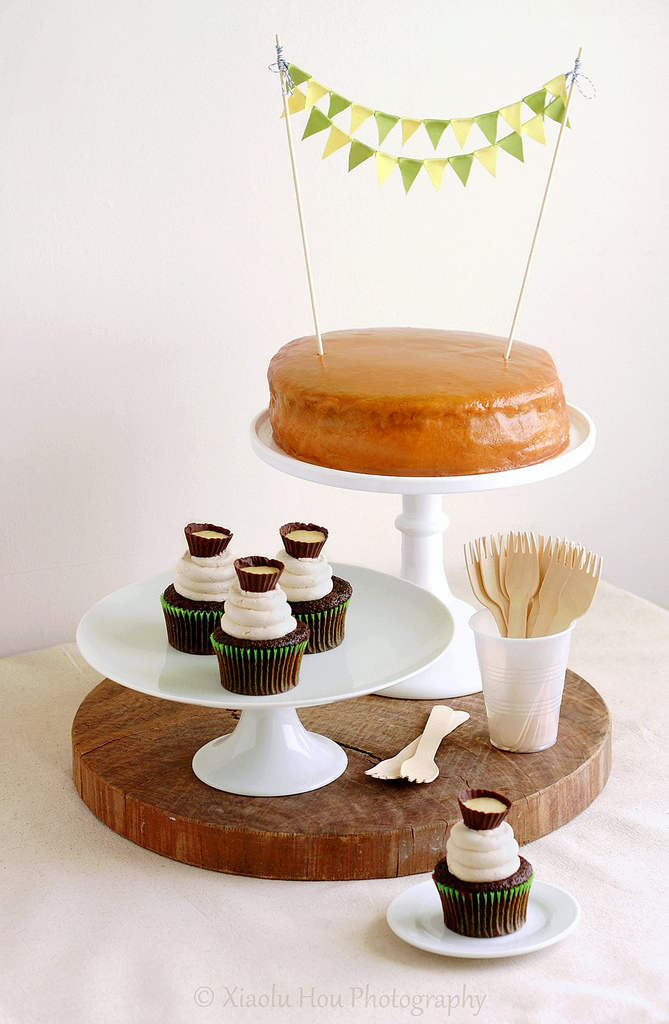
P.S. - If anyone's interested in this banner, you can print it on PDF HERE, preferably in color on card stock paper.
Simply cut it out and glue/tape it to some wood skewers. Enjoy!


Snickers Chocolate Peanut Caramel Macarons [Printable Recipe]
Adapted from Tartelette, Daydreamer Desserts, and Not So Humble Pie (a great macaron troubleshooting post)
Makes about 25 to 35 macarons

XIAOLU'S NOTES: Please do not try to convert this recipe to volume measurements if you don't have a scale (I use and love this one). This recipe is very sensitive and will not work if the measurements are not exact. Please also note that every oven is different and you'll figure out what works best for yours over time. Since mine has major hot spots, I bake on 2 stacked pans for insulation. If you're uncertain of your ability to pipe uniformly-sized macarons, like me, simply trace 1 1/4-inch circles on your parchment paper, flip the paper over, and pipe on the other side, using the outlines as your guide OR print (choose "fit to page") and slide this template under your parchment as a guide but don't forget to remove before baking! Macarons are best after having been refrigerated for 24 to 48 hours, according to French pastry master, Pierre Herme, "An osmosis takes place between the garnish and the biscuit. When freshly baked this is hard and crisp, but it absorbs some humidity from the filling and its inside becomes more tender while the crust on the surface stays intact" (quote via Not So Humble Pie). So even if you accidentally overbake the shells by a few minutes, maturing the macarons in the fridge for at least 48 hours should undo most of the damage =).

65 g almonds [not roasted or salted]
60 g peanuts [not salted]
15 g cocoa powder
160 g powdered sugar
Pinch of salt
55 g granulated sugar
2 g egg white powder [optional, to stabilize batter in humid weather]
100 g egg whites [about 3 large egg whites]
1/8 tsp cream of tartar or 1/4 tsp lemon juice [optional, to stabilize meringue]

Milk Chocolate Ganache (Recipe below)
Marshmallow Peanut "Nougat" (Recipe below)
About 1/3 cup caramel sauce OR dulce de leche (Recipe below)
About 25 to 35 peanut halves

Separate your eggs 2 to 5 days before, and store the whites in a covered container in the fridge. Bring the egg whites to room temperature before proceeding with the recipe. OR just microwave fresh egg whites 10 to 15 seconds in the microwave on medium heat.

Combine the almonds, peanuts, cocoa powder, powdered sugar, and salt in a food processor, and pulse on and off until the nuts are finely ground (about 1 to 2 minutes). Sift the powder to remove any large chunks that remain. Put those chunks back into the food processor and pulse again for another 30 to 60 seconds. Sift again. You will probably have some slightly chunkier almond bits. Hopefully they're no more than a tablespoon or so, in which case you can throw them out.

Weigh out and mix your granulated sugar and egg white powder in a small bowl until uniform; set aside. Using a handheld or stand mixer, whip the egg whites on medium-low speed with cream of tartar until foamy, then turn the speed up to medium to medium-high and gradually add the sugar mixture until you obtain a glossy meringue (it'll look like shaving cream, hold stiff peaks, and stay in place if you turn the bowl upside-down; don't overbeat your meringue or it will be too dry).

Add all of the nut mixture to the meringue, and fold in. Use both a folding motion that scrapes the bottom of the bowl (to incorporate the dry ingredients) and a gentle pressing motion, to deflate the meringue against the side of the bowl. Slow down after about 25 strokes, and fold the mass carefully until you obtain a batter that flows like magma or a thick ribbon. The whole process should not take more than 50 strokes. Test the batter by spooning a small amount of the batter up, then dropping it back down on itself. If it melts back into the rest of the batter within 30 seconds, it's ready for piping (this page has great photos of this test). If not, fold 2 more strokes and test again.

Fill a pastry bag fitted with a 1/3 to 1/2-inch wide plain tip (I like Ateco #804 or 806) with half of the batter. (When your bag is too full, the pressure causes the batter to rush out in a way that’s difficult to control, making for sloppy macarons.) Pipe tiny blobs of batter onto the 4 corners and center of 2 baking sheets, then line baking sheets with parchment paper OR line with silicone mats. Pipe small rounds (slightly larger than 1 inch wide) straight down and about 1 inch apart onto the baking sheets. Pick up each sheet with both hands and slam it firmly straight downward on the counter 2 to 3 times. This will to force out any large air bubbles. Immediately pop any bubbles that rise up but don't break with a toothpick. Do NOT do this once a few minutes have passed because you'll mess up the shell that's forming.

Preheat the oven to 275 to 300 degrees F. Let the macarons sit out for 25 to 60 minutes to harden their shells a bit (to prevent tops from cracking during baking). Test if they're ready by touching the top and side of one shell lightly. It should feel dry and not stick to your finger at all. Bake one pan at a time for 15 to 20 minutes in the middle shelf of your oven, depending on the size of the macarons. Let cool for 15 to 30 minutes before trying to move the shells.

Once cool, flip the shells over. If you have trouble removing them from parchment paper, pour a couple of drops of water under the paper while the sheet is still a bit warm, and the macarons will lift up more easily due to the moisture. Don't let them sit there in it too long or they will become soggy.

Fill the shells with 1/2 to 1 teaspoon of ganache, then 1/2 to 1 teaspoon of caramel sauce, top with a peanut, a 3/4-inch circle of flattened marshmallow nougat, and a similarly-sized top shell. For the best flavor and texture, store in the refrigerator for 24 to 48 hours before eating (see notes above for detailed explanation) but they are best if eaten within 5 days. Bring to room temperature before eating.

Milk Chocolate Ganache
3 oz. milk chocolate, roughly chopped
4 Tbsp heavy cream

In a small saucepan over medium high heat, bring the cream to a boil. Remove from heat, drop in the milk chocolate and let stand 5 minutes. Stir the chocolate into the cream until smooth. Set aside until it cools down and thickens a bit (chilling in the fridge or freezer is fine).

Marshmallow Peanut "Nougat"
3/4 cup marshmallows
2 Tbsp smooth peanut butter

In a heavy saucepan over medium low heat, melt marshmallows and peanut butter until smooth. Let cool. Once cooled you will be able to pull the "nougat" and from the saucepan and cut pieces to flatten in the palm of your hands and sandwich within the macarons.

Dulce de Leche
Adapted from Cooking for Engineers
Makes about 1 3/4 cups

14-oz. can sweetened condensed milk (NOT evaporated milk)
Heavy cream, as needed

MICROWAVE METHOD:
Pour into large (preferably 2 1/2-qt. capacity) microwave-safe bowl. Heat on medium for 2 minutes. Whisk and repeat until appears curdled (around 7 to 10 minutes total, depending on your microwave oven). To use as a caramel sauce, simply stop heating at this point and stir the dulce de leche until smooth. For a thicker candy-like caramel, continue heating for another 2 minutes or so and stir until smooth again while still hot.

PRESSURE COOKER METHOD:
Peel the label off the can of sweetened condensed milk. Put it in a pressure cooker with enough water to come 2/3 up the can. Do NOT open the cans at all. The can won't explode because the pressure cooker equalizes the pressure, but please still proceed with caution and follow the manufacturer's directions for operating the pressure cooker safely! Close the pressure cooker, and bring it up to full pressure. Turn the heat down to maintain the pressure for 20 (lighter) to 30 (darker and thicker) minutes. Turn off the heat and and let the pressure cooker cool slowly. Once the cooker is completely cool, open the lid and remove the can with tongs. Do not open the can while it is still warm. If there’s any pressure left in the can, it could spray and burn you with hot caramel. Wait until the can has completely cooled before opening it. Remove cooled caramel from can. If too thick for your liking, stir in 2 tablespoons of warm heavy cream at a time until desired consistency.

PREVIOUSLY: Chocolate Chunk Challah Bread French Toast

Tuesday, April 26, 2011

Guest Post: Grilled Fish in Banana Leaf

You may remember that I did a guest post for my friend Leemei of My Cooking Hut some time ago. I've done a few guest posts since then but will always be grateful to Leemei for being the first to invite me into her virtual home. Of course with the impressive array of beautiful and distinctive foods on her blog (like caramelized fresh pineapple cake, steamed fish and spinach rolls, or watermelon salad), I couldn't miss a chance to have her share something with us. It's hard to believe, but I think the dish below is the loveliest one yet from my talented cook and photographer friend. I'm delighted to welcome Leemei to my site this time and hope you'll make her feel right at home =D.

Not too long ago, Xiaolu from 6 Bittersweets wrote a lovely guest post about the scrumptious Cold Mung Bean Noodles on my blog. She later had asked me to share a savoury recipe on her blog. I should have got this done a while ago but due to my tight schedule, I had to postpone it.

Thanks to Xiaolu for being understanding for this long overdue post! I have chosen to share a delicious Malaysia dish – grilled fish in banana leaf. Thank you, Xiaolu, for giving me this wonderful opportunity to contribute to your lovely blog!

Grilled Fish in Banana Leaf
Malaysian food has always been understated. But, recent years, I have seen more and more Malaysian food being introduced to the Western world. It is pretty tricky to define what Malaysian food is as it is not a distinct cuisine but an array of food where the diversity is found through its multi-ethnic population of Malay, Indian, Eurasian, Chinese, Nyonya and the Indigenous people of Borneo.

Being brought up in a melting pot society with disparate rhythms and cultures, my taste buds have been taught to be bold and adventurous. My life has been very much connected to food since young. Where I come from is 45 minutes away from the Southern Thai border, which explains the Thai cooking influence in my cooking. I have to admit that I have been blessed to learn so much different taste and texture in food.

During my teenage years, there were many times my friends and I liked to organize BBQ. We easily got distracted in the classroom when we had a plan for BBQ outing. We would be busy thinking and discussing what each would bring.

As a seafood lover, I was always in charged in fish or other seafood. One of my signature dishes has to be fish wrapped in banana leaf. In Malay language, we simply call it Ikan Panggang. It is very common to use mackerel as it has really fine and soft flesh that doesn’t break easily. It is a very simple recipe yet tasty! Thanks to the fragrant spices that are used in this recipe. The use of banana leaf imparts a subtle fragrance to the fish as well as keeping it moist. Summer is soon approaching, it will definitely be a winner!

Grilled Fish in Banana Leaf [Printable Recipe
Serves 4

4 whole mackerel (cleaned and gutted, heads chopped off if desired)
1/2 tsp ginger powder
1/2 tbsp coriander powder
2 tsp chili powder
1/2 tbsp cumin powder
1 tbsp turmeric powder
1/2 tsp of salt
2 tbsp water
2 tbsp sunflower oil
banana leaves and cocktail sticks for wrapping

Dipping sauce:
3 tbsp sweet dark soya sauce (kecap manis)
2 tsp chopped fresh red chili
2 - 3 tbsp lime juice

Rinse and dry mackerel with kitchen towel.

Mix ginger, coriander, chili, cumin, turmeric and salt in a bowl and mix with 2 tbsp spoon of water. Make a couple of slashes on both sides of the fish and rub curry paste on them, make sure it covers the diagonal cuts. Then, drizzle sunflower oil on the fish.

Wrap each fish with banana leaf and secure with cocktail sticks. Layer BBQ grill with banana leaf and cook fish parcels for 15 to 20 minutes, half the time for each side.

For the dipping sauce, mix all the ingredients in a bowl. Adjust acidity if necessary. Serve with grilled fish.

Saturday, April 23, 2011

Orange Soufflés in Orange Cups (Guest Post on Indian Simmer)

Orange
You all follow the blog, Indian Simmer, right? It's a site written and photographed by the incredibly talented Prerna, and one which I've been a great fan of ever since I saw this post. If you haven't seen it yet, I suggest you check it out right away. Between the delectable photos, creative Indian-centric recipes, and inviting descriptions, I wouldn't be surprised if you get sucked in for at least a good hour 8). Just don't say I didn't warn ya!

As much as I adore Prerna and her site, I do have a sneakier motive for sending you over today. You see, Prerna is on a well-deserved vacation right now and asked me to blog-sit this week in her absence! Thus I'm sharing a guest post today featuring a treat that combines my fondness for fresh citrus fruit with my obsession with cute ways to serve food. Please head over to Indian Simmer to read more about my orange souffles! You can also go straight to the printable recipe here. Thanks, Prerna, for inviting me into your beautiful virtual home!

Orange Souffles

Friday, April 22, 2011

My First Order!

Hi guys! Sorry for the longer-than-planned absence. I have a post in the works that's taking a few tries to get right, and of course I want to iron out the kinks before sharing the recipe with you. In the meantime, I wanted to say a few things to my wonderful readers...

First, thanks so much for your comments on my cake pops post! Clearly that's a dessert that provokes a big response from people whether positive or not 8). Please continue sharing your thoughts with me and feel free to tell me what you wanna see more of on 6 Bittersweets.

First Baking Order!
Next, I have some shameless self-promotion for you today ;p. The deal is, I finally created a Facebook page for my little blog. Won't you please show it some love? Or you could "like" it from my sidebar without even leaving this page.

On top of that, I've started selling some baked goods (cupcakes, cakes, cookies, etc.) locally in the D.C./Northern Va. area. In fact, I was so excited to finish my first order of 3 dozen red velvet cupcakes that I simply had to share them with you (pictured above)! If you or someone you know lives around here and would be interested in purchasing some scrumptious homemade baking, please email me at xiaolu6+info(at)gmail(dot)com!

Thanks a million -XL

Monday, April 18, 2011

Musical Monday: My Love Affair with Stars

Not gonna lie. Half the reason I'm writing this post is to show off that I got to meet and take photos with the lead singers (Amy Millian and Torquil Campbell) of the amazing band, Stars (albeit 3 years ago). They're both incredibly sweet and talented people who hugged me and happily autographed my ticket, which I carry around with me to this day trying to decipher Amy's chicken scratch handwriting =p.

But seriously, I can't even begin to tell you how much this band has affected my life, though thankfully I was able to tell Amy and Torquil on the night pictured below. When I saw Torquil playing a great show a few nights ago with his other band, Memphis, and realized I'd never shared the life-changing, heart-wrenching beauty of their music with you all, I couldn't get this post up fast enough!

I won't go into details, but let's just say that their music has gotten me through a thousand rough patches in my life, ranging from terrible breakups to crappy days. Take my word for it, don't go without Stars in your life for another moment. I recommend starting with the album "Set Yourself on Fire" and then going backwards or forwards. Preferably both. You really can't go wrong either way. Ready? Set...Go!

Photos with Stars

Saturday, April 16, 2011

International Incident Party! (Boston Cream Pie Cake Pops)

Boston Cream Pie Cake Pops...
This has a "vintage" feel mostly because I ran low on light! 8)
Is anyone else sick of hearing that this or that treat is going to be "the next cupcake"? The sweets I've heard mentioned most are cake pops, French macarons, whoopie pies, and now even regular pies. I mean I know what what people mean when they say it (i.e., "the next big thing"), but please just let each treat have it's own identity! Plus I'm pretty sure actual cupcakes ain't goin' away anytime soon 8).

Partly due to my aversion to fads plus just plain lack of interest, I'd neither tasted nor made cake pops until last month. Then one rainy night right after a particularly painful chemistry exam, I really needed some sugary cheer. Thats when I caved to the adorable pink "birthday cake pops" at Starbucks. Big mistake...after struggling to even bite through the overly thick candy coating, my taste buds balked to be assuaged with greasy, tooth-achingly sweet mush that had long lost any resemblance to real cake.

Boston Cream Pie Cake Pops In Progress...
Was this what all the fuss was about? was my first thought. But the funny thing is (and this will tell you something of my personality) rather than put me off from cake pops forever, this experience made me suddenly determined to redeem what was actually a pretty great idea for parties and/or for using leftover cake. I was on a mission, ladies and gentlemen, to save the cake pop from my own worst judgment! It seemed to be fated, then, when Penny of Jeroxie announced her latest blog event, the International Incident Cake Pops Party, the very next week. Now I had some serious motivation to try my own cake pops at home.

So it's nearly impossible to mention cake pops without mentioning Bakerella. While I'm not certain she "invented" the treat, she's the one person most responsible for their ever-increasing popularity as far as I can tell. My first stops in formulating my own recipe were naturally her blog and very helpful video tutorial.

Other than the usual goal of creating cute n' tasty treats, I had several others in mind: to avoid (1) an overly mushy/greasy/sweet filling, (2) flavorless cake, and (3) excessive coating. My solution was to make cake and frosting from scratch and only dip my pops once in each coating. By going homemade, I held more control over the flavor and sweetness of my filling. While the appeal of storebought mix and frosting is understandable, you can't expect great taste from such ingredients. The last and trickiest part of cake pops for me was the texture. Too little frosting and the pop falls apart, too much and it's got the mouthfeel of gooey paste. Considering the variation of moistness in cakes, I highly recommend adding a little frosting at a time until it feels right over dumping in a whole can.

Fail Pops =p
Fail Pops: before I figured out the best dipping method =p
Now for the fun part...the flavor! My inspiration for these pops was Boston Cream Pie, which is not a pie but a yellow cake with pastry cream and chocolate glaze. I had a lot of fun figuring out how to incorporate a soft filling into the pop. While you obviously won't get the same lovely texture contrasts as in the original cake (which I highly recommend you try), I'm really pleased with how my cake pops turned out. The filling is creamy, not too sweet, and as flavorful as the yellow cake that went into it. The chocolate coating is a ganache and thus a little softer than melted chocolate, which makes it a bit more reminiscent of glaze. And the pastry cream filling adds a bonus surprise, allowing you to experience 3 textures in one bite-size treat.

Lastly, please don't forget to check out the cake pops of all the other International Incident partyers by clicking on the thumbnails at the bottom of this post below the recipe.
Also remember to nominate your favorite blogs for Saveur Magazine's 2011 Best Food Blog Awards (nominations close April 22; finalists to be announced April 26)!


P.S. - I finally created a Facebook page for my little blog. I'd be honored if you'd check it out and "like" it =D

Boston Cream Pie Cake Pops [Printable Recipe]
General procedure adapted from Bakerella
Makes 45 to 50 lollipops

XIAOLU'S NOTES: Honestly it's fastest and easiest to use your hands to work with the cake mixture, so wash 'em up and dig in! =D Though I was hoping to achieve a more cake-like texture to these pops, I eventually realized that a certain amount of "mushing" is required to make the pop adhere to the stick and itself. If you've never tried cake pops before, please be prepared for a creamy, truffle-like consistency inside. Do NOT use water-based liquid or gel coloring as this will cause the chocolate to clump up.

Moist Yellow Cake (Recipe below or use your favorite)
1/2 cup (1 stick) unsalted butter, room temperature, as needed
1/2 cup powdered sugar, sifted and as needed

Pastry Cream Filling (Recipe below)
1 lb. white chocolate chips
1 Tbsp trans fat-free shortening (such as Earth Balance)
1 tsp canola or vegetable oil
Cream/brown/yellow oil-based or powder food coloring (optional)
6 oz. semisweet chocolate, roughly chopped
1/4 cup heavy cream
1 tsp unsalted butter
1 Tbsp light corn syrup

About 45 to 50 lollipop sticks
Styrofoam block, to hold cake pops upright while drying

Transfer pastry cream to freezer. After cake has cooled completely, crumble it into a large bowl, removing any overcooked/crusty pieces. Try to roll the mixture into a quarter-size ball. If the ball isn't moist enough to hold together, you'll need to add some buttercream. Make the buttercream by beating the butter with an electric mixer until light and fluffy. Add the powdered sugar and mix in thoroughly. Now add buttercream 1 to 2 tablespoons at a time to the cake mixture, incorporating it into the crumbs completely between each addition, until the mixture is moist enough to hold together in a ball.

Line 2 large baking pans with parchment paper, and take the pastry cream out of the freezer. Make round "bowls" out of about 1 tablespoon of the cake mixture (make the middle hole with your fingertip) and fill the middle with a scant teaspoon of cold pastry cream. Press another 1/2 tablespoon of cake mixture to make a "lid" for the "bowl." Cover the cream-filled cake ball with the cake piece, press edges together, and roll/press the cake ball to make an approximately 1 1/2-inch diameter cake ball. Repeat until the remaining cake mixture has been used up.

Place white chocolate chips and shortening into a heatproof bowl and microwave at 30-second intervals, stirring between each, until it's completely melted. Add cream/brown and yellow food coloring a little at a time, mixing thoroughly between each, until you have a light yellowish-tan cake color. Mix in the vegetable oil. Dip the tip of your lollipop sticks in a little melted chocolate and insert into the cake balls (about halfway in). Place in the freezer for 15 to 20 minutes to firm up so they won't melt when dipped in the hot chocolate.

Once firm, carefully hold a cake pop sideways (but angled slightly upward) just above the melted chocolate, and quickly pour 3 large spoonfuls of melted chocolate over the ball, then rotate the ball to the opposite side and do the same. Now check if any spots are still uncoated and pour large spoons of chocolate over them. Once covered, softly tap the stick against the edge of the bowl for about 10 to 15 seconds until the excess chocolate drips off. Don’t tap too hard or the cake ball will fall off, too! And do NOT rotate the stick or the coating won't be as smooth anymore. Stick cake pops straight down into a styrofoam block to dry or place down onto a parchment-lined pan with the sticks pointing straight up. Do NOT refrigerate as this will lead to condensation on the coating (freezing is fine).

Meanwhile, place heavy cream in a small saucepan and bring to a boil. Place chopped semisweet chocolate in a heatproof bowl. Pour boiling cream over the chocolate and let stand 5 minutes. Stir the mixture until smooth and shiny. Add butter and corn syrup and mix well. Allow to cool for 10 to 15 minutes. Dip the cake pops diagonally into the chocolate, then hold over the bowl for a few seconds to allow excess to drip off. Place cake pops back in styrofoam block or on parchment-lined pan. Let cake pops cool completely or freeze, then enjoy at cool room temperature with friends!

Moist Yellow Cake
Makes a 2-layer 9-inch cake

2 1/4 cups all purpose flour
1 1/2 cups sugar
3 1/2 tsp baking powder
1 tsp salt
1 cup PLUS 1 Tbsp milk
1 tsp apple cider vinegar
1 1/2 Tbsp canola or vegetable oil
1/2 cup (1 stick) unsalted butter, softened
1 3/4 tsp pure vanilla extract
3 large eggs, room temperature
3 large egg yolks, room temperature

Preheat oven to 350 degrees F. Cut parchment paper to fit the bottom of two 9 x 1 1/2-inch round pans. Grease the pans lightly with oil or cooking spray, then place the paper in the pans and grease the paper.

Sift the flour, sugar, baking powder, and salt into a large mixing bowl. Add the milk, vinegar, oil, butter, and vanilla to the flour mixture and beat with on medium to medium-high speed for 1 to 2 minutes, scraping the sides of the bowl as needed. Add the eggs and yolks and continue beating an additional 2 minutes. Divide batter evenly between the prepared pans.

Bake for 22 to 30 minutes or until a toothpick inserted near the center of a cake comes out clean, or until cake springs back when touched lightly in the center. Cool cakes on wire racks for 15 minutes; remove from pans and cool completely.

Pastry Cream Filling
Adapted from Bakewise
Makes about 1 cup

2/3 cup milk [not skim]
1/4 cup heavy cream
3 1/2 Tbsp sugar
1/8 tsp salt
2 Tbsp PLUS 1 tsp cornstarch
2 large egg yolks
3/4 tsp pure vanilla extract
1 Tbsp unsalted butter

Add milk and cream to a medium saucepan. Heat over medium heat until the liquid starts to produce steam. In medium heatproof bowl, combine the sugar, salt, and cornstarch and stir until evenly combined. Drizzle the hot liquid mixture into the sugar mixture, whisking immediately and continuously. Return to the saucepan and cook over medium heat until the mixture thickens, stirring constantly.

In a medium bowl, stir together the egg yolks. Whisk about 1/4 cup of the hot mixture into the yolks, then add the yolks to the saucepan. Bring everything to a boil, stirring continuously and scraping the bottom, until the custard thickens and becomes smooth. Make sure to bring the entire mixture to a good boil; otherwise, the enzymes in the egg yolks will break apart the starch and the custard will become soupy instead of thick.

Pour the custard into a bowl and cover. Stir in vanilla and butter, mixing until butter is completely melted and mixed in. Once it has cooled to room temperature, transfer to the refrigerator and chill for at least 2 hours.

Wednesday, April 13, 2011

Guest Post: Watercress and Avocado Salad

It's probably not showing yet but one of my goals for 6 Bittersweets this year is to post more savory and healthy recipes in light of my plan to become a dietitian one day. But don't you fret...it's not like cupcakes will become scarce around here or anything! =p Anyway, it's just my luck that I recently found a beautiful blog full of healthy, nourishing, and full-flavored sweet and savory foods. It's called Scandi Foodie, and Maria is the talent behind all of it. And by "it" I'm referring to mouth-watering posts like these pear and semolina baked puddings, walnut-crusted chocolate ricotta cups, and roasted brussels sprouts walnut salad. After tweeting a few times, I already felt comfortable asking her to share one of her refreshing dishes with us and she graciously said yes. So now it's time for me to just be quiet and turn the mic over to my gifted friend, Maria!

Watercress Salad 2
Hi friends! I’m so happy to be guest posting here at 6 Bittersweets! Xiaolu and I share a similar food philosophy of healthy, feel-good food and
it is an honour to share this humble salad recipe with you.
Watercress Salad
As the Southern Hemisphere prepares for the cooler seasons ahead, spring is on its way for everyone else. This watercress salad is a colourful reminder of the summery months ahead, but for me it is as welcoming any time of the year. The gorgeous, simple and fresh ingredients make this salad a real favorite!

Watercress Salad Ingredients
Watercress and Avocado Salad [Printable Recipe]
Serves 2

100g watercress [about 3 cups], leaves picked and washed
70g snow pea sprouts (about 2 cups)
4 red radishes, cut thinly into slices
1 avocado, sliced
1/2 cup pumpkin seeds (toasted)
Juice of 1/2 lemon
1 Tbsp flaxseed/linseed oil
Pinch of sea salt

1. Place the watercress and snow pea sprouts into serving bowls.
2. Toss the radishes, avocado slices and pumpkin seeds in a separate bowl.
3. Whisk the lemon juice and flaxseed oil together and season with a pinch of salt.
4. Add the dressing into the mixing bowl and toss to coat.
5. Pour the vegetables on top of the watercress and snow pea sprouts and serve immediately.

Tuesday, April 12, 2011

Food as Art: Introducing Laksmi W.

If you've been coming here a while (who am I kidding...if you've ever been here before), you've seen me get pretty excited about food. But to be perfectly straight with you, I'm more excited about this post than I've been about any in quite some time. And the real kicker? There's not a single recipe to be found...just beautiful, soulful captures of real food from a dear friend of mine who is as wise as she is generous, and as beautiful within as without. I think you'll soon agree with me that this beauty and vitality radiates through her work as well. It's my great honor to introduce to you, Laksmi, and to share with you some of my favorites from her collection. Please find the rest on her Flickr photostream. Thank you, dear, for your friendship and guidance ever since we first "met" and for permitting me to reprint your work here. As for my readers, I do so hope you enjoy these as much as I have. And as many times as I've seen these photos, they still take my breath away so I'll be enjoying them along with you!

Bread
Beet
Avocado
Blueberry
Sugar
Fennel
Copyright Laksmi Wennakoski-Bielicki - All rights reserved

Saturday, April 9, 2011

A Lotta (Scharffen Berger) Chocolate Part 1: Chocolate Chunk Challah and French Toast

Isn't it funny how we often are when it comes to commitments? If asked, we'd list off a number of relationships, goals, etc. we're committed to. But when we take a hard look at our actions, they rarely line up. Or even if we actually do follow up on our promises, we often do so begrudgingly. I bring this up because I'm taking a seminar that's asked us to examine these things. Though the idea that we don't always follow through on our commitments is hardly surprising to anyone (hello New Years Resolutions?!), this seminar has pushed me to think from some new angles.

Chocolate Chunk Challah
One is via the possibility that our disconnect btween speech and action is due to hidden commitments we have that have stronger sway over our actions than those overt ones. You could be secretly committed to being right/in control, to avoiding past pains, or even just allowing yourself some time to be lazy/selfish. What do you guys think? Do you see merit in this concept and some truth of it in examples in your own life? I think I do.

The other (and maybe more interesting to you ;p) reason I bring up commitments is this. About 3 months ago, I asked my dear readers for a little help with a contest. The prize was a huge Scharffen Berger gift basket and I proclaimed that "I'd love to have all that chocolate to use in treats for my friends, family, and all of you." Well, guess what...I WON and it's time for me to make good on my commitment to make y'all some fantastic chocolatastic treats! Fortunately this is an easy promise to keep since I love chocolate, baking, and sharing both with you guys =D.


Chocolate Chunk Challah French Toast
What I have planned is a "Lotta Chocolate" series that will span about 4 or 5 posts and feature some less common ways of utilizing this versatile ingredient. And yes, that means you won't be seeing any brownies or chocolate chip cookies in it. But I hope you'll trust me not to lead you astray (though how wrong could you go with chocolate anyway, eh?).

Today I present to you a treat taken from the Scharffen Berger chocolate cookbook, itself, a rich slightly sweet challah bread studded with unexpected chunks of semisweet chocolate. While delicious in its own right, I knew this challah would be even more amazing as French toast. I even "discovered" some blueberries from last summer in the freezer, which were easily transformed into my favorite, blueberry syrup. Honestly, you guys, this couldn't have turned out any better than it did! Between the juicy blueberries in syrup, rich creamy toast, and pockets of melted chocolate, I was in brunch heaven. Won't you join me? ^__^

P.S. - If you enjoy this post and my site in general, I'd be honored if you'd nominate me for Saveur Magazine's 2011 Best Food Blog Awards (nominations close April 22) =D.

P.P.S. - Almost forgot, I'm sending this over to Susan at Wild Yeast for her weekly Yeastspotting event.


Chocolate Chunk Challah Braided Bread [Printable Recipes]
Adapted from The Essence of Chocolate by John Scharffenberger and Robert Steinberg
Makes 2 loaves

XIAOLU'S NOTES: If you're not familiar with 4-strand braids (which I wasn't), watching someone do it is really helpful, much more so than photos or written directions in my opinion. This is a good one I found on Youtube. My bread was overbaked, especially the bottom, so I recommend starting to check for doneness at 25 minutes and NOT using a dark baking pan. Lastly, I love the look of tall challah, so next time I plan to make one braid slightly smaller than the other and to stack the smaller braid atop the larger one for baking like this.

1 1/4 cups lukewarm water, divided
1/2 cup plus 1 Tbsp sugar, divided and more for sprinkling
2 1/2 tsp active dry yeast
4 1/2 to 5 1/2 cups all purpose flour, divided [scoop and sweep measurement]
1 3/4 tsp salt
6 Tbsp canola (or other flavorless) oil
2 Tbsp honey
3 large eggs, divided
4 oz. semisweet chocolate (preferably 62%), cut into chip-size chunks
1 Tbsp sesame seeds

In a small bowl, combine 1/4 cup of the water, 1 tablespoon of the sugar, and the yeast. Stir to dissolve. If it does not foam in 10 to 15 minutes, discard and start with fresh yeast.

In the large bowl of an electric mixer, combine 1 1/2 cups of the flour, the remaining 1/2 cup of sugar, salt, oil, honey, 2 eggs, yeast mixture, and remaining 1 cup of water. Beat at low speed, scraping bowl periodically. Add 3 more cups of flour, then switch to dough hook and knead at low speed, scraping the bowl from time to time, until an elastic dough forms. Only if the dough seems too sticky, add more flour a few tablespoons at a time JUST until dough is no longer sticky but still is soft. Let rest 10 minutes.

On a lightly floured board, shape dough into a 7 x 10-inch rectangle. Press the chocolate pieces into the dough and fold dough in half over the chunks. Seal edges and tuck under; let rest 10 more minutes.

Lightly oil a large bowl. Form the dough into a ball by tucking edges under, and place in the bowl, turning to coat with oil. Cover with a kitchen towel and let rise 45 minutes to 1 hour, until doubled in bulk.

Lightly oil 2 baking sheets. Turn dough out onto a lightly floured board, punch down and divide into 8 equal pieces. Cover half the pieces with a kitchen towel, and roll the remaining 4 pieces into 15-inch ropes. Pinch the ropes together at one end, and set that end near the short side of one baking sheet opposite from you. Braid the ropes by continuing to weave the right-most strand over, under, then over the strands to its left (see notes above for video link). Pinch strands together at the end, and tuck both ends under slightly. Cover the 1st loaf with kitchen towel, and use the same procedure to braid the the remaining 4 ropes on the other pan.

Whisk remaining egg to make an egg wash and brush top of each loaf, being careful not to let egg run down to baking sheet (it can burn). Let rise until doubled, 45 minutes to 1 hour. Twenty minutes into this rise, preheat the oven to 375 degrees F.

Once loaves have doubled in size, brush them with egg one more time, and sprinkle with sesame seeds or sugar. Bake 25 to 35 minutes, or until top is glossy and brown, rotating the pans halfway through. If tops brown too quickly, cover loosely with foil. Cool completely on racks, then wrap well so loaves are airtight and store at room temperature or freeze if not eating immediately.

Challah French Toast with Blueberry Syrup/Compote
Adapted from Bromberg Bros. Blue Ribbon Cookbook and pictures and pancakes
Serves 4 to 6

XIAOLU'S NOTES: If your challah is taller than mine, you may need to use fewer slices or make more of the batter and syrup so there's enough for all 8 slices. This french toast is delicious with regular challah, but I really enjoyed the combination of chocolate and blueberry. And the chocolate could be a wonderful surprise for guests digging into the final product.

1 cup maple syrup
1 1/2 to 2 cups blueberries
4 large eggs
1 cup milk
2 Tbsp sugar
1 tsp pure vanilla extract
1/4 tsp ground cinnamon
Pinch of salt
8 (1-inch) slices challah bread, homemade (see above) or store-bought
4 tsp unsalted butter, or more as needed and to serve

In a small saucepan, combine maple syrup and 1 cup blueberries. bring to a boil and simmer until blueberries release their juices. remove from heat and stir in remaining 1/2 to 1 cup of blueberries. Set aside.

In a large bowl, whisk together the eggs, milk, sugar, vanilla, cinnamon, and salt. Pour the custard into a wide, shallow dish. Soak each slice of bread in the liquid, turning to coat on both sides, until the bread is saturated but not falling apart, 3 to 5 minutes.

Heat a large skillet over medium heat. Melt 1 teaspoon of butter in the pan. Working in batches, cook challah until golden brown, 2 to 3 minutes per side. Repeat with the remaining challah, adding butter if needed.

Divide the toast among individual plates and serve topped with blueberry maple syrup and butter, if desired.

Wednesday, April 6, 2011

Guest Post: Handvo (Indian Savory Snack Cake)

There are many reasons I'm grateful to my best friend N. Just one among many is for introducing me to fantastic homemade Indian food in high school. Years later, this passion for Indian cuisine led me to discover a community of talented bloggers who inspired me to invest in some spices and dare to make Indian food in my own kitchen. One of those bloggers was Harini, who authors the lovely vegetarian Indian food blog Tongue Ticklers. Harini has the unique talent of not only cooking scrumptious Indian food, but also presenting and capturing it beautifully and creatively. Some of my favorite posts over the years have been her Vella Cheedai / Jaggery Balls, Mango Dessert Soup with Coconut Cream, Semiya Upma/Vermicelli Pasta Salad, and Keerai Masiyal / Mashed Greens Curry. Having enjoyed her work so much, I naturally wanted to share it with you. I'm delighted to introduce Harini today as my latest guest blogger. Please give her a warm welcome!

_MG_1616
Hi, old and new friends :),

It is my pleasure to be invited as guest blogger to 6 Bittersweets, a home for delectable goodies and sinful visuals! Xiaolu as you all know, always puts her best food forward. So it was bit of tussle for me to choose a dish for I have to bring in something as gracious to the table! She gave me a free reign which made it a lot easier, her only wish being that I should bring in something Indian. Perfect! Indian food is comfort food to me.

Stove top in Skillet
Stove-top Variation
I am very proud of the diverse and wide culinary heritage India has to offer, and picking out one spectacular dish was a dilemma. We have more regional cuisines than States! I however decided on a dish that I feel has not received its share of the limelight. It is rustic but I am sure many of you can identify with it. For me this is an opportunity to show that Indian dishes serve more than just spicy curries.

Oven baked version 1
Baked Variation
"Handvo" [haand – woe or aand-woe] is a savoury cake from the Western region of Gujarat. It is not traditionally a vegan dish but is easily adaptable. Along the way, I have made this dish my own, which I think is what cooking is all about. My version is quicker than the original version as I do not set aside the batter for fermentation. Instead I add baking powder to imitate the effect. A reason I chose handvo is that the recipe does not call for any hard-to-find ingredients. I am sure most of the ingredients are already stocked in your pantry!

Handvo makes a healthy, wholesome breakfast as it is a combination of lentils and rice. The original version calls for two tablespoon of wheat flour but since my daughter has allergies, my version is gluten free.

_MG_0945
Pearl Millet Flour Variation
Handvo [Printable Recipe]
Serves 4

NOTES: My version is vegan, soy free, gluten free, nut free.

Ingredients:
To soak overnight:
4 Tbsp PLUS 1 tsp (61 g) rice
4 Tbsp PLUS 1 tsp (35 g) brown rice flour
4 Tbsp PLUS 1 tsp (61 g) split mung bean lentils [Optional]
4 Tbsp PLUS 1 tsp (61 g) split bengal gram lentils
4 Tbsp PLUS 1 tsp (61 g) husked black gram lentils
3/4 cup PLUS 1 Tbsp (200 ml) vegan buttermilk, and more if needed [Recipe follows]
About 3 tsp freshly squeezed lemon juice, from 2 small lemons

Spice mix:
1 Tbsp grated ginger
2 green chillies, chopped, or per taste
5 garlic cloves, or per taste, crushed lightly and peeled
3 Tbsp cilantro (coriander) leaves, finely chopped.
1/8 tsp asafoetida (hing)
4 to 5 Tbsp vegetable or any neutral oil
1 cup grated bottle gourd/zucchini, loosely packed

1 level tsp gluten free, aluminium free baking powder
A pinch of baking soda

1/8 tsp turmeric powder
1/4 tsp red chilli powder [optional]
Salt to taste
1 Tbsp sugar

Seasoning:
1 tsp black mustard seeds
1 tsp white sesame seeds
1 sprig of curry leaves

Garnish:
2 Tbsp chopped cilantro (coriander) leaves
Fresh grated coconut [Optional]

Tools:
An 8” square cake tin or jelly pan, if baking
A skillet, if using stove top method
Mixing bowl
Grinder/blender

Method:
Prepare the tin (if you are baking):
Heat a shallow wok. Add a Tbsp of oil. When hot, add the mustard seeds. When they splutter add sesame seeds. Stand back! Sesame seeds tend to jump about as they splutter. When lightly golden, remove wok and immediately add curry leaves. Pour this into your cake tin. Using a half cut potato rub the hot oil and seasonings all over the bottom of the pan. Also grease the sides with the same oil. Set aside.

Prepare the batter:
Soak the rice and lentils together overnight in sufficient water. Next morning drain the water, rinse till water runs clean, drain, and grind to a paste. To grind add 1/4 cup of the prepared buttermilk or more if needed, a tablespoon at a time. Stop the motor in between and push the lentils down the sides so that the blend is even. The batter should resemble pancake batter so try and add buttermilk sparingly. You can increase the liquid towards the end if needed.

Pour into a mixing bowl. Add the grated bottle gourd or zucchini. Set aside.

Run the ginger, green chillies, and garlic cloves together in a mixer or just pound together in a mortar. Add to the batter along with coriander leaves. Heat 2 Tbsp of oil and add asafetida to it. Pour this into the batter.

Add turmeric powder, salt and sugar. Mix the batter well. If thick adjust with more buttermilk till it attains the consistency of pancake batter.

Add baking powder and a pinch of baking soda. Mix first in figures of eight and then beat well so that the seasonings and leavening agents are uniformly distributed. Taste and check the salt.

Oven Method:
Pre-heat oven to 180 degrees C [350 degrees F].

Pour batter into the prepared pan till it reaches half way up, carefully and evenly so that the seasonings are not pushed to the sides of the pan. Tap to even the surface. A jelly pan works best, but if you do not have one use a square cake pan. I also like to use a bundt pan as it makes cutting much easier.

Bake at 180 degrees C [350 degrees F] till the top starts browning, about 35-40 minutes. If the top is firm and browned the cake is done. If your oven has burn points, rotate half way through. If the batter starts browning in 15 minutes, reduce temperature to 160 degrees C [320 degrees F] and continue.

Remove and cool in pan for ten minutes before slicing. The cake tends to stick to the bottom and it is best to slice in the pan and remove with a pancake turner.

Stove top method:
Heat a skillet and season with mustard, sesame and curry leaves like you did earlier. Pour a thick layer of batter, about three ladles evenly. Level the surface without disturbing the seasoning.

Cover and cook on very low heat for about 7-10 minutes. With a flat spatula raise once corner and check whether browned underneath. If not cook a little more. Using a broad spoon and a broad pancake turner, carefully remove the cake and turn it over to cook the other side. Hold the cake on the top with one spoon while turning else it might break. Again cover and cook for the same time till the base is browned. Do not increase the heat.

Remove onto a plate. Cool for about 2-3 minutes before cutting into wedges.

Repeat with the rest of the batter. This will make 2 handvo cakes.

While serving garnish with extra seasoning and coriander leaves or fresh grated coconut. Serve with mint chutney or tamarind chutney. If its tea time you will not need the chutneys.

Recipe for vegan buttermilk:
I soak about 10 cashews in hot water till soft and blend to a fine paste. Thin it with warm water till it reaches the consistency of milk. Measure 1/2 cup and add lemon juice to make sour buttermilk. Alternatively, use fresh pressed coconut milk or any non-dairy milk of your choice, and add lemon juice. Set aside till needed. Taste and check for sourness. Adjust with more lemon juice as needed.

Texture:
The cake will be dense and not rise as much as regular cakes. If using bottle gourd or zucchini the cake tends to be a little sticky and not spongy. I noticed that if I use onions or carrots the cake gets a spongy texture. I suppose it has something to do with the liquid in the gourd. You can also try finely chopped coriander, spinach or fenugreek leaves.

Variations:
If you would like the cake really spicy add 1/2 a teaspoon of red chili powder alongwith salt. Substitute pearl millet flour or sorghum flour (4 Tbsp PLUS 1 tsp) instead of rice. I have reduced the quantity of the flour here because they are more dense than rice.

I enjoyed my time here and hope you enjoyed my post too.

Sunday, April 3, 2011

For My Love: Moist Yellow Caramel Cake and Chocolate Baileys Cupcakes with Liqueur Shots

Birthday Dessert Table
It's sometimes funny to me how my views/interests have changed over time. Of course this applies across my life to things both serious and silly, but I bet you can guess which type is on my mind now ;p. For example, if you'd told me just a few years ago that I'd have a blog full of cupcakes (I used to hate this "silly overpriced fad") I'd have been horrified. Perhaps it was going to a "preppy" college, but I really disliked pastel colors, anything "cutesy," and had little interest in things like pretty weddings or party decorations.

Just by looking at this site, you can tell I've changed a bit, no? What started as a subtle shift became a landslide, though, when I discovered some amazing party/style blogs, especially My Sweet & Saucy and Kara's Party Ideas. They're so inspiring I started planning how I'd break the news of my career change to "party planning/catering" to my dad before I knew it. That was just a daydream but with my boyfriend's birthday coming up I had the perfect opportunity to translate all that inspiration into a real party for the love of my life and our friends =).

Pompoms!
From the food to the decorations, my plan for P's birthday party was all about DIY (do-it-yourself). Since P is a pretty down-to-earth guy, I kept things simple using a natural color scheme with accents in green (his favorite color) and yellow. The ribbon cake bunting banner and tissue paper pom-poms (both pictured above) were easy to make using these tutorials: cake bunting and pom-poms. The biggest surprise (and my favorite part of the preparation) was convincing P to help make the pom-poms and discovering that he was a natural at it! On the other hand, mine looked like a dog had chewed on it...=p

We offered our guests a lot to fill their bellies at the party. After munchin' on some store-bought chips and dips, they got to sample P's favorite spiked pasta and customized homemade pizzas at the toppings "bar." There was also plenty to satisfy their sweet tooths. The Boy's favorite cake in the world is his aunt's yellow cake with an amazing caramel frosting. Having tried to recreate it for his last 3 birthdays, I'm happy that's it's finally good enough to be shared! If you've ever had caramel or penuche frosting, you're probably used to it being hard. The beauty of this version is that it stays soft and buttery, a perfect compliment to the oh-so-moist yellow cake.

Patrick's 26th Birthday Party/Cake
Photos from my friend Mimi =D
In honor of P's half-Irish ancestry, I also created some fun chocolate Irish cream cupcakes. To make them as "Irish" as possible, I used my homemade Irish cream 3 ways: in place of milk in the cake batter, to flavor the frosting, and to fill the homemade chocolate cup toppers. The chocolate liqueur "shots" were especially fun -- to make and consume! In case you're wondering about the proper way to eat these, here's how we did it:
  1. Hold the cupcake around its wrapper between your thumb and index finger, then bring it up and toward you so you can drink the Irish cream shot out of the chocolate cup.
  2. Now pick up the empty chocolate cup and gobble it up like a proper chocoholic!
  3. Now eat the remaining cupcake any ole way you want.
I'm happy to report the party was a success! Everyone, including the birthday boy, seemed to have fun and enjoy the food. Like the above-mentioned style blogs inspired me, I hope some of you might be inspired to make your own crafts and treats for your next special gathering!

Moist (Really!) Yellow Layer Cake with Soft Caramel Frosting [Printable Recipe]
Adapted from ChefTalk and from My Yellow Bluff
Makes a 2-layer 9-inch cake (about 10 to 12 servings)

XIAOLU'S NOTES: I think part of the compromise of such a moist, tender cake is that it's quite delicate to handle. I definitely recommend chilling the cakes at least an hour before frosting to firm it up so crumbs won't come off easily. Especially since this frosting is really good at pulling cake bits off hehe. You can't tell in my photo (or at least I hope not!) but a small section of the edge of the cake actually got pulled off by the frosting entirely. So, again, handle with care! Or, if not, it'll be delicious just the same =D.

2 1/4 cups all purpose flour
1 1/2 cups sugar
3 1/2 tsp baking powder
1 tsp salt
1 cup PLUS 1 Tbsp milk
1 tsp apple cider vinegar
1 1/2 Tbsp canola or vegetable oil
1/2 cup (1 stick) unsalted butter, softened
1 3/4 tsp pure vanilla extract
3 large eggs, room temperature
3 large egg yolks, room temperature

Soft Caramel Frosting (Recipe below)

Preheat oven to 350 degrees F. Cut parchment paper to fit the bottom of two 9 x 1 1/2-inch round pans. Grease the pans lightly with oil or cooking spray, then place the paper in the pans and grease the paper.

Sift the flour, sugar, baking powder, and salt into a large mixing bowl. Add the milk, vinegar, oil, butter, and vanilla to the flour mixture and beat with on medium to medium-high speed for 1 to 2 minutes, scraping the sides of the bowl as needed. Add the eggs and yolks and continue beating an additional 2 minutes. Divide batter evenly between the prepared pans.

Bake for 22 to 30 minutes or until a toothpick inserted near the center of a cake comes out clean, or until cake springs back when touched lightly in the center. Cool cakes on wire racks for 15 minutes; remove from pans and cool completely. Frost as desired.

Soft Caramel Frosting
Makes enough to frost a 2-layer cake

XIAOLU'S NOTES: Steph of Cupcake Project also posted an adaptation of this frosting. Though our measurements are different, the technique remains the same. Check out her post for some useful photos of the caramelization process. This frosting doesn’t crust up like many other caramel frostings and retains wonderfully creamy, buttery, and soft. However, it does still become harder to spread as it cools, so you’ll want to have the cake(s) baked, cooled, and ready to frost before making the frosting.

3 cups sugar, divided [save 1/2 cup to brown]
3/4 cup (1 1/2 sticks) unsalted butter
1/2 tsp salt
1 1/4 cups (10 oz.) canned evaporated milk
1 tsp pure vanilla extract
Pinch of baking soda

Mix 2 1/2 cups sugar, 4 tablespoons (1/2 stick) butter, salt, and evaporated milk in a heavy-bottom medium saucepan (at least 3-qt. capacity). Cook over medium heat, stirring periodically until all of the sugar dissolves. Reduce heat to low.

Melt the remaining 1/2 cup of sugar in a small iron skillet, stirring constantly until it turns an even light to medium amber brown color.

Add this caramelized sugar and the remaining stick of butter into the mixture in the pot. Quickly stir everything together thoroughly and continue to cook until “soft ball” stage is reached (about 235 degrees F or when a bit of caramel dropped into cold water forms a soft, malleable ball) – this may take up to 30 minutes. Remove from heat, and let cool and thicken slightly. Add vanilla and baking soda. Use immediately, as the frosting will continue to thicken as it cools.

Chocolate Baileys Cupcakes with Irish Cream Liqueur Shots [Printable Recipe]
Makes 12 cupcakes

1 cup MINUS 1 Tbsp all-purpose flour
3/4 cup PLUS 2 Tbsp sugar
6 Tbsp unsweetened cocoa powder
3/4 tsp baking soda
1/2 tsp baking powder
1/2 tsp salt
1 large egg, room temperature
3/4 tsp instant coffee powder dissolved in 1/2 cup hot water (or 1/2 cup espresso)
1/2 cup Irish cream liqueur (homemade or storebought, like Baileys)
1/4 cup vegetable oil
1 tsp pure vanilla extract

Baileys Swiss Meringue Buttercream (Recipe below)
Irish Cream-Filled Chocolate Shots (Recipe below)

Preheat the oven to 350 degrees F and line a standard muffin pan with paper liners.

In large bowl, stir together the sugar, flour, cocoa, baking soda, baking powder, and salt. Add the egg, Irish cream, coffee (or reconstituted coffee mixture), oil, and vanilla extract. Beat by hand or with an electric mixer on medium speed until well combined (no more than 1 minute).

Pour the batter, which will be thin, to fill the paper liners about 2/3 full. Tap the pan firmly against the counter one time to remove any air bubbles. Bake for 20 to 25 minutes or just until a toothpick inserted into the middle of a cupcake comes out clean. Let cupcakes cool in the pan for 2 minutes, then remove them to a wire rack and let them cool completely there.

Once cupcakes are completely cool, pipe or spread buttercream onto cupcakes and top with Irish cream-filled chocolate shots (be careful to position them securely so they don’t spill). Enjoy!

Irish Cream Swiss Meringue Buttercream
Makes enough to generously frost 12 cupcakes

3 large egg whites
3/4 cup PLUS 2 Tbsp sugar
15 Tbsp unsalted butter, cool room temperature and cut into 10 pieces
1 tsp pure vanilla extract
1/3 to 2/3 cup Irish cream (homemade or storebought, like Baileys)

Combine the sugar and egg whites in the stainless steel bowl of an electric mixer. Bring a large pan of water to a simmer, making sure that the water isn’t high enough that it will not touch the bowl. Set the bowl in the pan of simmering water and whisk constantly until the sugar is completely dissolved and the top becomes foamy. Be careful not to curdle the egg whites. Remove bowl from heat.

Transfer bowl to your mixer and beat on high speed for at least 3 minutes, until the mixture holds glossy, marshmallow-like peaks and the bowl is completely cool (very important -- the frosting's consistency will be off otherwise). If using a stand mixer, switch to the paddle attachment, and add butter to the meringue a tablespoon at a time, beating well after each addition (at least 5 seconds in between). With the mixer on low, add the vanilla and Irish cream, and continue beating 1 minute to incorporate the additions and reduce air bubbles.

Irish Cream-Filled Chocolate Shots

XIAOLU'S NOTES: If you have extra chocolate leftover, you can simply spread it in a layer (about 1/4-inch thick) over some parchment paper or other non-stick flat surface and let it cool completely. Once hard, chop it up to use for chocolate chunks in chocolate chip cookie or other recipes calling for chocolate chips/chunks!

5 to 6 oz. semisweet chocolate, roughly chopped or chipped
1/3 cup Irish cream (homemade or storebought, like Baileys)

I used a mini-sized silicone mold, but mini foil cupcake liners inside of a mini pan should work as well. If using foil liners, be sure to spray the insides with oil first. Bring a small pan of water to a simmer, and set a small heatproof bowl filled with the chopped chocolate on top of the pan. Stir until the chocolate is completely melted. Turn off heat but keep bowl on top of the warm pan. Another option is to microwave the bowl of chocolate at 30 second intervals, stirring in between each, until fully melted and shiny.

Using a small pastry brush, brush the inside of the molds or liners with an even layer of chocolate. Freeze mold or pan for 5 minutes, then brush another layer of chocolate over the first layer. Repeat the previous step one more time (for a total of 3 chocolate layers). Freeze for 20 minutes, then unmold the cups by peeling of one side of the silicone (or foil liner) carefully. Keep cool until ready to use. Fill with 1 teaspoon of Irish cream to serve.

Saturday, April 2, 2011

CSN Giveaway Winner!

Thanks to everyone who participated in my CSN Stores giveaway! The randomly selected winner is Lynda of The Spangly Princess. Congrats and I hope you enjoy your giftcard =D!

Friday, April 1, 2011

DMBLGIT March 2011: Judges and Awards

Wow, you guys! Can I just start off by saying what an unadulterated pleasure it's been to host this month's DMBLGIT photography event? Can you all please just pretend it's still March and keep delivering lovely food photos to my inbox? The other judges and I had a lot of fun drooling over your entries and a heck of a time picking out just a few for awards. Without further ado, let me introduce you to the wonderful judges of this month's contest.

MEET THE JUDGES:


Sala Kannan is a software services entrepreneur by day and food blogger/photographer at Veggie Belly by night. Her site features a wide array of vegetarian recipes reflecting the varied cuisines she's enjoyed throughout the world. Originally from India, she has traveled and eaten her way through over 36 countries, and currently resides near Washington, D.C.


Kris Ngoei is a graphic designer in Bangkok who has also unearthed a great talent and passion for baking as well as food decoration, styling, and photography. Having won a total of 8 awards to date, I can't imagine anyone more qualified to be a DMBLGIT judge. Please check out his stunning works of edible art on his blog, Bake in Paris.


Patricia Scarpin, of Technicolor Kitchen, has been baking since before her teens and blogs from Brazil in both English and Portuguese. She's a cookbook fanatic like me, and her comforting treats are always just the thing you wish were coming out of your own oven. Her lovely photos and sweet styling are also not to be missed.


Ashley Colbourne is the Canadian author of Butterflyfood, a blog featuring gorgeous edibles and photography that bursts with rustic charm. She has a love for old movies, vintage mystery radio, and taking photos of all things food. It's downright impossible to peruse her work without wanting to plop down at her table =p.


OVERALL WINNERS:

After careful evaluation of all 55 entries this month, the judges scored each photo according to edibility, originality, and aesthetics. The entries with the 3 highest scores when all categories were combined were chosen as the overall winners.

Citrus from my garden

First Place: Citrus from my garden by Edda of Un déjeuner de soleil. Taken with a Pentax K-m and 50 mm f 1.4 lens.

Comments
“I'm absolutely captivated with the play of light in this. The colors are natural yet wonderfully vibrant, and the styling of the stems/leaves adds just the right amount of playfulness.”

*************************

Brunch Bruschetta

Second Place: Brunch Bruschetta by Asha Pagdiwalla of Fork Spoon Knife. Taken with a Nikon D5000.

Comments
“Love the gloss on those egg yolks! I almost feel like I could grab one right out of the screen and take a bite.”

*************************

Crepes with apple and raspberries

Third Place: Crepes with apple and raspberries by Pamela Rodríguez in Bilbao, Vizcaya, Spain, of Uno de Dos. Taken with a Canon EOS 350D and 50 mm f/1.8 lens.

Comments
“Beautiful styling.”
“So beautiful, almost ethereal.”

INDIVIDUAL CATEGORY WINNERS:

Excluding the overall winners, these are the highest scoring photos for each category.

Chocolate Cupcakes

Edibility Category Winner (TIE): Chocolate Cupcakes by Asri of Food and Story. Taken with a Nikon D700.

Comments
“Nice color theme.”

*************************

Raspberry and Pistachio Baked Cheesecake

Edibility Category Winner (TIE): Raspberry and Pistachio Baked Cheesecake by Emma of Poires au Chocolat. Taken with a Sony Alpha A580 and 2.8/50mm Macro lens.

Comments
“Nice use of complimentary colors. Those glossy raspberries are really mouth-watering!”

*************************

 Mac-candy apple in the snow

Originality Category Winner: Mac-candy apple in the snow by Mardi Michels of eat. live. travel. write. Taken with a Nikon D40 and 40mm lens, ISO 200, f/6.3, 1/160.

Comments
“Quirky and fun shot.”

*************************

Chicken salad (tonno di cappone)

Aesthetics Category Winner: Chicken salad (tonno di cappone) by Virginia Spilucchino of Lo Spilucchino. Taken with a Canon EOS 500D and 60mm lens.

Comments
“Nice styling and choice of depth of field and textured background.”
“Lovely styling including the basket, folded cloth, and placement of the utensils.”

HOST'S AWARD:

As the host this month, I'm allowed to choose one winner that I think deserves an award but was not named winner in the other categories.

The art of Vietnamese coffee

The art of Vietnamese coffee by Anh of A Food Lover's Journey. Taken with a Canon 30D and kit lens.

Comments
“Lovely capture of the human element.”
“I like the unique setting that includes prominent human presence but still keeps the focus on the drinks. It creates a lovely sense of human connection.”

THANKS FOR ENTERING!

You all were the ones who made this event a feast for the eyes and a joy to take part in. We only wish there were more awards to give out to the many beautiful photos we saw this month. Please do check out all the wonderful entries in this month's gallery!

The April 2011 edition of DMBLGIT will be hosted by Magpie of Magpies Recipes. If anyone is interested in hosting a future edition of DMBLGiT, please email Andrew with "DMBLGIT Host" as the subject.