Showing posts with label heavy cream. Show all posts

Thursday, October 11, 2012

Celebration Cake (Yellow Layer Cake with Milk Chocolate Ganache)

When it comes to yellow cake, fluffy and moist are where it's at in my book. But sometimes I just can't deal with all the crumbs that break off the second I apply frosting. Especially in planning my first ever multiple-tiered cake, I knew I'd need a yellow cake endowed with a touch more strength and structure than my current go-to. I get enough baking anxiety without adding collapsing cake tiers to the not-so-little list of horrors! Luckily my favorite white cake recipe had a yellow cake (egg yolk) variation built right in! A double batch was just right for the 2 tall tiers pictured above (5 x 4 inches and 8 x 5 inches), and the cake came out nicely firm without sacrificing moistness or flavor.

SMS Cake
Yellow Cake with Milk Chocolate Ganache and Covered in Fondant

Surrounding each cake layer was a generous coating of milk chocolate ganache (I used Trader Joe's Pound Plus bars, which are just $5 for 17.6 oz. and taste seriously amazing). I recommend a milk chocolate-to-heavy cream ratio of 2.8 or 2.9 to 1 so that the ganache will set up firmly and provide a sturdy, smooth (and decadent) base for your fondant covering. And I calculated the total amount of ganache needed using this awesome tool called The Ganacherator. Now if you've read anything about fondant, you'll have heard that a cake covered in fondant will only look as good (read: smooth and straight) as the buttercream or ganache underneath. This is absolutely true, and ganache is much easier to learn with as it will set really firm at room temperature (unlike buttercream). Making celebration cakes is really an art-form and I've got a long long ways to go (as evidenced by the elephant skin, not-quite-straight sides, and drooping of the corners in the above cake). But for anyone interested in going down the rabbit hole, I've shared some of my favorite video tutorials below of ganaching, covering, and smoothing the fondant to get a clean professional look to your fondant cakes. I hope this helps the other beginners out there, and I'd love to get feedback on improving my fondant work from any cake experts out there! Cheers!

Making Ganache for Decorating Cakes by Inspired by Michelle
Covering a Cake in Ganache with Smooth and Straight Sides by Inspired by Michelle
Rolling out Fondant, Covering, and Smoothing a Ganached Cake by Planet Cake
Smoothing Cake Covered in Fondant to Get Sharp Edges by Inspired by Michelle

Saturday, October 22, 2011

Spooky Graveyard Vanilla Cookies N' Cream Cupcakes (Guest Post for Pure Joy Events)

Spooky Graveyard Cupcakes for Halloween!
Halloween is just over a week away! And I'm uber-excited to announce today that I've been asked to become a regular contributor on my incredibly talented stylist friend Christine's blog, Pure Joy Events. You've probably figured out by now that Halloween is my favorite holiday (what with all the themed posts I've been doin' lately ;p). So it's a no-brainer that my first post over there as an official contributor should be another spooky and scrumptious Halloween-themed cupcake! Please head over to Pure Joy Events to check out my post, recipe, and step-by-step tutorial for making these fondant skull and bone toppers! If you're in a hurry, the printable recipe+tutorial can be found here and the FREE printable for tombstone toppers shared generously by Heather of Chickabug can be downloaded here.

Spooky Graveyard Cupcakes for Halloween!

Thursday, July 21, 2011

A Lotta Chocolate Part 5: Bruléed Mocha Crepe Cake with Chocolate Liqueur Sauce

First of all, this is completely unrelated to food, but my friend R just took me to see the musical, Wicked, as a belated birthday gift, and it was AMAZING! I'd always found the idea of approaching the Wizard of Oz story from a different perspective intriguing. But I'm pretty sure I'd never have taken the initiative to see it where it not for my friend. Wicked was funny, exciting, and heart-warming throughout its 2 1/2 hours. And when it ended I could swear only 15 minutes had passed (I'd been so engrossed). If this show comes near you or vice versa, I strongly recommend getting tickets!

Now let's return to our regularly scheduled programming... Today's post is the 5th and last in my A Lotta Chocolate series. When we started down this road I promised you chocolate treats that would be less conventional, though no less delicious. A French toast, macaron, chestnut cake roll, and couscous salad later, it's my hope that you consider that promise fulfilled. For our last outing I decided to also make good on another promise. One that I made to myself when I started this site: to make my own crepe cake one day! (Is it just me or is this series getting a bit French food-centric? 8p)

Bruleed Chocolate Mocha Crepe Cake
Well folks, I made it! And not just any crepe cake, but a bruléed mocha crepe cake with homemade chocolate liqueur sauce! There's no getting around the fact that all these delicate crepes take time to cook and layer up. Yet you'd be hard-pressed to find any cake that slices as prettily or embraces chocolate as thoroughly as this one. Not only is dark mocha ganache spread between 15+ crepe layers, each slice of this cake is served with a generous pouring of chocolate liqueur sauce.

A rich and decadent chocolate treat worthy of closing out a chocolate series? Check! Thanks for joining me on this ride -- I sure hope you had as much fun as I did! If you missed any of the previous stops, you can still check them out right here: Chocolate Chunk Challah Bread French Toast, Snickers Macarons, Chocolate Cake Roll with Chestnut Cream, and Cherry Pistachio Orange Cocoa Couscous.

Bruléed Mocha Crepe Cake [Printable Recipe]
Adapted from Homelife and The Essence of Chocolate
Serves 8

XIAOLU'S NOTES: The chocolate liqueur recipe obviously makes much more than you need for the crepe cake, but it's so easy to make and so delicious in cocktails or sipped with whipped cream that I'd just go ahead and make the whole batch :).

For crepes
5 large eggs, lightly whisked
1 cup all purpose flour
1 1/2 cups milk
3 Tbsp white sugar [preferably fine/caster]
2 tsp vanilla bean paste OR pure vanilla extract
2 Tbsp melted butter, plus more to grease

For filling and topping
8 oz. dark chocolate, coarsely chopped
3/4 cup light cream
1/3 cup espresso
6 to 8 Tbsp white sugar [preferably fine/caster], divided

For sauce
4 oz. dark chocolate, chopped
3 Tbsp light cream or half and half
3 Tbsp espresso
3 Tbsp chocolate liqueur (Recipe below)
3 Tbsp brown sugar
2 tsp honey (optional)

Blend all the crepe ingredients just until smooth. Set aside for 30 minutes to rest.

Heat an 8-inch non-stick frying pan over medium heat. Brush with melted butter. Pour in enough batter to coat the base of the pan (swirl the pan to coat it evenly with batter immediately). Cook for 1 minute or until lightly golden and just set. Use a spatula to turn and cook for a further 30 seconds or until golden. Transfer to a plate. Repeat with remaining batter, reheating and greasing pan between batches.

To make filling, place chocolate, cream, coffee, and 4 tablespoons of sugar in a heatproof bowl over a small saucepan of simmering water. Use a spatula or heatproof spoon to stir for 5 minutes or until chocolate melts and mixture is smooth. Taste a tiny bit and add up to 2 more tablespoons of sugar if desired. If more sugar was added, heat the mixture until new sugar has dissolved. Remove from heat; cover with plastic wrap. Place in the fridge, stirring occasionally, for 30 minutes or until mixture cools and thickens.

Line a 6 to 7-inch springform pan with plastic wrap. Place a crêpe in the pan. Spread with a little filling. Continue layering with crêpes and filling, finishing with a crêpe. Cover with plastic wrap and place in the fridge until chilled and set (at least 3 hours and up to 1 day).

To make chocolate mocha sauce, combine chocolate, cream, coffee, liqueur, sugar, and honey in a heatproof bowl over a small saucepan of simmering water. Stir for 5 minutes or until sauce is smooth.

Turn the cake out onto a clean serving platter. Sprinkle the top of the cake evenly with the remaining 2 tablespoons of white sugar. Then melt the sugar evenly with a kitchen torch to form a crisp caramel topping. Allow to sit at least 5 minutes before serving. Use a sharp knife to cut into wedges. Place on serving plates and drizzle with hot sauce.

Chocolate Liqueur
Makes 3 1/2 cups

5 Tbsp unsweetened cocoa powder
1 cup boiling water
1 cup sugar
3/4 cup water
1 cup vodka
3/4 cup heavy cream, for optional topping
Cocoa nibs or chocolate shavings, for optional garnish

In a bowl, dissolve cocoa powder in boiling water. In a saucepan, bring sugar and 3/4 cup of water to a simmer, stirring until sugar is dissolved. Add sugar syrup to cocoa syrup. Strain through a fine-mesh sieve into a jar with a lid. Add the vodka, cover and refrigerate overnight. (It will keep up to 1 month, but will lose potency over time.).

If serving on its own, stir well and strain again through a fine-mesh sieve into a glass until 2/3 full. Top with lightly-sweetened whipped cream, or float heavy cream on top (by holding a spoon with the bowl down and the edge almost touching the liqueur in the glass then pouring cream slowly over the back of the spoon until a layer (1/8 to 1/4-inch deep) floats on top of the liqueur). Garnish with cocoa nibs or chocolate shavings.

Monday, June 27, 2011

6 Bittersweets Turns 2! (Raspberry Tres Leches Cake and Mango Mascarpone Macarons)

I can hardly believe it, but it's been 2 years to the day since I made my first food blog post. 174 posts later, my passion for cooking, blogging, and photography continues to grow with no bounds in sight. Equally important is that I've been able to connect with hundreds of incredible people (you!), without whose support this fledgling blog would have faded into oblivion long ago. In fact, you guys gave me an amazing 26th birthday gift last week of seeing my subscriber count surpass 1,500! Almost a week later I'm still pinching myself to confirm if it's real. Thank you, thank you, THANK YOU to all my readers old and new!

Raspberry Tres Leches Birthday Cake
I've never been one to make much ado over my birthday, but I do like to gather friends around for a fun and relaxing evening. Plus, any opportunity to bake a celebration cake is not to be missed...especially on the one day of the year when I have full control over the menu (mwahaha! ^_^). And what a menu it turned out to be! P and I prepared the main dishes and desserts, while friends contributed the rest. Not having set a theme for the meal, we got quite an eclectic mix of dishes but all so yummy that I wouldn't have done it any other way.

For the curious among you, here's what we ate: Spinach Salad with Strawberries and Candied Pecans (even better with mandarin oranges instead of strawberries), Baked Pizza Dip, Grilled Chicken Yakitori Skewers, Spicy Sriracha-Grilled Tofu, Otsu Sesame Noodle Salad with Grilled Eggplant, Mapo Tofu, and Dirty Rice from Bojangles (yes, very random). As scrumptious as all that was, my favorite part of the meal was its sweet ending.

As a kid I hated having a summer birthday because all my school friends would be on family vacations by the time I threw my party. Now that I'm all grown up, I've done quite the 180°, delighting in all the fresh fruits and veggies available this time of year. Nothing speaks summer! louder to me than fresh fruit and cream. As proof you can find my previous iterations of this divine combination here, here, and here.

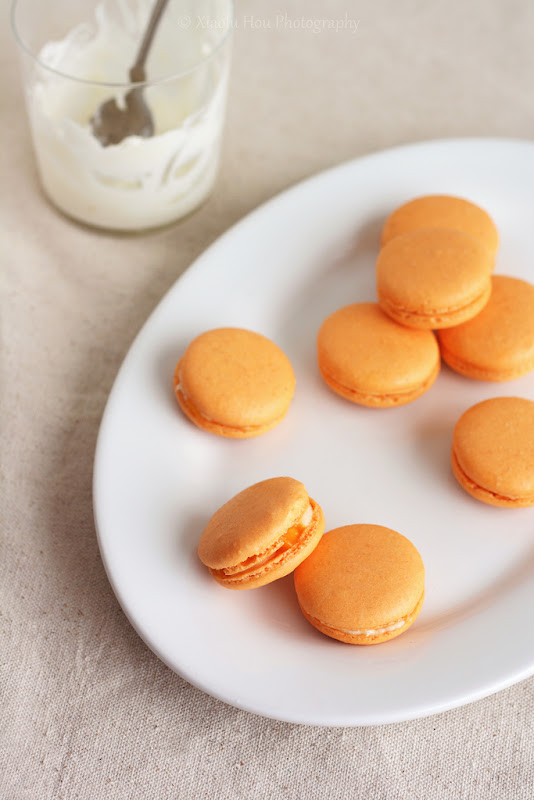
Mango Mascarpone Macarons
To mix it up this year, I expanded on the "cream" portion with not only heavy cream but a trifecta of cream, sweetened condensed milk, and caramelized cinnamon evaporated milk in this irresistable Tres Leches Cake. The filling of sugared raspberries is a fresh twist on the Spanish classic, adding just the right amount of tartness to counter the sweet n' creamy sauce.

Knowing certain guests didn't fancy raspberries, I made a second dessert of Mango Mascarpone-Filled Macarons. This was my first time filling macarons with mascarpone and I must say I love it! Not only did it taste fantastic but it was fantastically easy to prepare: just whisk with fork...no mixer required! When you then add in a topping of juicy, ripe diced mangoes, how could it not be good? And as far as I'm concerned, it was ALL good: the food, the company, the beginning of my 27th year of life... Thank you, my lovely readers, for adding to the wonder of it all!

P.S. - I'm submitting these macarons to this month's MacTweets challenge: Fruit!

Tres Leches Cake with Raspberries
[Printable Recipe]
Adapted from Sunset
Makes 10 to 12 servings

XIAOLU'S NOTES: Evaporated goat milk (Meyenberg is a popular brand) is sold in many grocery stores. I couldn't find it in mine, however, so I substituted regular evaporated milk and the cake was still fabulous. Look in the baking aisle, near the condensed milk. The cake and tres leches sauce (prepare while cake bakes) can both be made a day ahead; reheat tres leches sauce before drizzling over cake. You can chill the completed cake for up to 3 days (garnish with raspberries just before serving).

Cake
1 1/3 cups all purpose flour [stirred, spooned, and leveled to measure]
1 tsp baking powder
1/4 tsp salt
6 large eggs
1 cup granulated sugar
6 Tbsp (3/4 stick) unsalted butter, melted

Tres Leches Sauce
1 can (12 oz.) evaporated goat milk (see Notes)
1/4 cup sugar
1 stick cinnamon (about 2 inches)
1/8 tsp baking soda MIXED WITH 2 tsp water
2/3 cup canned sweetened condensed milk
1 1/4 cups light cream
2 Tbsp rum [optional]

Filling and Frosting
2 cups fresh raspberries, divided
1 1/2 Tbsp granulated sugar
2 cups whipping cream
2 tsp pure vanilla extract
6 Tbsp powdered sugar, sifted

Preheat oven to 350 degrees F; position rack in center of oven. Cut a large parchment circle about 13 inches in diameter and place it atop the base of a 9-inch springform cake pan (at least 2 inches deep). Place the pan's rim back on top of the base and lock it in, securing the edges of the parchment paper. Now butter and flour the bottom and sides of the pan, and set aside.

For cake: Sift flour, baking powder, and salt together; set aside. Select a large stainless steel bowl (at least 10-cup capacity) that can nest comfortably in a large pot. Fill pot halfway with water and bring to a boil over high heat, then reduce heat to a gentle simmer. In bowl, combine eggs and sugar. Set bowl over water; with a handheld mixer, beat eggs and sugar at high speed until pale and thick enough to fall from a spoon in a wide ribbon, about 10 minutes. [If you have a stand mixer but no handheld, combine eggs and sugar in your metal mixer bowl. Set bowl over water, and whisk continuously by hand until the mixture is very warm and foamy. Then remove the bowl from heat and attach it to your stand mixer. Mix until pale and thick enough to fall from a spoon in a wide ribbon, about 10 minutes.]

Remove bowl from heat. Add sifted flour mixture to egg mixture and immediately fold in gently but quickly. Add melted butter and fold in gently until no streaks remain. Scrape batter into prepared pan. Bake on center rack until cake is evenly browned, just begins to pull from pan sides, and springs back when lightly touched in the center, about 35 to 40 minutes. Set pan on a cooling rack and let cool 5 minutes. Run a thin knife between pan and rim. Remove rim and let cake cool completely.

For tres leches sauce: In a large pot (at least 6-qt. capacity) over high heat, combine goat milk, sugar, and cinnamon stick. Bring mixture to a boil. Stir in baking soda mixture (sauce will foam up) and reduce heat to medium. Simmer, stirring occasionally, until sauce turns a caramel color and reduces to 3/4 cup, 10 to 12 minutes.

Remove sauce from heat; discard cinnamon stick, and stir in condensed milk, whipping cream, and rum. Use warm.

With a long, serrated knife, cut cake in half horizontally. Lift off cake top and set, cut side down, on a flat plate.

Transfer cake bottom off the pan base onto a cake stand or other serving platter. Poke cake bottom all over with a toothpick, being careful not to poke all the way through. Slowly spoon enough warm tres leches sauce (slightly less than 1 cup) over cake bottom to saturate well but not cause it to ooze. Let stand until cool, about 10 minutes.

For filling: Reserve 1/2 cup of raspberries to go on top of the cake, then put remaining fruit in a bowl and mix gently with granulated sugar. Set aside. In a chilled bowl, use a mixer to whip cream until it holds medium stiff peaks and is thick enough to spread. Add vanilla and powdered sugar; mix well.

Scoop about 1 2/3 cups whipped cream onto cake bottom and spread evenly, leaving a 1/2-inch border around the edge. Dot with sugared raspberries, pushing them down into cream. Carefully transfer the cake top, cut side down, onto the base and make sure they are aligned. Poke top all over with a toothpick as before, then slowly spoon slightly less than 1 cup of sauce evenly over cake top to saturate.

Now smoothly frost top and sides of cake with remaining whipped cream, then use a clean towel to wipe any stray frosting or sauce from around the base. Cover cake without touching (invert a large bowl over it) and chill at least 2 hours. Cover and chill reserved raspberries if held longer than 2 hours. Cover and chill remaining tres leches sauce.

Uncover cake and decorate with reserved raspberries. Serve with remaining tres leches sauce.

Mango Mascarpone Macarons [Printable Recipe]
Makes about 25 to 30 macarons

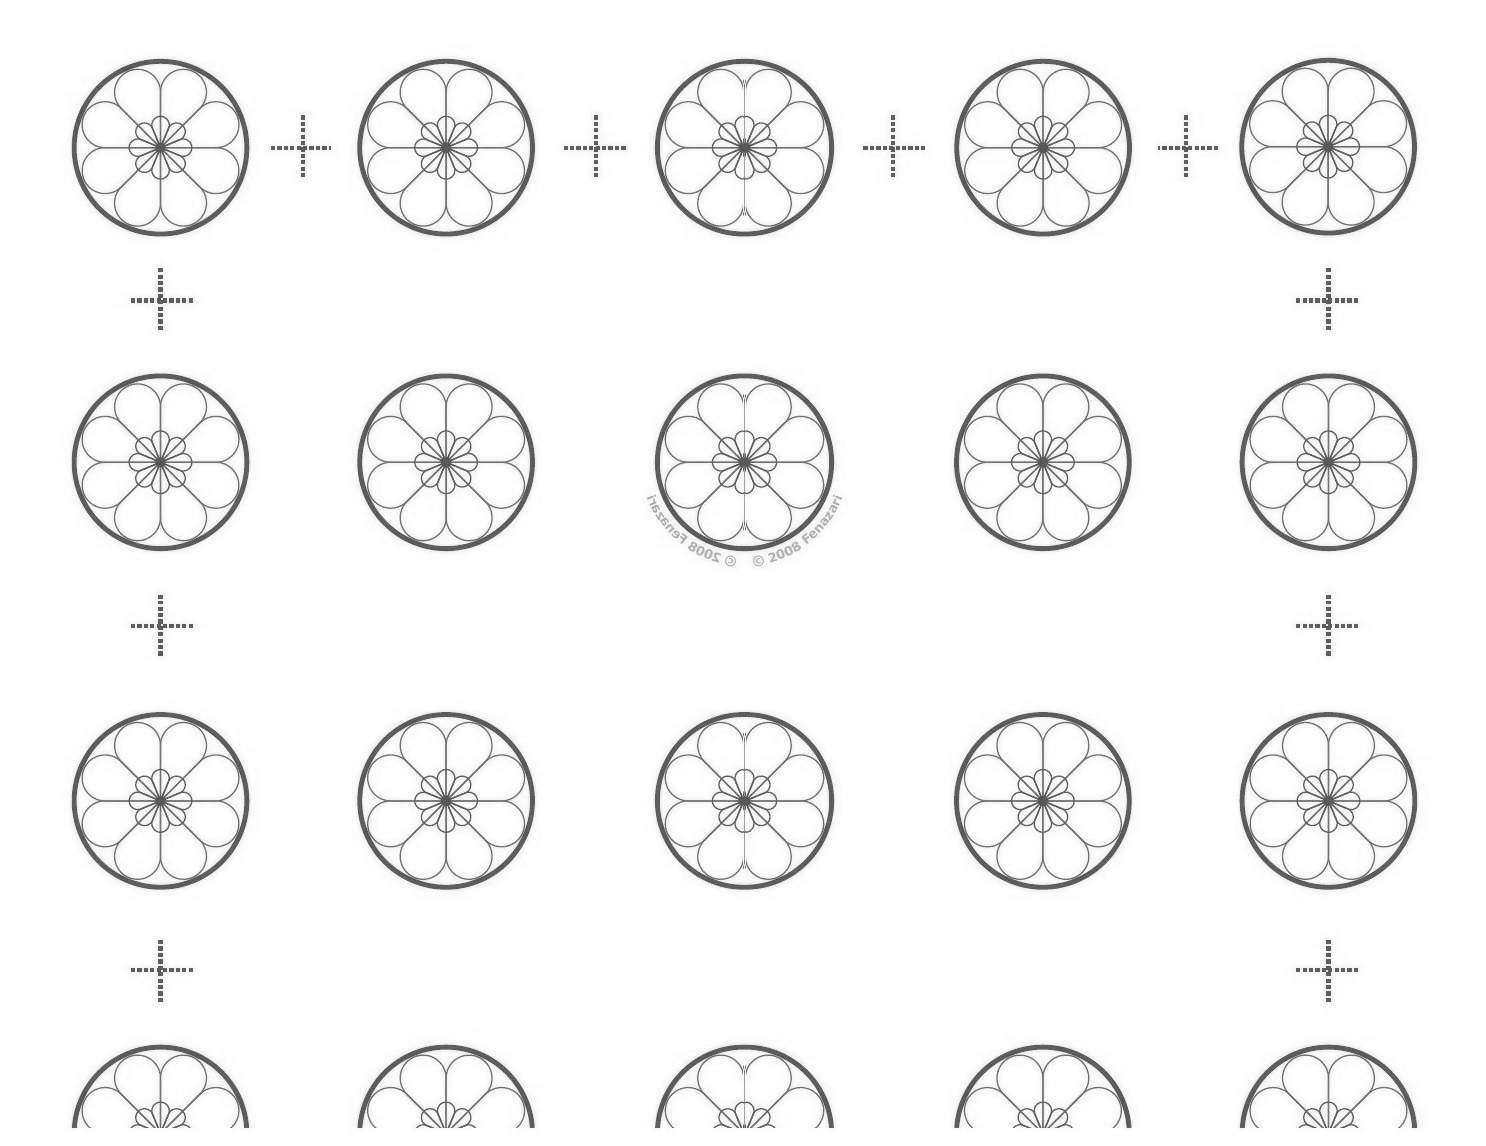
XIAOLU'S NOTES: Please do not try to convert this recipe to volume measurements if you don't have a scale (I use and love this one). This recipe is very sensitive and will not work if the measurements are not exact. Please also note that every oven is different and you'll figure out what works best for yours over time (see this post for great information on ovens and macarons). Since mine has major hot spots, I bake on 2 stacked pans for insulation if using parchment paper. If you're uncertain of your ability to pipe uniformly-sized macarons, like me, simply trace 1 1/4-inch circles on your parchment paper, flip the paper over, and pipe on the other side, using the outlines as your guide OR print (choose "fit to page") and slide this template under your parchment as a guide but don't forget to remove before baking! See my first macaron post for helpful videos of the whole macaron-making process!

125 g almonds [not roasted or salted]
170 g powdered sugar
1/4 tsp amchoor (Indian dried green mango) powder [optional]
Large pinch of salt
35 g granulated sugar
2 g egg white powder [optional, to stabilize batter in humid weather]
Splash of white or cider vinegar [to clean utensils/stabilize meringue]
90 to 95 g egg whites [about 3 large egg whites]
Orange food coloring (powder or gel) [optional]

5 oz. mascarpone cheese, cool room temperature
1 Tbsp heavy cream
2 Tbsp powdered sugar, sifted
1/2 cup finely diced ripe mangoes

Microwave fresh egg whites 10 to 15 seconds in the microwave on medium-low heat (I set my microwave to 40%).

Combine the almonds, powdered sugar, mango powder, and salt in a food processor, and pulse on and off until the nuts are finely ground (about 1 to 2 minutes). Sift the powder to remove any large chunks that remain. Put those chunks back into the food processor and pulse again for another 30 to 60 seconds. Sift again. You will probably have some slightly chunkier almond bits. Hopefully they're no more than a tablespoon or so, in which case you can throw them out.

Weigh out and mix your granulated sugar and egg white powder in a small bowl until uniform; set aside. Add splash of vinegar then a splash of water to the bowl that will be used for whipping the egg whites. Swirl liquid around the bowl, then use a clean paper towel to wipe the bowl dry. Use the same paper towel to wipe down your beaters. Now using a handheld or stand mixer, whip the egg whites on medium-low speed until foamy, then turn the speed up to medium to medium-high and gradually add the sugar mixture. Now add orange food coloring, if using, until the desired shade is reached (color will lighten once fully whipped). Continue whipping until you obtain a glossy meringue (it'll look like shaving cream, hold stiff peaks, and stay in place if you turn the bowl upside-down; but don't overbeat your meringue or it will be too dry).

Add all of the nut mixture to the meringue and fold together. Use both a folding motion that scrapes the bottom of the bowl (to incorporate the dry ingredients) and a gentle pressing motion, to deflate the meringue against the side of the bowl. Slow down after all the dry ingredients have been incorporated, and continue folding the mass carefully until you obtain a batter that looks somewhat glossy and flows from the spatula in a thick ribbon. Test the batter by spooning a small amount of the batter on a plate: if the top flattens on its own within about 20 seconds, it’s ready to pipe. If there is a small peak, give the batter 2 to 3 more folds and test again. The peak shouldn’t disappear immediately either or it’s already overmixed.

Fill a pastry bag fitted with a 1/3 to 1/2-inch wide plain tip (I like Ateco #805 or 806) with half of the batter. (When your bag is too full, the pressure causes the batter to rush out in a way that’s difficult to control, making for sloppy macarons.) Pipe tiny blobs of batter onto the 4 corners and center of 2 baking sheets, then line baking sheets with parchment paper OR line with silicone mats. Pipe small rounds (slightly larger than 1 inch wide) straight down and about 1 inch apart onto the baking sheets. Pick up each sheet with both hands and slam it firmly straight downward on the counter 2 to 3 times. This will to force out any large air bubbles. Immediately pop any bubbles that rise up but don't break with a toothpick. Do NOT do this once a few minutes have passed because you'll mess up the shell that's forming.

Preheat the oven to 285 to 300 degrees F. Let the macarons sit out for 25 to 90 minutes to harden their shells a bit (to prevent tops from cracking during baking). Test if they're ready by touching the top and side of one shell lightly. It should feel dry and not stick to your finger at all. Bake one pan at a time for 15 to 25 minutes, depending on the size of the macarons. After the first 10 minutes of baking, rotate the pan and place a large piece of foil loosely over the macarons to prevent browning (If I’m baking on 2 stacked pans, I also remove the bottom pan at this point to make sure the macarons will be completely cooked on the bottom and not sticky). Let cool completely before trying to move the shells.

Once cool, remove the shells from the silicone mat or parchment and flip them over. If you have trouble removing them, freeze the macarons for about 10 minutes, then quickly peel them off before they have a chance to warm up and get sticky again.

To prepare the filling, combine the mascarpone, powdered sugar, and heavy cream and mix well. To fill, spoon or pipe about 1 teaspoon of mascarpone mixture onto half the macaron shells, sprinkle with diced mangos, then top with a similarly-sized top shell. For the best flavor and texture, store in the refrigerator for at least 1 hour before eating so flavors are allowed to mature, but they are best if eaten within 2 days. Bring to cool room temperature before eating.

Wednesday, June 1, 2011

A Lotta Chocolate Part 3: Chocolate Cake Roll with Chestnut Cream

Chestnut Chocolate Sponge Cake Roll
Today I'm delighted to inform you that the 3rd post in my chocolate series will be on my dear friend Sala's blog, Veggie Belly. You may remember her as one of the gracious judges of the March 2011 DMBLGIT blog photography contest which I hosted. We live quite close to each other so we've also become good friends in person and not just online. Thus for once I was actually able to present the cake in my guest post for her to taste. Please hop over to her site for her reaction and my post. You can also go straight to the printable recipe here. Thanks for this wonderful opportunity, Sala!

Chestnut Chocolate Sponge Cake Roll Slice

Friday, May 6, 2011

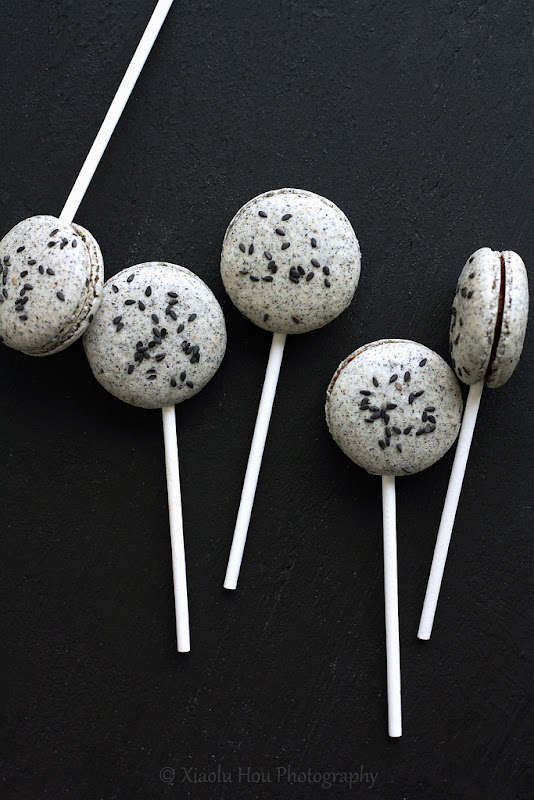
You Might Call Me Hooked... (Black Sesame Macaron Pops with Mochi Filling)

Black Sesame Macaron Ingredients
I think anyone who knows me well would tell you that I have what some would call an "addictive personality." No, thankfully I don't mean any illegal substances or alcohol! But I can become intensely interested (let's not use the O-word here...;p) with things very quickly and often develop an unlimited capacity to read or watch about that thing. For example, my boyfriend P will often walk in on me completely engrossed in a TV show and ask what it is. My reply? "Oh I'm not sure I just came across it 5 minutes ago," which of course leaves him totally perplexed. Or in middle school when I discovered that the huge company Proctor & Gamble made so many of our household products, I became so curious in them that I read a 300+ page book about the history of the company.

But anyway, the real point here is that no one should be surprised that after finally baking my first successful macarons, I caught the Mac Bug bigtime ^_^. Both before and after that batch, I've poured over countless tutorials from fellow bloggers, YouTube videos, and basically any piece of helpful information on the process that I could get my hungry eyes and greedy hands on hehe. But as I learned in my previous attempts, there's no education like rolling up your sleeves and getting in the kitchen. Especially after I remembered the black sesame seeds still stashed in my freezer, it didn't take long for another mac creation to materialize.

Black Sesame Macarons with Chocolate Mochi Fillings
Since I already gushed over the addictive flavor and health benefits of black sesame in my black sesame matcha cupcake post, I'll spare you this time and just send you over there for the details. It delights me that the sesame in these macarons is impossible to miss with respect to appearance, flavor, and fragrance -- as it should be! Still, I couldn't help adding a bit of sesame powder to even the chocolate filling for a double dose of deliciousness (even if it upset the Chinese traditionalist in me just a tad ;p). Finally I had one more Asian twist up my sleeve: a chewy mochi center!

This unusual mix of French and Asian flavors, of crisp, moist, and chewy textures was definitely a risk for me. Especially for what was only my second date with lovely Mr. Macaron, but it definitely paid off! These have been a real hit with my friends, both Chinese and not. Some found them so addictive that my pleas to wait 24 hours before eating them were beyond futile. But that's really not something to complain about =D!

Black Sesame Macarons Bitten
Lastly, many of you left comments to my Snickers Macarons post saying you were still afraid to try these persnickety French treats (I may be paraphrasing haha). I just want to encourage you all to just take the leap! I was just like you for years, thinking that if I just read another post or watched another video I'd finally be ready. But honestly you just have to jump in and do it, and it's not nearly as scary as you think. Yes, there will be imperfect batches (or you may be one of those lucky people who get it on the first try!) but they will still be delicious and impress your friend I promise. In fact I actually underbaked this batch a smidge and got shorter "feet" than I'd have liked, but now I see it as a valuable lesson and look forward to improving the next batch! I hope more of you will join me in my macaron explorations and can't wait to hear about your successes!

Black Sesame Macaron Pops with Mochi Filling and Ganache
[Printable Recipe]
Fillings adapted from Bonbini and Evan’s Kitchen Ramblings
Makes about 25 to 35 macarons

XIAOLU'S NOTES: Please do not try to convert this recipe to volume measurements if you don't have a scale (I use and love this one). This recipe is very sensitive and will not work if the measurements are not exact. Please also note that every oven is different and you'll figure out what works best for yours over time. Since mine has major hot spots, I bake on 2 stacked pans for insulation (see this post for great information on ovens and macarons). If you're uncertain of your ability to pipe uniformly-sized macarons, like me, simply trace 1 1/4-inch circles on your parchment paper, flip the paper over, and pipe on the other side, using the outlines as your guide OR print (choose "fit to page") and slide this template under your parchment as a guide but don't forget to remove before baking! Macarons are best after having been refrigerated for 24 to 48 hours, according to French pastry master, Pierre Herme, "An osmosis takes place between the garnish and the biscuit. When freshly baked this is hard and crisp, but it absorbs some humidity from the filling and its inside becomes more tender while the crust on the surface stays intact" (quote via Not So Humble Pie). So even if you accidentally overbake the shells by a few minutes, maturing the macarons in the fridge for at least 48 hours should undo most of the damage =). See my first macaron post for helpful videos of the whole macaron-making process!

85 g almonds [not roasted or salted]
40 g black sesame seeds
145 g powdered sugar
Pinch of salt
40 g granulated sugar
3 g egg white powder [optional, to stabilize batter in humid weather]
95 to 100 g egg whites [about 3 large egg whites]
1/8 tsp cream of tartar or 1/4 tsp lemon juice [optional, to stabilize meringue]

1/2 cup Black Sesame Ganache (Recipe below)
25 to 35 Pieces of Mochi Filling (Recipe below)
25 to 35 4-inch lollipop sticks

Microwave fresh egg whites 10 to 15 seconds in the microwave on medium heat.

Combine the almonds, sesame seeds, powdered sugar, and salt in a food processor, and pulse on and off until the nuts are finely ground (about 1 to 2 minutes). Sift the powder to remove any large chunks that remain. Put those chunks back into the food processor and pulse again for another 30 to 60 seconds. Sift again. You will probably have some slightly chunkier almond bits. Hopefully they're no more than a tablespoon or so, in which case you can throw them out.

Weigh out and mix your granulated sugar and egg white powder in a small bowl until uniform; set aside. Using a handheld or stand mixer, whip the egg whites on medium-low speed with cream of tartar until foamy, then turn the speed up to medium to medium-high and gradually add the sugar mixture until you obtain a glossy meringue (it'll look like shaving cream, hold stiff peaks, and stay in place if you turn the bowl upside-down; but don't overbeat your meringue or it will be too dry).

Add all of the nut mixture to the meringue and fold together. Use both a folding motion that scrapes the bottom of the bowl (to incorporate the dry ingredients) and a gentle pressing motion, to deflate the meringue against the side of the bowl. Slow down after all the dry ingredients have been incorporated, and continue folding the mass carefully until you obtain a batter that looks somewhat glossy and flows from the spatula in a thick ribbon. Test the batter by spooning a small amount of the batter up, then dropping it back down on itself. If it melts back into the rest of the batter within 30 seconds, it's ready for piping (this page has a nice photo of this test). If not, fold 2 more strokes and test again.

Fill a pastry bag fitted with a 1/3 to 1/2-inch wide plain tip (I like Ateco #804 or 806) with half of the batter. (When your bag is too full, the pressure causes the batter to rush out in a way that’s difficult to control, making for sloppy macarons.) Pipe tiny blobs of batter onto the 4 corners and center of 2 baking sheets, then line baking sheets with parchment paper OR line with silicone mats. Pipe small rounds (slightly larger than 1 inch wide) straight down and about 1 inch apart onto the baking sheets. Pick up each sheet with both hands and slam it firmly straight downward on the counter 2 to 3 times. This will to force out any large air bubbles. Immediately pop any bubbles that rise up but don't break with a toothpick. Do NOT do this once a few minutes have passed because you'll mess up the shell that's forming.

Preheat the oven to 320 degrees F. Let the macarons sit out for 25 to 90 minutes to harden their shells a bit (to prevent tops from cracking during baking). Test if they're ready by touching the top and side of one shell lightly. It should feel dry and not stick to your finger at all. Bake one pan at a time for 5 minutes in the middle shelf of your oven. Now lower the temperature to 300 degrees F and continue baking another 10 to 15 minutes, depending on the size of the macarons. Turn oven back up to 320 degrees F and let it come to temperature again before baking the next batch. Let cool completely before trying to move the shells.

Once cool, flip the shells over. If you have trouble removing them from parchment paper, pour a couple of drops of water under the paper while the sheet is still a bit warm, and the macarons will lift up more easily due to the moisture. Don't let them sit there in it too long or they will become soggy.

Fill the shells (spooning or piping) with 1 teaspoon of ganache, top with a mochi round, add another small dollop of ganache (just enough to cover the mochi because the macaron shell will cause the mochi to dry and harden if they touch directly), and a similarly-sized top shell. For the best flavor and texture, store in the refrigerator for 24 to 48 hours before eating (see notes above for detailed explanation) but they are best if eaten within 5 days. Bring to room temperature before eating.

Black Sesame Ganache
1/3 cup heavy cream
3 oz. semisweet chocolate, roughly chopped
2 tsp honey or light corn syrup
1 Tbsp ground black sesame powder
Pinch of salt

In a small saucepan over medium high heat, bring the cream to a boil. Meanwhile, place chopped chocolate into a small heatproof bowl. Remove cream from heat, pour over chocolate and let stand 5 minutes. Add honey or corn syrup, sesame powder, and salt, then stir everything together until smooth. Set aside until it cools down and thickens a bit (chilling in the fridge or freezer is fine).

Mochi Filling
2/3 cup glutinous rice flour [like Mochiko brand]
Slightly rounded 1/3 cup powdered sugar
2/3 cup PLUS 2 Tbsp water, divided
Cornstarch, for dusting

Put water and 1/4 cup powdered sugar in a microwave-safe bowl and mix well until sugar has dissolved. Add glutinous rice flour to the bowl and mix well until uniform. Put the bowl in the microwave and heat the dough on high heat for 2 minutes. Stir. If the dough pulls away from the side of the bowl, add the remaining 2 tablespoons of water until combined. If not, return bowl to the microwave and heat in 20-second intervals until the dough pulls away from the sides of the bowl, then mix with the remaining water.

Dust a flat pan and your hands with cornstarch. Carefully transfer the hot mochi from the bowl to the pan. Let cool slightly until you can handle the mochi with your hands. Keep your hands well dusted in cornstarch. Cut small pieces of mochi and roll them in your hands so that you end up with about 25 to 35 fairly flat 3/4-inch rounds.

Thursday, April 28, 2011

A Lotta Chocolate Part 2: Snickers Macarons

Not sure how many of you follow me on Twitter, but I've been yappin' about macarons a lot lately and posted this teaser image for a future post last week. Little did I know at the time, but successful macarons would elude me for over a week. So those of you who saw that image had plenty o' time to figure it out! If you put 2 and 2 together and guessed my next post would be Snickers macarons, you get brownie points from me today! =D

5th Time's The Charm!
Similar to my first successful souffles, which took me 5 attempts to attain, the 5th time was the charm for my triumph over macarons (Here's some evidence of my failed attempts...I really hope this doesn't become a pattern!). And I must divide credit among my Twitter friends Stella of Bravetart, Kaitlin of Whisk Kid, Josie of Daydreamer Desserts, Steph of Desserts for Breakfast, Mardi of eat.live.travel.write., and of course the Macaron Queen herself, Helene of Tartelette for their invaluable advice helping me to troubleshoot each failed batch until I got it right this morning. Thank you so much, ladies!

While you probably expect I got frustrated with all these failures (and I did at times), I actually got very invigorated by the learning process. The aggravating yet oddly fun thing about macarons is that there are so many ways to go wrong 8). When each batch came out with a new set of problems, (after the initial wailing) it was fun to play detective, teasing out causes to each symptom. I learned a lot, the most important being that 3 factors really make or break French macarons: properly whipping up the egg whites to stiff peaks, knowing when to stop mixing the batter, and knowing your oven (especially any major hot/cold spots). Each of my failed attempts resulted directly from a failure to do one of the above, and once I figured them out I got the results I wanted. On the flip side, humidity and heat are NOT the great saboteurs of macaron success you've heard them to be. It was warm and humid (rainy with no AC!) all 5 times I baked them but hottest and wettest on the day I succeeded 8).

Snickers Macaron Closeup
If you'll remember, this is the second in a series of chocolate posts that began with my chocolate chunk challah french toast. Plus I'm submitting these to this month's MacTweets challenge: "Decadently Chocolate." Macarons may not be such an unusual way to feature chocolate, but Tartelette's idea to transform a common candy bar into a fancy macaron drew my curiosity enough to warrant a try (or 5 in this case =p). And in the end, I was very impressed. These adorable treats combine the best of both worlds: the classic taste of Snickers bars with the delicate texture and portion-control (ha!) of macarons. Do you love chocolate, Snickers, and/or macarons? If the answer is yes, I really recommend you try these soon!

Now I've probably scared you with all this talk of failed macarons and the recipe below will look impossibly long at first glance, but please rest assured that it's really not so hard. Macaron-making is simply a process that requires hands-on familiarity to perfect, and if you focus on the 3 key things I listed above, you'll have it down in no time. To give you a head's start, I've included some helpful videos below (not my own!) and lots of useful tips in the body of the recipe (which is why it's so long!). Once you've run through the process once or twice, you won't even look at directions anymore 'cause it'll be second nature. And if you learn anything from my experience, I hope it's to try try and try again! While I'm a beginner myself, I'd be happy to answer any macaron questions you may have via Twitter or email.

P.S. - If anyone's interested in this banner, you can print it on PDF HERE, preferably in color on card stock paper.
Simply cut it out and glue/tape it to some wood skewers. Enjoy!


Snickers Chocolate Peanut Caramel Macarons [Printable Recipe]
Adapted from Tartelette, Daydreamer Desserts, and Not So Humble Pie (a great macaron troubleshooting post)
Makes about 25 to 35 macarons

XIAOLU'S NOTES: Please do not try to convert this recipe to volume measurements if you don't have a scale (I use and love this one). This recipe is very sensitive and will not work if the measurements are not exact. Please also note that every oven is different and you'll figure out what works best for yours over time. Since mine has major hot spots, I bake on 2 stacked pans for insulation. If you're uncertain of your ability to pipe uniformly-sized macarons, like me, simply trace 1 1/4-inch circles on your parchment paper, flip the paper over, and pipe on the other side, using the outlines as your guide OR print (choose "fit to page") and slide this template under your parchment as a guide but don't forget to remove before baking! Macarons are best after having been refrigerated for 24 to 48 hours, according to French pastry master, Pierre Herme, "An osmosis takes place between the garnish and the biscuit. When freshly baked this is hard and crisp, but it absorbs some humidity from the filling and its inside becomes more tender while the crust on the surface stays intact" (quote via Not So Humble Pie). So even if you accidentally overbake the shells by a few minutes, maturing the macarons in the fridge for at least 48 hours should undo most of the damage =).

65 g almonds [not roasted or salted]
60 g peanuts [not salted]
15 g cocoa powder
160 g powdered sugar
Pinch of salt
55 g granulated sugar
2 g egg white powder [optional, to stabilize batter in humid weather]
100 g egg whites [about 3 large egg whites]
1/8 tsp cream of tartar or 1/4 tsp lemon juice [optional, to stabilize meringue]

Milk Chocolate Ganache (Recipe below)
Marshmallow Peanut "Nougat" (Recipe below)
About 1/3 cup caramel sauce OR dulce de leche (Recipe below)
About 25 to 35 peanut halves

Separate your eggs 2 to 5 days before, and store the whites in a covered container in the fridge. Bring the egg whites to room temperature before proceeding with the recipe. OR just microwave fresh egg whites 10 to 15 seconds in the microwave on medium heat.

Combine the almonds, peanuts, cocoa powder, powdered sugar, and salt in a food processor, and pulse on and off until the nuts are finely ground (about 1 to 2 minutes). Sift the powder to remove any large chunks that remain. Put those chunks back into the food processor and pulse again for another 30 to 60 seconds. Sift again. You will probably have some slightly chunkier almond bits. Hopefully they're no more than a tablespoon or so, in which case you can throw them out.

Weigh out and mix your granulated sugar and egg white powder in a small bowl until uniform; set aside. Using a handheld or stand mixer, whip the egg whites on medium-low speed with cream of tartar until foamy, then turn the speed up to medium to medium-high and gradually add the sugar mixture until you obtain a glossy meringue (it'll look like shaving cream, hold stiff peaks, and stay in place if you turn the bowl upside-down; don't overbeat your meringue or it will be too dry).

Add all of the nut mixture to the meringue, and fold in. Use both a folding motion that scrapes the bottom of the bowl (to incorporate the dry ingredients) and a gentle pressing motion, to deflate the meringue against the side of the bowl. Slow down after about 25 strokes, and fold the mass carefully until you obtain a batter that flows like magma or a thick ribbon. The whole process should not take more than 50 strokes. Test the batter by spooning a small amount of the batter up, then dropping it back down on itself. If it melts back into the rest of the batter within 30 seconds, it's ready for piping (this page has great photos of this test). If not, fold 2 more strokes and test again.

Fill a pastry bag fitted with a 1/3 to 1/2-inch wide plain tip (I like Ateco #804 or 806) with half of the batter. (When your bag is too full, the pressure causes the batter to rush out in a way that’s difficult to control, making for sloppy macarons.) Pipe tiny blobs of batter onto the 4 corners and center of 2 baking sheets, then line baking sheets with parchment paper OR line with silicone mats. Pipe small rounds (slightly larger than 1 inch wide) straight down and about 1 inch apart onto the baking sheets. Pick up each sheet with both hands and slam it firmly straight downward on the counter 2 to 3 times. This will to force out any large air bubbles. Immediately pop any bubbles that rise up but don't break with a toothpick. Do NOT do this once a few minutes have passed because you'll mess up the shell that's forming.

Preheat the oven to 275 to 300 degrees F. Let the macarons sit out for 25 to 60 minutes to harden their shells a bit (to prevent tops from cracking during baking). Test if they're ready by touching the top and side of one shell lightly. It should feel dry and not stick to your finger at all. Bake one pan at a time for 15 to 20 minutes in the middle shelf of your oven, depending on the size of the macarons. Let cool for 15 to 30 minutes before trying to move the shells.

Once cool, flip the shells over. If you have trouble removing them from parchment paper, pour a couple of drops of water under the paper while the sheet is still a bit warm, and the macarons will lift up more easily due to the moisture. Don't let them sit there in it too long or they will become soggy.

Fill the shells with 1/2 to 1 teaspoon of ganache, then 1/2 to 1 teaspoon of caramel sauce, top with a peanut, a 3/4-inch circle of flattened marshmallow nougat, and a similarly-sized top shell. For the best flavor and texture, store in the refrigerator for 24 to 48 hours before eating (see notes above for detailed explanation) but they are best if eaten within 5 days. Bring to room temperature before eating.

Milk Chocolate Ganache
3 oz. milk chocolate, roughly chopped
4 Tbsp heavy cream

In a small saucepan over medium high heat, bring the cream to a boil. Remove from heat, drop in the milk chocolate and let stand 5 minutes. Stir the chocolate into the cream until smooth. Set aside until it cools down and thickens a bit (chilling in the fridge or freezer is fine).

Marshmallow Peanut "Nougat"
3/4 cup marshmallows
2 Tbsp smooth peanut butter

In a heavy saucepan over medium low heat, melt marshmallows and peanut butter until smooth. Let cool. Once cooled you will be able to pull the "nougat" and from the saucepan and cut pieces to flatten in the palm of your hands and sandwich within the macarons.

Dulce de Leche
Adapted from Cooking for Engineers
Makes about 1 3/4 cups

14-oz. can sweetened condensed milk (NOT evaporated milk)
Heavy cream, as needed

MICROWAVE METHOD:
Pour into large (preferably 2 1/2-qt. capacity) microwave-safe bowl. Heat on medium for 2 minutes. Whisk and repeat until appears curdled (around 7 to 10 minutes total, depending on your microwave oven). To use as a caramel sauce, simply stop heating at this point and stir the dulce de leche until smooth. For a thicker candy-like caramel, continue heating for another 2 minutes or so and stir until smooth again while still hot.

PRESSURE COOKER METHOD:
Peel the label off the can of sweetened condensed milk. Put it in a pressure cooker with enough water to come 2/3 up the can. Do NOT open the cans at all. The can won't explode because the pressure cooker equalizes the pressure, but please still proceed with caution and follow the manufacturer's directions for operating the pressure cooker safely! Close the pressure cooker, and bring it up to full pressure. Turn the heat down to maintain the pressure for 20 (lighter) to 30 (darker and thicker) minutes. Turn off the heat and and let the pressure cooker cool slowly. Once the cooker is completely cool, open the lid and remove the can with tongs. Do not open the can while it is still warm. If there’s any pressure left in the can, it could spray and burn you with hot caramel. Wait until the can has completely cooled before opening it. Remove cooled caramel from can. If too thick for your liking, stir in 2 tablespoons of warm heavy cream at a time until desired consistency.

PREVIOUSLY: Chocolate Chunk Challah Bread French Toast

Saturday, March 5, 2011

Ain't So Pretty But Sure Is Tasty (Roasted Vegetable Chorizo Frittata)

After the 2 recent posts about food styling/photography, you all must realize I'm quite devoted to making the food on this blog attractive. After all, we eat with the eyes first, don't we? When I pulled this frittata out of the oven and saw how brown it'd gotten, I knew that task wouldn't be easy this time. Well folks, I made the best of the brown edges and setting sun, but clearly it's far from ideal 8). What I can offer, however, is my guarantee that this frittata will impress you with its ease and yumminess!

Roasted Vegetable Soy Chorizo Frittata

The addition of chorizo sausage (soy in my case) was simply inspired on Donna Hay's part. I loved getting alternating bits of spicy flavorful "meaty" sausage and tender roasted vegetables (both in one bite when I was lucky!). The beets, potatoes, butternut squash, and onion used here are well-suited in taste and seasonality. But that shouldn't stop you from substituting whatever's in season in your part of the world. Please do also play with other herb and spice combinations. Just think of this recipe as a fantastic blueprint from which to build your own favorite frittata.

Now I'd love to know if you make frittata at home. And what are your favorite add-ins? Plus don't forget to enter my giveaway and food blog photography contest if you haven't already!

Roasted Winter Vegetable Chorizo Frittata [Printable Recipe]
Adapted from Donna Hay via The Baking Bird
Serves 4

XIAOLU'S NOTES: The original recipe called for 3/4 cup of heavy cream, half of which I replaced with milk instead. I thought the dish tasted perfect, but feel free to use all cream if you want something richer. On the other hand, if you want to lighten it up a bit, try replacing another 3 tablespoons of cream with milk and/or replacing 1 to 2 whole eggs with 2 egg whites per egg.

3 baby beets OR 1 to 2 regular beets, peeled and sliced
2 small red potatoes, sliced
1/4 medium butternut squash, sliced into 1/6 to 1/4-inch strips
1 small to medium red onion, sliced
1 chorizo sausage, crumbled [I used 1 1/2 vegetarian chorizo sausages]
1 to 2 tsp fresh thyme (optional)
2 Tbsp olive oil
5 large eggs
6 Tbsp milk [whole or lowfat, not skim]
6 Tbsp heavy cream
1/2 cup finely grated parmesan cheese
Sea salt and cracked black pepper, to taste.

Preheat oven to 425 degrees F. Place beets, potato, pumpkin, onion, soyrizo, thyme, and oil in a 9 x 13-inch baking dish (about 2-quart capacity) and toss to combine. Roast for 30 minutes or until vegetables are golden and cooked through.

Place eggs, milk, cream, parmesan, salt and pepper in a bowl and whisk to combine. Pour mixture over the vegetables and return to the oven for another 15 to 20 minutes or until puffed and golden.

Wednesday, February 2, 2011

Orange Passionfruit Curd Mini Tarts (Guest Post on Trissalicious)

Orange Passionfruit Curd Tartlets

Happy Year of the Rabbit! Though it isn't Chinese or even Asian at all, I do have something lovely to share with you today. Trissa of the always beautiful and mouth-watering blog, Trissalicious, has generously invited me to guest post. Please stop by her site to read all about my Orange Passionfruit Tartlets. A fun meeting of tangy and sweet fruits, creamy curd, and crunchy poppy seeds, these are tarts fancy enough for guests or as a special treat for yourself ^_^. You can also go straight to the recipe below. Thanks, Trissa, for sharing your amazing space with me.

Orange Passionfruit Curd Tartlet Closeup
Orange Passionfruit Curd Mini Tarts [Printable Recipe]
Makes six 4-inch mini tarts

XIAOLU'S NOTES: You can use any combination of citrus fruits that you want for the topping, really. I chose navel orange, blood orange, and cara cara oranges. Practically all components of this recipe can be prepared in advance, leaving only minor assembly to be done the day you want to serve the tarts.

Poppy Seed Mini Tart Shells (Recipe Below)
Passionfruit Curd (Recipe Below)
3 assorted citrus fruits, ends and peel sliced off and sectioned

Preheat oven to 300 degrees F (150 degrees C) at least 15 minutes before baking. Smoothly fill the prebaked tart shells with passionfruit curd and bake for 7 to 10 minutes. The filling shouldn't change color and should barely jiggle when the pan is moved. Transfer tarts to a rack to cool.

Once the tarts have completely cooled, transfer to the refrigerator and chill until set (at least 2 hours). Once set, arrange several citrus segments decoratively atop each tart. Then remove tarts from their pans and enjoy!

Poppy Seed Mini Tart Shells
1 1/3 cups (6.5 oz.) bleached all purpose flour
2 1/2 Tbsp sugar
1/3 tsp salt
1 Tbsp poppy seeds
8 Tbsp (1 stick) unsalted butter, cold
2 1/2 to 3 1/2 Tbsp ice water
1 1/2 tsp apple cider vinegar
1 large egg white, lightly beaten

Sift the flour, sugar, and salt into a large bowl, then add poppy seeds and stir until evenly distributed. Cut the butter into small pieces. Mix the butter into the flour by using a pastry scraper to cut in the butter and fully incorporate it into the flour mixture. You can also use your fingers, but if you do you must do it quickly. Once the dough has the texture of fine sand, freeze the bowl for 5 to 10 minutes. Remove from freezer, then create a well in the center. Whisk the water, vinegar, and egg white together in a small bowl, then add to the center of the well (you can do this in batches depending on the size of your well). Slowly incorporate the flour into the center. Once most of the flour has been incorporated you can start using your hands. Knead the dough and form a round ball of dough. At this point, transfer a small handful of the dough to a marble, non-stick silicone, or parchment paper surface and, using the heel of your hand, smear it out completely onto the surface. This process makes sure that the butter is fully incorporated, and helps bring the dough together. Re-form the smeared piece of dough and move it to a far corner of the surface. Repeat with the rest of the dough, then press all the portions of dough into a single disc and wrap twice in plastic wrap. Let rest in the fridge for at least 45 minutes and up to several days.

Remove dough from the refrigerator and let warm to a cool room temperature. Roll dough out to 1/8 to 1/16-inch thickness. Cut out 5 1/2-inch circles of dough and press each of these into a mini tart pan. Prick the bottoms of the dough all over with a fork. Cover and freeze for at least 10 minutes and up to a day before baking.

Preheat your oven to 400 F. Cover tart pans with foil OR parchment paper and weigh down using dry beans or pie weights. Bake for 10 to 12 minutes. Remove from the oven, and remove the beans and parchment. Press down lightly with a spoon on any areas of the crusts that have puffed up while baking. Return to the oven for 5 minutes more or until lightly golden. Remove from oven.

Passionfruit Curd
Makes about 2 cups

2 large eggs
2 large egg yolks
2 1/2 tsp cornstarch, sifted
1 cup sugar
1/2 cup passionfruit puree OR juice from about 6 fruits, divided
1/4 cup freshly squeezed orange juice (from about 1 small orange)
1 1/2 tsp finely grated orange zest
1 1/2 tsp finely grated lemon zest
Pinch of salt
1/2 cup (1 stick) unsalted butter, cut into 1/2-inch cubes
1/4 tsp pure vanilla extract

In a heavy non-reactive saucepan, beat the eggs, yolks, cornstarch, and sugar until well blended. Stir in 7 tablespoons (reserve 1 tablespoon for later) passionfruit puree, orange juice, the zests, and salt. Cook over medium-low heat, stirring constantly and scraping the sides of the pan, until mixture comes to a boil. Let boil 1 to 2 minutes. Mixture will change from translucent to opaque.

Once curd has boiled 1 to 2 minutes, remove from heat and stir in butter and vanilla until smooth. Press curd through a strainer suspended over a medium bowl to remove any potential lumps. Add remaining tablespoon of passionfruit puree to the bowl and stir thoroughly; allow to cool. Curd can be refrigerated in an airtight container for up to 3 weeks.

Saturday, January 29, 2011

Chocolate Nutella Alfajores (Dessert Wars)

UPDATE: The round-up for Dessert Wars: Nuts for Nutella has been posted. Please check out everyone else's delectable creations. I didn't end up winning but did get runner-up =).

When Flickr user Momma Cupcake contacted me recently about her new Dessert Wars contest, I wasn't sure I could fit more baking into this week's busy schedule. That was before I saw the theme (Nutella!) and prizes (details below) though! Needless to say, I crossed the distance from on-the-fence to eagerly-on-board faster than you can say "Nutella-holic." Also with World Nutella Day just a week away, I couldn't help but join in on the fun!

For anyone who's unfortunate enough to have never tried Nutella =p, it's an amazingly rich and creamy chocolate hazelnut spread that's fantastic on everything from crepes to cakes to my fingers. If you're still hungry to learn more, click right here.

Chocolate Nutella "Alfajores"

Readers who're familiar with the alfajores from South America may have already dubbed these cookies a misnomer. And you would be right. These chocolate cookies hardly resemble the tender white biscuits enclosing decadent dulce de leche caramel that we know and love as alfajores. Still this recipe was in fact adapted from one for true alfajores, and thus the title pays homage to that history :).

As much as I adore traditional alfajores, I find this version to be a true treat in its own right. Both crisp and tender, the lightly chocolatey cookies complement the generous smear of Nutella inside. Rolling them through fragrant, lightly roasted crushed hazelnuts makes for enhanced flavor and presentation. If you're looking for a sweet indulgence for World Nutella Day, Valentine's Day, or any other day of the year, I hope your search ends here ;).


I'm submitting this to the Nutella-themed January challenge for Dessert Wars. The winner of this challenge will receive the following prizes:

Thank you to all our prize sponsors!

I'm also submitting this to World Nutella Day, hosted by Sara of Ms Adventures in Italy and Michelle of Bleeding Espresso, which will be on February 5.

Chocolate Nutella Alfajores [Printable Recipe]
Adapted from Aromas Y Sabores
Makes about 3 dozen 1 1/2-inch cookie sandwiches

1 cup all purpose flour
3/4 cup cornstarch
1/4 cup unsweetened cocoa powder
1/8 tsp salt
1 tsp baking powder
7 Tbsp unsalted butter, softened
2/3 cup sugar
1 large egg, room temperature
1 large egg yolk, room temperature
1 tsp pure vanilla extract
1 tsp brandy (optional)

1/2 cup Nutella or other chocolate hazelnut spread
1/2 to 3/4 cup hazelnuts, toasted and finely chopped

Sift together flour, cornstarch, cocoa powder, salt, and baking powder. Set aside.

Using a handheld electric or stand mixer, beat butter and sugar together until light and fluffy. Add whole egg and yolk and beat until incorporated. Add vanilla and brandy and mix well. Finally add the flour mixture and mix by hand using a wooden spoon or spatula until you get a soft dough. Refrigerate for at least 2 hours, preferably overnight.

Preheat the oven to 275 degrees F. Divide dough into 3 equal parts, and work on one at a time while keeping the rest covered. On a floured work surface, roll out dough to desired thickness, between 1/16 and 1/8-inch. Cut into rounds (traditional shape) or whatever shape you choose. Save scraps to re-roll (only once) and use at the end. Transfer to a baking sheet lined with parchment paper or a silicon mat. Bake for 12 to 16 minutes, depending on size of cutter. Cookies should be just cooked but not browned. Repeat rolling, cutting, and baking cookies until all the dough is used up. Let all cookies cool completely.

Transfer chopped hazelnuts into a medium bowl; set aside. Once cookies have cooled, spread a spoonful of Nutella on one cookie and top it with another of similar shape and size. Press together gently, then roll edges of cookie sandwich in chopped hazelnuts. Repeat with remaining cookies.

Sunday, November 14, 2010

Boy-Approved Spiked Pasta (Spaghetti with Vodka Cream Sauce)

Tomato Vodka Cream Pasta Ingredients
My boyfriend P has a busy, active job and is often too busy to eat a big lunch, if any lunch at all. It's no surprise then that he comes home hungry at only 5 p.m. For those days especially, I have a list of go-to meals that can be whipped up in no time. And while P's sweet enough to try almost anything I cook, I reserve this list for only the dishes he gets excited about. Chief among them is this fabulous spaghetti alla vodka.

P's not much of a foodie. So it's easy to tell when he loves a dish. The giveaway is usually his request to "never stop making this!" Exactly what he said after his first taste of this creamy tomato pasta made moreish by the addition of a little alcohol. Don't worry if you don't like the taste of vodka (I don't either). Cooking mellows the flavor so you won't even know it's spiked ^_^.

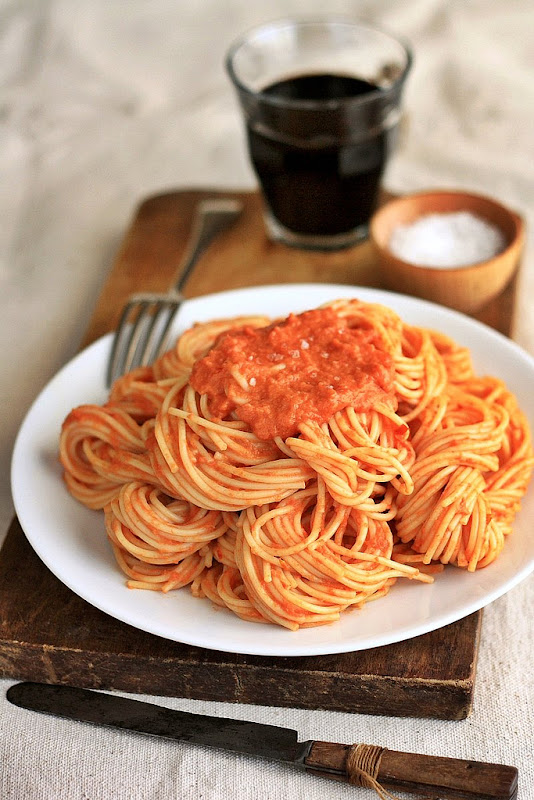
Spaghetti with Tomato Vodka Cream Sauce
I'd actually seen many versions of this dish long before, yet was always scared off by their copious use of heavy cream. I know, I know...nothing provides the same luxurious mouthfeel or coats pasta as well. But why drown out all those vibrant flavors from the tomato sauce? This version from Cooking Light magazine uses the amount needed to provide those textural benefits and no more. Still an indulgence, but a much healthier one.

Do you also have a go-to list of quick, delicious meals for those really hectic days? I can't wait to hear what's on it.

Spaghetti with Vodka Cream Sauce [Printable Recipe]
Slightly adapted from Cooking Light
Serves 3 to 4

XIAOLU'S NOTES: I HIGHLY recommend using fire-roasted canned tomatoes for this recipe -- it adds that much more depth to the flavor! I hesitated to add this detail before when Muir Glen made the only widely available version since they're a bit pricey. Luckily, Hunt's has come out with a version that's even easier to find than Muir Glen's and about as cheap as non-roasted diced tomatoes. Enjoy!

1/2 pound dry thin spaghetti pasta OR any other pasta
1 Tbsp olive oil
1/2 cup finely chopped onion OR 2 to 3 shallots
1/8 to 1/4 tsp crushed red pepper OR 1 dried red chili, split in half
1 garlic clove, minced
Vegetable bouillon cube OR paste in amount used to flavor 1 cup broth
1/2 cup vodka
1/3 to 1/2 tsp salt
1 (14.5-ounce) can diced tomatoes, undrained
1/4 cup whipping cream
3 Tbsp thinly sliced fresh basil
Shaved or grated parmesan cheese, to garnish
Additional fresh basil leaves (optional)

Cook the pasta according to the package directions. Drain and keep warm.

Heat oil in a large nonstick skillet over medium-high heat. Add onion to pan; sauté 4 minutes or until tender. Add pepper, garlic, and bouillon; sauté 1 minute. Add vodka (when cooking with alcohol, there is always the chance of it catching on fire, so be very careful); bring to a boil. Reduce heat, and simmer 3 minutes or until liquid is reduced by about half. Stir in 1/3 teaspoon salt and tomatoes; bring to a boil. Reduce heat, and simmer 15 to 20 minutes. Remove skillet from heat and let cool slightly.

IF you have stick blender, you can now puree the sauce right in the pan (easy peasy!). OTHERWISE, place tomato mixture in a conventional blender. Remove center piece of blender lid (to allow steam to escape); and secure the lid on blender. Place a clean towel over opening in blender lid (to avoid splatters), and process until smooth. Return tomato mixture to pan.

Mix in cream, then cook the sauce for 2 minutes over medium heat, stirring constantly. Remove from heat. Stir in cooked pasta and basil. Taste the pasta and add more salt if needed. Serve immediately.

Friday, August 13, 2010

A Cobbler to Remember

Ripe
I will never forget this peach cobbler. Not because it was my first. And not even because it was mindbogglingly good. (Don't get me wrong. It was darn tasty.) No, the reason this rustic dessert -- possibly named for its laid-back prep -- has taken a place of honor in my baking memory is that it took 3 days to make.

Now you may be thinking this was some cobblerization of the infamous 36-hour chocolate chip cookie (a day and a half well spent from what I hear). Alas, it wasn't. Far from any revolutionary baking method, what struck in reality was a short but powerful storm that snapped every large tree in our neighborhood and ripped our power lines to shreds. I was literally rolling out the biscuit dough when the storm came. So my embarrassing first reaction was "crap, I can't bake the cobbler now!"

Inner Beauty
Thankfully (in all seriousness) P and I, as well as his car and our apartment, came out unscathed. Truly lucky, because while the storm encompassed much of Northern Virginia, I hear our neighborhood was one of the hardest hit. Much of our perishable food didn't fair so well though. With the power out for 2 days, we were forced to pick the most important (read, expensive) items to jam into our tiny coolers.

Peach Cobbler
The cobbler dough was the first to go. Yet amazingly, the peach filling survived in the residual coolness of the fridge. What a relief! And not just because I hate wasted food and time. What I haven't told you is that these were no ordinary peaches. They were the juiciest, most perfectly ripe peaches I'd ever tasted. A sweet gift from a friend who'd gotten them locally. And so intoxicating that I halved the cobbler recipe so I could enjoy more of them fresh. What happened to that resilient filling? I remade the topping (while praying for good weather) and it baked up without a hitch. A lovely treat to celebrate our return to normality.

Peach Cobbler

Peach Cobbler [Printable recipe]
Adapted from Peace, Love, & Barbecue via Country Living
Makes 8 servings

XIAOLU'S NOTES: My peaches were so ripe and sweet that I reduced the white sugar by 3 tablespoons. You should start low and increase according to taste.

TIPS: The best way to peel a peach is to plunge it first into boiling water, then immediately into ice water. The skins will slip away easily as you peel with a sharp paring knife. Use the peaches right away or toss them with a few teaspoons of lemon juice to keep the flesh from turning brown.

1 1/2 cups all purpose flour [I substituted 1/2 cup whole wheat]
1 cup plus 2 Tbsp white sugar, divided
1/2 tsp ground ginger
1 3/4 tsp baking powder
1/3 tsp salt
6 Tbsp unsalted butter, cold and cut into small pieces
3/4 cup plus 1 tablespoon heavy cream

2 1/4 pounds peaches, peeled, pitted, and sliced 1/4-inch thick
2 Tbsp light brown sugar
2 Tbsp pure vanilla extract
1 Tbsp cornstarch

Combine the flour, brown sugar, 1 1/2 tablespoons white sugar, ginger, baking powder, and salt in a large mixing bowl. Cut in the butter using a pastry blender, 2 knives, or your fingers until mixture resembles coarse meal . Stir in 3/4 cup cream to form a dough . Wrap the dough in plastic wrap or parchment paper and chill for 1 hour, up to overnight.

Combine the peaches, brown sugar, 1 cup white sugar, and vanilla in a large bowl. Cover and let stand for 1 hour. Drain half of the liquid [I saved this and used it as a sauce for serving the cobbler.]; toss in the cornstarch. Transfer to a 10-inch round cast-iron skillet (or similarly sized oven-proof dish(es)).

Preheat the oven to 350 degrees F. Remove the dough from refrigerator. If needed, let it warm up slightly until pliable. Roll the dough out on a floured surface to 1/4-inch thickness. Cut out 1 1/2-inch rounds. Top the fruit mixture with the rounds without overlapping. Brush the top of the dough with the remaining 1 tablespoon cream and sprinkle with remaining 1/2 tablespoon white sugar. Bake until golden brown and the fruit is bubbling in the center, about 35 to 45 minutes. Check that the biscuits are cooked through and return to the oven for 10-15 minutes if they're not. Serve warm, ideally with vanilla ice cream or frozen yogurt.