Wednesday, June 29, 2011

Wednesday Favorites!

Thanks for all the lovely comments on my blogiversary post =D. I really love you guys =D! Here is another round-up of the recipes/food photos I discovered this week!

Hot Air Balloon Brownie Lollipops from Marzipan
3 Marzipan-Hot Air Balloon Cake Pops
Olive Oil Cake with Roasted Rhubarb from Pictures and Pancakes
1 Picturesandpancakes-Olive Oil Cake Slice Roasted Rhubarb
Chocolate Tart with Creme and Blood Oranges from Our Kitchen
6 OurKitchen-Choco Tart Sliced with Cream Blood Orange, Ingred
Chocolate Cherry Cupcakes from Call Me Cupcake
4 Callmecupcake-Choco Cherry Cupcakes Process Black Forest
Roasted Peaches with Vanilla Ice Cream from Mowie Kay Magazine
7 MowieKayMag-Roasted Peaches with Vanilla Ice Cream Idea
Cantonese Savory Glutinous Rice Dumplings from Life is Great
5 Pickyin-Chinese Sticky Rice Dumpling Zhongzi Leaf
Watermelon Mojito Popsicles from Pizzazzerie
8 Pizzazzerie-Watermelon Mojito Lime Popsicles Idea Ingred
Homemade Goldfish Crackers Using Cutter Made From A Soda Can from Miss Anthropist's Kitchen
9 Homemade Goldfish Crackers Using Cutter Made From Soda Can

Monday, June 27, 2011

6 Bittersweets Turns 2! (Raspberry Tres Leches Cake and Mango Mascarpone Macarons)

I can hardly believe it, but it's been 2 years to the day since I made my first food blog post. 174 posts later, my passion for cooking, blogging, and photography continues to grow with no bounds in sight. Equally important is that I've been able to connect with hundreds of incredible people (you!), without whose support this fledgling blog would have faded into oblivion long ago. In fact, you guys gave me an amazing 26th birthday gift last week of seeing my subscriber count surpass 1,500! Almost a week later I'm still pinching myself to confirm if it's real. Thank you, thank you, THANK YOU to all my readers old and new!

Raspberry Tres Leches Birthday Cake
I've never been one to make much ado over my birthday, but I do like to gather friends around for a fun and relaxing evening. Plus, any opportunity to bake a celebration cake is not to be missed...especially on the one day of the year when I have full control over the menu (mwahaha! ^_^). And what a menu it turned out to be! P and I prepared the main dishes and desserts, while friends contributed the rest. Not having set a theme for the meal, we got quite an eclectic mix of dishes but all so yummy that I wouldn't have done it any other way.

For the curious among you, here's what we ate: Spinach Salad with Strawberries and Candied Pecans (even better with mandarin oranges instead of strawberries), Baked Pizza Dip, Grilled Chicken Yakitori Skewers, Spicy Sriracha-Grilled Tofu, Otsu Sesame Noodle Salad with Grilled Eggplant, Mapo Tofu, and Dirty Rice from Bojangles (yes, very random). As scrumptious as all that was, my favorite part of the meal was its sweet ending.

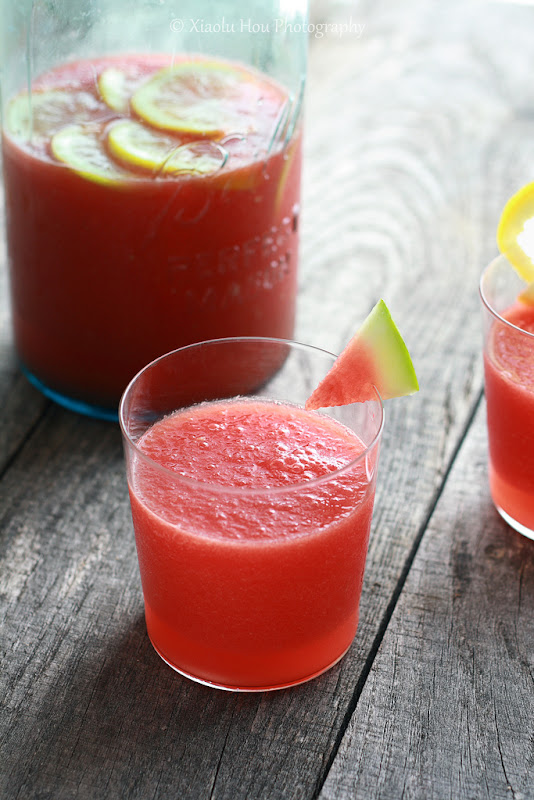
As a kid I hated having a summer birthday because all my school friends would be on family vacations by the time I threw my party. Now that I'm all grown up, I've done quite the 180°, delighting in all the fresh fruits and veggies available this time of year. Nothing speaks summer! louder to me than fresh fruit and cream. As proof you can find my previous iterations of this divine combination here, here, and here.

Mango Mascarpone Macarons
To mix it up this year, I expanded on the "cream" portion with not only heavy cream but a trifecta of cream, sweetened condensed milk, and caramelized cinnamon evaporated milk in this irresistable Tres Leches Cake. The filling of sugared raspberries is a fresh twist on the Spanish classic, adding just the right amount of tartness to counter the sweet n' creamy sauce.

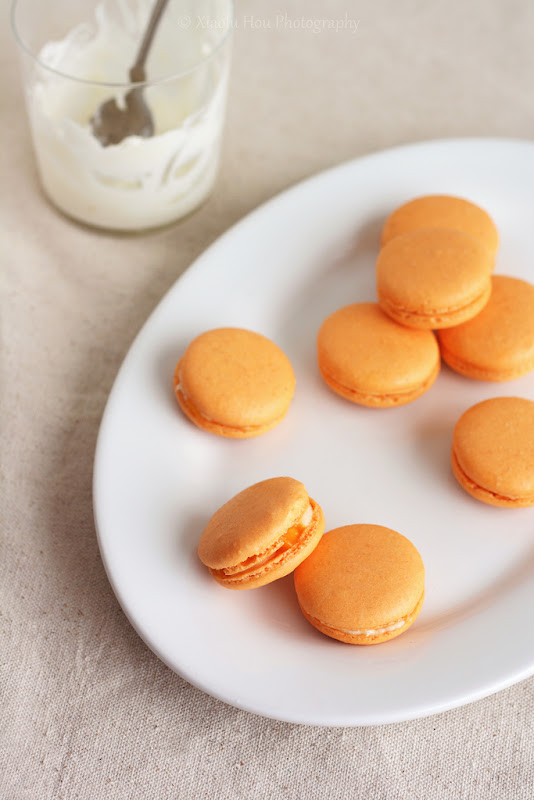
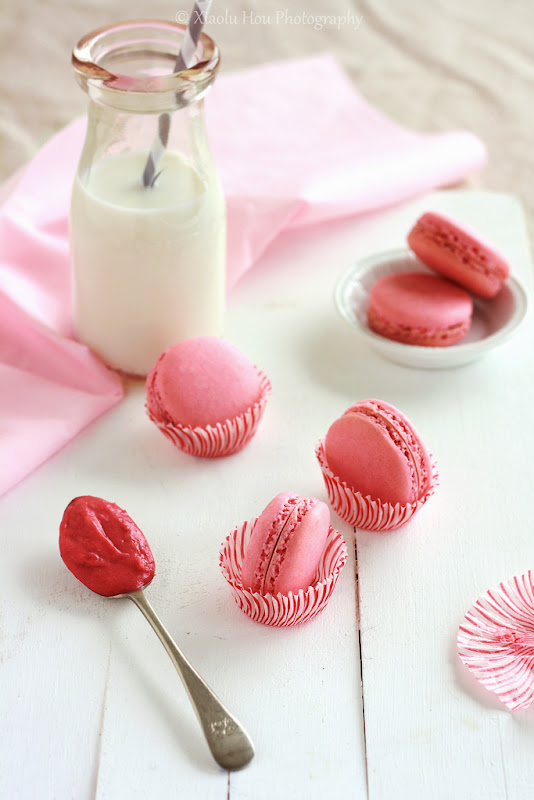
Knowing certain guests didn't fancy raspberries, I made a second dessert of Mango Mascarpone-Filled Macarons. This was my first time filling macarons with mascarpone and I must say I love it! Not only did it taste fantastic but it was fantastically easy to prepare: just whisk with fork...no mixer required! When you then add in a topping of juicy, ripe diced mangoes, how could it not be good? And as far as I'm concerned, it was ALL good: the food, the company, the beginning of my 27th year of life... Thank you, my lovely readers, for adding to the wonder of it all!

P.S. - I'm submitting these macarons to this month's MacTweets challenge: Fruit!

Tres Leches Cake with Raspberries
[Printable Recipe]
Adapted from Sunset
Makes 10 to 12 servings

XIAOLU'S NOTES: Evaporated goat milk (Meyenberg is a popular brand) is sold in many grocery stores. I couldn't find it in mine, however, so I substituted regular evaporated milk and the cake was still fabulous. Look in the baking aisle, near the condensed milk. The cake and tres leches sauce (prepare while cake bakes) can both be made a day ahead; reheat tres leches sauce before drizzling over cake. You can chill the completed cake for up to 3 days (garnish with raspberries just before serving).

Cake
1 1/3 cups all purpose flour [stirred, spooned, and leveled to measure]
1 tsp baking powder
1/4 tsp salt
6 large eggs
1 cup granulated sugar
6 Tbsp (3/4 stick) unsalted butter, melted

Tres Leches Sauce
1 can (12 oz.) evaporated goat milk (see Notes)
1/4 cup sugar
1 stick cinnamon (about 2 inches)
1/8 tsp baking soda MIXED WITH 2 tsp water
2/3 cup canned sweetened condensed milk
1 1/4 cups light cream
2 Tbsp rum [optional]

Filling and Frosting
2 cups fresh raspberries, divided
1 1/2 Tbsp granulated sugar
2 cups whipping cream
2 tsp pure vanilla extract
6 Tbsp powdered sugar, sifted

Preheat oven to 350 degrees F; position rack in center of oven. Cut a large parchment circle about 13 inches in diameter and place it atop the base of a 9-inch springform cake pan (at least 2 inches deep). Place the pan's rim back on top of the base and lock it in, securing the edges of the parchment paper. Now butter and flour the bottom and sides of the pan, and set aside.

For cake: Sift flour, baking powder, and salt together; set aside. Select a large stainless steel bowl (at least 10-cup capacity) that can nest comfortably in a large pot. Fill pot halfway with water and bring to a boil over high heat, then reduce heat to a gentle simmer. In bowl, combine eggs and sugar. Set bowl over water; with a handheld mixer, beat eggs and sugar at high speed until pale and thick enough to fall from a spoon in a wide ribbon, about 10 minutes. [If you have a stand mixer but no handheld, combine eggs and sugar in your metal mixer bowl. Set bowl over water, and whisk continuously by hand until the mixture is very warm and foamy. Then remove the bowl from heat and attach it to your stand mixer. Mix until pale and thick enough to fall from a spoon in a wide ribbon, about 10 minutes.]

Remove bowl from heat. Add sifted flour mixture to egg mixture and immediately fold in gently but quickly. Add melted butter and fold in gently until no streaks remain. Scrape batter into prepared pan. Bake on center rack until cake is evenly browned, just begins to pull from pan sides, and springs back when lightly touched in the center, about 35 to 40 minutes. Set pan on a cooling rack and let cool 5 minutes. Run a thin knife between pan and rim. Remove rim and let cake cool completely.

For tres leches sauce: In a large pot (at least 6-qt. capacity) over high heat, combine goat milk, sugar, and cinnamon stick. Bring mixture to a boil. Stir in baking soda mixture (sauce will foam up) and reduce heat to medium. Simmer, stirring occasionally, until sauce turns a caramel color and reduces to 3/4 cup, 10 to 12 minutes.

Remove sauce from heat; discard cinnamon stick, and stir in condensed milk, whipping cream, and rum. Use warm.

With a long, serrated knife, cut cake in half horizontally. Lift off cake top and set, cut side down, on a flat plate.

Transfer cake bottom off the pan base onto a cake stand or other serving platter. Poke cake bottom all over with a toothpick, being careful not to poke all the way through. Slowly spoon enough warm tres leches sauce (slightly less than 1 cup) over cake bottom to saturate well but not cause it to ooze. Let stand until cool, about 10 minutes.

For filling: Reserve 1/2 cup of raspberries to go on top of the cake, then put remaining fruit in a bowl and mix gently with granulated sugar. Set aside. In a chilled bowl, use a mixer to whip cream until it holds medium stiff peaks and is thick enough to spread. Add vanilla and powdered sugar; mix well.

Scoop about 1 2/3 cups whipped cream onto cake bottom and spread evenly, leaving a 1/2-inch border around the edge. Dot with sugared raspberries, pushing them down into cream. Carefully transfer the cake top, cut side down, onto the base and make sure they are aligned. Poke top all over with a toothpick as before, then slowly spoon slightly less than 1 cup of sauce evenly over cake top to saturate.

Now smoothly frost top and sides of cake with remaining whipped cream, then use a clean towel to wipe any stray frosting or sauce from around the base. Cover cake without touching (invert a large bowl over it) and chill at least 2 hours. Cover and chill reserved raspberries if held longer than 2 hours. Cover and chill remaining tres leches sauce.

Uncover cake and decorate with reserved raspberries. Serve with remaining tres leches sauce.

Mango Mascarpone Macarons [Printable Recipe]
Makes about 25 to 30 macarons

XIAOLU'S NOTES: Please do not try to convert this recipe to volume measurements if you don't have a scale (I use and love this one). This recipe is very sensitive and will not work if the measurements are not exact. Please also note that every oven is different and you'll figure out what works best for yours over time (see this post for great information on ovens and macarons). Since mine has major hot spots, I bake on 2 stacked pans for insulation if using parchment paper. If you're uncertain of your ability to pipe uniformly-sized macarons, like me, simply trace 1 1/4-inch circles on your parchment paper, flip the paper over, and pipe on the other side, using the outlines as your guide OR print (choose "fit to page") and slide this template under your parchment as a guide but don't forget to remove before baking! See my first macaron post for helpful videos of the whole macaron-making process!

125 g almonds [not roasted or salted]
170 g powdered sugar
1/4 tsp amchoor (Indian dried green mango) powder [optional]
Large pinch of salt
35 g granulated sugar
2 g egg white powder [optional, to stabilize batter in humid weather]
Splash of white or cider vinegar [to clean utensils/stabilize meringue]
90 to 95 g egg whites [about 3 large egg whites]
Orange food coloring (powder or gel) [optional]

5 oz. mascarpone cheese, cool room temperature
1 Tbsp heavy cream
2 Tbsp powdered sugar, sifted
1/2 cup finely diced ripe mangoes

Microwave fresh egg whites 10 to 15 seconds in the microwave on medium-low heat (I set my microwave to 40%).

Combine the almonds, powdered sugar, mango powder, and salt in a food processor, and pulse on and off until the nuts are finely ground (about 1 to 2 minutes). Sift the powder to remove any large chunks that remain. Put those chunks back into the food processor and pulse again for another 30 to 60 seconds. Sift again. You will probably have some slightly chunkier almond bits. Hopefully they're no more than a tablespoon or so, in which case you can throw them out.

Weigh out and mix your granulated sugar and egg white powder in a small bowl until uniform; set aside. Add splash of vinegar then a splash of water to the bowl that will be used for whipping the egg whites. Swirl liquid around the bowl, then use a clean paper towel to wipe the bowl dry. Use the same paper towel to wipe down your beaters. Now using a handheld or stand mixer, whip the egg whites on medium-low speed until foamy, then turn the speed up to medium to medium-high and gradually add the sugar mixture. Now add orange food coloring, if using, until the desired shade is reached (color will lighten once fully whipped). Continue whipping until you obtain a glossy meringue (it'll look like shaving cream, hold stiff peaks, and stay in place if you turn the bowl upside-down; but don't overbeat your meringue or it will be too dry).

Add all of the nut mixture to the meringue and fold together. Use both a folding motion that scrapes the bottom of the bowl (to incorporate the dry ingredients) and a gentle pressing motion, to deflate the meringue against the side of the bowl. Slow down after all the dry ingredients have been incorporated, and continue folding the mass carefully until you obtain a batter that looks somewhat glossy and flows from the spatula in a thick ribbon. Test the batter by spooning a small amount of the batter on a plate: if the top flattens on its own within about 20 seconds, it’s ready to pipe. If there is a small peak, give the batter 2 to 3 more folds and test again. The peak shouldn’t disappear immediately either or it’s already overmixed.

Fill a pastry bag fitted with a 1/3 to 1/2-inch wide plain tip (I like Ateco #805 or 806) with half of the batter. (When your bag is too full, the pressure causes the batter to rush out in a way that’s difficult to control, making for sloppy macarons.) Pipe tiny blobs of batter onto the 4 corners and center of 2 baking sheets, then line baking sheets with parchment paper OR line with silicone mats. Pipe small rounds (slightly larger than 1 inch wide) straight down and about 1 inch apart onto the baking sheets. Pick up each sheet with both hands and slam it firmly straight downward on the counter 2 to 3 times. This will to force out any large air bubbles. Immediately pop any bubbles that rise up but don't break with a toothpick. Do NOT do this once a few minutes have passed because you'll mess up the shell that's forming.

Preheat the oven to 285 to 300 degrees F. Let the macarons sit out for 25 to 90 minutes to harden their shells a bit (to prevent tops from cracking during baking). Test if they're ready by touching the top and side of one shell lightly. It should feel dry and not stick to your finger at all. Bake one pan at a time for 15 to 25 minutes, depending on the size of the macarons. After the first 10 minutes of baking, rotate the pan and place a large piece of foil loosely over the macarons to prevent browning (If I’m baking on 2 stacked pans, I also remove the bottom pan at this point to make sure the macarons will be completely cooked on the bottom and not sticky). Let cool completely before trying to move the shells.

Once cool, remove the shells from the silicone mat or parchment and flip them over. If you have trouble removing them, freeze the macarons for about 10 minutes, then quickly peel them off before they have a chance to warm up and get sticky again.

To prepare the filling, combine the mascarpone, powdered sugar, and heavy cream and mix well. To fill, spoon or pipe about 1 teaspoon of mascarpone mixture onto half the macaron shells, sprinkle with diced mangos, then top with a similarly-sized top shell. For the best flavor and texture, store in the refrigerator for at least 1 hour before eating so flavors are allowed to mature, but they are best if eaten within 2 days. Bring to cool room temperature before eating.

Wednesday, June 22, 2011

Wednesday Favorites!

Since my first favorites post was so well-received, I'm definitely making them a regular thing (every 1 to 2 weeks). Enjoy!

Spicy Sriracha Grilled Tofu from The Bitten Word
1 BittenWord-Spicy Sriracha Grilled Tofu
Hot Nicoise Tuna Veggie Salad from Gwyneth Paltrow's My Father's Daughter via The Daily Meal
2 Gwyneth Paltrow via Daily Mail Hot Nicoise Tuna Fish Green Bean Roasted Vege Salad
Berry Nice Cupcakes from Hello, Cupcake!
3 HelloCupcake-Strawberry Cupcakes
Caprese Cherry Tomato Basil Strawberry Macarons from Cacao, Australia
5 AurelienTrottierFrance-Tomato Basil Strawberry Shaped Macarons Idea Wood Board
Blueberry Apple Pie from Home Beautiful
4 Homebeautiful-Blueberry Apple Pie Summer Idea
Sweet Cherries from Tasty Food and Photography
6 Tastyfoodandphotography-Sweet Cherries Ingred
7 DIY Vintage-Look Wood Table Tutorial
Fourth of July Flag Cake from Glorious Treats
8 GloriousTreats-American Flag July 4th Layer Cake Idea
9 CookRepublic-Steamed Indian Savory Lentil Cake, Bars Dhokla

Monday, June 20, 2011

Cool It! (Spiked Watermelon Cooler)

Watermelon
Some of you have been asking for more fast, easy recipes on 6 Bittersweets -- and such you shall receive! Today watermelon cooler is very simple to make and inspired by a favorite childhood drink. Though the term "watermelon juice" will probably just make you furrow your brow in confusion, it's actually a drink widely available in restaurants throughout China. Made purely of blended and strained watermelon chunks, this juice has got to be one of the most refreshing things on a hot summer day.

The major (for serious) heat wave we've had in the D.C. area lately inspired to make this grown-up watermelon juice cooler. Don't tell anyone, but I actually intended this to be a frozen drink (and still included directions in case you prefer it slushy). But alas, I ran out of time and didn't get to fully freeze the melon. Perhaps it was for the best as this version is even closer to the beloved drink of my memories of China. Of course it didn't have vodka back then, but I think spiking this juice only made it better ^__^.

Watermelon Lemon Vodka Cooler
Spiked Watermelon Cooler/Slushie [Printable Recipe]
Serves 4 to 6

6 cups cubed seeded watermelon, 3/4-inch cubes
1 Tbsp freshly squeezed lemon juice
1 tsp freshly grated lemon zest
1 cup tonic water
1/2 cup vodka (optional)
6 Tbsp powdered sugar, or more to taste

If making into a slushie, place chunks side by side on a large baking sheet, so that they're not touching one another. Freeze at least 2 hours. Then puree melon cubes (frozen or not) with the remaining ingredients in a conventional blender or using a stick immersion blender. Taste and add more powdered sugar, if desired. For slushie, pour into glasses or small bottles and serve immediately. For non-frozen drink, pour into a pitcher and chill well before serving.

Photography Tip: Pure White Look

Donna Hay Spinach Ricotta Dill Mini Pies
Photo from Donna Hay's No Time to Cook via Style At Home
My good friend, Kulsum, from Journey Kitchen asked me today how to create the pure, almost ethereal white background of Donna Hay photos like the one above. To be truthful, I'm not certain. Heck, if I could make photos like this, I'd have done so already and would be working for Donna (a girl can dream, right?) =p. But after noting that there are almost no shadows in this photo and also remembering some photos I'd seen of the Donna Hay studio, I was fairly certain that the lighting conditions were key to this effect. And since I'd already uploaded the studio photos for Kulsum, I thought I might as well share with everyone :). As you'll see below, Donna's studio is surrounded by large windows on all sides which gorgeous white light spills through. All these windows have sheer white screens over them which diffuse the abundant light. This essentially turns the studio into a huge natural light softbox in which these dreamy white photos can be captured. Or that's my best guess anyway 8). If anyone knows better, please chime in!

Donna Hay Food Photography Studio and Prop Room
Photos of Donna Hay Studio and Prop Room from Issue #50

Thursday, June 16, 2011

I Wanna Hear What You Want =D


Photography by Kan Kanbayashi via Prop Closet. Prop Stylist Robin Zachary.
I have great news! Professional creative art director and prop stylist, Robin Zachary -- whose awesome blog, Prop Closet, was the source of the photography tip I shared just a few days ago -- has agreed to do a guest post here to share some prop styling tips with us! Now that the hard part (getting her on board) is over, I need YOU to tell me by the end of Saturday (June 18) what you'd most like to learn from and/or ask her relating to PROP (not food) styling and general art direction. I'm looking forward to hearing what you want, and hope you're as excited about this as I am =D.

Wednesday, June 15, 2011

A New Series: This Week's Favorites

I have a little guest post coming up that I'm quite excited about...but I'm not sure when it'll be posted. So in the meantime, partly to distract myself, I've decided to start a new occasional series highlighting my favorite recipes/photos I've bookmarked during the week. I guess I'm trying to use this blog as a Tumblr of sorts now, too -- what can't it do? =p Hope you enjoy these!

Strawberry Mascarpone Trifle from Little Upside-down Cake
Photo 1
Kimchi Rice from Rasa Malaysia
Photo 2
Photo 3
Photo 4
Greek Dolmadakia from Laksmi W
Dolmadakia
Photo 6
Peanut Butter Carrot Salad from Appetite for China
Photo 7

Monday, June 13, 2011

Photography Tip: Endless Fabric Background

Prop Closet Seamless Background
Photos and Method via Prop Closet (click to view larger)
Since many of you expressed interest in seeing more photography tips on this blog, I thought I'd share with you a new method I was excited to discover today on the fabulous blog, Prop Closet. I think I'm outing myself as a huge geek here, but it's been bugging me forever trying to figure out how the apparently endless backgrounds in Martha Stewart and other magazine photos could be possible! For some reason my conclusion was that they must have some crazy mile-long table. Well luckily for us the secret is much simpler! As the behind-the-scenes photo above from Prop Closet made me realize, you simply have to pull the fabric in the background evenly upward and voila! Soon everyone will be marveling at your very own infini-table! =p Thanks, Robin, for posting this incredibly helpful photo of the set-up!

Saturday, June 11, 2011

When Life Gives You Lemons...It's Time for a Mac Attack! (Lemon Macarons with White Chocolate Ganache)

Guest posts and macarons have become quite the norm recently here, haven't they? I'm actually getting a bit tired of photographing these cookies so much 8p. In fact I'd have waited weeks to post these, except that I've gotten such positive feedback on the taste of them from friends and family alike! Plus, I've been dying to share these adorable lemon shapes with you as soon as I came across the idea on Erica's blog. Believe it or not I actually lost my Mac Mojo a bit this week and had to make these 3 times before they came out to my liking. Not only have I continued to struggle with my hot spot-laden oven but this recipe also added in a new factor of slightly adjusting the shape of the shells.

Fortunately, despite my meekness in dealing with certain issues in life, that's not a problem I have with baking! I simply take each imperfect batch (still delicious,
thankfully) as a challenge to improve myself. And whether you've yet to try your hand at macarons or have failed a few times, let me assure you that the satisfaction of getting them right is so worth it in the end!

As I mentioned before, a lot of my macaron issues have been the result of reducing the sugar in the shells. Because sugar stabilizes the batter, decreasing it compromises the cookie's structure. So if you're new to them, I'd definitely recommend starting with a full sugar recipe. In the continuing evolution of my own shell recipe, I've also decided to add some (but not all) the customary sugar back in, while making other tweaks to reduce the experience of sweetness instead of just the actual amount of sugar.

Lemon Party!
What do I mean? Based on personal experience, perception of sweetness is based both on the objective amount of sugar present AND on the relative strength of salty and sour flavors also present. So how do we use this to our mac-vantage? Well first, we add a healthy pinch of salt to the shells as suggested by my friend/macaron authority, Stella of Bravetart. Other than that there's not too much we can do without upsetting the delicate balance of the batter, so let's turn our attention inward...

The sweetness of the shells can be countered with fillings that can be only mildly sweetened with out losing structural integrity (like Swiss meringue buttercream, mascarpone, or whipped cream). Or why not try a tart fruit curd (like rhubarb raspberry) or dark chocolate ganache with a bitter edge? Plenty of great options there...but being stubborn as I am I was stuck on the idea a lemon white chocolate ganache. So how did I turn an ingredient infamous for being tooth-achingly sweet into a treat even the sugar-shunners in my life loved? I gave it a good sour kick in the arse with a liberal dose of citric acid (a natural powder often used to add sourness to food/drinks)!

Do you have your own way of showing those overly sweet macs who's boss that I haven't mentioned above? Lemme hear 'em, please! =D

Lemon Party Macarons [Printable Recipe]
Lemon-shaping method adapted from Macarons by Erica
Makes 25 to 30 macarons

XIAOLU'S NOTES: I purchased citric acid fairly cheaply from my local Indian store. If you don't have it, you may be able to add 1 to 2 tablespoons lemon juice instead. However I haven't tried this myself and therefore am not certain it won't cause curdling or other problems. Please do not try to convert this recipe to volume measurements if you don't have a scale (I use and love this one). This recipe is very sensitive and will not work if the measurements are not exact. Please also note that every oven is different and you'll figure out what works best for yours over time (see this post for great information on ovens and macarons). Since mine has major hot spots, I bake on 2 stacked pans for insulation if using parchment paper. If you're uncertain of your ability to pipe uniformly-sized macarons, like me, simply trace 1 1/4-inch circles on your parchment paper, flip the paper over, and pipe on the other side, using the outlines as your guide OR print (choose "fit to page") and slide this template under your parchment as a guide but don't forget to remove before baking! Macarons are best after having been refrigerated for 24 to 48 hours, according to French pastry master, Pierre Herme, "An osmosis takes place between the garnish and the biscuit. When freshly baked this is hard and crisp, but it absorbs some humidity from the filling and its inside becomes more tender while the crust on the surface stays intact" (quote via Not So Humble Pie). So even if you accidentally overbake the shells by a few minutes, maturing the macarons in the fridge for at least 48 hours should undo most of the damage =). See my first macaron post for helpful videos of the whole macaron-making process!

125 g almonds [not roasted or salted]
160 g powdered sugar
2 Tbsp lemon zest, air-dried at least 1 hour
Large pinch of salt
35 g granulated sugar
2 g egg white powder [optional, to stabilize batter in humid weather]
90 to 95 g egg whites [about 3 large egg whites]
Pinch of citric acid [optional, to stabilize meringue and add subtle tart flavor]
Tart White Chocolate Lemon Ganache (Recipe below)

Microwave fresh egg whites 10 to 15 seconds in the microwave on medium-low heat (I set my microwave to 40%).

Combine the almonds, powdered sugar, dried zest, and salt in a food processor, and pulse on and off until the nuts are finely ground (about 1 to 2 minutes). Sift the powder to remove any large chunks that remain. Put those chunks back into the food processor and pulse again for another 30 to 60 seconds. Sift again. You will probably have some slightly chunkier almond bits. Hopefully they're no more than a tablespoon or so, in which case you can throw them out.

Weigh out and mix your granulated sugar and egg white powder in a small bowl until uniform; set aside. Using a handheld or stand mixer, whip the egg whites on medium-low speed with citric acid until foamy, then turn the speed up to medium to medium-high and gradually add the sugar mixture until you obtain a glossy meringue (it'll look like shaving cream, hold stiff peaks, and stay in place if you turn the bowl upside-down; but don't overbeat your meringue or it will be too dry).

Add all of the nut mixture to the meringue and fold together. Use both a folding motion that scrapes the bottom of the bowl (to incorporate the dry ingredients) and a gentle pressing motion, to deflate the meringue against the side of the bowl. Slow down after all the dry ingredients have been incorporated, and continue folding the mass carefully until you obtain a batter that looks somewhat glossy and flows from the spatula in a thick ribbon. Test the batter by spooning a small amount of the batter on a plate: if the top flattens on its own within about 20 seconds, it’s ready to pipe. If there is a small peak, give the batter 2 to 3 more folds and test again. The peak shouldn’t disappear immediately either or it’s already overmixed.

Fill a pastry bag fitted with a 1/3 to 1/2-inch wide plain tip (I like Ateco #805 or 806) with half of the batter. (When your bag is too full, the pressure causes the batter to rush out in a way that’s difficult to control, making for sloppy macarons.) Pipe tiny blobs of batter onto the 4 corners and center of 2 baking sheets, then line baking sheets with parchment paper OR line with silicone mats. Pipe small rounds (slightly larger than 1 inch wide) straight down and about 1 inch apart onto the baking sheets. Immediately use a toothpick to pull out points on opposite sides of each round to create the lemon shapes. Then pick up each sheet with both hands and slam it firmly straight downward on the counter 2 to 3 times. This will to force out any large air bubbles. Immediately pop any bubbles that rise up but don't break with a toothpick. Do NOT do this once a few minutes have passed because you'll mess up the shell that's forming.

Preheat the oven to 285 to 300 degrees F. Let the macarons sit out for 25 to 90 minutes to harden their shells a bit (to prevent tops from cracking during baking). Test if they're ready by touching the top and side of one shell lightly. It should feel dry and not stick to your finger at all. Bake one pan at a time for 15 to 25 minutes, depending on the size of the macarons. After the first 10 minutes of baking, rotate the pan and place a large piece of foil loosely over the macarons to prevent browning (If I’m baking on 2 stacked pans, I also remove the bottom pan at this point to make sure the macarons will be completely cooked on the bottom and not sticky). Let cool completely before trying to move the shells.

Once cool, remove the shells from the silicone mat or parchment and flip them over. If you have trouble removing them from parchment paper, freeze the macarons for about 10 minutes, then quickly peel them off before they have a chance to warm up and get sticky again.

Fill the shells (spooning or piping) with 1 1/2 to 2 teaspoons of filling and top with a similarly-sized top shell. For the best flavor and texture, store in the refrigerator for 24 to 48 hours before eating (see notes above for detailed explanation) but they are best if eaten within 6 days. Bring to room temperature before eating.

Tart White Chocolate Lemon Ganache
6 Tbsp heavy cream
1 tsp lemon zest
6 oz. white chocolate, coarsely chopped
1/2 to 3/4 tsp citric acid
Pinch of salt

Heat cream and lemon zest in a small saucepan, and bring to a boil. Slowly pour the cream into a heatproof bowl containing the chopped white chocolate and let sit for 3 to 5 minutes. Stir gently until all of the chocolate is melted and you've obtained a smooth ganache. Sprinkle the citric acid and salt over the ganache and stir in thoroughly. Let cool to a cool room temperature until thickened before filling macarons. (It's fine to speed up the cooling by popping the ganache in the fridge but make sure it doesn't get too hard to pipe/spoon on.)

Thursday, June 9, 2011

New Etsy Shop: Tissue Paper Pom-Pom Cupcake Toppers!

More Cupcakes for Joy's Birthday
Guess it's just an announcement kind of day ^_^. Many of you have kindly expressed regret that you're not close enough to order my cupcakes and other baked goods. While I unfortunately can't remedy that yet, I've opened up an Etsy shop to sell some of my easily shipped crafts -- starting with these pom-pom cupcake toppers! I'll add more products in the future, including perhaps some photo prints. Tell it to me straight, would any of you be interested in purchasing prints if I made them available? Either way, thanks as always for your amazing support! <3 XL

Getty Images

Getty Images
Happy Thursday, everyone! Did you realize that tomorrow is Friday (partyin' partyin' we so excited!) and Saturday comes after...wards? Haha sorry I couldn't resist the Rebecca Black reference. If you have no idea what I'm talking about, check out the "Friday" music video in all its cringe-inducing glory here.

But the real point of this quick post is to share with y'all that I'm now an official Getty Images Artist! So far I have 19 photos on sale with this stock photography website and will hopefully have the opportunity to add more in time. If you're interested, you can check them out on Getty Images!

Wednesday, June 8, 2011

Guest Post: Spicy Lentil Tart with Pomegranate and Mint

Those of you who've been reading my blog for some time will know that I eat a mostly vegetarian diet (plus occasional seafood) and am a BIG fan of vegetarian and vegan cooking. One of my long-time favorite blogs has been Veggie num num, written by the wonderful Trudy from Australia. Not only does she take gorgeous photos, she also creates the most creative vegetarian recipes. They're guaranteed to have you drooling whether you're a veggie or meat-lover! I tried her Spanish Chickpea Balls a few months ago and was captivated by the unique spicing. Equally mesmerizing is the savory lentil, pomegranate, and mint tart she's sharing today, which -- believe it or not -- was adapted from a lamb recipe! I'll let her tell you all about it now. Thanks for your stunning guest post and for being such an inspiration to me, Trudy!

VeggieNumNum's Guest Post Lentil Tart
I have to say I am a little excited to be here! Without a doubt I am a devoted fan of 6 Bittersweets and Xiaolu’s beautiful inspiring desserts and photography and so thrilled and honoured to be guest posting today!!

I am constantly blown away with Xiaolu’s clever and amazingly scrumptious looking recipes. Her talent for creating truly beautiful and imaginative food is absolutely inspiring. So my first thought when I started to brainstorm ideas for a recipe to share was it must be something elegant and pretty and of course delicious.

VeggieNumNum's Guest Post Lentil Tart
Being a vegetarian it can be hard to convince people that you eat interesting, varied and delicious foods. I still think there is a popular misconception out there that vegetarian food is boring and plain and can’t be inspiring and tasty and beautiful in it’s own right.

There is nothing I love more than turning this idea on its head and providing vegetarian recipes that I really hope everyone finds delicious and appealing!!

VeggieNumNum's Guest Post Lentil Tart

I had been meaning to experiment with a vegetarian version of a Lebanese tart for some time and thought this post would be the perfect opportunity to do just that. Something I find so rewarding in the kitchen is to take a traditional meat dish and transform it into a vegetarian meal. I love the challenge and the fun of experimenting with different ingredients and flavours and this tart did not disappoint.

Middle Eastern flavours are some of my absolute favourites and this dish is wonderfully fragrant, spicy, colourful and I hope you’ll agree super tasty.

Thank you so very much Xiaolu for the opportunity to share this veggie recipe and I hope you’ll all enjoy it as much as I enjoyed creating and photographing it for you.

VeggieNumNum's Guest Post Lentil Tart
Spicy Lentil Tart with Pomegranate and Mint [Printable Recipe]
Preparation time: 40 minutes
Serves 4

1 sheet of ready-rolled puff pastry (thawed)
1 free range egg lightly whisked or 1/4 cup non-dairy milk
1 cup brown lentils, rinsed
3 cups vegetable stock
2 bay leaves
1/2 cinnamon stick
1 Tbsp pomegranate molasses
2 Tbsp warm water
1 tsp black peppercorns
1 tsp ground cumin
1 tsp paprika
1/2 tsp coriander seeds
1/2 tsp salt flakes or rock salt
2 Tbsp olive oil
1/2 red onion, finely diced
1 red chili, seeded and finely diced
1/2 cup pine nuts, roasted
1 cup flat leaf parsley, roughly chopped
1 cup fresh mint, roughly chopped
1 tsp sumac
1/2 pomegranate, seeds only

To serve
1/2 cup tahini paste
1 Tbsp olive oil
1 lemon, juiced
1/2 Tbsp water
Extra lemon wedges

Preheat the oven to 180°C/356°F.

Bring the stock, lentils, bay leaves and cinnamon stick to a gentle simmer in a large pot, allow to cook for 15-20 minutes over a medium/low heat, stirring occasionally until the lentils are tender and liquid absorbed. Remove the bay leaves and cinnamon stick and strain off any excess liquid, set aside.

Grind the black peppercorns, salt flakes or rock salt, cumin, paprika and coriander seeds together in a mortar & pestle or spice grinder to form a fine spice powder.

Combine the pomegranate molasses with the warm water until smooth, set aside.

Lay the thawed puff pastry sheet out on a baking tray, carefully score a 3cm (1 inch) border around the outside and brush with the prepared egg or non-dairy milk being careful not to brush over the score mark.

Place in the oven and bake for 10 minutes until the pastry just begins to puff and golden, remove from the oven and set aside.

Meanwhile fry off the onion in the olive oil for a few minutes over a medium heat in a large frying pan until soft, add the cooked lentils and prepared spice powder and continue to cook for 3-4 minutes over a medium heat.

Add the pomegranate molasses & water mixture and the pine nuts, fry the lentils until they just begin to brown and stick to the bottom of the pan, add the fresh herbs reserving half the mint and stir though.

Spoon the lentil mixture onto the prepared puff pastry sheet, sprinkle over the sumac and return to the oven for 15 minutes until pastry is golden.

Meanwhile whisk the tahini paste with the olive oil, lemon juice and water until smooth.

Remove the tart from the oven a serve sprinkled with pomegranate seeds and reserved mint. Accompany with the tahini dressing and wedges of fresh lemon.

A wonderfully colourful and tasty vegetarian recipe perfect for parties or picnics, enjoy!!

{This recipe was inspired by the Spicy Lebanese Lamb Tart found in ABC’s Delicious Magazine.}

Tuesday, June 7, 2011

10% Off All Baking Orders in June!

Strawberry N' Cream Cupcakes
Happy Tuesday, everyone! Hope your week is off to a great start. Just wanted those in the DC/Virginia/Maryland area to know that in honor of Father's Day and my/6 Bittersweets' birthdays coming up, all baking orders for the rest of June will be 10% off! Doesn't Dad deserve something sweet for his special day? I highly recommend the Strawberries N' Cream Cupcakes pictured above -- they've been very popular for spring! =D

Saturday, June 4, 2011

Rhubarberric Macarons (Guest Post for Journey Kitchen)

Rhubarb and Raspberries
Hope you guys don't mind the recent back-to-back guest posts in the past week. It wasn't my intention to have them spaced so closely, but sometimes life just happens how it does regardless of your plans ^_^. Today I'm sharing a guest post for my lovely friend Kulsum of Journey Kitchen. She's been easy to connect with from the beginning as we have quite a bit in common, including a love of Indian food and good chocolate as well as both being in school currently. Please drop by her blog to check out my Rhubarb Berry Curd Macarons plus all of Kulsum's tasty and beautiful dishes. If you're just looking to grab the printable recipe, you'll find it here.

Rhubarberric Macarons for My Friend

Thursday, June 2, 2011

Pom-Pom Cupcake Toppers Winner!

Thanks to everyone who entered this giveaway! The randomly selected winner is Lisa of Parsley, Sage, Desserts and Line Drives. Congrats, Lisa -- I emailed you just now. Please reply with your mailing address and the color you want the toppers in. Thanks!

Wednesday, June 1, 2011

A Lotta Chocolate Part 3: Chocolate Cake Roll with Chestnut Cream

Chestnut Chocolate Sponge Cake Roll
Today I'm delighted to inform you that the 3rd post in my chocolate series will be on my dear friend Sala's blog, Veggie Belly. You may remember her as one of the gracious judges of the March 2011 DMBLGIT blog photography contest which I hosted. We live quite close to each other so we've also become good friends in person and not just online. Thus for once I was actually able to present the cake in my guest post for her to taste. Please hop over to her site for her reaction and my post. You can also go straight to the printable recipe here. Thanks for this wonderful opportunity, Sala!

Chestnut Chocolate Sponge Cake Roll Slice