Monday, October 31, 2011

Happy Halloween!

Cat Ghost Cupcake Skeleton Bat Pumpkins
Wishing everyone a safe and happy Halloween today!
P and I went to a friend's pumpkin-carving party this weekend, and here's what everyone made =D. I was joking on our way to the party about carving a cutesy cupcake pumpkin. Then I was distracted chatting with some people at the party, and next thing I know he's well on his way to making my cupcake pumpkin a reality! Is he the sweetest or what?! Sorry, ladies...he's all mine ^____^. Below are some more photos of the party, including my Pumpkin Cupcakes with M&M Creepy Crawly Bugs and Mummy Faces!

M&M Candy Bug Mummy Halloween Cupcakes
Pumpkin Carving CollageCupcake Pumpkin

Saturday, October 29, 2011

My Tips for Great (Cupcake) Success and Halloween Recipes Round-up!

More Black Widow Cupcakes
It's an unfortunate truth that sometimes you put in hours of work on a recipe only to have it do a complete belly flop on ya. Today was one of those times as I tried to make Jell-O Shot Brain Cupcakes for the 4th and final post in my Halloween Cupcake series. The Jell-O was too soft, the frosting curdled, and a heavy gray blanket covered the sky from dawn til dusk. Sure, the cupcakes tasted alright, but when I realized I'd choose real Jell-O shots over those anyday, there was no way I was gonna send this recipe into the vast interwebs with my stamp attached to it!

Though I'm no expert, I take a lot of pride in everything I do and wouldn't want to share anything less than the best with you guys. So instead of my original post, I'm going to share some general cupcake tips which have helped make most of my other cupcake experiments successful. Plus a quick round-up of all my Halloween recipes for you last-minute planners =p.

XIAOLU'S CUPCAKE TIPS:
  • Use a good muffin pan. I recommend one that's nonstick and has some weight (like this one). A sturdier pan will be less likely to warp (become misshapen) easily. I recall using my new pan for the first time 3 years ago and noticing an immediate difference. My cupcakes rose at least 1/4 inch higher and baked more evenly.
  • Buy an oven thermometer (or even 2!) and always preheat at least 25 minutes, ovens (even brand new ones) are notorious for being inaccurate as to temperature. Buy your own thermometer and rely on it rather than your oven's. If your oven tells you that it's up to 400 degrees F only 5 minutes after you turned it on...it's lying...
  • If it's your first time making a recipe, try to read it a few days in advance in case you need to buy/prepare anything ahead of time. At the very least, try to read it before you start making the cupcakes.
  • Lightly grease the top of your cupcake pan BEFORE putting in liners. Especially if you overfill the cups with batter later, this will make it much easier to lift the cupcakes out later. I've found that the grease seems to reduce the "muffin-top" effect and encourages the cakes to rise up and not outward.
  • Use good-quality baking liners. Especially if you bake cupcakes/muffins a lot, this should be a no-brainer. I usually buy basic solid liners (white, brown, black) in bulk online so that I'm never low -- I usually search for the lowest prices on Etsy. Cupcake Social is one seller I've had a good experience with. If you're a fan of those paper souffle standalone baking cups (similar to those Wilton nut cups except that those aren't oven-safe), you can get a LOT of them for cheap here. Unsuitable liners can take a lot away from your final product. For example, I bought white liners at the grocery store when I was nearly out of my usual liners. Luckily I didn't need to use them because when I placed one into the pan, it wouldn't even fit without a big fold forming along the top. Liners can also differ in their non-stick coating. Some are so non-stick that they tend to pull away from the cupcake. Trust me, this is NOT a good look!
  • When measuring flour for cakes, it's best to go by weight OR to stir the flour, spoon it into the measuring cup, then level it with a knife or other straight edge. The method of measurement can make a big difference. Scooping up the flour with your measuring cup will compact the flour, result in you using too much flour, and the cake being too dry.
  • Sift dry ingredients together, it helps minimize the formation of clumps of dry ingredients when they're being mixed into the batter later.
  • Unless the recipe specifies otherwise, use room temperature eggs and butter. Obviously if you'll be heating up the butter or eggs as part of the recipe, you don't need to worry about the starting temperature. But if you'll be creaming the butter with sugar, you'll need it to be warm enough to properly incorporate the air that will make your cake fluffy. Room temperature eggs are also important if the eggs are to mix in evenly in the batter. You can speed up their warming by placing them in a bowl of lukewarm water. Once the water becomes cool, replace it with more warm water. Do this until the eggs no longer feel cool to the touch.
  • If whisking by hand, beat eggs separately (or with other wet ingredients) before adding to batter. I always pre-beat my eggs even for one-bowl recipes because of one incident. When crumbling up my favorite chocolate cake to make cake pops one time, I noticed there were chunks of something rubbery in the cake. I realized these were from streaks of egg white that didn't get totally mixed into the batter. Referring back to the bullet point above, it's important to use room temperature eggs as well to avoid these streaks.
  • If whisking by hand, whisk in one direction only when first combining wet and dry ingredients. Once the 2 are fairly combined, you can change directions, but I find that changing directions before the dry ingredients are mixed in results in more clumping.
  • Unless the recipe instructs otherwise, always stop mixing as soon as the added ingredients have been mixed in. Overmixing will result in developing the gluten (proteins that make bread chewy) in the batter too much = tough cake!
  • For even and clean distribution of batter, use a cookie/ice cream scoop. I love love LOVE this scoop -- it makes dividing up batter a cinch and is also great for cookies and ice cream, of course.
  • Don't overfill your baking liners. I've rarely seen a recipe that calls for filling more than 3/4 full. Most cupcakes recommend somewhere between 2/3 and 3/4 full. A few batters rise exceptionally high, so if the recipe says to only fill 1/2 full, follow the directions!
  • After filling pan with batter, slam pan directly down on counter from a height of 2 inches. Don't do this though if the batter is exceptionally delicate. Otherwise, it helps push any big air bubbles to the top and out. This way you won't have big holes and tunnels in your finished cakes.
  • Don't open the oven door before the last 5 minutes of baking. Cakes can be very sensitive to temperature changes and drafts. Especially opening the door during the first 1/2 of baking can have big consequences such as the cake collapsing.
  • Always check in on your cupcakes about 5 minutes before the baking time listed in the recipe. Due to variations in ovens, pans, altitude, and whatever else, it's a good idea to check your goods a little early. Better that than dry, overbaked cakes (ew). For most cakes the toothpick test is fairly accurate; the cupcakes are ready as soon as a toothpick stuck into the middle of the cupcake comes out mostly clean (a few moist crumbs are usually ok; wet batter or a lot of crumbs are not).
  • Regardless of what the recipe says, move cupcakes from pan to cooling rack no more than 5 minutes after they come out of the oven (but be careful not to burn yourself!). After persistent issues with cupcake liners separating from the sides of the cake (as mentioned above), I did some research and found 2 main culprits. First was the type of baking liner used, and second was steam formed when cupcakes sat cooling in their pans for too long. After figuring these out, I haven't had this problem again.
  • Let cupcakes cool on racks COMPLETELY before frosting unless the recipe says otherwise. Even if your cupcakes feel just barely warm, that bit of heat is probably going to be enough to melt your frosting if you try to put it on too early.
  • To fill cupcakes, I prefer the "cone method" or using a cookie cutter. The cone method simply means using a paring knife to cut a cone about halfway down into the cupcake, then using the tip of the knife to help pop the cone out. Or you can use a 1-inch wide round cookie cutter. Press the cutter down into the center of the cupcake, left it up and out, then use the tip of a knife to help you pull out the round of cake you just cut. With either method, you can spoon/pipe in the filling at this point. Now you can either put back the cone/round of cake on top of the filling or frost directly on top of the filling.
  • Cupcakes with any perishable ingredients (like whipped cream or cream cheese frosting) should be stored in the fridge. Other cupcakes can be stored, well-covered, at room temperature. They are usually good for several days this way.
  • If you make cupcakes ahead of time and want to keep them fresh/moist, wrap or place them in an airtight container and freeze them. Defrost before frosting and serving.
  • Share the joy of cupcakes with friends and family. I promise, they taste better when enjoyed together ;p.
Well, that's all I can think of for now. Please feel free to add your own tips or any questions you may have for me in the comments! In the meantime, if you're still looking for a fun and tasty Halloween treat, I've gathered all of mine in one convenient locations (...in Africa...brownie point if you get this reference ^-^).
Oreo Cookies & Cream Owl Cupcakes
Creepy Pumpkin Bug and Mummy-cakes (Cupcake Hero::October)
Happy Halloween XD
Devilishly Delicious! (My Favorite Red Velvet Cupcakes)
Black Widow Chocolate Rum Cupcakes
Spooky Graveyard Cupcakes for Halloween!

Thursday, October 27, 2011

Latest Music Obsession: Kanye West ft. Rihanna and Kid Cudi "All of the Lights"

Are you surprised I'm posting something mainstream? 8p Well that makes 2 of us! But I like to share honestly what's on heavy rotation in my Itunes and this one's taken up long-term residence since several weeks ago. As the video itself says, this video's been identified by Epilepsy Action to potentially trigger seizures for people with photosensitive epilepsy. Please don't watch this if you are one such person. Otherwise, enjoy!

Wednesday, October 26, 2011

Halloween Candy Giveaway Winner!

Thanks to everyone who entered my Halloween Candy Giveaway sponsored by Oh Nuts! The randomly selected winner is Cass (comment #11) -- congrats and enjoy eating and/or giving away your sour worms =D.

Tuesday, October 25, 2011

Tuesday Favorites!

Having just finished several posts and 3 exams in less than a week and then gotten hit today with bad news that I won't go into here, I have to say I'm not in much of a chatty mood. So none of my rambling today (lucky for you guys ;p)...let's get straight to the photos, shall we? Hope your week is starting off a bit better than ours ^_^.

1 Mycookinghut-Apple Jelly Steve Jobs Tribute
Blueberry Dutch Baby Pancake from Always with Butter
2 Alwayswithbutter-Blueberry Dutch Baby Puff Pancake Iron Pan
3 DonalSkehan Sticky Maple Apple Cinnamon Cake
Flowery Wedding Cake Photographs from Cake Power
4 Cakepower-Gumpaste Flower Wedding Cake Idea
Toast with Ricotta, Grapes, and Honey from In the Mood for Food
5 Diana_m4f-Toast Ricotta Grapes Honey, Bruschetta Idea
6 Tartelette-Acorn Squash Pumpkin Sweet Potato Pureed Soup Propwish
7 LAtelierVi-Rose Heart-shaped Macarons
9 Howdoesshe-Homemade Royal Icing Candy Eyes Halloween Idea Tutorial
10 DuncanHines-Maple Choco Leaf Caramel Acorn Fall Thanksgiving Cupcake Idea
11 OxanaPaneMiele-Beetroot Ricotta Apple Cider Tart Outside
12 Karaspartyideas-Totem Pole Indian Marshmallow, Cake Lollipops Tropical Party Idea
Pumpkin Pie Coffee Cake from Food for My Family
13 Foodformyfamily-Pumpkin Pie Coffee Cake Pecan Crumb Topping
14 Stephsus-Apples Peeling Ingred Process Knife

Saturday, October 22, 2011

Spooky Graveyard Vanilla Cookies N' Cream Cupcakes (Guest Post for Pure Joy Events)

Spooky Graveyard Cupcakes for Halloween!
Halloween is just over a week away! And I'm uber-excited to announce today that I've been asked to become a regular contributor on my incredibly talented stylist friend Christine's blog, Pure Joy Events. You've probably figured out by now that Halloween is my favorite holiday (what with all the themed posts I've been doin' lately ;p). So it's a no-brainer that my first post over there as an official contributor should be another spooky and scrumptious Halloween-themed cupcake! Please head over to Pure Joy Events to check out my post, recipe, and step-by-step tutorial for making these fondant skull and bone toppers! If you're in a hurry, the printable recipe+tutorial can be found here and the FREE printable for tombstone toppers shared generously by Heather of Chickabug can be downloaded here.

Spooky Graveyard Cupcakes for Halloween!

Wednesday, October 19, 2011

If You Want To Live and Thrive, Let the Spider Run Alive (Black Widow Chocolate Rum Cupcakes)

Black Widow Chocolate Rum Cupcakes
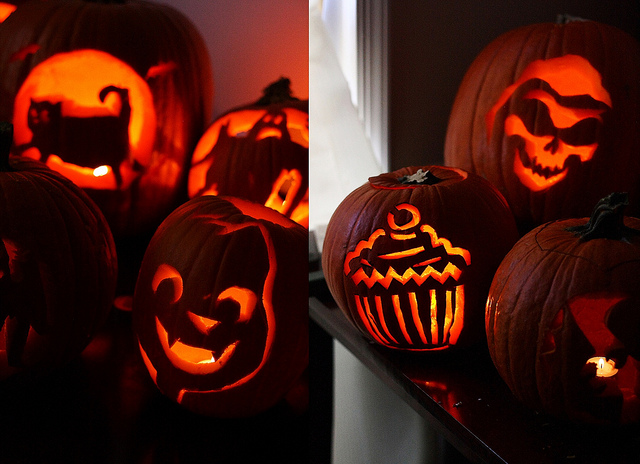
Are you getting in the spirit of Halloween yet? Please tell me you are! Here I can almost feel it coming in the air (tonight...hold on =p), which is just starting to get that real bite of cold. Still the chill comes and goes. And on days like this one when I bake, it still gets hot enough that I worry about my chocolate toppers melting before they can be appreciated in all their spooky glory...

If you're wondering what the post title's all about, it's just a quote I found while searching for a spider-related saying for these cupcakes. This one caught my eye right away...heck if I saw a Black Widow, I certainly wouldn't mess with it! There's just something extra creepy about that red hourglass marking, don't you think?

More Black Widow Cupcakes
So I've seen plenty of adorable spider cupcake ideas (like those featured over on McCormick's Kitchen PLAY), but I really wanted to make my version more realistic and creepy than those I'd come across ^_^. Since it's notoriously difficult to color homemade fondant a true black and I happened to have some black modeling chocolate on hand, I turned to this medium to make my crawly friends more dimensional and thus, my spidery vision start coming to life. Then melted chocolate, red candy melts, and a good blast of cold freezer air did the rest!

One thing that I failed to foresee was that the semisweet chocolate I used wouldn't be dark enough to match the black modeling fondant. That's why I've replaced semisweet with dark chocolate in the recipe below and also suggested that you even add a bit of black food coloring to make these truly black widows rather than "brown widows" as my boyfriend called mine hehe. Hope that you like these and you're having as much fun preparing for All Hallow's Eve as I am! And be sure to stay tuned for the next cupcake in my Halloween series -- it's so good you might even call it deadly...8p.

Black Widow Chocolate Rum Cupcakes [Printable Recipe]
Makes 12 to 14 cupcakes

XIAOLU'S NOTES: These can easily be converted into kid-friendly moist chocolate cupcakes by substituting the 3 tablespoons of rum with boiling water and simply omitting the rum from the ganache. The ganache needs to be used shortly after it's made. Toppers can be made in advance and stored at room temperature, but you should re-freeze the toppers for 10 to 15 minutes before moving them to the cupcakes since they (especially the spiders) are quite delicate. I made my spider toppers with semisweet chocolate and they turned out a bit too brown, so I definitely recommend using dark chocolate and even adding some black food coloring.

1 cup sugar
3/4 cup PLUS 2 Tbsp all purpose flour
6 1/2 Tbsp unsweetened Dutch-process cocoa powder
3/4 tsp baking powder
3/4 tsp baking soda
1/2 tsp salt
1 large egg, room temperature
1/2 cup milk [NOT skim]
1/4 cup vegetable oil
1 tsp pure vanilla extract
5 Tbsp boiling water [OR 1/2 cup IF omitting rum]
3 Tbsp dark rum
Rum Chocolate Ganache (Recipe below)
White Chocolate Spiderwebs (Recipe below)
Chocolate Spiders (Recipe below)

Heat oven to 350 degrees F. Grease tops of a cupcake pan and then line it with baking liners.

In a large bowl, sift together sugar, flour, cocoa, baking powder, baking soda and salt. Add egg, milk, oil and vanilla; beat on medium speed for about 2 minutes. Stir in boiling water and rum (batter will be thin). Pour batter into prepared cupcake liners, filling no more than 3/4 full. If there is batter left over, fill an additional 1 to 2 liners in another baking pan OR standalone baking cups with the remaining batter. Bake 18 to 23 minutes or until a toothpick or thin knife inserted into the center of one comes out clean. Cool 5 minutes, then remove from pans to wire racks to finish cooling. Make the ganache as you wait for the cupcakes to cool.

Dip each cupcake upside-down into the ganache up to the liner, lift cake out of chocolate, and let excess ganache drip off. Next, turn cupcake right-side up and place on wire rack to let ganache set. (If ganache begins to harden before all of the cupcakes are dipped you may heat for 5-second intervals in a microwave until chocolate is smooth again).

After 30 minutes, once ganache has partially set, center a white chocolate spiderweb and then a chocolate spider atop each cupcake. Enjoy!

Rum Chocolate Ganache
3 oz. bittersweet chocolate (chips or finely chopped bar)
1/3 cup heavy cream
1 tsp unsalted butter
2 tsp dark rum

Make ganache after cupcakes are mostly cooled off. Place chocolate in a small to medium bowl. Bring heavy cream and butter just to a boil. Pour hot cream mixture over chocolate and let sit for about 5 minutes. Begin stirring mixture and continue stirring until the mixture is uniform and smooth (may take about 5 minutes of stirring). Stir in rum. Use immediately.

White Chocolate Spiderwebs
Slightly adapted from Country Living

3/4 cup white chocolate chips

Microwave white chocolate chips in a bowl for 30 seconds and stir. Continue to microwave in 20-second intervals until almost melted. Stir again until chocolate is completely melted. Pour inside a zipper-lock bag with one tip snipped off to create an opening for piping.

Line a cookie sheet with parchment or wax paper. Slide the spiderweb template underneath paper. To make each web, use piping opening to trace white chocolate along design, making sure to connect all lines. Repeat process until you've created 12 to 14 toppers (depending on the number of cupcakes). Chill them in refrigerator for 10 minutes. Then, using a spatula, carefully remove webs from parchment.

Chocolate Spiders
Modeling Chocolate (Recipe below)
1/2 cup roughly chopped dark chocolate
Black oil-based or powder food coloring (optional)
Red royal icing or melted candy melts

Microwave chopped dark chocolate in a bowl for 30 seconds and stir. Continue to microwave in 20-second intervals until almost melted. Stir again until chocolate is completely melted. If desired, add black oil-based or powder food coloring (do NOT use liquid/gel coloring; if you do, the chocolate will clump together and you'll have to toss it!) a little at a time, stirring well in between additions, until the chocolate is the desired shade of black. Pour inside a zipper-lock bag with one tip snipped off to create an opening for piping.

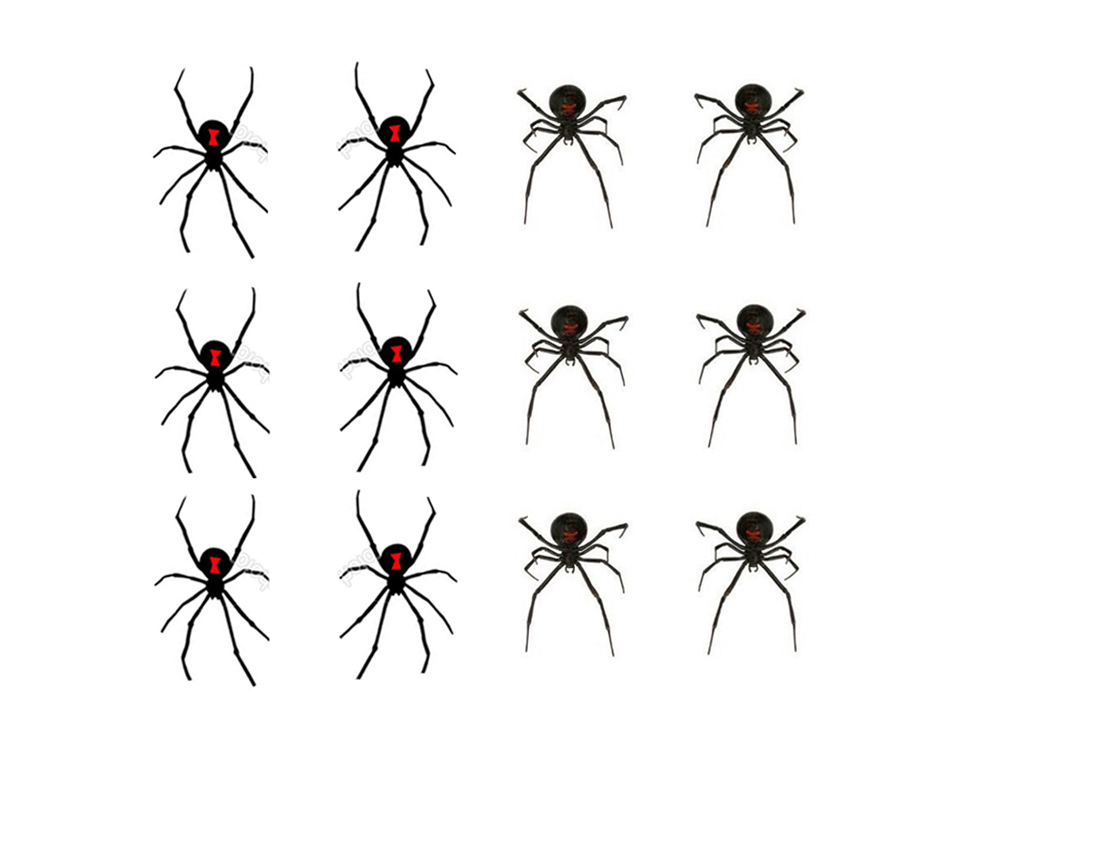
Line a cookie sheet with parchment or wax paper. Slide a spider template [I simply printed out some cartoony images of black widow spiders I found online; here's what I used] underneath paper OR you could pipe freehand IF you trust yourself to do this. To make each spider, first roll modeling chocolate into 12 to 14 balls about the size of large green peas. Pipe a small dot of melted chocolate on the parchment above the round area of a spider on the template, and press ball of modeling chocolate onto it to secure. Now pipe chocolate to trace along the rest of the design, forming the spider head and legs. Make sure to connect all lines. Repeat process until you've created 12 to 14 spider toppers (depending on the number of cupcakes). Now place red royal icing or red candy melts (melted the same way as the chocolate chips above) into a zipper-lock bag. Snip off a tiny bit of the tip for piping, then trace and fill in an hourglass shape on each modeling chocolate spider "abdomen." Chill spiders in refrigerator for at least 15 minutes. Then remove carefully from parchment just before transferring to cupcakes.

Modeling Chocolate
10 oz. semisweet chocolate (coarsely chopped chunks or chips)
1/3 cup light corn syrup
Black food coloring, as needed (such as McCormick Black Food Color)

In a shallow bowl, melt the chocolate in microwave (be careful so that the temperature does not exceed 100 degrees F) for 2 minutes; stir. If chocolate is not completely melted, return to microwave for 30 seconds at a time and stir until smooth. Add corn syrup to the chocolate and mix well (scrape all the corn syrup into the chocolate with a rubber spatula). Using a rubber spatula, stir and fold mixture, scraping the sides and bottom of the bowl well, until no shiny syrup is visible and the mixture forms a thick ball. Pour mixture onto a large sheet of wax or parchment paper and spread with the spatula until it’s about 1/2-inch thick; let it sit and stiffen, uncovered, for about 2 hours.

After that, knead black food coloring into the modeling chocolate 1 to 2 drops at a time until you get the desired shade. Use at once or store in an airtight container at room temperature for up to 1 month.

I'm submitting these Black Widow Spider Cupcakes to McCormick's Kitchen PLAY Contest as a conceptual adaptation of My Baking Heart's Spider Cupcakes. They're giving away ten $50 prizes to those who recreate any of the recipes in this month's Halloween-themed Progressive Party. If you're interested in entering, you can review the complete contest rules here. Deadline is October 31, 2011. Good luck!

Monday, October 17, 2011

Monday Favorites and Kitchen Safety Tips!

My First Decorated Cookies!
What a crazy weekend this has been! Between Thursday and Saturday, I made 60 cupcakes for a hospital fundraiser, 6 orange passionfruit curd mini tarts, a batch of tangerine mousse, 24 pumpkin-decorated sugar cookies (my first decorated cookies ever and pictured above), and a lemon genoise cake filled with lemon curd and covered in lemon white chocolate mousse frosting as well as decorating a half sheet cake with lots of buttercream and pumpkin and fall colored designs! To be honest, I can hardly believe I was able to get it all done, but it feels damn good to have completed all of it! But I must confess that I moved my favorites post up this week because I simply could not drag myself back to baking just yet. So please enjoy these lovely photos from around the blogosphere while I muster up the will to get back in the kitchen =p.

Almond Toffee Fudge Photograph from Pure Vegetarian by Lakshmi
1 LaksmiW-Almond Toffee Fudge
Fairytale Wedding Cake Photograph via The Wedding Chicks
2 WeddingChicks-Birch Wood Look Flower Fairytale Wedding Cake Idea
3 KatieQuinnDavies-Upside-down Rhubarb Cake Rack Blueberry Galette
4 StuderTV-Hot Apple Cider Drink Bottle Basket Idea
5 SproutedKitchen-Crusted Butternut Squash Herbed Breadcrumbs Ingred
Apple Pie Bars from Kwestia Smaku
Kwestiamaku-Apple Pie Bars
Cocktails Photographs from Sheri Giblin
7 Sheri Giblin-Unknown Cocktails Drinks with Lime Garnish
8 TicketKitchen-Hot Choco Cube Pumpkin Labels Party Idea (See Printable)
9 HostesswiththeMostess-Lychee Cherry Eye of Newt Halloween
Lemon Curd Tart with Olive Oil from Gourmet Magazine
10 Gourmetmag-Lemon Curd Tart Olive Oil Sliced
11 Bron Marshall-Mandarin Orange Pistachio Muesli Oats Granola
12 Donna Hay-Brownie Cookie Sandwiches
13 GourmetTraveller-Apples with Calvadoes and Clam Chowder
14 Cookiesandcups-Pumpkin Orange, Red Velvet Whoopie Pie Cookie Sandw Fall Halloween Idea
Lastly I wanted to share this very useful kitchen safety infographic that a reader recently shared with me. Trust me, I'm familiar with the many ways that you can hurt yourself in the kitchen. Plus a lot of food-related illness comes from improper handling. So please put safety first whenever you're in the kitchen!

Your Kitchen is Trying to Kill You:  Tips for staying safe in the kitchen (Infographic)

Source by JES Restaurant Equipment

Wednesday, October 12, 2011

Tuesday, October 11, 2011

Tuesday Favorites!

I'm literally just back in town from a fun weekend in NYC catching up with old and new friends. Thanks C, J, W, L, and Joanne for making this a weekend to remember! Before we get to this week's favorite food photos, I just want to quickly share that a food photo of my own (last year's bloody rat cupcakes) has been published by the Danish magazine BoligLiv, both online and in print! I was especially awed when I got my complimentary hard copy and saw the gorgeous food photos published in the same issue as my photo (including the first photo below). On top of that, I'm bursting with joy to announce another big milestone for 6 Bittersweets: the number of you subscribing to this blog has now surpassed 2,000! Thanks, as always, from the bottom of my heart. I wouldn't have accomplished any of this without your incredible support and kindness!

N1 Boligliv-Cheese and Toast Bread with Cherry, Cranberry Compote
Laduree French Macarons Photograph from Licking the Plate
N2 Mwhammer-Laduree Macarons
Fried Okra from Dine & Dish
N3 DineandDish-Fried Okra Muslin Cloth
Marshmallow S'more Pops by One Stone Events via Hostess with the Mostess
N4 OneStoneEvents-Marshmallow S'mores Lollipops
Brush Embroidery Flower Cake Pops from The Cake Poppery
N6 Cupcakestakethecake-Brush Embroidery Cake Lollipops Idea
Wedding Cake with Lace Pattern, Fabric-look Ruching, and Buttons by Amy Beck Cake Design via Elizabeth Anne Designs
N5 ProjectWedding-Draping Lace Button Fondant Wedding Cake Idea
Chicken Salad Wrap from La Petite Cuisine
N7 LaPetiteCuisine-Chicken Salad Lettuce Roll Wrap Twine Pewter Knife
N8 Cintamani-Spring Peas Green Pureed Soup
N9 IslandMenu-Lamb Potato Peas Stew Bread Loaf Dark
Strawberry Cream Shortbread Cookies from Il Cavoletto Di Bruxelles
N11 Sigrid Verbert-Strawberry Cream Shortbread Cutout Cookies
Pirate Ship Fondant Cupcake Toppers by Lynlee's Petite Cakes via Pure Joy Events
N12 LynleesPetiteCakes-Pirate Ship Treasure Map Cupcake Fondant Toppers Party Kid Idea
Apple Zucchini Bread from Citrus and Candy
N13 CitrusandCandy-Apple Zucchini Quickbread Loaf Slice Honeycomb Butter
N14 Papercrave-Owl Treat Boxes Halloween Idea