Sunday, September 27, 2009

S'more Bars


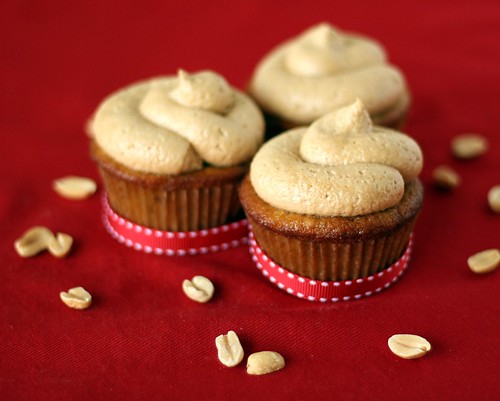
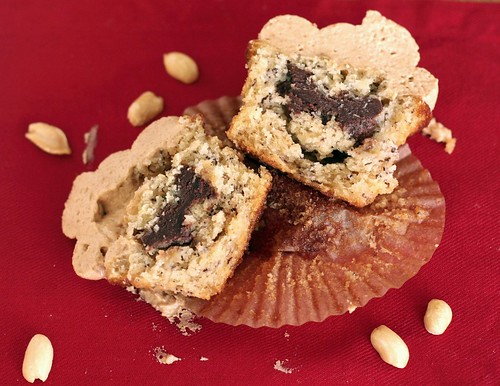
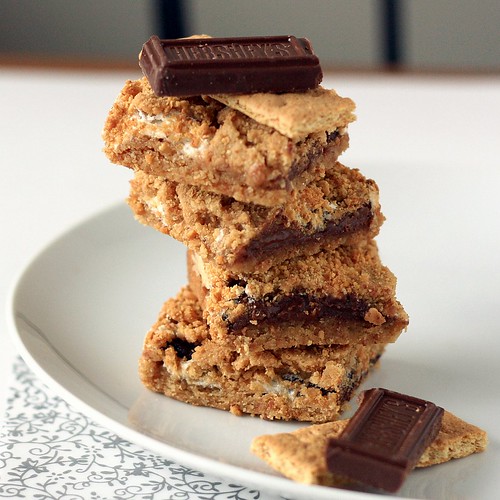
Today I bring you one of my favorite desserts - s'mores - in bar form! Traditional s'mores are an irresistible campsite love affair between roasted marshmallow and gooey milk chocolate, all enveloped by crunchy graham crackers. In my honest opinion, it's an essential part of the camping experience. Making them is an adventure. I always look away for a second when the marshmallow's over the fire and suddenly it's aflame! It's all good though 'cause the black ones are still yummy. By the end of the night, there's inevitably marshmallow goo on my hands, in my hair, and of course in my tummy.

Now I wholeheartedly believe that messier foods are often the most delicious. But no one wants chocolate smears on their documents, so baking for the office called for something a bit more sophisticated. These bars really fit the bill. Try 'em out for a satisfying reinterpretation of the classic that fills your craving for those s'more flavors while keeping stickiness to a minimum. Nothing trumps the original though, so especially if you've never tried a real s'more, get ye to a campsite ASAP!


Now for a quick update about my "real" world. Lord knows I sound like a broken record when I mention how busy work is, but I jest not that all but a handful of my waking hours have been spent at the office for the last few weeks. And it'll only get worse with my 4-6 week trial starting early November. Posting will be less frequent, but I'll try to make each one special. This seems like a good time to say a big THANK YOU to my lovely readers and followers so far! To show my appreciation for having you in my life, stay tuned for a little giveaway action next month.

S'more Bars [Printable Recipe]
Adapted from Hershey's via Baking Bites
Makes 16 2" squares

1/2 cup unsalted butter, room temperature
1/2 cup sugar
1 tsp unsulphured molasses
1 large egg
1 tsp vanilla extract
1 1/3 cups all purpose flour
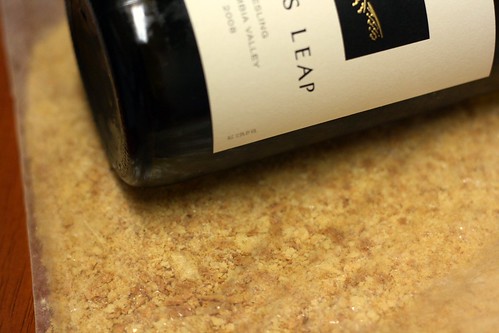
1 cup graham cracker crumbs
(from about 8-9 graham cracker sheets broken down in a food processor)
1 tsp baking powder
1/4 tsp salt
2 king-sized or 4 regular-sized milk chocolate bars
1 1/2 cups marshmallow fluff (Recipe Below)

XIAOLU'S NOTES: You can certainly use store-bought marshmallow fluff but the homemade recipe below is very simple, cheap, and superior in flavor. I also couldn't stand the idea of washing all 273 parts of the food processor just to make cracker crumbs, so I did it the old-fashioned way. Why yes, ziplocs are practically 19th century =p. Lastly, I can't read apparently and used a 9-inch instead of 8-inch pan, so my bars turned out thinner and less gooey than the original.


Preheat oven to 350 degrees F. Line an 8-inch square baking pan with parchment paper, including the sides. (You can also just grease the pan.) In a small bowl, whisk together flour, 3/4 cup graham cracker crumbs, baking powder, and salt.

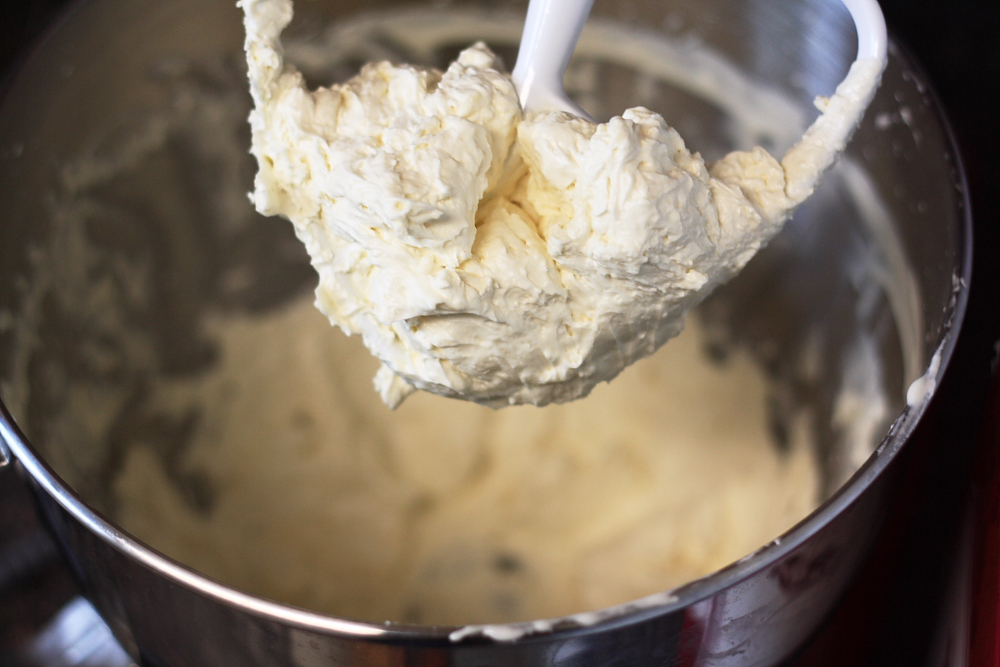
In a large bowl, cream together butter and sugar until light. Beat in egg, molasses, and vanilla. Add the dry ingredients and mix at a low speed until combined. Divide dough in half and press one half into an even layer on the bottom of the prepared pan.


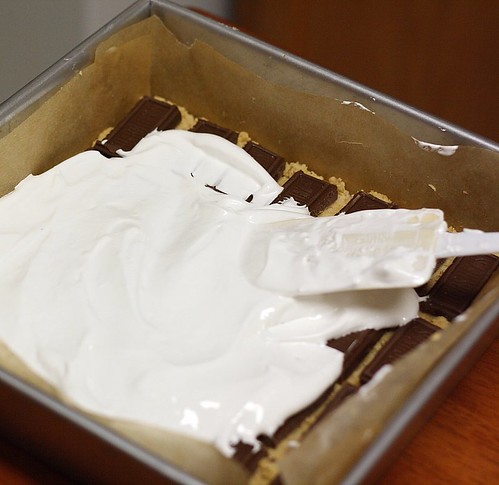
Place chocolate bars over dough, breaking the chocolate (if needed) to get it to fit in a single layer no more than 1/4 inch thick. Spread marshmallow creme or fluff on top of the chocolate. Combine the remaining dough with the reserved 1/4 cup of graham cracker crumbs. Then flatten the dough into small pieces and spread them in a single layer on top of the fluff. There will probably be crumbs left over. Simply sprinkle these over the top, especially over any sections with marshmallow fluff still peaking out. Bake for 30 to 35 minutes, until lightly browned. Cool completely before cutting into bars.

Kittencal's Marshmallow Fluff Clone
Reduced from from Recipezaar
Makes about 2 1/2 cups

NOTE: This is more than you need for the s'more bars, but extra fluff can easily be refrigerated for up to 1 week OR frozen for later use. Just make sure to defrost it and stir well with a spoon before using.


1 egg white
2/3 cup light corn syrup
1/4 teaspoon salt
2/3 cup powdered sugar (confectioner's)
1 tsp pure vanilla extract

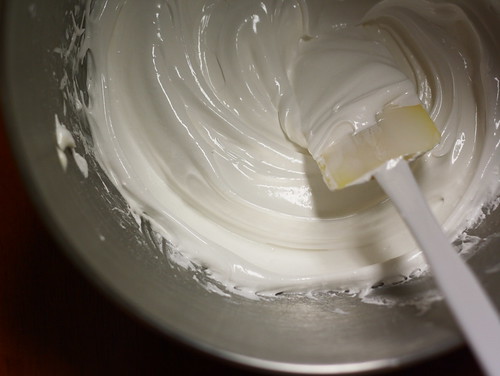
In a large bowl, combine egg white, corn syrup, and salt; beat with mixer on high speed for 10 minutes or until thick. Add in powdered sugar, then beat on low speed until blended. Beat in vanilla until blended.

Saturday, September 19, 2009

Spicy Chinese Long Beans


It must be the combination of my Chinese heritage and my foodie-ism (is that even a word?), but Asian food markets are to me what candy shops are to little kids. I can spend (and likely have spent) hours in one, much to the frustration of my boyfriend. Twenty types of bean sauce? I'm fascinated. Fresh tofu? Is there anything tastier? (Yes, tofu DOES have its own flavor and yes, I love it!) Sweet black sesame-filled buns? Swooooon.

But my favorite has got to be the fresh produce section. Row after row of familiar and exotic (even to me) fruits and vegetables. And they're darned cheap too! After missing out on fresh green beans due to a hectic summer at work, these pretty Chinese yard-long beans easily seduced me during our recent Asian market outing.


As the name suggests, long beans can grow up to 3 feet long! They taste similar to the green beans you're used to but are both chewier and less sweet. You can find more information about them here and my fast but flavorful stir-fry recipe after the jump.

Chinese Long Beans Stir-fry [Printable Recipe]
Serves 4 to 6

XIAOLU'S NOTE: These beans should be available at most Asian markets, but you can substitute green beans for a somewhat different but still delicious texture and taste.

1 tablespoon vegetable oil
3 tablespoons of preserved mustard (za cai)
3 dried red chili peppers, or to taste
2 cloves garlic
1 bunch (about 1 1/2 lbs) long beans
1 tablespoons oyster sauce
1 tablespoon soy sauce
1 tablespoon rice wine
1 teaspoon sugar
salt to taste

Snap or cut all the ends off of the long beans, then wash and dry them. Slice the beans into 1 to 1 1/2" pieces. Roughly chop the preserved mustard and mince the garlic.

Heat the vegetable oil in a large pan or wok over medium-high heat. Break the dried red peppers in half and add them to the pan. Throw in the preserved mustard and garlic, and cook until fragrant, stirring frequently to avoid burning the garlic (which turns it bitter and gross).

Add the long beans and cook several minutes until it begins to soften. Mix in the oyster sauce, soy sauce, rice wine, and sugar. Continue cooking until beans are tender but not mushy (but long beans are supposed to be a little chewy so don't judge them by green bean standards). Taste and add salt if necessary. Serve hot with steamed rice and chili garlic sauce.

Chinese Long Bean on Foodista

Thursday, September 17, 2009

Cupcake Hero::Banana Roundup - Please Vote!

UPDATE: I didn't win the vote, but CB picked my caramelized banana creme brulee cupcakes as the baker's choice to go up against Christy's PB banana cupcake sandwich. Thanks so much, CB!


The roundup of entries for the banana-themed Cupcake Hero::September is up. Thanks so much to CB of I Heart Cuppycakes for bringing Cupcake Hero back! VOTING IS OPEN from now through September 21st @ 11:59pm EST. CB will then have a throwdown.


My entries were Chocolate-Filled Banana Cupcakes with Peanut Butter Mousse Frosting and Caramelized Banana Creme Brulee Cupcakes. Please visit I Heart Cuppycakes to drool over, um I mean, to check out all the entries and to vote vote vote for your favorites! May the best banana cupcake win! =D

Monday, September 14, 2009

Banana Cupcakes with Peanut Butter Frosting (Cupcake Hero)


UPDATE: The Cupcake Hero::September roundup is up! Please go check out all the entries and VOTE for your favorite!

Can I let you in on a little secret? Although this blog seems to be raining them lately, I didn’t always love cupcakes. Quite the opposite. This girl who prides herself on being a non-snobby foodie used to thumb her nose at all that cutesy-ness (all the while concealing a soft spot for those fluffy swirls of frosting). Ironically that frosting was also the source of my aversion.

Until I started doing my own baking, the frosting I encountered was mostly greasy and nauseatingly sweet. To me, a cupcake was just a pretty, overpriced face disguising a pile of butter+sugar paste. But inspired by countless blogs over the last few years, I discovered truly scrumptious frostings, including cream cheese whipped cream, ganache, and swiss meringue buttercream. That issue resolved, it was only a matter of time before the adorably portable and portion-controlled (ha!) cupcake won me over...and I began entering cupcake contests (see the natural progression?).

These delicate cakes wouldn't show off their insides willingly.
The struggle was intense, the spoils beyond delicious!


So without further ado, I present to you my second entry to Cupcake Hero::September. These are chocolate-filled banana cupcakes with peanut butter mousse frosting that's just sweet enough. Quite a mouthful! Really they could just be called “scrumptious” or “sexy” and it’d be just as accurate. But if you make these (and I insist that you do!), do yourself a favor and have a glass of milk or coffee close-by. Enjoy!


Banana Cupcakes with Chocolate Filling and Peanut Butter Frosting
[Printable Recipe]
Cake adapted from Evil Shenanigans (Love that blog title!)
Frosting from Maple N' Cornbread
Makes 12 cupcakes

1/2 cup mashed ripe bananas
1/2 cup buttermilk (I used 1/3 cup yogurt and 3 tablespoons milk)
1 cup all-purpose flour
1/2 teaspoon baking soda
1/8 teaspoon baking powder
1/8 teaspoon salt
4 tablespoons (1/2 stick) unsalted butter, at room temperature
3/4 cup sugar
1 large egg, room temperature
1 1/2 teaspoons pure vanilla extract

Chocolate Filling (Recipe below)
Peanut Butter Mousse Frosting (Recipe below)

Heat the oven to 350 degrees F and line a standard muffin pan with paper liners. Sift the flour, baking powder, baking soda, and salt in a large bowl and set aside. Peel your ripe banana and mash it very well until there are no large chunks remaining. Add the buttermilk to the bananas, mix well, and set aside.

Using an electric or stand mixer, cream the butter and sugar until light and fluffy. Add the egg and then the vanilla, mixing well after each addition. Add half of the flour mixture, the banana mixture, then the rest of the dry ingredients.

Fill cupcake liners about 2/3 full (I like to use my large cookie scoop for this). Bake until a toothpick inserted in center of a cupcake comes out clean, 18 to 25 minutes. Allow the cupcakes to cool for 5 minutes in the pan. Then move them to a wire rack to cool completely.

Once cool, cut a cone in each cupcake and spoon in 2-3 teaspoons of the chocolate filling. Replace the cone and frost as desired (I used an Ateco 808 tip).


Chocolate Filling
1/3 cup heavy cream
2/3 cup semisweet chocolate chips

Combine the chocolate chips and cream in a medium, microwave-safe bowl. Try to submerge the chocolate as much as possible, but it's okay to have some above the cream. Microwave the mixture on medium for 1 minute. Stir and heat again in 15-second increments, stirring each time, until fully melted. Let this cool and thicken (in the fridge if needed) before using.

Peanut Butter Mousse Frosting
1 cup creamy peanut butter
5 tbsp unsalted butter, room temp
1 tsp pure vanilla extract
1/4 teaspoon kosher salt
1/3 cup heavy whipping cream
1 to 1 1/2 cups confectioners sugar

Place the butter and peanut butter in a bowl. Whip with electric beaters on low until mixed. Add the remaining ingredients, beating on high speed for 2-3 minutes until light and very fluffy.

Saturday, September 12, 2009

Pumpkin Pancakes with Cream Cheese Syrup


My partner-in-crime and food-taster-in-chief, Patrick, has a job that gives him Thursday and Friday off instead of the regular weekend. This makes Wednesday night great, of course. But he's often a little down on Friday, as he anticipates entering the work week before everyone else. The least I could do to start things off right was a surprise of homemade pancakes for breakfast.

One thing you gotta know about me is that I hate waste, especially relating to food and during this economic downturn. (It's probably got somethin' to do with my Chinese upbringing that emphasized not wasting even a single grain of rice. There's even a poem about this -- no joke.) So no surprise that I chose pumpkin pancakes to use up the pumpkin puree and cream cheese frosting left over from cupcakes I made earlier.


This recipe produces fluffy yet moist pancakes with a pumpkin flavor that really shines through. And cayenne powder (just a pinch or 2) has become a regular in my spicy sweets ever since I made those ginger cookies. But the kicker has got to be the syrup. The tanginess of cream cheese, milky richness of sweetened condensed milk, and decadent creaminess of both. My breakfasts don't usually sound so much like dessert, but with the colder weather upon us, I don't mind this indulgence one bit.

Pumpkin Pancakes with Cream Cheese Syrup [Printable Recipe]
Adapted from Martha Stewart via Baking and Books
Makes about 8 4-inch pancakes

XIAOLU'S NOTE: To save time in the morning, you can separately mix the dry and wet ingredients the night before. The next morning, just let the wet mixture warm up for a bit. Then combine with the dry mixture and cook as directed below.

Pancakes
1 1/4 cups all purpose flour
1 1/2 teaspoons baking powder
1/2 teaspoon baking soda
1 tablespoon wheat germ
(I forgot to add this but I'm sure it adds great texture and nutty flavor)
1/2 teaspoon ground cinnamon
1/4 teaspoon ground nutmeg
1/4 teaspoon ground ginger
pinch of ground cloves
pinch of cayenne powder
1 egg
2 tablespoons vegetable oil
1 tablespoon molasses
1 tablespoon sugar
1/2 cup pumpkin puree (I used canned)
1 cup buttermilk (I substituted 1% milk plus 1 teaspoon vinegar)
vegetable oil for the pan

Cream Cheese Syrup
3/4 cup cream cheese frosting (any kind but I used extra from this recipe)
1/2 cup milk
1 tablespoon sweetened condensed milk, or more to taste

In a large mixing bowl, stir together the flour, wheat germ, baking power, baking soda, and spices. In a separate mixing bowl, whisk the egg until thoroughly combined, then add the oil, molasses, sugar, pumpkin, and buttermilk. (Cover and refrigerate the liquid mixture at this point if making ahead.) Pour the liquid ingredients into the dry ingredients and whisk gently until the batter is mostly mixed but still contains small lumps. Let batter rest while pan heats, at least 5 minutes.


XIAOLU'S NOTE: My gas stoves always run hot, so I never turn the heat above medium and more often than not, it's lower than that.

Heat non-stick skillet or griddle over medium heat. Add a few drops of oil and spread it over the bottom of the pan. Pour pancake batter onto hot griddle approximately 1/4 cup at a time. When the edges start to dry and bubbles appear on top, flip to cook the other side. Keep pancakes warm in an oven heated to 275 degrees as you repeat the process to cook the rest of the batter.

To make the syrup, simply mix all the ingredients together until smooth. You can play around with the proportions to get the perfect sweetness/thickness for you.

Gluten-free Pumpkin Cupcakes with Cream Cheese Frosting


A friend of mine was recently diagnosed with Celiac disease. For those who may not know, it's a genetic autoimmune disorder of the small intestine caused by a reaction to a gluten protein found primarily in wheat, rye, and barley (but also, in smaller amounts, in oats and spelt) (Wikipedia). Symptoms of this can include diarrhea, malnutrition, bloating, and fatigue.

Many of us have only recently heard about Celiac disease (and many still haven't), but it's by no means a new or rare disorder. Approximately 1 in 133 people in America suffer from Celiac disease according to this article. Yet Shauna of Gluten-Free Girl writes that only about 3% of those have been diagnosed. That's a big problem since, left untreated, it can do very serious damage to your body. And the only treatment that works is to cut gluten out of your diet completely and permanently. Fortunately, awareness of Celiac and other types of wheat sensitivity is growing. Especially through the internet, there's now a wide variety of gluten-free (GF) products, information, and support available.


Now all of this comes back to my friend, whose birthday was last week. See, she'd requested pumpkin cupcakes months ago. But that was before her diagnosis. My old (all purpose flour) recipe was no good now! Luckily, this recipe was only a Google search away. These cuppin' cakes rose really well and tasted surprisingly good. The bean flours in the GF mix I used did leave a slight aftertaste though, so next time I'll play around with making a bean-free mix.

Gluten-free Pumpkin Cupcakes with Cream Cheese Frosting
[Printable Recipe]
Adapted from Simply Recipes
Makes 16-17 cupcakes

XIAOLU'S NOTE: I omitted the raisins and nuts called and STILL got 1 more cupcake than Elise said I would. Either my wrappers are tiny, or you should expect to get at least 20.

1 stick (1/2 cup) unsalted butter, room temperature
1 cup brown sugar, packed
1 Tbsp molasses
1 Tbsp honey
2 large eggs, room temperature
1 teaspoon vanilla extract
1 cup pumpkin purée
2 cups Bob's Red Mill's gluten-free flour
(I replaced 1/4 cup with tapioca starch to try to minimize the "beany" taste as much as possible but Elise used all GF mix)
1 teaspoon xanthan gum (optional, but recommended on the GF flour package)
1/4 teaspoon baking powder
1 teaspoon baking soda
1/2 teaspoon salt
1 1/2 teaspoon of pumpkin pie spice (1/2 teaspoon cinnamon, 1/4 teaspoon ground ginger, 1/4 teaspoon ground cloves, 1/4 teaspoon ground nutmeg, 1/4 teaspoon lemon zest)
1/2 cup buttermilk (see note below)
1/2 cup chopped pecans (omitted)
1 cup raisins (omitted)
8 oz. cream cheese, room temperature
1/4 cup (1/2 stick) unsalted butter, room temperature
1/4 cup maple syrup (I only used 1 Tbsp cause that's all I had)
1 cup confectioner's powdered sugar, sifted

ELISE'S NOTE: To make your own buttermilk, combine 1/2 cup of milk with 1/2 Tbsp of vinegar or lemon juice. Stir and let stand 10 minutes before using.

Preheat oven to 350°F, and place rack in the center of the oven.

Cupcakes
Using an electric mixer, cream the butter, brown sugar, molasses and honey, until as light and fluffy as it will be, about 2-3 minutes. Add the eggs, one at a time, mixing well after each addition. Add the pumpkin purée and vanilla and beat until incorporated.

In a separate bowl, sift together flours, baking soda, baking powder, salt and spices. Add the flour mixture and buttermilk alternately to the pumpkin batter, in three additions, beginning and ending with the flour mixture.


Set paper cupcake holders in a muffin tin. Spoon the batter into the cupcake paper cups, close to the top of the cups. Bake approximately 18 minutes (mine took exactly 22 minutes), or until a toothpick inserted in the middle comes out clean. Let cool completely before frosting.

Frosting
Using an electric mixer, mix together cream cheese and butter until smooth. Add maple syrup and confectioners' sugar and mix to combine. Once cupcakes have cooled, apply frosting.

Wednesday, September 9, 2009

Caramelized Banana Crème Brulee Cupcakes with SMBC (Cupcake Hero)

UPDATE: This cupcake won Cupcake Hero for September's banana theme!


These cupcakes are my entry to Cupcake Hero::September. Upon discovering that banana was the theme, my imagination overflowed with possibilities. The idea to combine gooey caramelized bananas with a creamy yet crunchy crème brulee frosting stuck, and I simply had to pursue it.

I entered the kitchen eager to bring this concept to life...and emerged humbled and exhausted a short *cough* 4 hours later. There were hiccups aplenty (who knew bananas could turn such an ugly gray color?) and moments of panic (when the frosting started melting). But so what if this was no speedy, picture-perfect confection? I learned from each mistake, conquered swiss meringue buttercream (finally!), and had fun in between. My coworkers gobbled these up, one even dubbing them “a party in my mouth"! Please find the recipe after the jump with my notes so no one will repeat my mistakes.

SMBC Avalanche: so yummy but not so pretty

Are you still with me? Cause I’d love to get to know you better if you are. One of the reasons I started this blog was to connect with others who share a passion for food. To start off, I'm curious if you find posts about kitchen "flops" interesting/informative or off-putting? Have your own failed attempts shaped you into a better cook or baker over time? For other bloggers out there, do you ever find the pressure to make not only tasty but attractive dishes getting in the way of simply enjoying the food? Penny for your thoughts =).

Caramelized Banana Crème Brulee Cupcakes [Printable Recipe]
Adapted from How to Eat a Cupcake via Beantown Baker
Make 12 cupcakes

1 1/4 cups all purpose flour
1 1/2 teaspoons baking powder
1/4 teaspoon salt, plus a pinch for the egg whites
1/4 cup (1/2 stick) unsalted butter, room temperature
1/2 cup sugar
1/2 teaspoon molasses (not blackstrap)
(You can simply use 1/2 cup of brown sugar instead of the sugar and molasses)
1 egg, separated
2/3 cup milk
1/2 cup sweetened condensed milk
1 teaspoon vanilla extract

Caramelized Banana Filling (Recipe below)
Brown Sugar Swiss Meringue Buttercream (Recipe below)
1/3 cup granulated sugar (for torching...mwahaha)

Preheat oven to 350°F.

Line a muffin pan with 12 cupcake liners. Sift flour, baking powder, and salt together and set aside. Cream butter and sugar together until light and fluffy. Add egg yolk and mix in well. Add molasses and vanilla. Beat until smooth. Alternately beat in dry ingredients and milks.

In a separate (completely grease-free) bowl, beat the egg white with a pinch of salt until stiff but not dry. Gently fold whites into batter.

Spoon batter into cupcake papers (I like to use my large cookie scoop for this), filling cups about 2/3 full. Rap the pan against the counter once to get rid of any air bubbles. Bake for about 15-20 minutes or until a toothpick inserted into the center comes out clean. Remove from oven and cool completely.


Cut a cone out of each cupcake. (You won't be needing the tops anymore so feel free to nom on them. You deserve it, cupcaking is hard work!) Spoon in 1-2 pieces of the caramelized banana filling into each cupcake, then spread or pipe buttercream on top.


Sprinkle sugar over the frosting and caramelize with a creme brulee torch. (Be careful to hold the torch no closer or longer than necessary, to avoid melting the buttercream.) Top cupcakes with a piece of caramelized banana each if you want folks to know what's inside (BUT you gotta chill the cupcakes at least 30 minutes after torching OR all that precious buttercream will avalanche, as pictured above). Or just let it be a delicious surprise =D.

Caramelized Banana Filling
Adapted from Recipezaar

XIAOLU'S NOTE: My bananas turned gray overnight. I found this method to prevent discoloration next time.

2-3 firm, ripe bananas
4-6 tablespoons sugar
2 tablespoons butter
2 tablespoons dark rum, optional
juice of any citrus fruit


Slice bananas into 1/2"-thick coins. Sprinkle slices with citrus fruit juice to prevent discoloration.

Melt butter in medium size nonstick pan over medium-high heat. Sprinkle sugar evenly over the melted butter, then add the bananas in a single layer on top of the sugar. Cook bananas until light to golden brown underneath, about 4-5 minutes (you can lift with a spatula to peak). Be careful not to overcook or burn them (if you smell them browning, or see color in the pan, flip them right away). Sprinkle rum, if using, over the bananas. When cooking with alcohol, there is always the chance of it catching on fire, so be very careful when adding the rum. Gently flip bananas over to brown the other side, turning heat down to medium. The second side will brown in about one minute.


Transfer to a plate that has been coated with oil or cooking spray (otherwise they may stick) and set aside. Soak pan in hot water to make cleaning easier later on. Or you can fill it with water and reheat it over medium heat to dissolve any stubborn bits.

Brown Sugar Swiss Meringue Buttercream

XIAOLU'S NOTE: My buttercream remained soupy even after 8+ minutes of beating. I guessed that my beater blade, the temperature, or the amount of butter was the problem. So I chilled the mixer bowl for 10 minutes, switched to the paddle attachment, and added 3 more tablespoons of cold butter, 1 tablespoon at a time. The buttercream came together in under 3 minutes of mixing this time, at which point I may have let out a celebratory yelp.

1/2 cup light brown sugar
2 egg whites
1/8 teaspoon salt
1/2 cup (1 stick) unsalted butter, cooler side of room temperature
1 teaspoon vanilla extract

My first successful swiss meringue buttercream coming together
It looks chunky here but it smoothed out after more beating


Combine sugar, egg whites, and salt in the mixing bowl of your stand mixer over a pan of simmering water. Whisking constantly, cook until sugar has dissolved and mixture is warm (about 160 degrees). Turn off the stove and move the bowl to your stand mixer fitted with the whisk attachment. Beat egg white mixture on high speed until it forms stiff (but not dry) peaks. Continue beating until fluffy and cooled (this is important), about 7 minutes total.

Switch to the paddle attachment. With mixer on medium-low, add butter two tablespoons at a time, beating well after each addition (about 10 seconds between each addition). Increase speed to medium-high; continue beating until frosting appears thick, at least 3 minutes. (You'll hear a distinct slapping sound and visibly see the buttercream go from soupy to cohesive when it becomes SMBC.) Reduce speed to low, add the vanilla, and continue beating 1 minute to incorporate the extract and reduce air bubbles.

Sunday, September 6, 2009

Tiramisu Cupcakes


Tiramisu is an amazing dessert that combines layers of contrasting - but all extremely delicious - tastes and textures into each indulgent bite. The espresso (and alcohol)-kissed sponge biscuits meld perfectly in your mouth with the egg-rich mascarpone cream, all tied together by a hint of cocoa. Remember that eye-rolling I wrote about earlier? Well, a good tiramisu will set me off every.single.time. And I'm not the only one enamored with it. There's an entire website dedicated to tiramisu, and you can read about one woman's research into its origins here.

As much as I (clearly) love the original, I was recently in need of a version more suitable for work. That is, something less messy to serve and without raw egg yolks. And since I was throwing tradition to the wind, I swapped out mascarpone for cream cheese to save myself an extra trip to the store. To avoid offending any tiramisu snobs out there (myself included haha), I call these cupcakes "tiramisu-inspired." This was also my first time trying the famous Amy Sedaris vanilla cupcakes, and everything turned out great! The recipe I came up with, drawing inspiration from a bunch of blogs and cookbooks, can be found after the jump.

A peek inside...

Tiramisu-Inspired Cupcakes [Printable Recipe]
Makes 10 to 12 cupcakes

Vanilla Cupcakes (Recipe below)
Coffee Soaking Syrup (Recipe below)
Cream Cheese Filling/Frosting (Recipe below)
Cocoa powder OR semi-sweet chocolate shavings, for garnish
Chocolate-covered coffee beans OR chocolate chips, for garnish

Cut a cone out of the top of each cupcake and set it to the side. Using a spoon or pastry brush, coat the sides and bottom of the opening with coffee syrup. (You don't want the cake to be soggy, but you can be fairly generous here - up to 2 tablespoons)

Fill the opening with the cream cheese mixture, brush the bottom of the cone with a little coffee syrup, then place it back onto each cupcake. (There should be enough filling that some of it oozes up and attractively frames the cone) Top each cupcake with another small dollop of frosting. Garnish the tops with cocoa powder or chocolate shavings. Crown every cupcake with a chocolate coffee bean or chip and you're all set!

It's best to let these hang out for at least an hour so that all the caffeinated goodness of the syrup can soak in.


Vanilla Cupcakes

1 cup PLUS 2 Tbsp all purpose flour
1 1/2 tsp baking powder
1/4 tsp salt
5 tablespoons unsalted butter, softened
2 Tbsp canola or vegetable oil
1/2 cup plus 2 Tbsp milk
1 tsp pure vanilla extract
3/4 cup sugar
1 large egg, room temperature
1 large egg yolk, room temperature

Preheat oven to 350 degrees F. Line a standard muffin tin with 12 paper liners.

In a large bowl, sift together the flour, baking powder, and salt. Add the butter, oil, milk, and vanilla to the dry ingredients and beat with an electric mixer on medium until the batter is smooth and uniform (no more than 2 minutes). Add the egg and yolk, then continue beating an additional minute.

Fill cupcake liners until they are about 2/3 full (I like to use my large cookie scoop for this). Bake for 16 to 20 minutes or until golden brown. Transfer cupcakes from the pan to a cooling rack within 5 minutes of removing from the oven. Let cool completely.

Coffee Soaking Syrup
1 Tbsp instant coffee or espresso powder
1/2 cup water
3 Tbsp sugar
2 Tbsp dark rum, amaretto, Kahlua, or brandy

Stir the coffee powder, water, and sugar together in a small saucepan and bring just to a boil. Pour the syrup into a small heatproof bowl and stir in your alcohol of choice; set aside.

Cream Cheese Filling/Frosting
6 oz. (3/4 cup) cream cheese, room temperature
3 Tbsp heavy cream, cold
1 Tbsp dark rum
1/2 tsp pure vanilla extract
1 to 1 1/2 cups powdered sugar

Beat cream cheese until smooth with a mixer on low. Add in the heavy cream and continue beating until incorporated. Sift the powdered sugar then add it slowly, starting with the lowest amount and adding more as required to reach your desired sweetness and consistency. Add vanilla and increase mixer to medium. Beat 1-2 minutes. Set aside (in the fridge if you'd like the frosting to be firmer).

Saturday, September 5, 2009

Potato Methi (Fenugreek) Curry


PHEW! I haven't mentioned it here yet, but I actually just moved to a new apartment last week. My work commute is 10 minutes shorter now (every extra minute of sleep counts ^_^). A new home always requires an adjustment period and we were quite spoiled by the amenities at our old place, but we're settling into the new nest quite nicely. No one who knows me will be surprised to hear that the kitchen was the first thing I set up.

Today, on my first real day off from work and moving, I was looking for something fast and fuss-free but with a new and distinct flavor. This potato fenugreek curry was just what I needed. Fenugreek seeds are a common ingredient in curry powders and a mainstay of many tasty Indian and Sri Lankan curries. This recipe, however, uses dried fenugreek leaves, which when added sparingly lend an addictive hint of bitterness to the dish.

I'm submitting this to the Mad Tea Party: Express Indian cooking event, featuring Indian dishes that are quick to make and have 6 ingredients or less. You can see the full recipe after the jump.

Potato Methi (Fenugreek) Curry [Printable Recipe]
Adapted from Ruchii

3 medium red potatoes
1 medium onion
2 tbsp dried fenugreek (methi) leaves
1 tsp cumin (jeera) seed
1 tsp red chili powder
1/2 tsp turmeric powder
Cilantro leaves and about 1 tsp fresh lime juice, for garnish (optional)


Wash then dice potatoes into approximately 1" cubes. Boil until soft but not mushy. Set aside. Dice the onion and measure out the spices for tempering (cumin seed through turmeric).


Heat 1 tsp oil in a medium pan over medium-high heat. Once the oil is hot, add cumin seeds, turmeric, and red chili powder. Then add in the onion and fenugreek leaves and mix well. Cook until the onion begins to soften, stirring when needed.


Crumble the cooked and cooled potatoes into the pan and mix with the onion mixture, making sure not to mash the potatoes too much. Adjust salt to taste. Garnish with cilantro leaves and fresh lime juice, then serve with rice or bread.