Showing posts with label cupcake. Show all posts

Sunday, March 17, 2013

Chocolate Guinness Stout Cupcakes with Baileys Frosting (Happy St. Patrick's Day!)

Happy St. Patrick's Day, dear readers! It's actually not a big day for P and me 'cause it's a bit like St. Paddy's Day every day around here (lol can you guess what P stands for now? =p). The joke started a few years ago when we went shopping at Old Navy close to a certain holiday. A cute green St. Patrick's Day tee was on sale, so I got it for him with the justification that he could wear it any day rather than just the one and he totally does wear it all the time (yay!). But then again, I just asked if he'd wear it later today, and all I got was a huge eye roll. Don't worry though, I'll keep working on this...I've still a few hours yet.

Happy St. Patrick's Day! (Chocolate Guinness Baileys Cupcakes)
In the meantime, I want to share a really delicious Irish-themed (by which I mean boozy ^-^) cupcake recipe with you. I have my coworker and friend A to thank for requesting these chocolate cupcakes full o' Guinness stout and Baileys Irish cream. Her repeated guidance as I prepared to make these was "Remember. There is no such thing as too much Baileys!" I agree in theory, but many of you bakers will already know that runny frosting is a bit of a nightmare. I found a happy medium using my special cold cream cheese technique to keep the frosting firm while adding more liquid than usual.

These cupcakes were actually such a hit with P and my coworkers that I only got a single bite of one. So I've decided to use their descriptions rather than my own for this post:
  • The Boy called these "seriously dangerous" and a combination of "F yea and awesome!"
  • Guinea pig coworker N may have moaned a little while eating his cupcake.
  • Coworker B called these the "best thing ever!"
  • Coworker C, who works in Pricing, when asked if the cake was moist enough drew me a bell curve showing me that on a scale of 1 to 100 (completely dry to terribly moist) with 50 being the ideal level of moistness these cupcakes were a 48. 
    • On a side note, I'm a crazy perfectionist so I tweaked the cake recipe in response to his feedback. Hopefully the recipe below makes a perfectly moist 50-worthy cupcake now.
  • Coworker N liked the cupcake and was kind enough to be my hand model for the photo above (thanks!!).
Now if those reactions don't get you running to the kitchen, I don't know what will! I truly do hope you'll give these a shot. Either way, hope you all have a fantastic (and safe) St. Patrick's Day!

Wednesday, October 31, 2012

Happy Halloween!

Hope you all had a fun (and safe) Halloween! Between Hurricane Sandy and coming down with a cold, I didn't go all out this year like I did last time. But I did manage to add a gorily festive touch to these fluffy Coconut Cupcakes with Chocolate Filling and Frosting by splattering them with red-colored simple syrup. I usually need to put my personal stamp on recipes, but this super versatile white/yellow cake recipe from Beyond Buttercream is perfect as is. I followed her directions for a coconut variation, and it was a thing of beauty. For a cupcake version, fill liners 1/2 to 2/3 full (this batter rises a lot) and bake at 350 degrees F for 19 to 22 minutes or just until a toothpick inserted into the center of a cupcake comes out mostly clean (moist crumbs are okay; wet batter means it needs to bake longer). Since my chocolate frosting has my personal spin, I will post the recipe below. Enjoy!

Bloody Cupcakes
I know I've been out of the blogging loop and haven't been visiting your sites as much as I'd like to, so I'd love to hear about your Halloween or just about how you've been in general in the comments below!

Dark, Rich Chocolate Buttercream Frosting [Printable Recipe]
Makes enough to frost at least 2 dozen cupcakes

2 cups unsweetened cocoa powder
4 to 5 cups powdered sugar
Large pinch salt
1 1/2 cups (3 sticks) unsalted butter, softened
5 to 8 Tbsp milk, half and half, OR heavy cream
1 Tbsp pure vanilla extract

Sift the cocoa powder, powdered sugar, and salt into a large bowl. In another large mixing bowl, cream the butter using an electric mixer. Alternate adding the sifted mixture (1 cup at a time) with adding the cream, mixing well between each addition. Once all the powdered mixture and 5 tablespoons of the milk have been incorporated into the frosting, turn the speed up to high and continue beating until a light, fluffy texture is achieved, at least 2 minutes. [Since the frosting will significantly lighten in color as it's beaten, you will need to scrape the sides of the mixing bowl carefully to ensure the darker portions are mixed in to make a uniformly colored frosting. Add more cream or powdered sugar if you want to thin or thicken the frosting. Use finished frosting right away to frost cooled cupcakes or cakes. If not using right away, frosting can be covered and stored at cool room temperature for at least 2 days. However, you may need to re-beat the frosting briefly if it's been siting a long time.

Monday, July 2, 2012

Guest Post: Introducing SPACIOUS

Especially in light of the recent hardship to hit the DC area, I'm proud to share with something incredible that's come from our region. SPACIOUS is an inspired collaboration between Joey Katona (a former-coworker friend of mine) and the lovely and vibrant, Cary Umhau, who's my honored guest today. Their organization is all about unexpected meetings that turn out fabulous, so I had a lot of fun making some uniquely sweet and tangy red velvet pomegranate cupcakes for its custom flavor. Please give some love to the newest addition to the 6 Bittersweets Menu and to Cary as she shares the story of SPACIOUS as well as our cupcake collaboration!

IMG_3843
Cary Umhau (SPACIOUS Founder and Creative Director)
Photography by Julie Wan
Xiaolu has a gift for putting together unusual flavors in her cupcakes, and that’s why I asked her to create a custom flavor for my social venture, SPACIOUS, after we’d ordered and enjoyed her wares at a couple of our events.

I thought it’d be fun to write about how I see her creativity as a damn tasty metaphor for what we do. I’m excited to be a guest-blogger here at 6 Bittersweets.

SPACIOUS is the brainchild of two people who – on the surface – couldn’t be more different. Joey Katona and I run it together, and although I’d dreamed about it for years, it came together only after Joey and I became close. We have a friendship that began online and grew in person. We found that in spite of a 28-year age gap, different faiths, genders, lifestyles and cultural backgrounds, we share many points of resonance and love doing things together. In a world where people generally stick to their own demographic, our unorthodox friendship enlarges both of us, and we see a rich opportunity to bring together different worlds to create a better one through what we’re doing together.


DSCN0998
Joey Katona (SPACIOUS Co-Founder and Cultural Catalyst) with 6 Bittersweets mini cupcakes at the
"Bring or Be Your Own Kid" adult recess event this spring
We create custom events that are fun and facilitated for deeper connections so that people can meet others they might not meet while doing something they might not do. Examples of our events have been BYOK (“Bring or Be Your Own Kid,” an adult recess with pie-throwing), Everyday Improv, a Blank Canvas Day where we created art as we did in childhood, field trips to the American Visionary Art Museum in Baltimore and to a racism exhibit at Smithsonian Natural History, and a walkabout in Central Park with a location-specific app created by Bluebrain, an ingenious brother duo, to name a few.

I also consult so that businesses and organizations can have more fun, creativity, generosity and connectedness in their programming and staff dynamics.


There’s such a trend these days of sticking to those people we already agree with, of only socializing with people like ourselves. Yet so much happens when we hear new perspectives, consider others’ experiences, and contemplate the fact that there’s more to a person than the external cues would tell us.

So although chocolate loves vanilla frosting, and carrot cake generally sticks with cream cheese frosting, and lemon seeks meringue, our SPACIOUS flavor is red velvet with a surprise pomegranate filling, topped with Swiss buttercream.

And Xiaolu created it, knowing that Joey and I are as different as can be, but that we love hanging out together and with others with the knowledge that people who might not seem like they’d enjoy each other really will find resonance, given the right facilitation and atmosphere. And then great things will happen as barriers fall and people connect.

Subscribe to our site for weekly updates. Come join us at an event. Or order some of these cupcakes!

Wednesday, May 23, 2012

Sherlockian Cupcakes Part 2: Chocolate Toasted Marshmallow Cupcakes!

Chocolate Toasted Marshmallow Cupcakes
I hope these photos do a proper job of teasing you with all the delectable components of this cupcake =D. But believe it or not, this tastes even better than it sounds or looks. First there's my favorite dark chocolate cake to get things off on the right foot. Next comes some fluffy marshmallow filling with a delightful hint of smokiness from real, toasted marshmallows (I can't be the only one dreaming of campfire s'mores already, right?). Last but not least we have a perfect swirl of rich yet tangy chocolate frosting topped with more toasted mini marshmallows.


More Chocolate Marshmallow Cupcakes
Speaking of looks, you're gonna give me some weird ones when I explain why these cupcakes are "Sherlockian." See, there's an inside joke amongst the cast and writers of the BBC Sherlock TV series that Martin Freeman (AKA John Watson in the show) has a round face that's chiseled out of marshmallows. Now I was gonna carve Martin's face out of a huge marshmallow in tribute to Sherlock, but alas I couldn't find one large enough so these toasted marshmallow cakes had to do =p. Next time, folks, next time. 

P.S. - If you haven't watched Sherlock yet, what are you waiting for?! Those in the US can now watch you Season 1 on Netflix Instant and Season 2 on the Masterpiece PBS website for a limited time only.


Chocolate Toasted Marshmallow Cupcakes 2

Sunday, May 13, 2012

Sherlockian Cupcakes Part 1: Red Velvet Cupcakes with Tart Pomegranate Filling

As my regular readers know from my music, film, and TV-related posts, food is just one of my many passions. Sometimes I like to do more than mention those other interests in favorites posts. Sometimes I'm inspired to create themed treats by those other art forms. Previously, I was inspired by the David Usher song, "Black Black Heart" to create my Black Black Forest Heart Cupcakes. Today, it's the brilliant re-imagined, modern-day BBC Sherlock Holmes television series (a new favorite, but already in my top 3 shows of all time) that guides my artist's whisk.

I Believe in Sherlock Cupcakes!
Whether you're a devotee of the Arthur Conan Doyle originals or not, "Sherlock" is bound to captivate your imagination and thirst for adventure. The protagonists remain Sherlock Holmes and Dr. Watson, of course, but they are younger, more energetic, and more delightfully irreverent than you've ever seen them. In honor of this sharp-as-a-whip update, I've decided to reinvent on my classic red velvet cupcake with a tart pomegranate filling (inspired by my friend A's wedding dessert). In case it's not obvious enough, yes I am trying to kill 2 birds with with 1 post: introduce you to a new favorite TV show AND new favorite cupcake flavor. But if either one tickles your fancy, I'll still consider it a success =D.

For my readers in the U.S., if "Sherlock" sounds like something you'd like, you can watch Season 1 on Netflix Instant and Season 2 is currently airing on Masterpiece PBS (Sundays at 9 pm EST...the next new episode in 1 hour!).

Wednesday, May 2, 2012

Urban Chic Boutique Shoshanna Trunk Show

Ruffled Cupcakes for Urban Chic Shoshanna Event
I love baking a variety of treats, but some orders are particularly fun! I was delighted when Katie of Petite Social approached about supplying desserts for a local boutique's Shoshanna Trunk Show. The styling for this event was inspired by a lovely dress from the collection (see above left), which had lots of vibrant colors in a fun zigzag pattern! I created cupcakes with chevron ruffled frosting to echo the dress pattern and was pleased with how it turned out! Please check out more wonderful photos of Katie's stylish dessert table on the MoxieSox Photography website and let me know what you think!

Saturday, April 21, 2012

VIDEO: How to Fluff Up Pom-Pom Cupcake Toppers

More Cupcakes for Joy's Birthday
I posted a tutorial a year ago on how to make your own cute pom-pom cupcake toppers from tissue paper (I also sell them pre-made on Etsy). You guys seemed to love the poms (yay!). Some of you sent me messages following that post asking how to fluff up the poms so that they're party-ready. Things like that are better demonstrated than described. Now that I'm able to make videos, I've made a short recording of my "fluffing" process (oh my that doesn't quite sound right, does it? 8x). Whether you purchase these toppers from me or choose to go the DIY route, I hope you find this helpful. If you enjoy this video, please "like" it on Youtube and subscribe to my channel. I'd also love to hear suggestions of other videos you'd like to see from 6 Bittersweets!

Friday, April 6, 2012

A Work of (Edible) Art: Monet's Water Lilies Cupcakes (Plus Cookbook Review and GIVEAWAY)

If you've seen my previous cute owl or creepy critter cupcake posts, both adapted from Hello, Cupcake!, you already know that I'm a huge fan of Karen Tack and Alan Richardson. Sure I love to make most treats from scratch, but I also love that their projects allow everyone from first-time bakers to professional decorators to create works of edible art from easy-to-find ingredients. I was delighted at the news that this unbeatable duo was coming out with another book and even more excited to accept a free advance copy of Cupcakes, Cookies, & Pie, Oh My! to review!

Monet's Water Lilies Cupcakes
Although Cupcakes, Cookies, & Pie, Oh My! is Karen and Alan's 3rd book together, it stands apart from Hello, Cupcake! and What's New, Cupcake? as their first to include cookies, pie, and oh my other treats in addition to cupcakes. If there's one thing I've learned about their books, it's that it is never easy to pick just one project to make. Stiletto Shoe Cupcakes, Chocolate-dipped Tea Bag Cookies, Nacho Cheesecake, and Hen House Mini Pies all beckoned to me as I flipped through CC&P. But the opportunity to literally "make art edible" with Monet's Water Lilies Cupcakes turned out to be the one I couldn't resist. 

Cupcakes Cookies & Pie Oh My
I realize I picked one of the more technically challenging recipes to test out, but I hope you'll agree the results are worth it and worth-y of a special occasion. One of my pet peeves is when dessert decorating books are stingy with photos, so I was glad to see that CC&P continues the pair's tradition of including photos of every recipe. Some particularly tricky steps even get their own photos. Even though I have some experience with baking and decorating, I still found the visual guidance extremely helpful when paired with the book's consistently clear and concise written directions.

Water Lilies Mini Cupcakes
Photograph © Alan Richardson
In short, I think that Cupcakes, Cookies, & Pie, Oh My! would make a great addition to any imaginative baker's bookshelf. Its projects are accessible for beginners but fun and unique enough to interest more experienced bakers. As with Karen and Alan's previous outings, CC&P contains ideas for specific holidays -- such as Father's Day, Thanksgiving, and Halloween -- as well as more versatile party ideas -- such as cake pops on plastic forks. There's really something for everyone, which is why I'm giving away a copy of Cupcakes, Cookies, & Pie, Oh My! by Karen Tack and Alan Richardson to one lucky reader! This giveaway is open to anyone with a US or Canadian shipping address. To enter, simply do as many of the following as you want and leave a separate comment for each thing you do! Please also make sure to leave a way for me to contact you if you win. The giveaway will close on April 12 at midnight, and the winner will be announced shortly thereafter. Good luck! This giveaway has ended -- thanks to all who entered!
  • Leave a comment below telling me what you look forward to making from this book.
  • Like 6 Bittersweets on Facebook, then leave a comment telling me you did or already do.
  • Subscribe to this blog, then leave a comment telling me you did or already do.
  • Follow 6 Bittersweets on Twitter, then leave a comment telling me you did or already do and including your Twitter name.
  • Link to this giveaway on Facebook, then leave a comment telling me and including a link to this post.
  • Tweet about this giveaway, tagging me @6bittersweets and linking this giveaway, then leave a comment telling me and including a link to this post.

Friday, March 30, 2012

My First VIDEO Post: How to Frost Cupcakes Using a Large Closed Star Tip


Cupcake Collage
I dunno if I've mentioned, but P got me a fabulous present for our 5-year anniversary back in February =). Right around that time I'd been coming across some helpful videos for everything from cake decorating to distressing metal and quickly became eager to try making videos of my own. P was sweet enough to get me the equipment to get started: an easy-to-use Flip Video Camera! I will confess to having some difficulty adjusting to automatic settings...I suppose the control freak in me got spoiled by all the manual controls on my dSLR ("What do you mean I can't adjust video exposure in-camera?!?" hehe, poor P). But in all seriousness, I'm delighted to have this new "toy" to take my first steps into becoming a multi-media blogger =D.

My first foray into the world of video is this simple demonstration of 3 basic ways to frost a cupcake using a large, closed star piping tip (my favorite is Ateco #849). One of the first lessons you learn when you frost a lot of cupcakes is that bigger is almost always better when it comes to piping tips for cupcake frosting! I believe the #849 tip is the largest closed star tip that Ateco makes, or you could use the Wilton equivalent if you'd prefer.

You'll probably recognize the first technique as my "signature swirl" of sorts. As the photos in this post illustrate, I've used this swirl time and time again for cupcakes on the blog (and off). It's easy, quick, and absolutely classic -- so I really hope you'll give it a try! Sometimes we all want a little variety, though, right? That's the reason I've also included 2 alternative techniques in the video using the same closed star piping tip. The drop star (probably not its real name ;p) method is especially useful for the times I'm asked to "go light" on the frosting, and the "ruffle wiggle" method is just plain fun to do.

I hope you enjoyed my first video and are as excited as I am for the others to come! I'm looking for ideas, so please leave a comment or shoot me an email if you've a topic in mind that you'd like to see me cover. And please subscribe to my Youtube channel to be notified when I post new videos!

Cupcake Collage 2

Thursday, March 29, 2012

WANTED: The Perfect Carrot Cupcake (Round 2)

Back in November of last year, I shared with you that P's cousin K had offered me the honor of baking cupcakes for her wedding in October. I decided to start testing recipes almost a year early 'cause I'm sometimes *cough* be a bit *cough* of a procrastinator O=). While I enjoyed the simplicity of the first batch and had a LOT of fun fashioning realistic carrot toppers out of marzipan, the flavor of the cake itself didn't have quite as much OOMPH as I wanted. It was inevitable that there would be a Round 2...I did declare after all that "I [wouldn't] rest until [I'd] found the perfect carrot cupcake for K's wedding day!"

Round 1 had covered the plain and simple end of the Carrot Cake Spectrum, so the goal for Round 2 was to really explore the options when it came to add-ins and alternative prep methods. Early on I was intrigued by a unique recipe from The Silver Palate Cookbook that called for steamed and pureed carrots rather than raw, shredded ones! But what I wasn't taken with were the copious amounts of sugar, oil, and sweetened coconut in the original. Being the irrepressible tweaker you should know me as, I went directly to the cutting board and I think it's accurate to say I went BIG. By the end of this surgical session, I'd cut 1/3 of the sugar, 1/2 the fat, and 1/2 the coconut along with pinches of salt and baking soda.


Carrot Cake Cupcakes (Round 2!)
Having wrapped up Round 2, I can now declare these to be The Best Carrot Cupcakes I've Ever Eaten =D. A feast of flavors from freshly mashed carrot and crushed pineapple to toasted nuts and (subtly) textured coconut. Dense and moist but absent any oily mouthfeel or excessive calories. I credit the texture in no small part to the pureed carrots, and that's not the only benefit to this unusual way of preparing them. Even if there were no benefit as to taste, I'd pick pureed carrots for my cake anyday for the time it saves me from slaving over the box grater!

It's pretty obvious I'm really taken with this recipe, right? But the funny thing with The Best anything is that there might always be an even better version out there -- and you'll never discover it unless you keep an open mind! So if anyone's convinced their mom/granddad/friend/neighbor's carrot cake is the best thing since the invention of cake, please DO shoot me a message and I may test it out! I certainly have time for Round 3 as K's wedding's not for 6 months 8).

Sunday, March 25, 2012

November Wedding Photo Shoot with Janice Cui

Wedding Photo Shoot 1
Today it's my delight to finally be able to share a few of the gorgeous photos from a wedding photo shoot to which I contributed desserts. I'm always trying to expand my repertoire, so I jumped at this chance to make ruffled gumpaste flower cake/cupcake toppers inspired by My Cake School. Thanks to wedding photographer Janice Cui for capturing everything wonderfully (I can't get over the bokeh in that first photo of the bride, can you?) and for getting me involved with this project to begin with. All the vendors involved did a splendid job, and I encourage you to check out their sites (linked below). Hope everyone had a nice weekend!
Wedding Photo Shoot 2
VENDOR CREDITS
Event Coordinator: Elegant Party Plans
Photographer: Janice C Photography
Flowers: J. Morris Flowers
Bridal Gown and Accessories: Layne Corban Bridal
Cake and Cupcakes: 6 Bittersweets
Hairstyle: A Cut To Dye For

Wednesday, November 16, 2011

Ruff(le)'s Up, Doc? (Carrot Cupcakes with Ruffled Frosting and Marzipan Carrots)

A few months back, P's cousin K asked me if I'd be willing to bake the cupcakes for her wedding (!!). This was the first time I'd been asked to contribute to someone's Big Day, and I was really touched by the request. And agreed right away, of course! K had her sights set on carrot cake from the start, which worked great for me. I loves me a client who knows what she wants =D. K's wedding doesn't actually take place until next October, but is it really ever too early to test run delicious carrot cupcakes? (Hint: the answer is "no!")

The weird thing about this carrot cupcake recipe is that I converted it into an all-apple recipe the first time I made it (that's just what I happened to need at the time). And I tell you what, the apple-fied version was so darn good that I couldn't resist re-converting it back to experience it in its full beta-carotene glory ^_^.

Carrot Cupcakes with Marzipan-Parsley Carrot Toppers
I also couldn't resist just a few tweaks here and there (swapping out some oil for the more flavorful melted coconut oil/butter, amping the spices up a touch, and so on...). What came out of the oven was to my mind the perfect basic carrot cupcake: delightfully moist but with no oily mouthfeel, packed with flavor from a balanced medley of spices, and boasting a subtle nuttiness and crunch from the toasted walnuts. Feel free to adapt this to your personal carrot-cake preferences! Like your carrot cake to have more nuts, no nuts, other nuts, coconut flakes, raisins, chocolate chips, whatever else? Go for it!

The only popular add-in that I'd expect any trouble from is pineapple chunks, since they'd add significant moisture to the batter. But I'm on a quest here, folks...I won't rest until I've found the perfect carrot cupcake for K's wedding day! And on the chance that the very best carrot cake contains pineapple, I'll be trying a recipe with pineapple in it next. Right now I'm eying this one, but please don't hesitate to speak up if you wanna share one better!

Monday, October 31, 2011

Happy Halloween!

Cat Ghost Cupcake Skeleton Bat Pumpkins
Wishing everyone a safe and happy Halloween today!
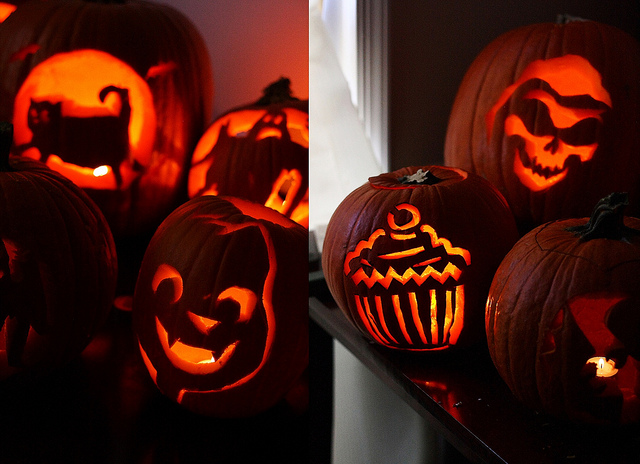
P and I went to a friend's pumpkin-carving party this weekend, and here's what everyone made =D. I was joking on our way to the party about carving a cutesy cupcake pumpkin. Then I was distracted chatting with some people at the party, and next thing I know he's well on his way to making my cupcake pumpkin a reality! Is he the sweetest or what?! Sorry, ladies...he's all mine ^____^. Below are some more photos of the party, including my Pumpkin Cupcakes with M&M Creepy Crawly Bugs and Mummy Faces!

M&M Candy Bug Mummy Halloween Cupcakes
Pumpkin Carving CollageCupcake Pumpkin

Saturday, October 29, 2011

My Tips for Great (Cupcake) Success and Halloween Recipes Round-up!

More Black Widow Cupcakes
It's an unfortunate truth that sometimes you put in hours of work on a recipe only to have it do a complete belly flop on ya. Today was one of those times as I tried to make Jell-O Shot Brain Cupcakes for the 4th and final post in my Halloween Cupcake series. The Jell-O was too soft, the frosting curdled, and a heavy gray blanket covered the sky from dawn til dusk. Sure, the cupcakes tasted alright, but when I realized I'd choose real Jell-O shots over those anyday, there was no way I was gonna send this recipe into the vast interwebs with my stamp attached to it!

Though I'm no expert, I take a lot of pride in everything I do and wouldn't want to share anything less than the best with you guys. So instead of my original post, I'm going to share some general cupcake tips which have helped make most of my other cupcake experiments successful. Plus a quick round-up of all my Halloween recipes for you last-minute planners =p.

XIAOLU'S CUPCAKE TIPS:
  • Use a good muffin pan. I recommend one that's nonstick and has some weight (like this one). A sturdier pan will be less likely to warp (become misshapen) easily. I recall using my new pan for the first time 3 years ago and noticing an immediate difference. My cupcakes rose at least 1/4 inch higher and baked more evenly.
  • Buy an oven thermometer (or even 2!) and always preheat at least 25 minutes, ovens (even brand new ones) are notorious for being inaccurate as to temperature. Buy your own thermometer and rely on it rather than your oven's. If your oven tells you that it's up to 400 degrees F only 5 minutes after you turned it on...it's lying...
  • If it's your first time making a recipe, try to read it a few days in advance in case you need to buy/prepare anything ahead of time. At the very least, try to read it before you start making the cupcakes.
  • Lightly grease the top of your cupcake pan BEFORE putting in liners. Especially if you overfill the cups with batter later, this will make it much easier to lift the cupcakes out later. I've found that the grease seems to reduce the "muffin-top" effect and encourages the cakes to rise up and not outward.
  • Use good-quality baking liners. Especially if you bake cupcakes/muffins a lot, this should be a no-brainer. I usually buy basic solid liners (white, brown, black) in bulk online so that I'm never low -- I usually search for the lowest prices on Etsy. Cupcake Social is one seller I've had a good experience with. If you're a fan of those paper souffle standalone baking cups (similar to those Wilton nut cups except that those aren't oven-safe), you can get a LOT of them for cheap here. Unsuitable liners can take a lot away from your final product. For example, I bought white liners at the grocery store when I was nearly out of my usual liners. Luckily I didn't need to use them because when I placed one into the pan, it wouldn't even fit without a big fold forming along the top. Liners can also differ in their non-stick coating. Some are so non-stick that they tend to pull away from the cupcake. Trust me, this is NOT a good look!
  • When measuring flour for cakes, it's best to go by weight OR to stir the flour, spoon it into the measuring cup, then level it with a knife or other straight edge. The method of measurement can make a big difference. Scooping up the flour with your measuring cup will compact the flour, result in you using too much flour, and the cake being too dry.
  • Sift dry ingredients together, it helps minimize the formation of clumps of dry ingredients when they're being mixed into the batter later.
  • Unless the recipe specifies otherwise, use room temperature eggs and butter. Obviously if you'll be heating up the butter or eggs as part of the recipe, you don't need to worry about the starting temperature. But if you'll be creaming the butter with sugar, you'll need it to be warm enough to properly incorporate the air that will make your cake fluffy. Room temperature eggs are also important if the eggs are to mix in evenly in the batter. You can speed up their warming by placing them in a bowl of lukewarm water. Once the water becomes cool, replace it with more warm water. Do this until the eggs no longer feel cool to the touch.
  • If whisking by hand, beat eggs separately (or with other wet ingredients) before adding to batter. I always pre-beat my eggs even for one-bowl recipes because of one incident. When crumbling up my favorite chocolate cake to make cake pops one time, I noticed there were chunks of something rubbery in the cake. I realized these were from streaks of egg white that didn't get totally mixed into the batter. Referring back to the bullet point above, it's important to use room temperature eggs as well to avoid these streaks.
  • If whisking by hand, whisk in one direction only when first combining wet and dry ingredients. Once the 2 are fairly combined, you can change directions, but I find that changing directions before the dry ingredients are mixed in results in more clumping.
  • Unless the recipe instructs otherwise, always stop mixing as soon as the added ingredients have been mixed in. Overmixing will result in developing the gluten (proteins that make bread chewy) in the batter too much = tough cake!
  • For even and clean distribution of batter, use a cookie/ice cream scoop. I love love LOVE this scoop -- it makes dividing up batter a cinch and is also great for cookies and ice cream, of course.
  • Don't overfill your baking liners. I've rarely seen a recipe that calls for filling more than 3/4 full. Most cupcakes recommend somewhere between 2/3 and 3/4 full. A few batters rise exceptionally high, so if the recipe says to only fill 1/2 full, follow the directions!
  • After filling pan with batter, slam pan directly down on counter from a height of 2 inches. Don't do this though if the batter is exceptionally delicate. Otherwise, it helps push any big air bubbles to the top and out. This way you won't have big holes and tunnels in your finished cakes.
  • Don't open the oven door before the last 5 minutes of baking. Cakes can be very sensitive to temperature changes and drafts. Especially opening the door during the first 1/2 of baking can have big consequences such as the cake collapsing.
  • Always check in on your cupcakes about 5 minutes before the baking time listed in the recipe. Due to variations in ovens, pans, altitude, and whatever else, it's a good idea to check your goods a little early. Better that than dry, overbaked cakes (ew). For most cakes the toothpick test is fairly accurate; the cupcakes are ready as soon as a toothpick stuck into the middle of the cupcake comes out mostly clean (a few moist crumbs are usually ok; wet batter or a lot of crumbs are not).
  • Regardless of what the recipe says, move cupcakes from pan to cooling rack no more than 5 minutes after they come out of the oven (but be careful not to burn yourself!). After persistent issues with cupcake liners separating from the sides of the cake (as mentioned above), I did some research and found 2 main culprits. First was the type of baking liner used, and second was steam formed when cupcakes sat cooling in their pans for too long. After figuring these out, I haven't had this problem again.
  • Let cupcakes cool on racks COMPLETELY before frosting unless the recipe says otherwise. Even if your cupcakes feel just barely warm, that bit of heat is probably going to be enough to melt your frosting if you try to put it on too early.
  • To fill cupcakes, I prefer the "cone method" or using a cookie cutter. The cone method simply means using a paring knife to cut a cone about halfway down into the cupcake, then using the tip of the knife to help pop the cone out. Or you can use a 1-inch wide round cookie cutter. Press the cutter down into the center of the cupcake, left it up and out, then use the tip of a knife to help you pull out the round of cake you just cut. With either method, you can spoon/pipe in the filling at this point. Now you can either put back the cone/round of cake on top of the filling or frost directly on top of the filling.
  • Cupcakes with any perishable ingredients (like whipped cream or cream cheese frosting) should be stored in the fridge. Other cupcakes can be stored, well-covered, at room temperature. They are usually good for several days this way.
  • If you make cupcakes ahead of time and want to keep them fresh/moist, wrap or place them in an airtight container and freeze them. Defrost before frosting and serving.
  • Share the joy of cupcakes with friends and family. I promise, they taste better when enjoyed together ;p.
Well, that's all I can think of for now. Please feel free to add your own tips or any questions you may have for me in the comments! In the meantime, if you're still looking for a fun and tasty Halloween treat, I've gathered all of mine in one convenient locations (...in Africa...brownie point if you get this reference ^-^).
Oreo Cookies & Cream Owl Cupcakes
Creepy Pumpkin Bug and Mummy-cakes (Cupcake Hero::October)
Happy Halloween XD
Devilishly Delicious! (My Favorite Red Velvet Cupcakes)
Black Widow Chocolate Rum Cupcakes
Spooky Graveyard Cupcakes for Halloween!

Saturday, October 22, 2011

Spooky Graveyard Vanilla Cookies N' Cream Cupcakes (Guest Post for Pure Joy Events)

Spooky Graveyard Cupcakes for Halloween!
Halloween is just over a week away! And I'm uber-excited to announce today that I've been asked to become a regular contributor on my incredibly talented stylist friend Christine's blog, Pure Joy Events. You've probably figured out by now that Halloween is my favorite holiday (what with all the themed posts I've been doin' lately ;p). So it's a no-brainer that my first post over there as an official contributor should be another spooky and scrumptious Halloween-themed cupcake! Please head over to Pure Joy Events to check out my post, recipe, and step-by-step tutorial for making these fondant skull and bone toppers! If you're in a hurry, the printable recipe+tutorial can be found here and the FREE printable for tombstone toppers shared generously by Heather of Chickabug can be downloaded here.

Spooky Graveyard Cupcakes for Halloween!

Wednesday, October 19, 2011

If You Want To Live and Thrive, Let the Spider Run Alive (Black Widow Chocolate Rum Cupcakes)

Black Widow Chocolate Rum Cupcakes
Are you getting in the spirit of Halloween yet? Please tell me you are! Here I can almost feel it coming in the air (tonight...hold on =p), which is just starting to get that real bite of cold. Still the chill comes and goes. And on days like this one when I bake, it still gets hot enough that I worry about my chocolate toppers melting before they can be appreciated in all their spooky glory...

If you're wondering what the post title's all about, it's just a quote I found while searching for a spider-related saying for these cupcakes. This one caught my eye right away...heck if I saw a Black Widow, I certainly wouldn't mess with it! There's just something extra creepy about that red hourglass marking, don't you think?

More Black Widow Cupcakes
So I've seen plenty of adorable spider cupcake ideas (like those featured over on McCormick's Kitchen PLAY), but I really wanted to make my version more realistic and creepy than those I'd come across ^_^. Since it's notoriously difficult to color homemade fondant a true black and I happened to have some black modeling chocolate on hand, I turned to this medium to make my crawly friends more dimensional and thus, my spidery vision start coming to life. Then melted chocolate, red candy melts, and a good blast of cold freezer air did the rest!

One thing that I failed to foresee was that the semisweet chocolate I used wouldn't be dark enough to match the black modeling fondant. That's why I've replaced semisweet with dark chocolate in the recipe below and also suggested that you even add a bit of black food coloring to make these truly black widows rather than "brown widows" as my boyfriend called mine hehe. Hope that you like these and you're having as much fun preparing for All Hallow's Eve as I am! And be sure to stay tuned for the next cupcake in my Halloween series -- it's so good you might even call it deadly...8p.

Black Widow Chocolate Rum Cupcakes [Printable Recipe]
Makes 12 to 14 cupcakes

XIAOLU'S NOTES: These can easily be converted into kid-friendly moist chocolate cupcakes by substituting the 3 tablespoons of rum with boiling water and simply omitting the rum from the ganache. The ganache needs to be used shortly after it's made. Toppers can be made in advance and stored at room temperature, but you should re-freeze the toppers for 10 to 15 minutes before moving them to the cupcakes since they (especially the spiders) are quite delicate. I made my spider toppers with semisweet chocolate and they turned out a bit too brown, so I definitely recommend using dark chocolate and even adding some black food coloring.

1 cup sugar
3/4 cup PLUS 2 Tbsp all purpose flour
6 1/2 Tbsp unsweetened Dutch-process cocoa powder
3/4 tsp baking powder
3/4 tsp baking soda
1/2 tsp salt
1 large egg, room temperature
1/2 cup milk [NOT skim]
1/4 cup vegetable oil
1 tsp pure vanilla extract
5 Tbsp boiling water [OR 1/2 cup IF omitting rum]
3 Tbsp dark rum
Rum Chocolate Ganache (Recipe below)
White Chocolate Spiderwebs (Recipe below)
Chocolate Spiders (Recipe below)

Heat oven to 350 degrees F. Grease tops of a cupcake pan and then line it with baking liners.

In a large bowl, sift together sugar, flour, cocoa, baking powder, baking soda and salt. Add egg, milk, oil and vanilla; beat on medium speed for about 2 minutes. Stir in boiling water and rum (batter will be thin). Pour batter into prepared cupcake liners, filling no more than 3/4 full. If there is batter left over, fill an additional 1 to 2 liners in another baking pan OR standalone baking cups with the remaining batter. Bake 18 to 23 minutes or until a toothpick or thin knife inserted into the center of one comes out clean. Cool 5 minutes, then remove from pans to wire racks to finish cooling. Make the ganache as you wait for the cupcakes to cool.

Dip each cupcake upside-down into the ganache up to the liner, lift cake out of chocolate, and let excess ganache drip off. Next, turn cupcake right-side up and place on wire rack to let ganache set. (If ganache begins to harden before all of the cupcakes are dipped you may heat for 5-second intervals in a microwave until chocolate is smooth again).

After 30 minutes, once ganache has partially set, center a white chocolate spiderweb and then a chocolate spider atop each cupcake. Enjoy!

Rum Chocolate Ganache
3 oz. bittersweet chocolate (chips or finely chopped bar)
1/3 cup heavy cream
1 tsp unsalted butter
2 tsp dark rum

Make ganache after cupcakes are mostly cooled off. Place chocolate in a small to medium bowl. Bring heavy cream and butter just to a boil. Pour hot cream mixture over chocolate and let sit for about 5 minutes. Begin stirring mixture and continue stirring until the mixture is uniform and smooth (may take about 5 minutes of stirring). Stir in rum. Use immediately.

White Chocolate Spiderwebs
Slightly adapted from Country Living

3/4 cup white chocolate chips

Microwave white chocolate chips in a bowl for 30 seconds and stir. Continue to microwave in 20-second intervals until almost melted. Stir again until chocolate is completely melted. Pour inside a zipper-lock bag with one tip snipped off to create an opening for piping.

Line a cookie sheet with parchment or wax paper. Slide the spiderweb template underneath paper. To make each web, use piping opening to trace white chocolate along design, making sure to connect all lines. Repeat process until you've created 12 to 14 toppers (depending on the number of cupcakes). Chill them in refrigerator for 10 minutes. Then, using a spatula, carefully remove webs from parchment.

Chocolate Spiders
Modeling Chocolate (Recipe below)
1/2 cup roughly chopped dark chocolate
Black oil-based or powder food coloring (optional)
Red royal icing or melted candy melts

Microwave chopped dark chocolate in a bowl for 30 seconds and stir. Continue to microwave in 20-second intervals until almost melted. Stir again until chocolate is completely melted. If desired, add black oil-based or powder food coloring (do NOT use liquid/gel coloring; if you do, the chocolate will clump together and you'll have to toss it!) a little at a time, stirring well in between additions, until the chocolate is the desired shade of black. Pour inside a zipper-lock bag with one tip snipped off to create an opening for piping.

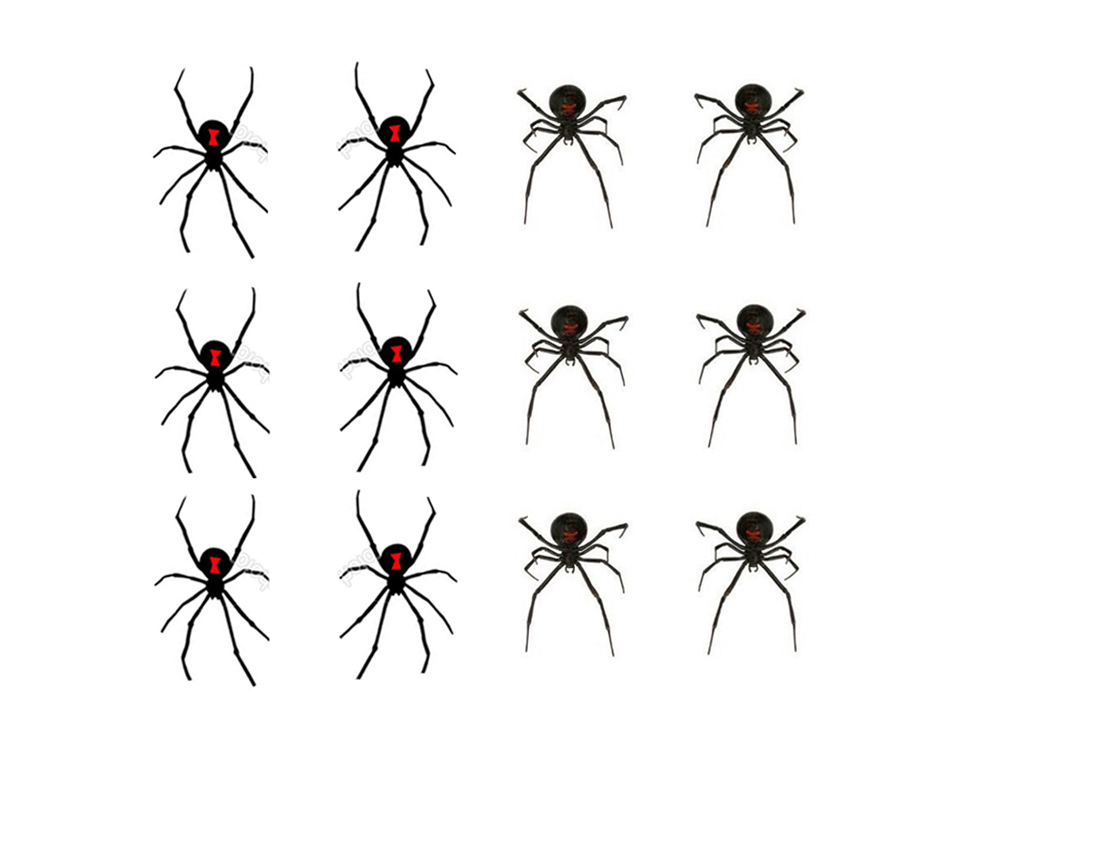
Line a cookie sheet with parchment or wax paper. Slide a spider template [I simply printed out some cartoony images of black widow spiders I found online; here's what I used] underneath paper OR you could pipe freehand IF you trust yourself to do this. To make each spider, first roll modeling chocolate into 12 to 14 balls about the size of large green peas. Pipe a small dot of melted chocolate on the parchment above the round area of a spider on the template, and press ball of modeling chocolate onto it to secure. Now pipe chocolate to trace along the rest of the design, forming the spider head and legs. Make sure to connect all lines. Repeat process until you've created 12 to 14 spider toppers (depending on the number of cupcakes). Now place red royal icing or red candy melts (melted the same way as the chocolate chips above) into a zipper-lock bag. Snip off a tiny bit of the tip for piping, then trace and fill in an hourglass shape on each modeling chocolate spider "abdomen." Chill spiders in refrigerator for at least 15 minutes. Then remove carefully from parchment just before transferring to cupcakes.

Modeling Chocolate
10 oz. semisweet chocolate (coarsely chopped chunks or chips)
1/3 cup light corn syrup
Black food coloring, as needed (such as McCormick Black Food Color)

In a shallow bowl, melt the chocolate in microwave (be careful so that the temperature does not exceed 100 degrees F) for 2 minutes; stir. If chocolate is not completely melted, return to microwave for 30 seconds at a time and stir until smooth. Add corn syrup to the chocolate and mix well (scrape all the corn syrup into the chocolate with a rubber spatula). Using a rubber spatula, stir and fold mixture, scraping the sides and bottom of the bowl well, until no shiny syrup is visible and the mixture forms a thick ball. Pour mixture onto a large sheet of wax or parchment paper and spread with the spatula until it’s about 1/2-inch thick; let it sit and stiffen, uncovered, for about 2 hours.

After that, knead black food coloring into the modeling chocolate 1 to 2 drops at a time until you get the desired shade. Use at once or store in an airtight container at room temperature for up to 1 month.

I'm submitting these Black Widow Spider Cupcakes to McCormick's Kitchen PLAY Contest as a conceptual adaptation of My Baking Heart's Spider Cupcakes. They're giving away ten $50 prizes to those who recreate any of the recipes in this month's Halloween-themed Progressive Party. If you're interested in entering, you can review the complete contest rules here. Deadline is October 31, 2011. Good luck!

Thursday, October 6, 2011

Devilishly Delicious! (The Best Red Velvet Cupcakes)

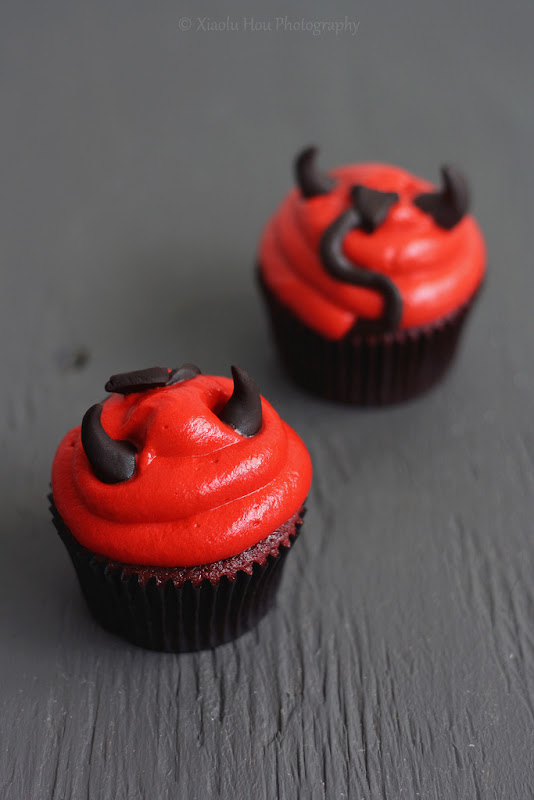
Can you guys believe that Halloween is less than a month away?! I hope you all are as excited as me because I've got lots of spooky cupcakes coming up in the next few weeks! We've got some creepin' crawlies, a couple a' brainiacs, and even a few cuppies workin' the graveyard shift...if ya know what I mean =p. But for those of you who're feelin' a might devilish this All Hallow's Eve, I've got just the treat you need...Devilishly Delicious Red Velvet Cupcakes!

Some of you may remember that I set out on The Great Quest for The Perfect Red Velvet Recipe back in the spring
(has it really been that long already...). When I posted about it, I was just veering off into unexplored territory after finding none of the famous recipes to my taste. Well I'm happy to finally make it known that I've found The One! After 8 attempts and much tweaking, I've combined several inspirations and some crazy add-ins of my own to bring a new and hopefully well-loved red velvet recipe into the world =D.

Devilishly Delicious!
This recipe has been tested frequently for over half a year and has won the approval of dozens of tasters. One friend liked my red velvet cupcakes so much, in fact, that she just asked me to make 140 of them for her wedding =D. I really do hope you'll give these cupcakes (and their Halloween costume) a try. The ingredient list is longer than your usual RV recipe, but they're all ingredients that you probably already have in your pantry. And if you do make them, please send me your feedback and, even better, a photo along with it!

Lastly, I want tell you about a really awesome surprise I got earlier this week. A while ago I left a comment on my friend Angie's blog. She'd just been visited by the Fairy Hobmother, and to my delight the Fairy stopped here next and gifted me with a fabulous Amazon gift card! Then when I was offered the chance to share the joy, of course I said yes! Now if you want a visit from the Fairy, just make your wish and comment below. Best of luck and thanks again, Fairy Hobmother!

6 Bittersweets' Best Red Velvet Cupcakes [Printable Recipe]
Makes 12 cupcakes

XIAOLU’S NOTES: It can be hard to get a strong red color when coloring white frosting. Making the frosting 24 hours ahead of time may help, since the color will darken over time. Do NOT use liquid food coloring since it will add too much moisture to the frosting. The modeling clay recipe below will make more than you'll need. You can store any extra for up to 1 month. If you don’t have buttermilk, you can use the following substitution. For this recipe, use 1 1/2 teaspoons of apple cider vinegar with enough milk added to total 1/2 cup PLUS 1 tablespoon. Stir well and let sit for at least 5 minutes before using. Do NOT substitute the cake flour in this recipe.

1 cup (4 oz.) cake flour [stirred, spooned, and leveled to measure]
1/4 cup (1.12 oz.) all purpose flour [stirred, spooned, and leveled to measure]
1 1/2 Tbsp (0.32 oz.) unsweetened natural cocoa powder
Slightly rounded 1/2 tsp baking soda
Scant 1/2 tsp salt
3/4 cup sugar
1/4 cup unsalted butter, melted and cooled slightly
1 Tbsp red GEL food coloring [I use Wilton No-Taste but you may need more or less depending on brand]
1/2 cup PLUS 1 Tbsp buttermilk, room temperature
3 Tbsp vegetable or canola oil
2 Tbsp mayonnaise (NOT fat-free or olive oil; low-fat is fine)
1 large egg, room temperature
1 tsp apple cider vinegar
1 tsp pure vanilla extract
Cream Cheese Frosting (Recipe below)
24 Modeling Chocolate Horns AND 12 Fondant Horned Tails (Recipe below)

If making the devil decorations, remember to make and color your frosting red ahead of time as well as to make the modeling chocolate ahead of time! I recommend making the horns and tails before baking the cupcakes. You can let them sit out to dry slightly as you bake, cool, and frost the cupcakes.

Preheat the oven to 350 degrees F. Grease the top of a standard 12-cup muffin pan (in case you get some “muffin top” action). Line pan with 12 baking liners.

Sift the flours, cocoa powder, baking soda, salt, and sugar into a large bowl; stir to ensure even distribution and set aside. In a separate bowl or measuring cup, whisk together the melted butter and gel coloring until blended. Then add the buttermilk, oil, mayonnaise, egg, vinegar, and vanilla until well combined. Now add the wet ingredients to the dry, and mix until the batter is mostly smooth (no more than 2 minutes and small lumps are fine).

Distribute batter evenly among baking cups, filling each about 2/3 full. When finished, slam the pan evenly and firmly downward from 2 inches above the counter to force out any large bubbles. Bake for 16 to 23 minutes, or until a toothpick inserted into the center of a cupcake comes out clean. Remove from oven right away, let cool for 2 minutes, then transfer cupcakes to a wire rack to finish cooling.

Once cupcakes have cooled completely, use a piping bag fitted with a medium round tip to pipe swirls from the outside edge inward and upward on each cake. Just before serving (condensation may form on the modeling chocolate if stored in a container with the moist/warm cupcakes), insert 2 chocolate horns directly opposite to each other near the top of a cupcake's frosting. Insert the non-pointed end of a chocolate tail at the base of the frosting between the 2 horns. Carefully place the rest of the tail up the side of the frosting, curving it in an "S" shape. Press the tail, including the point, gently into the frosting to secure it. Now you're looking at a devilish "behind." Add tails to all the other little devil-cakes in the same way. By now I just know you'll be feeling a little sinful. Go ahead...give in to it and take a bite...I won't tell =p.

Pipeable and Not-too-sweet Cream Cheese Frosting
1 cup (2 sticks) unsalted butter, room temperature
2 cups powdered sugar
1 tsp pure vanilla extract
Red gel/paste/powdered food coloring, as much as needed to reach desired shade
8 oz. (1 block) cream cheese, cold and cut into 6 to 8 chunks

Sift powdered sugar into a small bowl. [If using powdered food coloring, sift a small amount in with the powdered sugar.] In a larger mixing bowl, cream the butter, 1 1/2 cups of powdered sugar, vanilla, and a few drops of food coloring until thoroughly blended and fluffy. Add more food coloring, if needed, until you reach something close to the shade you want. Add the cream cheese, a chunk at a time, beating after each addition (just enough to work it in until it’s smooth). If needed, add more powdered or gel food coloring until the desired shade is achieved. Be careful to avoid overbeating or the cream cheese may start to break down and become gloppy. Chill for 24 hours (ideally) to allow the red color to deepen. Then beat again until smooth just before using.

Modeling Chocolate Devil Horns and Tail
Chocolate adapted from Cake Central

10 oz. semisweet chocolate (coarsely chopped chunks or chips)
1/3 cup light corn syrup
Black gel or paste food coloring, as needed

Making the modeling chocolate: In a shallow bowl, melt the chocolate in microwave (be careful so that the temperature does not exceed 100 degrees F) for 2 minutes; stir. If chocolate is not completely melted, return to microwave for 30 seconds at a time and stir until smooth.

Add corn syrup to the chocolate and mix well (scrape all the corn syrup into the chocolate with a rubber spatula). Using a rubber spatula, stir and fold mixture, scraping the sides and bottom of the bowl well, until no shiny syrup is visible and the mixture forms a thick ball.

Pour mixture onto a large sheet of wax or parchment paper and spread with the spatula until it’s about 1/2-inch thick; let it sit and stiffen, uncovered, for about 2 hours. After that, knead black food coloring into the modeling chocolate 1 to 2 drops at a time until you get the desired shade. Use at once or store in an airtight container at room temperature for up to 1 month.

Shaping the horns: Make 24 balls about 1/2 inch across with the modeling chocolate. Flatten one side of each ball against your working surface. Use your index fingers to roll the other end down to a point. Smooth and flatten the the chocolate, curving the points to one side until it looks like a horn. Set the finished horn down on its flattened end, and repeat until you have made 24 horns.

Shaping the pointed tails: Roll modeling chocolate into 12 ropes about 2 1/2 inches long and 1/6-inch thick each; set aside. Shape 12 small pieces of modeling chocolate into flat triangles that are each about 1/8 inch thick and and 1/2 inch on all 3 sides. Join each triangle to one of the ropes made earlier by pressing one end of the rope into a triangle.

Sunday, September 25, 2011

Under the Sea! (Little Mermaid Birthday Treats)

Under the Sea!
Hey there! I'm taking a little break from studying to share these "Under the Sea" cupcakes I made for a birthday order. They're s'mores-flavored with a graham cracker crust, chunks of Hershey's milk chocolate, chocolate cake, toasted marshmallow frosting, graham cracker "sand", and sea creature marshmallow fondant toppers I made! I also made the cupcake wrapper using the shape I bought online, an image from the movie, card stock paper, and double-sided tape. The birthday girl, Alaina, is turning 6 and loves The Little Mermaid, so of course these and all other desserts were ocean and mermaid themed =). I had a lot of fun with this order -- so fun to get a chance to be creative!

A Little Mermaid Birthday!DSC_0011-e copy EDIT
Photos of Entire Dessert Tower Taken by My Mom =)

Wednesday, September 21, 2011

A Collection for the Cure! (Cupcakes and Photos for Breast Cancer Awareness)

Photo Shoot for Breast Cancer Awareness 1
Whether directly or indirectly, you'd be hard pressed to find anyone whose life hasn't been touched by breast cancer or another type of cancer these days. Raising awareness is so important since those who discover it early on have a greater chance of successful treatment. And believe it or not, it's not only women who get breast cancer. It's far more rare, but men can get it too! This is clearly an important cause, and one I care about. So when my friend Christine of Pure Joy Events asked me to contribute cupcakes and photograph Chickabug's absolutely gorgeous collection of FREE printables for National Breast Cancer Awareness Month, I couldn't say yes fast enough.

As you can see for yourself, Christine did an incredible job coordinating and styling the shoot, including borrowing props and furniture and transporting it ALL to my neighborhood. She came over last Sunday, and we took full advantage of the pretty park behind my apartment and the perfect early autumn weather. There weren't many people around, but I wonder what the occasional joggers thought of the crazy ladies awash in pink ^-^. I've included some of my favorite outtakes below, and please check out the rest of the photos and the *FREE* printables collection over on Amy Atlas Events!

Photo Shoot for Breast Cancer Awareness 2
Full Dessert Table and White Cupcakes with Cream Cheese Frosting
Photo Shoot for Breast Cancer Awareness 3
Bottles of Punch with Printable Straw Flags
Photo Shoot for Breast Cancer Awareness 4
Printable Donation Card and Cupcakes with Fondant Toppers by Lynlee's Petite Cakes
Photo Shoot for Breast Cancer Awareness 5
Another Shot of Cupcakes and Printables
Photo Shoot for Breast Cancer Awareness 6
Incredible Decorated Cookies by JP Creatibles

Sunday, September 4, 2011

Hellooo Fall! (Irresistible Spiced Pumpkin Cupcakes)

My friend C's birthday is in just a few days. Never one to miss a chance to bake, I offered her a dozen cupcakes in any flavor she wanted. Now had I been in her shoes I would've thrown out something crazy...like passionfruit mousse cupcakes with macarons on top! But C is apparently too sweet to do that. Well actually...she can be pretty hilariously snarky when she wants to be. So the truth is just that C really really loves pumpkin cake and asked me for exactly that. Too easy, right?

Pumpkin Cupcakes for Christin's Birthday
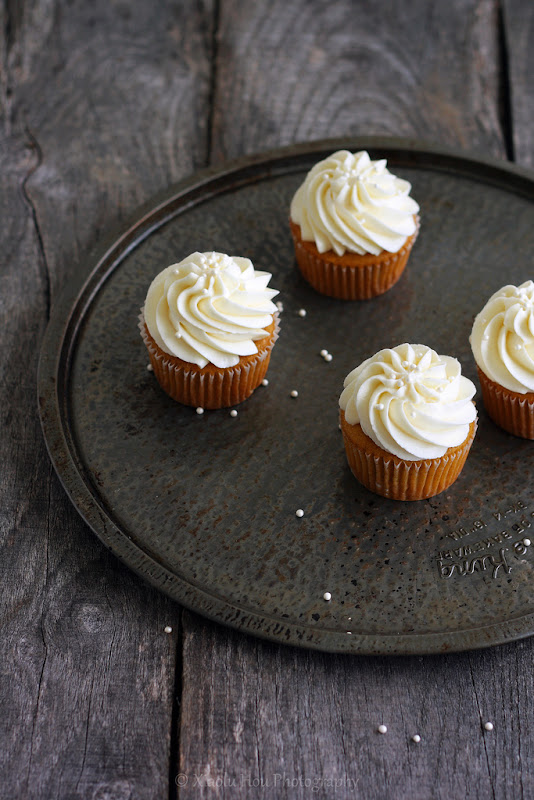
Well actually...there's no such thing as too easy when the results taste this fantastic! I immediately turned to Tartelette's delicious spiced pumpkin cupcake recipe, which I'd tried and loved before. It's got just the right amount of cinnamon and other fall spices to make me want the leaves to hurry up and reveal their glorious colors. I topped off these autumn beauties with generous swirls of my signature not-too-sweet cream cheese frosting. Happy (almost) Birthday, C!

Isn't fall baking just great? I want to hear all about what you can't wait to bake in the coming months! And my friends in the Southern Hemisphere, feel free to share your favorite spring treats, too!

P.S. - Since I've talked about the importance of analyzing your work and having others critique it, I'm going to share my thoughts about the above photo. My hope with the background and tray was to add additional texture and layers to the photo. Plus their cooler tones were meant to tone down the warmer orange of the pumpkin. An issue I had with this shoot was with trying to even out the lighting. Even in the final photo, the light coming from my window to the right is too strong. So the frosting of the bottom-most cupcake ended up a bit bright. To prevent this, I should have reflected more light from the left and/or used a black board to reduce the light from the window. Agree with me? Disagree? I'd love to hear it!


Spiced Pumpkin Cupcakes [Printable Recipe]
Cake slightly adapted from Tartelette
Makes 12 to 14 cupcakes

XIAOLU'S NOTES: I always use canned pumpkin for my baking due to its smooth texture and consistent thickness. If you really want to use a homemade puree, I recommend you drain it using cheesecloth or a coffee filter to ensure that it doesn't add too much liquid to the batter. This frosting recipe makes enough to frost 12 cupcakes fairly generously. If you prefer a thin layer of frosting, feel free to scale the recipe down by 1/3 or even 1/2.

1 cup PLUS 2 Tbsp all-purpose flour
1/2 tsp ground cinnamon
1/4 tsp ground ginger
1/8 tsp ground nutmeg
1 tsp baking powder
3/4 tsp baking soda
1/4 tsp salt
1 scant cup canned unsweetened pumpkin puree [1/2 of a 15 oz. can]
1/2 cup milk
1 tsp pure vanilla extract
6 Tbsp (3/4 stick) unsalted butter, softened
3/4 cup PLUS 2 Tbsp sugar
1 large egg, room temperature
1 large egg yolk, room temperature

Pipeable and Not-too-sweet Cream Cheese Frosting (Recipe below)

Preheat the oven to 350 degrees F. Grease the top of a standard 12-cup muffin pan (in case you get some “muffin top” action). Line pan with 12 baking liners. Sift the flour, spices, baking powder, baking soda, and salt into a medium bowl; set aside. In a separate bowl, whisk to combine pumpkin, milk, and vanilla; set aside also.

Using an electric mixer on medium-high, cream butter and sugar together until light in color and fluffy. Turn mixer down to low, and add egg and yolk. Beat well to combine. Next, add 1/3 the flour mixture, then 1/2 the pumpkin mixture, another 1/3 of the flour mixture, the remaining pumpkin mixture, and the last 1/3 of the flour mixture, mixing to combine after each addition. Fill baking liners about 3/4 full (I always use my large cookie scoop for this). If you've filled all 12 baking liners and still have more batter, you can fill standalone baking cups 1/2 full with batter. Bake 20 to 27 minutes OR until a toothpick inserted in the middle comes out clean (a few tiny crumbs are OK but there should be NO wet batter). Cool 3 minutes in pan, then remove from pans to wire racks to finish cooling completely. Pipe or spread on cream cheese frosting, and enjoy!

Pipeable and Not-too-sweet Cream Cheese Frosting
3/4 to 1 cup (1 1/2 to 2 sticks) unsalted butter, room temperature
Pinch of salt
1 1/4 to 2 cups (5 to 8 oz.) powdered sugar
1 tsp pure vanilla extract
8 oz. (1 block) cream cheese, cold and cut into 6 to 8 chunks

Sift powdered sugar into a small bowl. In a larger mixing bowl, cream the butter, salt, 1 1/4 cups of powdered sugar, and vanilla until thoroughly blended and fluffy. Add the cream cheese, a chunk at a time, beating after each addition (just enough to work it in until it’s smooth). Taste the frosting, adding and beating in more sugar as needed. Be careful to avoid overbeating or the cream cheese may start to break down and become gloppy. If not using immediately, chill until needed, then beat again until smooth just before using.

This recipe has been submitted to Happy Post Pumpkin Recipes over at Family Fresh Cooking.