
Tuesday, August 25, 2009
Latest Music Obsession: Friendly Fires
Though it's not the primary focus of this blog, I'm actually a huge music lover. My favorite songs have gotten me through many a rough patch and of course also made the high points even sweeter. In fact, one of the biggest perks of working in D.C. for me is being able to hop over to the 930 Club at night, often at a day's or even a few hours' notice. Many genres have captivated my ear and I'm always open to more, but indie rock/pop have a special place in my heart.
Lately I've been REALLY into this British band, Friendly Fires, introduced to me by my musically enlightened friends, Steve and Nancy ;). My favorite songs so far are their cover of Lykke Li's "I'm Good, I'm Gone" and their own songs "Lovesick," "Paris," and "White Diamonds." I'd love to hear if anyone else likes them or can recommend similar bands.
And while we're on the topic of music, check out Pitchfork's sweet list of Top 500 Songs of the 2000s. It's surprisingly diverse, and you can listen to most of the songs directly on the website. Enjoy!
Saturday, August 22, 2009
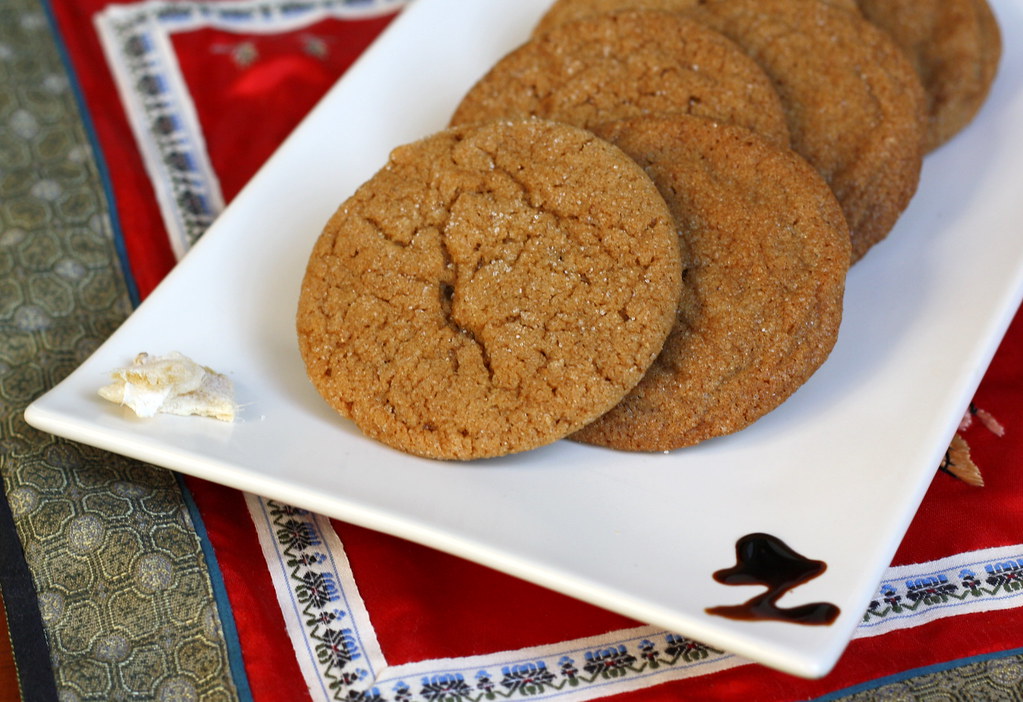
Soft Ginger Cookies
On the same night I made the Peach Crème Fraîche Crumble, I also baked these cookies. No, not (just) because I'm a crazy insomniac baker but because it was my friend and co-worker's birthday the following day. The first thing that came to mind was to bake her a cake, of course. My signature being a deep dark chocolate cake (which I promise to post about down the line) with frosting/filling varied according to each person's preference. But it turned out that she's not a fan of chocolate or even cakes in general. Luckily her enthusiasm for the ginger cookies I'd baked last winter came to mind, so I chose to make her a personal stash.

Truly, these are a delight. Slightly crunchy on the outside with chewy innards (hehe). And don't shy away from the cayenne! It's just a little bit, so trust me, no one will notice other than to note that these cookies have just the right amount of spicy kick.

Soft Ginger Cookies [Printable Recipe]
Adapted from Cookie Madness
Makes about 34 medium cookies
3/4 cup unsalted butter, cut up, still firm
1 cup granulated sugar
1 large egg
1/2 tsp pure vanilla extract
1/4 cup molasses (not blackstrap)
2 1/2 cups all purpose or white whole wheat flour (11.1 oz) – spoon and sweep
(Increased from the original since I used all butter and the dough was too soft)
1 tsp baking soda
1/4 tsp salt
1/2 tsp cinnamon
2 tsp ground ginger
1/2 tsp ground cloves
1 tsp cocoa powder
1/4 tsp cayenne pepper
1/3 cup sparkly sugar (I just used granulated)
Preheat oven to 350 degrees F. Have ready two or three large cookie sheets lined with parchment or silicone sheets.
Using an electric mixer, beat butter until creamy. Add sugar, 1/4 cup at a time. Continue beating for another minute. Beat in egg, vanilla and molasses.
In a separate bowl, thoroughly stir together the flour, soda, salt and remaining spices. Add the flour mixture to the butter mixture and stir until mixed.
Shape dough into balls approximately 1 inch across. Roll the balls in sparkly (or granulated) sugar. Place 2 inches apart on cookie sheets and bake one sheet at a time on center rack of oven for about 12 minutes. Cookies should appear cracked on top but still slightly soft.

Peach Crème Fraîche (Not Quite) Pie

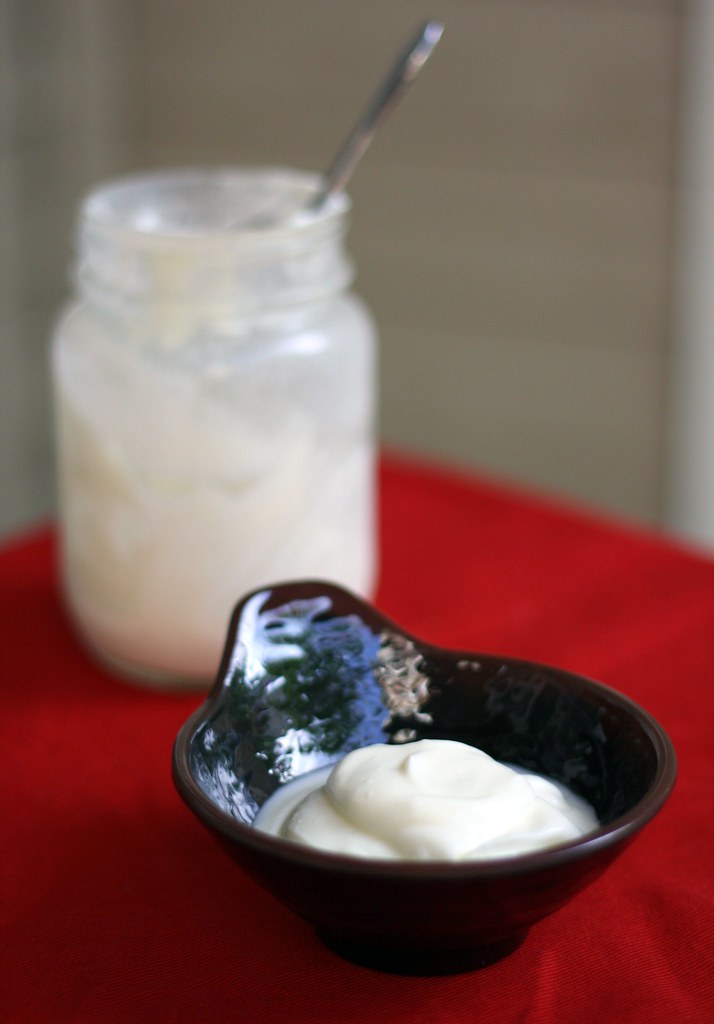
Let's talk about the amazing resources that are cooking videos. And how you should really use them BEFORE embarking on DIY food projects to avoid wasting 24 hours and precious heavy cream. What happened is that as soon as Deb posted this gorgeous Peach and Crème Fraîche Pie on Smitten Kitchen, I made plans to bake it. No surprise there. Isn't that everyone's usual reaction to ALL her posts? Anyway, I hit a roadblock in the form of a $6 price tag on the tiniest tub of store crème fraîche. But I grabbed heavy cream instead and set about making my own. Oh how I wish I'd known then about this video which quickly walks through the whole (and truthfully damned easy) process. Then I'd have realized that crème fraîche remains fairly liquid even after the culture develops. That the subsequent chilling is when it develops that characteristic luxurious thickness. Instead, I dumped out the first batch in my ignorance. But all's well that ends well, and I honestly can't look at that lovely second batch (or the crumble it went in) and regret this journey to deliciousness =).
Homemade (mock) Crème Fraîche
Oh, but of course there was another problem to come. I utterly FAILED at crust-making. This was my first attempt from scratch, and what I got can't even rightly be called a "crust." What came out was a greasy heap of melted butter-drenched dough. The other crust problems I've read about seem to deal mostly with toughness, and I've had little luck finding info matching my flop. My guess would be that large butter chunks, extra water, and the dough becoming too warm were the culprits. I'd love some help getting to the bottom of this though.
With conquering pie crust clearly destined for another day, my solution was simple: just skip the crust and make a crumble instead. So that's what I done, and it tasted damned good! In the end, despite a few jolts and detours, I got exactly what I wanted, which was to:
1) utilize precious fresh local produce;
2) treat my coworkers for surviving the week; and
3) maintain the stream of yummy food making its way to my mouth! O=)
Fragrant peaches from the farmers market

Peach and Crème Fraîche Pie (or Crumble) [Printable Recipe]
Adapted from Smitten Kitchen
NOTE: I made a crumble but left the crust instructions so I can re-attempt the pie later.
Your favorite single-crust pie dough, chilled for at least an hour in the fridge
Streusel
1/4 cup confectioners’ sugar
1/4 teaspoon baking powder
1 T vanilla sugar (why not use it since I make it myself?)
1/8 teaspoon cinnamon (I couldn't help it)
Pinch of salt
3/4 cup all-purpose flour
(I had to up this from the original 3-6 tablespoons to get the mixture to crumble consistency)
1/4 cup cold (1/2 stick) unsalted butter, cut into pieces
Filling
1 1/2 pounds ripe (I used 2 large and 2 medium) yellow peaches, pitted and quartered
5 tablespoons granulated sugar (Upped this a teeny bit too ^_^)
Pinch of salt
5 tablespoons crème fraîche
Prepare pie dough: Roll out pie dough to about 1/8-inch thick and fit into a regular (not deep dish) pie plate, 9 1/2 to 10 inches in diameter. Trim edge to 1/2 inch; fold under and crimp as desired. Pierce bottom of dough all over with a fork. Transfer to freezer for 30 minutes. Preheat oven to 400°F right before you take it out.
Make streusel: Stir sugars, cinnamon, baking powder, salt and three tablespoons flour together in a small bowl. Add bits of cold butter, and either using a fork, pastry blender or your fingertips, work them into the flour mixture until it resembles coarse crumbs. Add additional flour as needed; I needed to double it to get the mixture crumbly. Set aside.
Par-bake crust: Tightly press a piece of aluminum foil against frozen pie crust. From here, you ought to fill the shell with pie weights or dried beans, or you can wing it like certainly lazy people we know, hoping the foil will be enough to keep the crust shape in place. Bake for 10 minutes, then remove carefully remove foil and any weights you have used, press any bubbled-up spots in with the back of a spoon, and return the crust to the oven for another 5 to 8 minutes, or until it is lightly golden brown. Transfer to a wire rack to cool slightly. Reduce oven temperature to 375°F.
NOTE: Deb of Smitten Kitchen explained that the par-baking isn't absolutely necessary since this pie probably wouldn't become soggy even without it.
Make the filling: Sprinkle quartered peaches with sugar and salt. Let sit for 10 minutes. Spread two tablespoons crème fraîche in bottom of par-baked pie shell, sprinkle with one-third of the streusel and fan the peach quarters decoratively on top. Dot the remaining three tablespoons of crème fraîche on the peaches and sprinkle with remaining streusel.
Bake the pie: Until the crème fraîche is bubbling and the streusel is golden brown, about 50 minutes. Cover edge of crust with a strip of foil if it browns too quickly. Let cool on a wire rack at least 15 minutes before serving.
NOTE: Deb recommended storing this in the fridge due to the crème fraîche and because it tasted even better cold. I didn't get a chance to try this since I took the pie to work but will happily take the excuse to make it again!
Wednesday, August 19, 2009
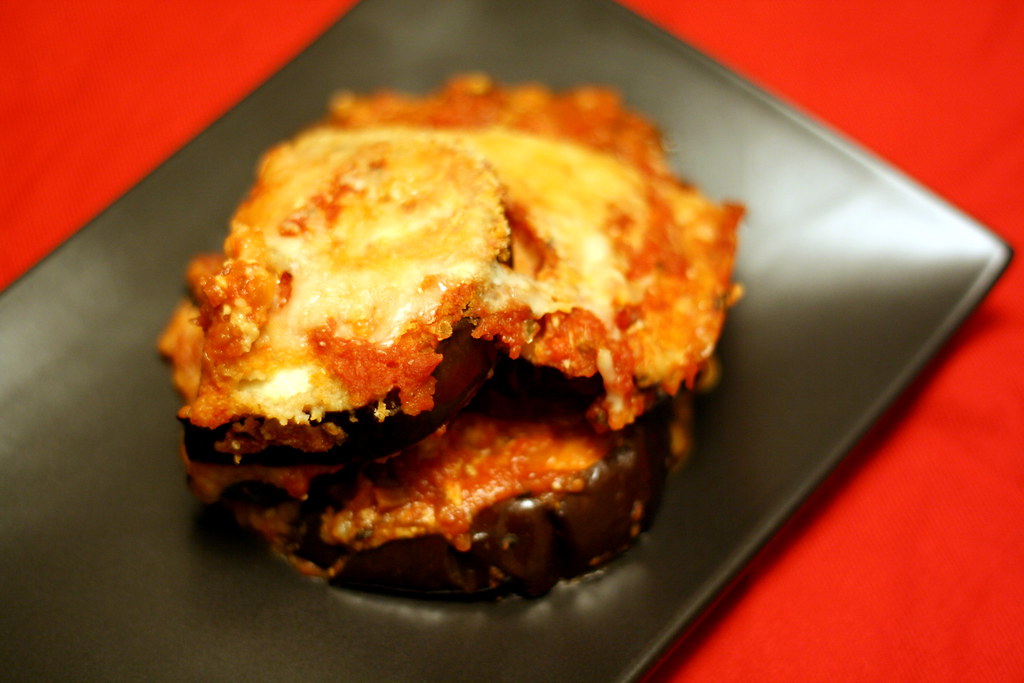
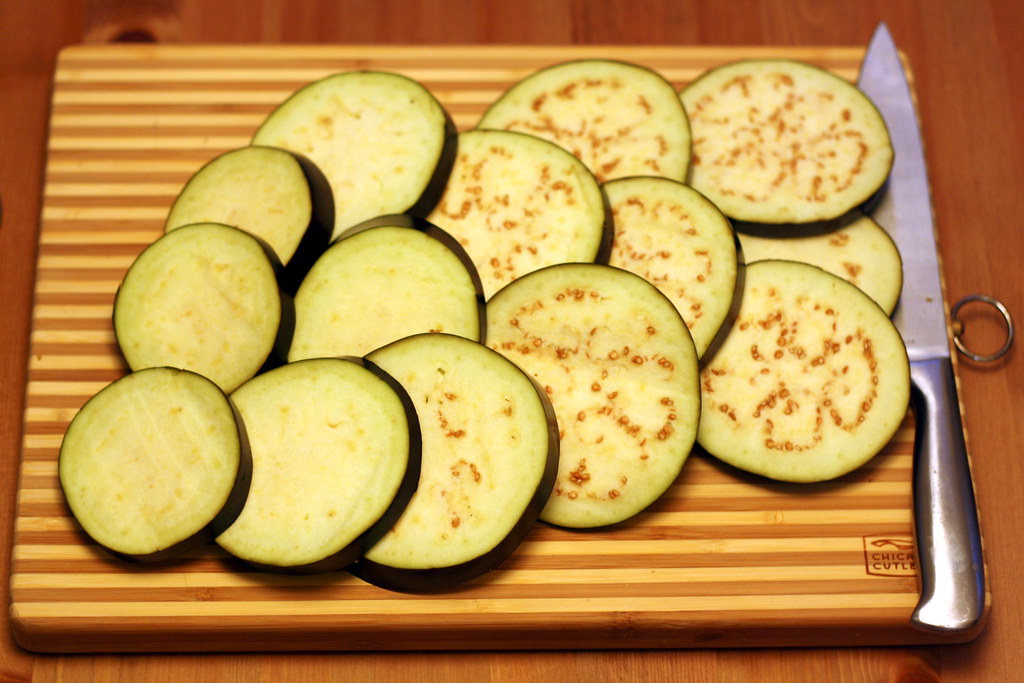
Amazing Baked Eggplant Parmigiana
 There's this idea in my head that people should moan when they taste something truly fantastic. Now me, I'm not such a big vocalizer. But rolling my eyes as the first waves of flavor bombard my taste buds? And licking the plate clean when it's all gone? SO me, and I did both while eating Susan's (of Food Blogga fame) eggplant parmigiana. Just so ya know, the NYC Creperie's strawberry nutella tiramisu (frakkin tiramisu!) crepes are worthy of the same reaction.
 The key point, though, is that you gotta try this recipe. Not only is it surprisingly simple and low-effort considering its taste, but Susan bakes her version, making it way healthier than the fast food parm subs of my childhood. Plus if you hop on over to her original post, she'll even tell you some cool stuff about eggplants. For example, did you know that they were grown first in India over 4,000 years ago? No wonder Indians also came up with such yummy ways to prepare it! One little tip from me if you do decide to try this parmigiana. Don't get the fattest eggplant in sight simply cause the recipe said "large." Even making thicker-than-directed slices, I still had extra that wouldn't fit on my largest baking sheet. Stick with the average lookin' guy and enjoy the recipe after the jump.
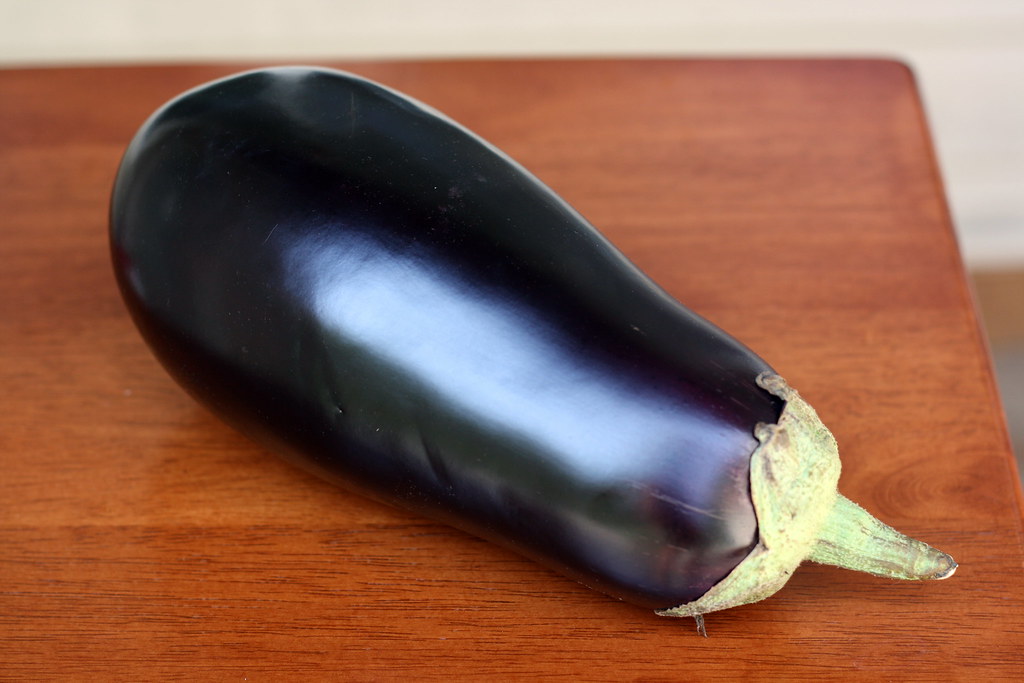
Baked Eggplant Parmigiana [Printable Recipe]
Adapted from Food Blogga
Serves 4
2 large eggs (I ran out of eggs and subbed in Ener-G egg replacer)
Pinch of crushed red pepper flakes
Couple pinches of salt
3/4 cup bread crumbs (preferably plain)
1/4 cup grated Reggiano-Parmigiano cheese
1 large eggplant, cut into 3/8-inch thick slices (yields 10-12 slices)
Marinara Sauce:
2 tsp olive oil
1 shallot, diced OR 1/4 cup onion plus dash of garlic powder
1 (28-ounce) can crushed tomatoes (preferably San Marzano OR Muir Glen)
1/8 tsp crushed red pepper flakes (I used 1 dried red chili)
a couple of pinches of salt
2 rounded Tbsp EACH of chopped fresh basil and parsley
3/4 cup shredded part-skim mozzarella cheese
1/2 cup grated Reggiano-Parmigiano cheese
 In a small bowl, whisk eggs, crushed red pepper, and salt. Pour into a wide, shallow bowl or plate.
Mix breadcrumbs and 1/4 cup grated cheese in a separate wide, shallow bowl or plate.
Dip eggplant slices one at a time into the egg mixture, allowing excess to drip into the bowl. Dredge in the bread crumbs, ensuring that the entire slice of eggplant is coated with the crumbs. Place on a large baking sheet. Repeat with remaining slices.
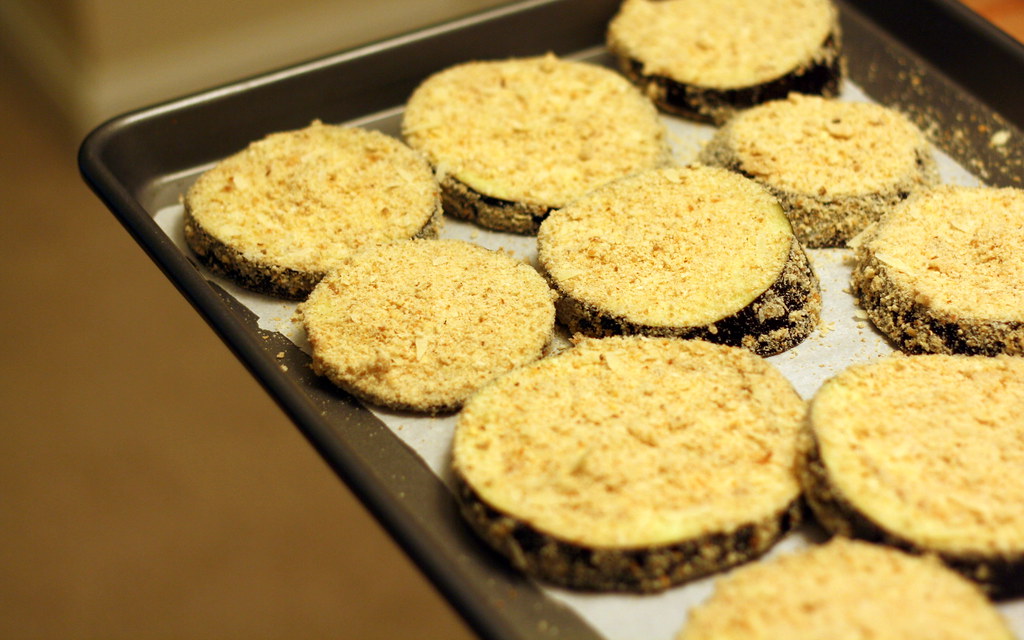 Bake eggplant at 400 degrees F for 15 minutes, or until golden and crisp.
While eggplant is cooking, the marinara sauce can be made. In a medium pot over medium heat, warm 2 teaspoons olive oil. Add shallots and saute 2-3 minutes or until translucent. Add the canned tomatoes, crushed red pepper flakes, and salt. Stir until well combined. Reduce heat to medium-low. Let sauce lightly bubble for 8-10 minutes, or until slightly thickened. Turn off heat. Stir in the fresh herbs.
To assemble the eggplant parmigiano, use either one 9-inch round or 8-inch square baking dish. Start by covering the bottom of the dish with a layer of marinara sauce. Add 4 slices of baked eggplant (larger slices on the bottom), and top with 1/3 of the shredded mozzarella and 1/3 of the grated cheese. Repeat two more times, or until all ingredients are used.
Bake at 400 degrees F for 25-30 minutes, or until the sauce begins to bubble and the cheese turns golden brown. Allow to cool for 10 minutes before slicing.
Monday, August 17, 2009
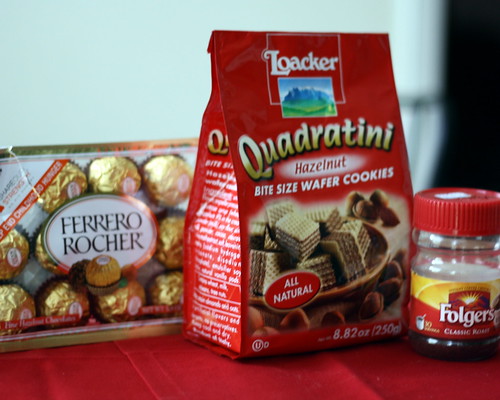
Ferrero Rocher Cupcakes (Baking for Mar Pt. 2)
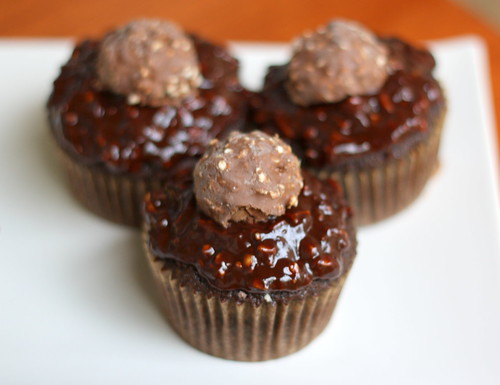
As I mentioned previously, last Friday was my friend Mar's birthday. Since I missed her big day, I decided to do it up and bake her 2 things she'd requested. Funny enough, I'd planned these Ferrero Rocher cupcakes for my own birthday in June, in addition to the amazing strawberry cream cake. See, when I was a kid, dad brought these hazelnut chocolates back to China from a business trip. Just for me. I fell so hard for Rocher right then and never got over him hehe. Fast forward to 2 weeks ago en route to NYC with Mar. I happened to mention these cupcakes, and she immediately knew she wanted them for her birthday. Like the chocolates themselves, these babies turned out to be the perfect little decadent treat. Most importantly, the birthday girl looked mighty happy.
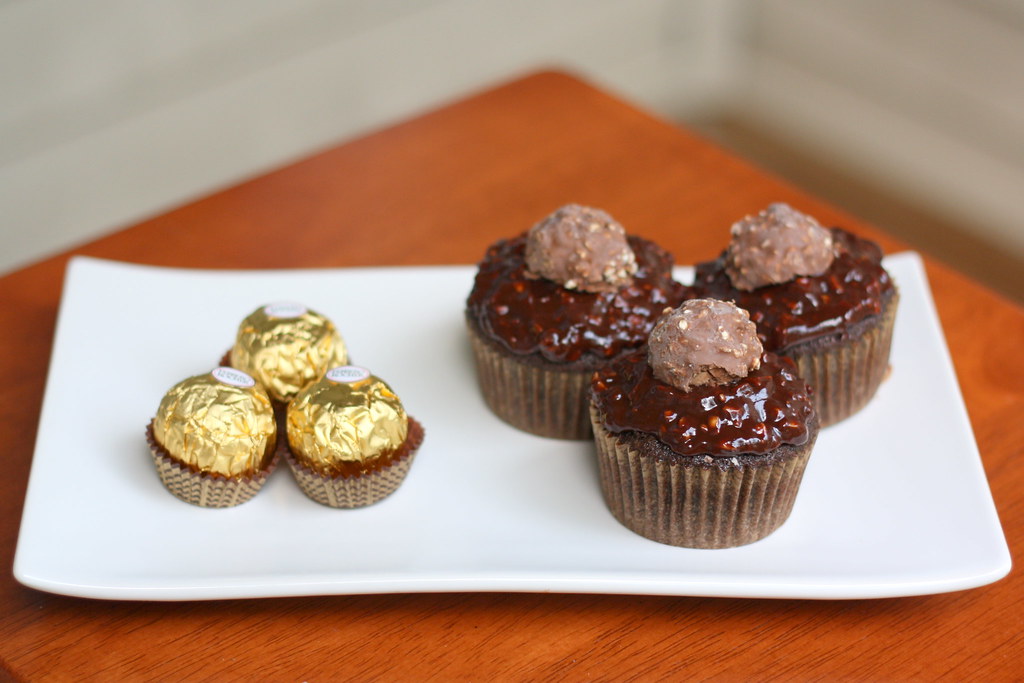
There're some less common ingredients in these cupcakes (like hazelnut extract and edible gold). So check out this Cupcake Project post for some great info on finding them. Also, although hazelnuts can be found in stores, I chose to get mine online and already-roasted from Oh Nuts!. Without the time or supplies to make my cupcakes look exactly Rocher-like, I chose instead to use some actual chocolates as toppers and pumped up the taste with some hazelnut wafer cookies from World Market plus more hazelnuts in the filling. All the recipes are after the jump.
The Star (Ferrero Rocher) and Supporting Cast
There were some other bumps too along the road to chocolate hazelnut bliss. While the cake and ganache recipes worked perfectly, my filling came out like soup (!!). Despite attempts to coax it to "gooey"-ness with powdered sugar and chilling, it refused to thicken more than marginally. It was still fabulous in the end, but if I make it again, I'll use less liquid or even substitute Nutella for the filling.
Ferrero Rocher Cupcakes [Printable Recipe]
Adapted from Cupcake Project
Makes 12 cupcakes
1/2 C boiling water
6 T unsweetened cocoa powder
1/4 C yogurt (not too thick)
1/2 t vanilla extract
1 T hazelnut extract
1/2 tsp molasses
1/2 C unsalted butter, softened
1 C granulated sugar
2 large eggs, room temperature
1 C all-purpose flour
1/2 + 1/8 t baking soda
1/4 t salt
Gooey Chocolate Hazelnut Filling (Recipe below)
Chocolate Hazelnut Ganache (Recipe below)
6 Ferrero Rocher chocolates, halved
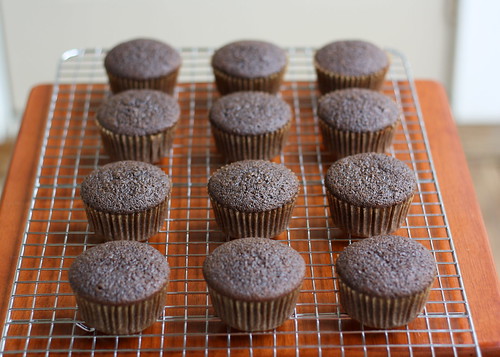
Preheat oven to 350F. In a bowl, whisk the boiling water into cocoa until smooth and whisk in yogurt, molasses, vanilla, and hazelnut extracts. In a large bowl, beat together butter and sugar until light and fluffy, about 2 to 3 minutes, and beat in eggs, 1 at a time, beating well after each addition. Into another bowl, sift together flour, baking soda, and salt and add to egg mixture in batches alternately with cocoa mixture, beginning and ending with flour mixture, and beating well after each addition. Fill each wrapper slightly more than 1/2 way. They will rise a lot. Bake in a preheated 350F oven for about 18 minutes. Cool on a wire rack.
Cut a cone in each cupcake. Put a few pieces of the wafers in, followed by 1-2 teaspoons of the filling. Replace the cone. Spread 1-2 tablespoons of the ganache over each filled cupcake. Top them all with one Ferrero Rocher half each. Take a bite and moan in pleasure.
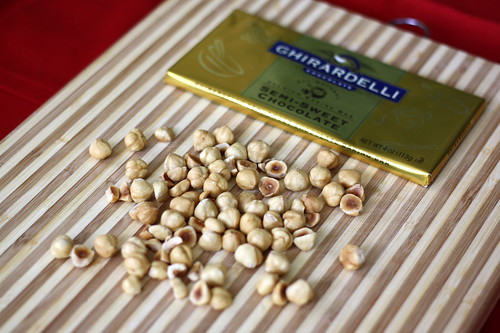
(Supposedly) Gooey Chocolate Hazelnut Filling
1/2 C heavy cream (I'd recommend reducing this to about 1/4 C)
1/2 C semisweet chocolate chips
(I chopped up a bar of semisweet chocolate instead. My consistency problems may have something to do with these changes.)
1 t hazelnut extract
1/2 C hazelnut wafer cookies, cut into 1/2" cubes
1/4 C roasted hazelnuts, chopped fine
Bring heavy cream to a boil. Pour over chocolate to melt it. Add extract. Mix until fluffy (I wasn't sure what this meant...). Let cool. (In my case, add sugar...still soup...repeat 6x...put in freezer...soup 4evarr...)
Chocolate Hazelnut Ganache
1/4 C heavy cream
4 oz good semi-sweet chocolate chunks
1 T light corn syrup
1 t hazelnut extract
1/3 C hazelnuts, chopped fine to medium
Heat the cream on the stove until it boils. Pour over the chocolate and stir to melt, adding the corn syrup and hazelnut extract. Stir in the chopped hazelnuts.
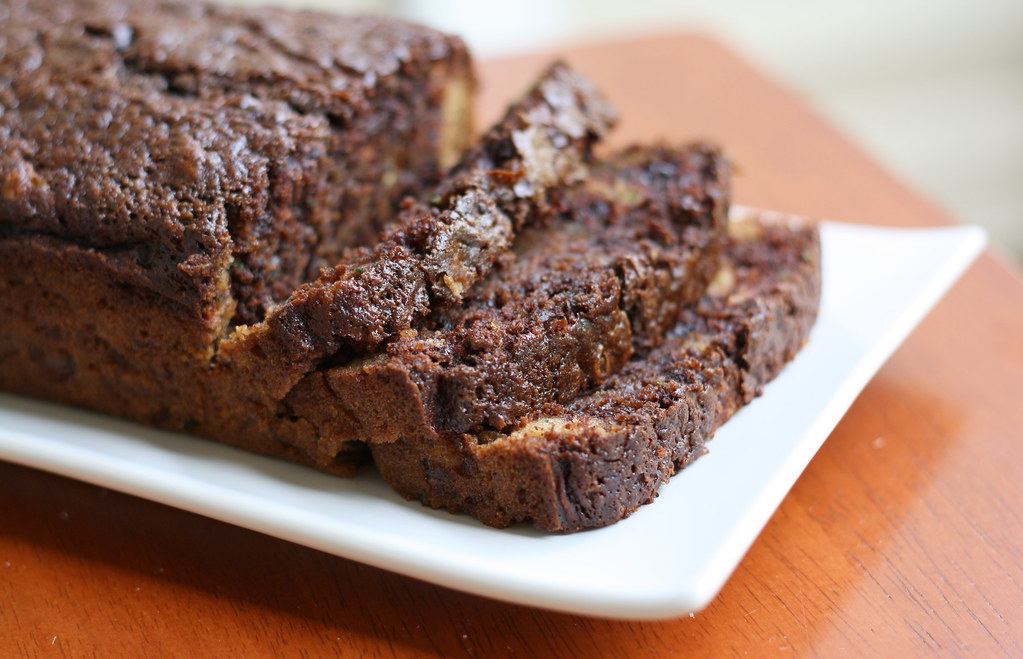
Chocolate Zucchini Bread (Baking for Mar Pt. 1)
My friend Martine "Mar" is the type of pal who sticks with you through thick and thin. She's intelligent, funny, passionate, loyal, insightful, spontaneous, and pretty much anything else you could ask for. Although we're opposites in many ways, Mar and I have been close friends since college, and she's as much family as friend to me by now. So when she asked me to make zucchini bread for her 24th birthday, I was more than happy to oblige. Oh, and if you're thinking that a veggie quickbread ain't exactly birthday material, rest assured that I take care of my own very well. Ferrero. Rocher. Cupcakes. How's that for special? All the details to come in the next post.

As for the zucchini bread, two words: simple & delicious. The hardest part may have been choosing a recipe. I like to play it safe when making food for others on special occasions. But when I don't have a go-to recipe, I turn to recipe sites with active reviewers, such as Allrecipes.com. Once there, a search for zucchini bread quickly uncovered no shortage of recipes with stellar ratings. Yet they all seemed to have a cup or more of oil. That's just ridiculous to me. Fortunately, with other blogs to point the way, I found the recipe below, which I've modified slightly to be even healthier. It's perfectly sweet and moist, even with very little fat. And if you actually divide the batter evenly (it's harder than it looks...) and don't go swirl-crazy when the directions don't even say to swirl (oops), you might even get a cute wave like the title suggests ^_^.
Chocolate Wave(less) Zucchini Bread [Printable Recipe]
Adapted from Allrecipes through Taste and Tell
1/4 cup oil
2 T yogurt
1 cup sugar
2 eggs
1 1/2 cups grated zucchini
1/3 cup water
1 teaspoon vanilla extract
1 2/3 cups all-purpose flour
1 teaspoon baking soda
1/2 teaspoon salt
1/4 teaspoon baking powder
1 teaspoon cinnamon
few pinches of ground cloves and nutmeg
1/3 cup chopped walnuts (I omitted the nuts)
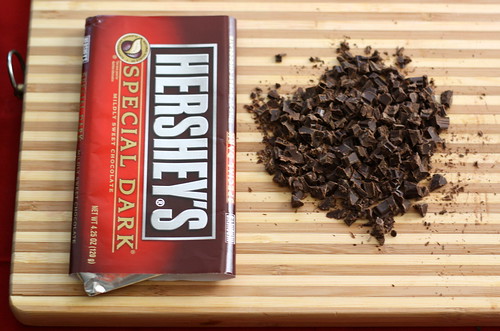
3 tablespoons unsweetened cocoa powder
1/3 cup chopped semisweet chocolate
Preheat oven to 350 degrees F. Grease one 9 x 5 inch loaf pan.

In a small bowl, stir together oil, yogurt, and sugar. Mix in eggs. Add zucchini, water, and vanilla; stir. In a separate large bowl, sift together flour, baking soda, salt, baking powder, and spices. Add the wet ingredients to the dry and stir just until combined.
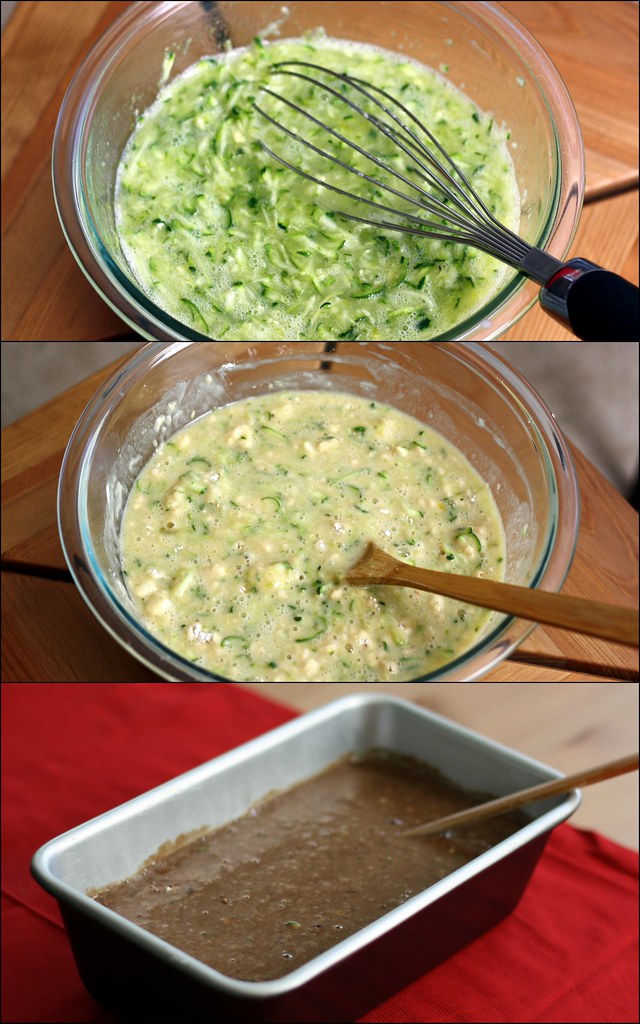
Pour half the batter into the pan. Then add cocoa powder and chocolate to the remaining half. Pour chocolate batter on top of plain batter.
Bake until wooden pick inserted into center comes out clean, about 1 hour. Cool 10 minutes, and remove from pan. Store in refrigerator.
Farmers Market
 Made it to the Columbia Pike Farmers Market today =). Hopefully I'll be transforming these lovelies into yummy peach pie and baked eggplant parmigiana later this week. Also did some birthday (not mine) baking that I'll post about later.
Saturday, August 15, 2009
Vegan Brunch Tofu Scramble
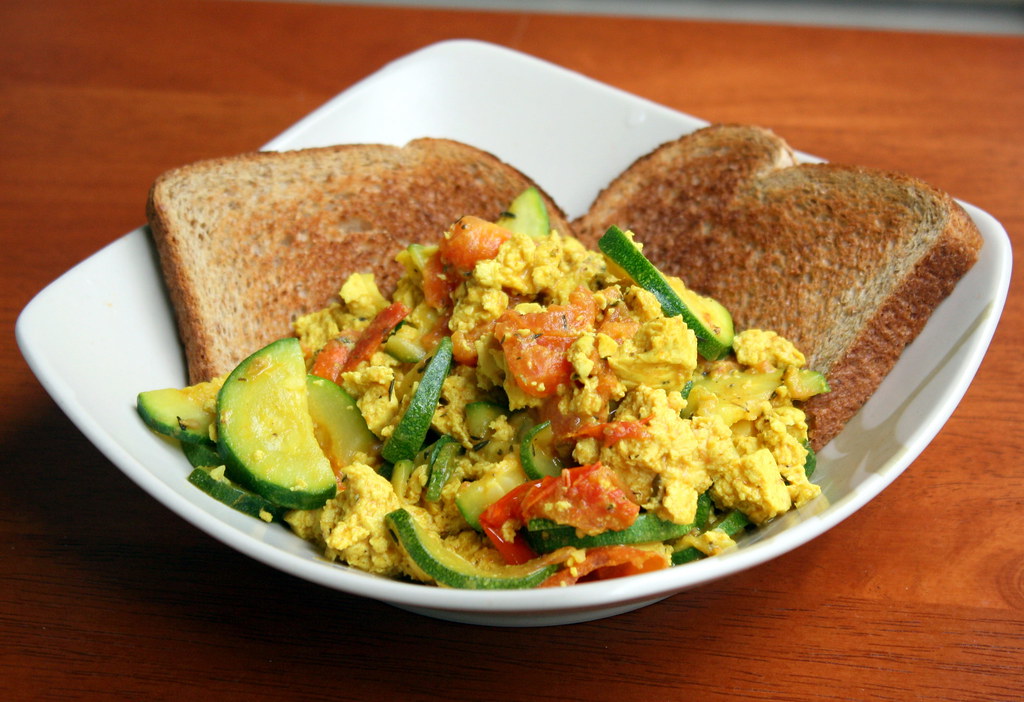 With a little over half an hour to cook and a 6 hour drive to the beach (which became 9 hours due to bad Google directions =/) ahead of us on Monday night, I knew I had to throw something together FAST. Since my omni boyfriend, The Driver, would be sharing this meal as well, I was pretty nervous when choosing a vegan recipe using nutritional yeast. This is a beloved ingredient for many vegans (among others), not the least because it's a good source of vitamin B12 and is considered by some to impart a "cheesy" flavor. But introducing nutritional yeast to someone who's never tried it can be tricky, because many people simply can't stand its unique taste. Fortunately, I lucked out and Patrick really liked this scramble. He praised it for being full on flavor and even noted (without prompting) that the brightly colored vegetables made for a nice presentation. There's reason to hope that I'll make a foodie out of him yet!
This scramble is based on the Basic Scrambled Tofu recipe (p. 19) from Vegan Brunch by Isa Chandra Moskowitz. I altered it to be slightly healthier (less oil) and to use up the vegetables I had on hand. All those veggies released their moisture while cooking, so my version turned out less dry than the original. It's slightly embarrassing to admit this is the first recipe I've made after owning Vegan Brunch for almost 3 months, but now I'm super excited to try more. Even if you don't own it yet, Isa's been so cool as to post a bunch of sample recipes on her site. She's also author of several other awesome cookbooks: Vegan with a Vengeance, Vegan Cupcakes Take Over the World, and Veganomicon. Her recipes are generally spot-on and really prove that plenty of great food can be made at home without any meat products. Isa's even coming out with a cookie book this winter that's already on my wishlist. Is there anything she can't do?
Zucchini Tomato Tofu Scramble [Printable Recipe]
Adapted from Vegan Brunch
 Spice Blend
2 teaspoons cumin powder
1 teaspoon dried thyme, rubbed with your fingers
1/2 teaspoon turmeric
1 teaspoon salt
3 tablespoons water
Combine the above ingredients in a small bowl and set aside.
Tofu and Vegetables
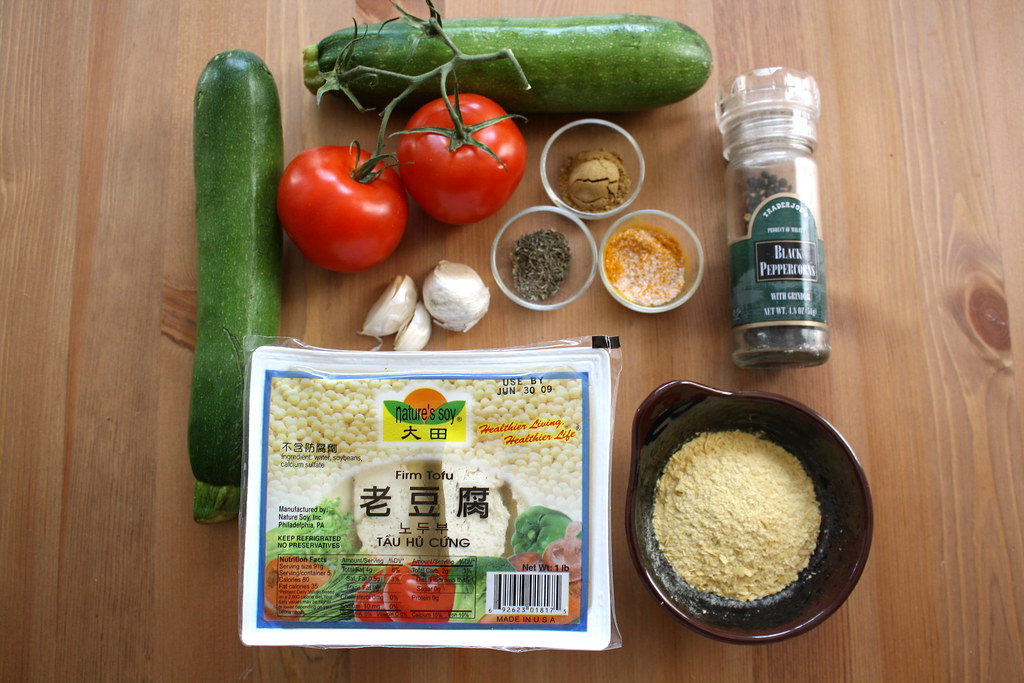
1 garlic clove, minced, plus a few dashes of garlic powder
(2 of the cloves pictured above turned out to be rotten)
1 tablespoon vegetable oil
2 small zucchini, sliced
2 medium tomatoes, chopped
1 pound firm tofu, drained and gently hand-squeezed to remove excess water
1/4 cup nutritional yeast
salt and black pepper to taste
Heat the oil in a large pan over medium heat. Add the garlic and cook for about a minute, stirring to make sure it doesn't burn.
Break the tofu into pieces of whatever size you prefer and add to the pan. Cook for about 5 minutes, stirring only occasionally so the tofu has a chance to brown. Then add the zucchini, tomatoes, and a few pinches of garlic powder and salt. (I added more salt to balance the large volume of vegetables). Continue cooking and stirring these until the zucchini and tomatoes have softened.
Add the spice blend and mix to incorporate. Last but not least, add the nutritional yeast and salt and pepper to taste. Cook for about another 5 minutes and it's ready to eat.
Muffin WIN
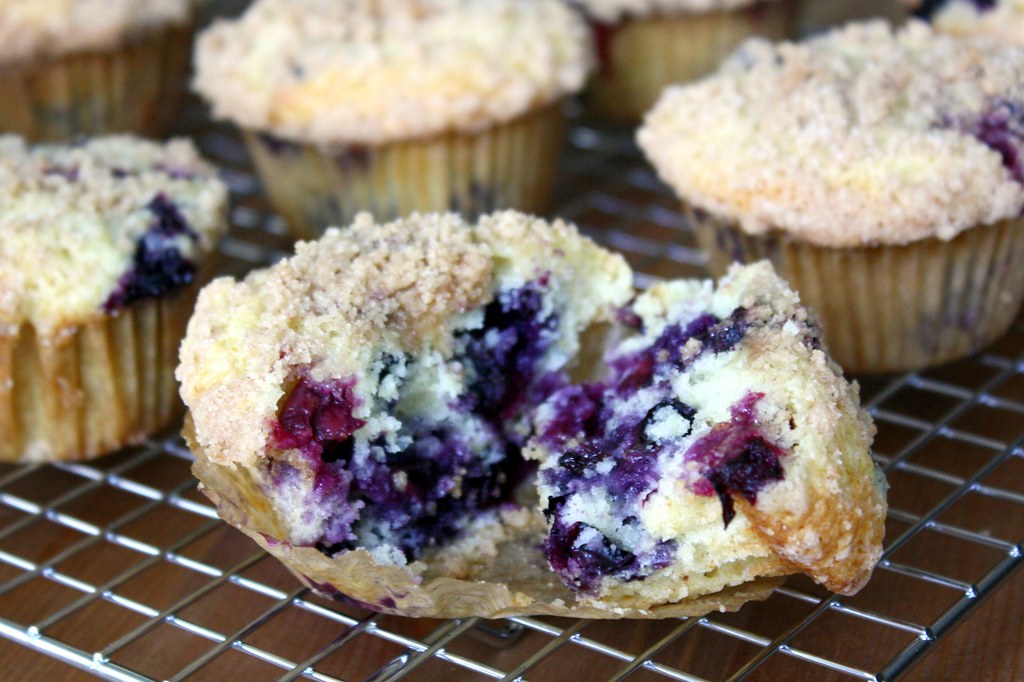
So I'm back and refreshed from a wonderful week at the beach! We actually got in so recently that there's still sand in my ears =), but I couldn't wait a second longer to gush about these scrumptious muffins that I'd brought with us. Although it's not documented here, I've had quite the bumpy history with from-scratch muffins. Sure, I've had some moderate success recently and discovered that recipes with bananas somehow manage to survive even my muffin misfortune. But I struggled on in search of THE berry muffin recipe that could live up to the ideal in my mind: sweet but not tooth-achingly so, bursting with fresh berry flavor, and possessing a tenderness reminiscent of cake, yet with enough substance to get me through an entire morning.

Well call off the search 'cause I FOUND IT. Just in time too. With the specter of one-too-many-rubbery-muffins-past looming over me, I'd begun to doubt that I'd ever conquer this classic breakfast treat. Oh boy did perseverance pay off, and who knew victory would taste so sweet...and tender? I made a few tweaks to make the original recipe even better, I dare say. If anyone else out there is, like I was not so long ago, desperate for their first unequivocal muffin success, please give this one a spin. You won't regret it. Nor will you be able to stop eating them while simultaneously patting yourself on the back (I particularly pride myself on this kind of multitasking). And in case you don't inhale them all the first day (unlikely), these keep well for several days. Just be sure to cool them completely before storing or the topping will get soggy.

S'About Time Blueberry Muffins [Printable Recipe]
Adapted from To Die For Blueberry Muffins posted on Allrecipes
Makes 12 muffins
XIAOLU'S NOTES: I've read that frozen blueberries will work as well, but that you have to toss the frozen fruit in a light coat of flour before gently folding into the batter to prevent the color from bleeding during baking.
2 1/4 cups (10 oz.) all-purpose flour
1 cup sugar
Slightly rounded 1/2 tsp salt
1 Tbsp baking powder
1/3 cup vegetable oil
2 large eggs, room temperature
1/2 cup yogurt (thin out with milk if too thick) OR buttermilk
1/2 Tbsp lemon or orange zest
1 tsp pure vanilla extract
1 1/2 cups fresh blueberries
1/4 cup sugar
1/3 cup (1.5 oz.) all-purpose flour
3 Tbsp butter, cubed
1 tsp ground cinnamon
Preheat oven to 400 degrees F. Grease muffin cups or line with muffin liners.
To Make Crumb Topping: Mix together 1/3 cup sugar, 1/3 cup flour, 3 T butter, and 1 teaspoon cinnamon. Mix with fork, and set aside.
To Make Muffin Batter: Sift together 2 1/4 cups flour, 1 cup sugar, salt, and baking powder into a medium to large mixing bowl. Mix dry ingredients to combine thoroughly and make a well in the center. Place vegetable oil into a 1 cup measuring cup; add the eggs, yogurt or buttermilk, zest, and vanilla. Pour the liquid ingredients into the flour mixture and mix very gently just until combined. Gently crush about a third of the blueberries with your hands or a spoon, then lightly fold all the berries into the batter.
To Assemble and Bake: Fill muffin cups right to the top (I like to use my 2 oz. cookie scoop for this), and sprinkle with crumb topping mixture (I was pretty generous in application and still had a little left over). Bake muffins for 20 to 25 minutes in the preheated oven, or until a toothpick inserted into the center comes out clean. Transfer to a wire rack and let cool for about 5 minutes before removing from pan.
Monday, August 10, 2009
Desiderata
Hello hello! I'm having a great time on vacation and didn't really expect to be posting so soon. But I was introduced in NYC to this an amazing poem by Max Ehrman that perfectly condenses the philosophy I'd like to have toward life. Please read it for yourself below and after the jump. Seeya after the beach!
Desiderata by Max Ehrman
Go placidly amid the noise and haste,
and remember what peace there may be in silence.
As far as possible, without surrender, be on good terms with all persons.
Speak your truth quietly and clearly; and listen to others,
even to the dull and ignorant; they too have their story.
Avoid loud and aggressive persons, they are vexations to the spirit.
If you compare yourself with others, you may become vain and bitter,
for always there will be greater and lesser persons than yourself.
Enjoy your achievements as well as your plans.
Keep interested in your own career, however humble;
it is a real possession in the changing fortunes of time.
Exercise caution in your business affairs,
for the world is full of trickery.
But let this not blind you to what virtue there is;
many persons strive for high ideals,
and everywhere life is full of heroism.
Be yourself. Especially do not feign affection.
Neither be cynical about love;
for in the face of all aridity and disenchantment
it is as perennial as the grass.
Take kindly the counsel of the years,
gracefully surrendering the things of youth.
Nurture strength of spirit to shield you in sudden misfortune.
But do not distress yourself with dark imaginings.
Many fears are born of fatigue and loneliness.
Beyond a wholesome discipline, be gentle with yourself.
You are a child of the universe no less than the trees and the stars;
you have a right to be here. And whether or not it is clear to you,
no doubt the universe is unfolding as it should.
Therefore be at peace with God, whatever you conceive Him to be.
And whatever your labors and aspirations,
in the noisy confusion of life, keep peace with your soul.
With all its sham, drudgery and broken dreams,
it is still a beautiful world.
Be cheerful. Strive to be happy.
Friday, August 7, 2009
Snickerdoodles (no relation to Snickers)

Yep, I baked for work 2 nights in a row on top of overtime...so I'm crazy alright. Frankly, this cookie recipe looked kind of vanilla to me after the "fancy" (as one coworker called it) flavor combination in yesterday's banana bread. Trust me though, I just inhaled 4 of these babies in an embarrassingly short amount of time so I'm confident they'll hold their own against other baked goods.
In case you're not familiar with snickerdoodles, as I just learned several people weren't, they're essentially sugar cookies rolled in cinnamon sugar before baking. For my first time making these from scratch, I chose Mrs. Sigg's Snickerdoodles recipe, posted on Allrecipes. With over 2,000 rave reviews, I figured I'd keep substitutions to a minimum and simply link to the original recipe. I used all butter and no shortening and doubled the amount of cinnamon sugar to make coating easier. As the photos show, mine were missing the cracked surfaces characteristic of snickerdoodles. On top of that, the cookies baked on different metal sheets and liners consistently set up differently from each other (see below):

Cookie baked on sheet with lower rim lined with a Silpat silicone mat (left) and
cookie baked on insulated sheet with higher rim lined with parchment paper (right)
I'd love to figure out what caused both of these results, but it'll have to wait. I'll be on vacation in NYC then NC all of next week. Superw00t! Bye for a while!
Thursday, August 6, 2009
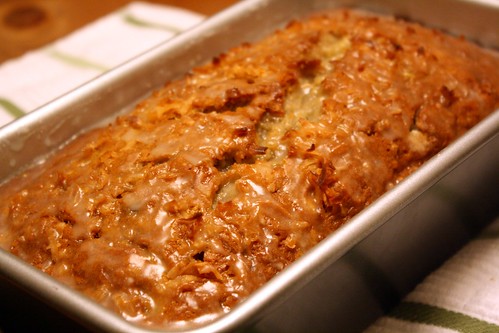
Not My Usual Banana Bread
Bananas have become one of my favorite ingredients to bake with in recent years. They're cheap, fairly healthy, and, when allowed to ripen sufficiently, provide amazing flavor. But for years before this, I'd largely avoided banana-flavored treats. Let's just say it took a long time to overcome the trauma of some close encounters with artificial "banana" flavoring. I'm so glad to have gotten over that though, because banana bread done right can do wonders for a bad (or good) day.
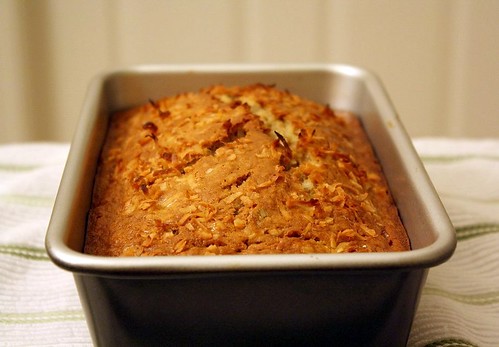 I was lucky enough to find a great banana bread recipe on my first attempt a few years back. The Very Moist Banana Nut Bread recipe (with minor variations) from Recipezaar has since become a regular in my baking repertoire and is always gobbled up wherever I take it. While that remains my go-to recipe, I really enjoyed trying an unconventional twist from Cooking Light. Their Coconut Banana Bread with Lime Glaze has already gotten plenty of coverage in the food blogosphere, but a good recipe deserves all the attention it can get. Plus, I was itching to upload my first photos taken with the new camera. There hasn't even been time for me to try any setting other than full auto, but that's what next week's vacation is for (so close I can taste the freedom!!). But getting back to the food, you can find the full recipe with my notes after the jump.
 The key flavors (left) and lemon glaze (right)
Coconut Banana Bread with Lime (or Lemon) Glaze [Printable Recipe]
Adapted from Cooking Light
*My comments/changes in italics
2 cups all-purpose flour
3/4 teaspoon baking soda
1/2 teaspoon salt
1 cup granulated sugar
1/4 cup butter, softened
2 large eggs
1 1/2 cups mashed ripe banana (about 3 bananas)
1/4 cup plain low-fat yogurt
3 tablespoons dark rum
1/2 teaspoon vanilla extract
*I also added 1/4 teaspoon of coconut extract
1/2 cup flaked sweetened coconut
Cooking spray
1 tablespoon flaked sweetened coconut
1/2 cup powdered sugar
1 1/2 tablespoons fresh lime or lemon juice *I used lemon juice and added 1 teaspoon of rum
Preheat oven to 350°.
Lightly spoon the flour into dry measuring cups, and level with a knife. Combine the flour, baking soda, and salt, stirring with a whisk to combine.
Place granulated sugar and butter in a large bowl; beat with a mixer at medium speed until well blended (about 1 minute). Add the eggs, 1 at a time, beating well after each addition. Add banana, yogurt, rum, and vanilla; beat until blended. Add flour mixture; beat at low speed just until moist. Stir in 1/2 cup coconut. Spoon batter into a 9 x 5-inch loaf pan coated with cooking spray; sprinkle with 1 tablespoon coconut. Bake at 350° for 1 hour or until a wooden pick inserted in center comes out clean. *Mine took 65-70 minutes to bake through.
Cool 10 minutes in pan on a wire rack; remove from pan. Combine powdered sugar and juice, stirring with a whisk; drizzle over warm bread. Cool bread completely on wire rack. *I did remove mine from the pan to cool for a while but put it back for lack of a better container.
UP NEXT: Snickerdooooodlez!
Subscribe to:
Posts (Atom)


