Showing posts with label coconut. Show all posts

Wednesday, September 11, 2013

Naturally Gluten-Free: Coconut Cassava Bars

Hello world! These are my baby steps back into the food blogging/photography world. A little scared...a lot clumsy (I swear I've somehow forgotten even the basics of how light works! =X)...and learning things again bit by bit (I hope) with each attempt!

Coconut Cassava Bars
For today's shoot, I chose coconut cassava bars inspired by one of my favorite nutrition blogs, Nutrition to Kitchen. Similar versions of this cake can be found in Vietnamese and Filipino cuisine. These bars are mildly sweet and just a little bit salty (partly due to the addition of cheddar cheese!); soft and chewy in a way that's reminiscent of mochi cake (not surprising once you learn cassava is used to make tapioca); rich with coconut flavor (from the milk as well as sweetened coconut strings known as macapuno); naturally gluten-free; and ab-so-lute-ly addicting to nibble on. Please do give it a go, and let me know what you think!

Wednesday, October 31, 2012

Happy Halloween!

Hope you all had a fun (and safe) Halloween! Between Hurricane Sandy and coming down with a cold, I didn't go all out this year like I did last time. But I did manage to add a gorily festive touch to these fluffy Coconut Cupcakes with Chocolate Filling and Frosting by splattering them with red-colored simple syrup. I usually need to put my personal stamp on recipes, but this super versatile white/yellow cake recipe from Beyond Buttercream is perfect as is. I followed her directions for a coconut variation, and it was a thing of beauty. For a cupcake version, fill liners 1/2 to 2/3 full (this batter rises a lot) and bake at 350 degrees F for 19 to 22 minutes or just until a toothpick inserted into the center of a cupcake comes out mostly clean (moist crumbs are okay; wet batter means it needs to bake longer). Since my chocolate frosting has my personal spin, I will post the recipe below. Enjoy!

Bloody Cupcakes
I know I've been out of the blogging loop and haven't been visiting your sites as much as I'd like to, so I'd love to hear about your Halloween or just about how you've been in general in the comments below!

Dark, Rich Chocolate Buttercream Frosting [Printable Recipe]
Makes enough to frost at least 2 dozen cupcakes

2 cups unsweetened cocoa powder
4 to 5 cups powdered sugar
Large pinch salt
1 1/2 cups (3 sticks) unsalted butter, softened
5 to 8 Tbsp milk, half and half, OR heavy cream
1 Tbsp pure vanilla extract

Sift the cocoa powder, powdered sugar, and salt into a large bowl. In another large mixing bowl, cream the butter using an electric mixer. Alternate adding the sifted mixture (1 cup at a time) with adding the cream, mixing well between each addition. Once all the powdered mixture and 5 tablespoons of the milk have been incorporated into the frosting, turn the speed up to high and continue beating until a light, fluffy texture is achieved, at least 2 minutes. [Since the frosting will significantly lighten in color as it's beaten, you will need to scrape the sides of the mixing bowl carefully to ensure the darker portions are mixed in to make a uniformly colored frosting. Add more cream or powdered sugar if you want to thin or thicken the frosting. Use finished frosting right away to frost cooled cupcakes or cakes. If not using right away, frosting can be covered and stored at cool room temperature for at least 2 days. However, you may need to re-beat the frosting briefly if it's been siting a long time.

Thursday, March 29, 2012

WANTED: The Perfect Carrot Cupcake (Round 2)

Back in November of last year, I shared with you that P's cousin K had offered me the honor of baking cupcakes for her wedding in October. I decided to start testing recipes almost a year early 'cause I'm sometimes *cough* be a bit *cough* of a procrastinator O=). While I enjoyed the simplicity of the first batch and had a LOT of fun fashioning realistic carrot toppers out of marzipan, the flavor of the cake itself didn't have quite as much OOMPH as I wanted. It was inevitable that there would be a Round 2...I did declare after all that "I [wouldn't] rest until [I'd] found the perfect carrot cupcake for K's wedding day!"

Round 1 had covered the plain and simple end of the Carrot Cake Spectrum, so the goal for Round 2 was to really explore the options when it came to add-ins and alternative prep methods. Early on I was intrigued by a unique recipe from The Silver Palate Cookbook that called for steamed and pureed carrots rather than raw, shredded ones! But what I wasn't taken with were the copious amounts of sugar, oil, and sweetened coconut in the original. Being the irrepressible tweaker you should know me as, I went directly to the cutting board and I think it's accurate to say I went BIG. By the end of this surgical session, I'd cut 1/3 of the sugar, 1/2 the fat, and 1/2 the coconut along with pinches of salt and baking soda.


Carrot Cake Cupcakes (Round 2!)
Having wrapped up Round 2, I can now declare these to be The Best Carrot Cupcakes I've Ever Eaten =D. A feast of flavors from freshly mashed carrot and crushed pineapple to toasted nuts and (subtly) textured coconut. Dense and moist but absent any oily mouthfeel or excessive calories. I credit the texture in no small part to the pureed carrots, and that's not the only benefit to this unusual way of preparing them. Even if there were no benefit as to taste, I'd pick pureed carrots for my cake anyday for the time it saves me from slaving over the box grater!

It's pretty obvious I'm really taken with this recipe, right? But the funny thing with The Best anything is that there might always be an even better version out there -- and you'll never discover it unless you keep an open mind! So if anyone's convinced their mom/granddad/friend/neighbor's carrot cake is the best thing since the invention of cake, please DO shoot me a message and I may test it out! I certainly have time for Round 3 as K's wedding's not for 6 months 8).

Sunday, January 29, 2012

Yuzu Mango Coconut Cake Shooters

What can I say, but that the generosity of my blogger friends continues to amaze me! Right now I'm speaking of Joyti of Darjeeling Dreams, one of the sweetest, brightest girls I know. Though we've been online buddies for a while, it wasn't until last August that I finally got to meet her (and her husband) while visiting San Francisco. Let me just tell you this, she's even sweeter in person than on her blog (and so pretty, too). Joyti blew me away again with her generosity when she recently sent me some fresh yuzu fruit after hearing my lament not having access to it. Not only that, she also sent me a bounty of other citrus, including Meyer lemons! We also decided it would be fun to post our yuzu recipes on the same day. Thanks for the lovely package, Joyti! I can't wait to see what you've made =D.

Yuzu Lemon Mango Cake Shooters
Lately I've been really into the idea of layered cake and other dessert shooters. They're such a lovely way to fit in multiple light desserts at the end of a party...even when you're mostly stuffed ;p. Especially having just added dessert shooters to my menu, I was excited to have this opportunity to test out a different flavor.

The results were delicious but I unfortunately didn't have enough juice to make the curd from entirely yuzu. Subbing in lemon juice to make up the remainder resulted in a curd that, while delicious, tasted as much of lemon as of yuzu. So if, unlike me, you have regular and abundant access to fresh yuzu, I recommend you use it and only it for the curd so that its delicate flavor and floral aroma is allowed to shine.

P.S. - I've finally submitted my graduate school application! Sorry for the long lull between new recipe posts -- I'm finding my way back slowly and surely =D.

Thursday, December 8, 2011

Guest Post: Coconut Rice

You may have noticed that I'm not posting recipes as frequently these days. With both final exams and GREs descending on me in less than 2 weeks, I've simply had to shelf my planned posts until winter recess (with one exception this weekend ^-^). Luckily my dear friend Sala of Veggie Belly has kindly stepped in with an absolutely delicious and doable recipe for her fragrant coconut rice! You may recall that I shared a chocolate chestnut cake roll on her blog back in June. We lived not too far from each other then and I've really missed her company since she moved to the West Coast. While I've never tasted this specific dish of hers, I've sampled enough of her cooking to have confidence that all her recipes are dynamite! Please give your warmest welcome to the exceedingly sweet and talented Sala!

ingredients-for-coconut-rice-horz
What I enjoy the most about blogging is the fact that I’ve met some amazing, like-minded people through blogging. And that’s how I met Xiaolu; through my blog. After weeks of emailing back and forth, we met up for a meal. It was the start of a great friendship, and exchange of ideas. I’ve come to admire Xiaolu for her passion for baking and blogging, and her meticulous food styling. I’m delighted to guest post today and share with you a simple, flavorful, childhood recipe.

coconut-rice-in-hand2
Coconut rice was a staple school lunch. I’d take it to school in a little tiffin box, and it always tasted great, hot or cold. Now, coconut rice has become a standard weeknight meal for me. It’s easy to put together and served with a steamed or curried vegetable like my cauliflower broccoli poriyal or some spinach dal and some yogurt, makes a complete meal.

curry-leaves-and-black-mustard
Good quality, fresh coconut is essential for this recipe. You can find fresh-frozen grated or shredded coconut at Indian and Asian stores. Just break off a chunk and let it thaw on your counter top.

If you like some fruity sweetness in your coconut rice, throw in 2 tablespoons of raisins or dried cranberries or dried apricots.

Thursday, August 25, 2011

Guest Post: Wonderfully Flaky Chocolate Chinese Pastries

I've written before about the wonderful community of food photographers and bloggers that I'm part of on the photo-sharing site, Flickr. In light of my recent posts about photography, I want to encourage you to find your own source of feedback for your photos. In addition to analyzing the work you admire from others, it's also important to examine your own in order to continue improving your skills. But as with most things in life, it's hard to keep a level perspective when examining yourself; so it's best to get a second (or even third) opinion. And be sure to find someone who's not afraid to tell it like it is -- their words may bruise your ego at times, but they're the ones who'll help you most in the long run.


Today my guest post series continues with some delectable Chinese pastries from my friend Tika of Cemplang Cemplung. She has long been a part of the supportive Flickr community I mentioned above, and it's been a great joy during the past year to grow side-by-side as artists and friends. Tika is quite the master of Asian treats and savories, and I'm constantly impressed by each new dish of hers. The pastries she shares today are no exception -- looking just as if they came fresh out of a fancy bakery! Aren't we lucky that she's generous enough to share not only the recipe but also photos of every step? Please give Tika your warmest welcome as she reveals the secret to these flaky chocolate pastries!


Tika Photo 1
For those who love food blogging, you must have been familiar with Xiaolu from 6 Bittersweets. Nice, friendly, helpful, kind and warm, that's my impression of her. Aside from that, she's a talented and innovative baker and a food photographer. With variations of cupcakes, cakes, macarons and other yummy food recipes that make our jaws drop in amazement. Though we have never met before, I'm sure she's loveable. I remember when I had trouble in making macarons, she sent me a bundle of tutorials and not to mention she offered me help. That was very sweet of you, dear :).


Tika Photo 2
The first time I made Green Tea Chinese Flaky Pastry, I was pretty upset because the pastry didn't turn out the way I expected. They look totally different from the mags, even though I followed the step-by-step of the process. I assumed it's because there were no step-by-step pictures! I interpreted the steps literally :D. Hence, to avoid the same old mistake, I googled some recipes of flaky pastries which included pictures of the process. Then I finally found out that my first attempt at making Chinese Flaky Pastry used "Hidden layering shaping technique" while the second one used "Visible layering - spiral (escargot) shaping technique".


Tika Photo 3
I modified the recipe by substitute the green tea powder with cocoa powder and I did half of the ingredients. So I got the smaller size of flaky pastry, a half size smaller than the original size!! :D I must confess the visible layer technique works like a charm to bring out those beautiful layers with different two colors. I did take some photos of the process to make it easy for you to follow. Last words before we start our journey of the flaky pastry, my big thanks to Xiaolu for her trust and the wonderful opportunity she has given to me :).


Chocolate Chinese Flaky Pastries [Printable Recipe]

Makes 16


Water dough (outer layer)

50 g all purpose flour

50 g cake flour

13 g caster sugar

1/4 tsp salt

40 g water

38 g unsalted butter, room temperature


Chocolate dough (inner layer)

105 g all purpose flour

70 g unsalted butter, room temperature

5 g cocoa powder


Filling

75 g peeled mung bean, soak in water for 1 hour

25 g thick coconut milk

50 ml water

3 g cocoa powder

38 g granulated sugar

1/4 tsp salt

1 pandan leaf


Tika Photo Step-by-step

Click Photo to Enlarge
How-to:


1. For the filling: steam mung beans for 20 minutes on medium heat.


2. Transfer the cooked mung beans to a blender; add coconut milk, water, cocoa powder, sugar and salt; and puree to a fine paste. Place mung bean paste in a saucepan, over medium heat, add pandan leaf. Stir well until dry. Move from the heat. Let it cool down.


3. When the filling has cooled, form it into balls, about 12-13 grams for each ball. Set aside.


4. For the water dough: Sift flour, sugar and salt. Add in water until the mixture resembles breadcrumbs. Add butter into the mixture and mix to form a soft and non-sticky dough. Cover and set aside to rest for 15 minutes.


5. Weigh the dough for 25 grams each and form into balls. Set aside.


6. For the chocolate dough: mix flour, butter and cocoa powder. Mix to form a soft even coloured dough. Form a soft ball that doesn't stick to your hands.


7. Weigh the dough for 25 grams each and form into ball. Set aside.


8. Take a piece of water dough and flatten. Place the chocolate dough in the center of the flat dough (pic #2). Gather the outer edges of the water dough circle and wrap up the chocolate dough ball. Seal and pinch the edges (pic #3).


9. With the heel of your palm, gently press the dough to flatten it lightly. Using a rolling pin, roll out the flattened dough (pic #4). Roll the dough up (pic #5).


10. Turn the rolled dough 90 degrees. Roll out the dough again. Roll up again (pic #6).


11. Cut the dough crosswise into 2 pieces (pic #7). Flatten out the dough. Place filling in the center (pic #8). Gather the outer edges of the dough circle and wrap up the filling (pic #9).


12. Grease a baking tray with butter then place pastries with sealed side down on tray.


13. Bake them in the oven for 25 minutes at 180 degrees C (350 degrees F).


Enjoy...

Sunday, July 31, 2011

Coconut Mung Bean Kaffir Lime Popsicles for MLLA Anniversary!

Mung Beans
I've long been a fan of my friend Susan and her gorgeous blog, The Well-Seasoned Cook, especially her elegant photography and her blog event, My Legume Love Affair (MLLA), which has done a great deal to popularize nutritious and delicious beans/legumes. MLLA recently had its 3rd anniversary, and I was honored to accept Susan's invitation to help celebrate this momentous occasion as well as help kick-start what's sure to be a fabulous 4th year! Inspired by Chinese mung bean popsicles as well as our Southeast Asian neighbors, I'm sharing these flavorful Coconut Mung Bean and Kaffir Lime Popsicles over on Susan's site. I'd love if you'd stop on by to check out my full guest post. But if you're in a hurry and just wanna grab the printable recipe, you'll find it right here.

Coconut Mung Bean Kaffir Lime Popsicles

Sunday, July 18, 2010

Procrastinators Anonymous (Coconut Cupcakes with Pineapple Curd)

Coconut Pineapple Cupcakes
I can't believe I'm saying this again, but I missed yesterday's Cupcake Hero deadline! (Check out the round-up here) It makes no sense, but sometimes I'm a naughty procrastinator even about things that make me happy (cupcakes being high on the list ^_^). I think I'm ready to make a change. Anyone got any tricks for kicking this habit?

Meanwhile, I'm pleased to report tardy cupcakes taste just as yummy as on-time ones. This month's theme was coconut. Pineapple and coconut share a tropical vibe, right? So I subtly flavored my babycakes with coconut milk, then injected them with a luscious pineapple curd.

Coconut is supposed to be the star here. I know. But the pineapple filling simply stole the show. It's a great alternative to its tangy lemon cousin (and leftovers are delicious on toast or in a fruit parfait). Next time, I'll pipe the frosting around the edge only and pile on even more curd in the middle (mm mm mm).

Coconut Pineapple Cupcakes [Printable Recipe]
Adapted from Simply Recipes and The Craving Chronicles
Makes 20 cupcakes

XIAOLU'S NOTES: The pineapple curd recipe makes about twice what you need to fill the cupcakes. But it's so good you should have no trouble gobbling the rest up within 2 weeks. Halve the recipe if you want just enough for the cupcakes.

3/4 cup unsalted butter, room temperature
1 1/4 cup sugar
3 large eggs, room temperature
1 cup canned coconut milk [shake well before opening & measuring]
1 teaspoon pure vanilla extract
2 1/4 cups all purpose flour
1 teaspoon salt
1 teaspoon baking powder
Pineapple Curd Filling (Recipe below)
Coconut Cream Cheese Frosting (Recipe below)
1/2 to 1 cup coconut flakes, for garnish [you can use sweetened or not]

Preheat the oven to 350 degrees F. Line 2 standard muffin tins with 20 paper liners. In a large bowl, sift together the flour, salt, and baking powder.

In another larger bowl, cream the butter until light and fluffy. Add sugar and cream till light and fluffy again, scraping down the sides halfway through to ensure even mixing. Add the eggs, one at a time, beating for 30 seconds each to ensure mixing. Be sure to scrape down the sides after each egg to ensure even mixing.

Add half of flour mixture; mix on low speed just until blended. Add 1 cup coconut milk; mix just until blended. Add remaining flour mixture and mix on low speed [or by hand] just until blended; do not overbeat.

Fill liners about 1/2 to 3/4 full. Bake for 18-22 minutes, rotating the pan after the first 15 to ensure even baking. Check with a toothpick to see if the cupcakes are done. If the toothpick comes out of the cupcake clean, they're ready. Allow the cupcakes to cool for 1-2 minutes in the pan, then transfer to a wire rack to cool completely.

Transfer pineapple curd to a piping bag fitted with a long pointed tip OR a squeeze bottle. Insert tip into each cupcake and squeeze out a small amount of filling. [One sign when the cupcake is full and to stop is when the filling oozes from the top.] Finally, spread cream cheese frosting on top of the cupcakes, sprinkle with coconut flakes, and enjoy!

Pineapple Curd
Makes approximately 2 1/2 cups

NOTES: The mixture may seem like it’s not thickening as you whisk over heat, but don’t stop – it thickens very quickly right at the end. For a smoother curd, push through a fine mesh strainer before storing. Press plastic wrap against the top of the curd to prevent a film from forming in the fridge.

2 large eggs plus 2 yolks [or 6 yolks for a richer curd]
2 1/4 cups pineapple juice [I used canned]
3/4 cup sugar
5 Tablespoons cornstarch

Combine all of the ingredients in a saucepan. Cook over medium heat for about 5-10 minutes, whisking constantly, until mixture thickens. Remove from heat and cool. Store in an airtight container in the refrigerator for up to 2 weeks.

Cream Cheese Frosting
1/2 cup unsalted butter (1 stick), room temperature
8 ounces cream cheese, room temperature
a pinch of salt
1 1/2 to 3 cups powdered sugar, sifted

Cream the butter, cream cheese, and salt together, about 2-3 minutes. Scrape down the sides and bottom of the bowl to ensure even mixing.

Slowly add the powdered sugar; taste as you go adding more sugar until you have reached the desired sweetness and consistency.

Sunday, November 15, 2009

Coconut Coffee Cupcakes with Peanut Butter Frosting

Coconut Coffee Cupcake with Peanut Butter Buttercream (Cupcake Hero::November)

Just when I thought cupcakes would be scarce around here for a while, the deadline (eek - today!) for November's peanut butter themed Cupcake Hero challenge crept up on me all ninja-like. Talk about squeaking by last-minute. I suppose I’ve always worked better under pressure anyway. So let's get started already!

First things first, you should know that we have a theme song this month: the net-(in)famous and ridiculously silly "It's Peanut Butter Jelly Time!" If you haven't seen the video yet, I (respectfully) demand that you go watch it now.

Coconut Coffee Cupcake with Peanut Butter Buttercream (Cupcake Hero::November)

A PB & J pairing was the first idea to spring to mind when CB announced peanut butter as the theme. Yet as much as I love that childhood classic, the time was ripe for a more sophisticated way to satisfy our PB (and cupcake) cravings. Of course the few days I gave myself to find an idea dragged into weeks. But lo and beyond, while mulling things over during lunch break, I only had to look down for inspiration to smack me in the face. Why not coffee?

Thus this coconut coffee cupcake with peanut butter swiss meringue buttercream frosting (SMBC) was born. I threw some coconut milk into the cake batter to add richness and complexity of taste that enhances without overpowering, like any good supporting actress. The real star here, though, is the peanut butter buttercream. It's silky smooth, not too sweet, and perfect for piping those beautiful swirls (which we all know get the most oohs and aahs).

This frosting was, in a word, amazing, and I can't wrap up this post without thanking Judy of Judy in Her Natural Habitat: The Kitchen for invaluable guidance about making SMBC. If you haven't already, please swing by her blog to see all the impressive creations. Some of my favorite posts of hers are the photo tutorial for making swiss meringue buttercream, her many flavors of SMBC, and especially her homemade cupcake wrappers which look cooler than any I've ever seen for sale. Thanks so much, Judy! And I hope these photos reveal me to be a dedicated student.

Coconut Coffee Cupcake with Peanut Butter Buttercream (Cupcake Hero::November)

Coconut Coffee Cupcakes with Peanut Butter Swiss Meringue Buttercream Frosting
[Printable Recipe]
Makes 11 to 12 cupcakes

6 tablespoons unsalted butter, room temperature
3/4 cup sugar
1 large egg and 1 large egg yolk
1 teaspoons pure vanilla extract
1 1/4 cups all purpose flour
1 1/4 teaspoons baking powder
1/8 teaspoon salt
1/2 cup coconut milk
1/4 cup milk
2 teaspoons instant coffee powder
Peanut Butter Swiss Meringue Buttercream (Recipe below)
Peanut brittle, to garnish (optional)

Preheat oven to 350 degrees F. Line a standard muffin tin with 12 paper liners. Heat the coconut and dairy milks gently on the stove or in the microwave, then add the instant coffee powder, making sure that it's completely dissolved. Set aside.

In a medium bowl, sift together the flour, baking powder, and salt. Set aside.

In a different larger bowl, cream butter and sugar together until light and fluffy. Add the egg and yolk and mix until combined into the batter. Then add the vanilla and mix again. Finally alternately beat in dry ingredients and milk mixture. Fill cupcake liners until they are about 2/3 full (I like to use my large cookie scoop for this). Bake for 16 to 20 minutes or until golden brown. Let cool completely. Frost the cupcakes as desired and top each with a small piece of peanut brittle, if desired.

2009.11.14 Coconut Coffee Cupcake with Peanut Butter Buttercream (Cupcake Hero::November) [Collage]

Peanut Butter Swiss Meringue Buttercream
Adapted from Crispy Waffle via Judy in Her Natural Habitat: The Kitchen
Makes enough to generously frost 12 cupcakes

XIAOLU'S NOTES: I used a natural, dark-roasted peanut butter, so I didn't need much for either color or flavor. But if you use a milder, lighter PB, feel free to add a couple tablespoons more. This technique of combining the meringue with butter was very successful, but I'm curious if dividing the meringue is really necessary. Next time I make SMBC, I'll try the simpler method of adding butter by the tablespoon to the entire meringue to see if the difference is worth the extra steps.

2 egg whites
6 to 8 tablespoons granulated sugar (according to how sweet you like things)
1 teaspoon molasses
1/8 teaspoon cream of tartar (optional)
10 tablespoons unsalted butter, cool room temperature
1/2 teaspoon pure vanilla extract
3 to 4 tablespoons peanut butter

Combine the sugar, egg whites, molasses, and cream of tartar in the stainless steel bowl of an electric mixer.

Bring a large pan of water to simmer, making sure that the water is at the same height as the egg whites in your stainless bowl. Set the bowl in the pan of simmering water and whisk constantly until the mixture reaches 160 degrees on an instant-read thermometer (I just whisked by hand and cooked it until the sugar was completely dissolved and the top became foamy). Be careful not to curdle the egg whites, remove from heat if this starts happening.

Remove the bowl to your stand mixer and beat on high speed for at least 3 minutes, until the mixture holds glossy, marshmallow-esque peaks and the bowl is completely cool (Very important - the frosting's consistency will be off otherwise). Remove the meringue to another bowl.

Switch to the paddle attachment and beat half the butter and one-third of the meringue until well combined. Continue to add the remaining two-thirds of the meringue a dollop at a time. The mixture may look scarily curdled at this point; adding the remaining butter a tablespoon at a time and beating well after each addition will smooth things out. With the mixer on low, add the vanilla and peanut butter, and continue beating 1 minute to incorporate the additions and reduce air bubbles.

Thursday, August 6, 2009

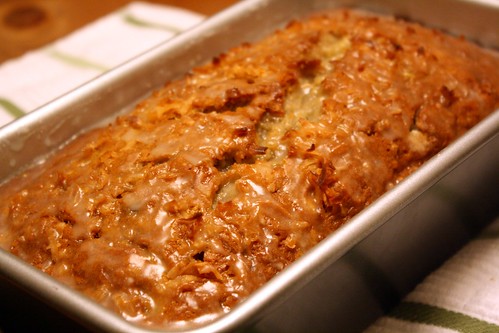
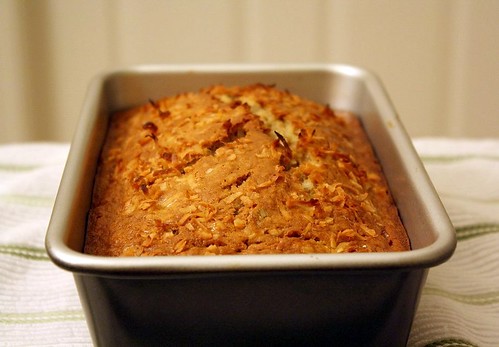
Not My Usual Banana Bread


Bananas have become one of my favorite ingredients to bake with in recent years. They're cheap, fairly healthy, and, when allowed to ripen sufficiently, provide amazing flavor. But for years before this, I'd largely avoided banana-flavored treats. Let's just say it took a long time to overcome the trauma of some close encounters with artificial "banana" flavoring. I'm so glad to have gotten over that though, because banana bread done right can do wonders for a bad (or good) day.

I was lucky enough to find a great banana bread recipe on my first attempt a few years back. The Very Moist Banana Nut Bread recipe (with minor variations) from Recipezaar has since become a regular in my baking repertoire and is always gobbled up wherever I take it. While that remains my go-to recipe, I really enjoyed trying an unconventional twist from Cooking Light. Their Coconut Banana Bread with Lime Glaze has already gotten plenty of coverage in the food blogosphere, but a good recipe deserves all the attention it can get. Plus, I was itching to upload my first photos taken with the new camera. There hasn't even been time for me to try any setting other than full auto, but that's what next week's vacation is for (so close I can taste the freedom!!). But getting back to the food, you can find the full recipe with my notes after the jump.

The key flavors (left) and lemon glaze (right)

Coconut Banana Bread with Lime (or Lemon) Glaze [Printable Recipe]
Adapted from Cooking Light

*My comments/changes in italics

2 cups all-purpose flour
3/4 teaspoon baking soda
1/2 teaspoon salt
1 cup granulated sugar
1/4 cup butter, softened
2 large eggs
1 1/2 cups mashed ripe banana (about 3 bananas)
1/4 cup plain low-fat yogurt
3 tablespoons dark rum
1/2 teaspoon vanilla extract
*I also added 1/4 teaspoon of coconut extract
1/2 cup flaked sweetened coconut
Cooking spray
1 tablespoon flaked sweetened coconut
1/2 cup powdered sugar
1 1/2 tablespoons fresh lime or lemon juice *I used lemon juice and added 1 teaspoon of rum

Preheat oven to 350°.

Lightly spoon the flour into dry measuring cups, and level with a knife. Combine the flour, baking soda, and salt, stirring with a whisk to combine.

Place granulated sugar and butter in a large bowl; beat with a mixer at medium speed until well blended (about 1 minute). Add the eggs, 1 at a time, beating well after each addition. Add banana, yogurt, rum, and vanilla; beat until blended. Add flour mixture; beat at low speed just until moist. Stir in 1/2 cup coconut. Spoon batter into a 9 x 5-inch loaf pan coated with cooking spray; sprinkle with 1 tablespoon coconut. Bake at 350° for 1 hour or until a wooden pick inserted in center comes out clean. *Mine took 65-70 minutes to bake through.

Cool 10 minutes in pan on a wire rack; remove from pan. Combine powdered sugar and juice, stirring with a whisk; drizzle over warm bread. Cool bread completely on wire rack. *I did remove mine from the pan to cool for a while but put it back for lack of a better container.

UP NEXT: Snickerdooooodlez!