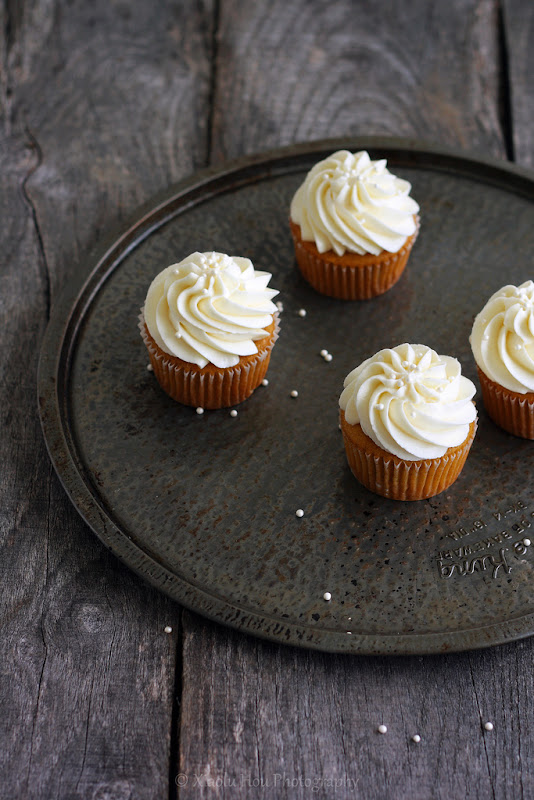
Showing posts with label cream cheese. Show all posts

Sunday, March 17, 2013

Chocolate Guinness Stout Cupcakes with Baileys Frosting (Happy St. Patrick's Day!)

Happy St. Patrick's Day, dear readers! It's actually not a big day for P and me 'cause it's a bit like St. Paddy's Day every day around here (lol can you guess what P stands for now? =p). The joke started a few years ago when we went shopping at Old Navy close to a certain holiday. A cute green St. Patrick's Day tee was on sale, so I got it for him with the justification that he could wear it any day rather than just the one and he totally does wear it all the time (yay!). But then again, I just asked if he'd wear it later today, and all I got was a huge eye roll. Don't worry though, I'll keep working on this...I've still a few hours yet.

Happy St. Patrick's Day! (Chocolate Guinness Baileys Cupcakes)
In the meantime, I want to share a really delicious Irish-themed (by which I mean boozy ^-^) cupcake recipe with you. I have my coworker and friend A to thank for requesting these chocolate cupcakes full o' Guinness stout and Baileys Irish cream. Her repeated guidance as I prepared to make these was "Remember. There is no such thing as too much Baileys!" I agree in theory, but many of you bakers will already know that runny frosting is a bit of a nightmare. I found a happy medium using my special cold cream cheese technique to keep the frosting firm while adding more liquid than usual.

These cupcakes were actually such a hit with P and my coworkers that I only got a single bite of one. So I've decided to use their descriptions rather than my own for this post:
  • The Boy called these "seriously dangerous" and a combination of "F yea and awesome!"
  • Guinea pig coworker N may have moaned a little while eating his cupcake.
  • Coworker B called these the "best thing ever!"
  • Coworker C, who works in Pricing, when asked if the cake was moist enough drew me a bell curve showing me that on a scale of 1 to 100 (completely dry to terribly moist) with 50 being the ideal level of moistness these cupcakes were a 48. 
    • On a side note, I'm a crazy perfectionist so I tweaked the cake recipe in response to his feedback. Hopefully the recipe below makes a perfectly moist 50-worthy cupcake now.
  • Coworker N liked the cupcake and was kind enough to be my hand model for the photo above (thanks!!).
Now if those reactions don't get you running to the kitchen, I don't know what will! I truly do hope you'll give these a shot. Either way, hope you all have a fantastic (and safe) St. Patrick's Day!

Wednesday, February 13, 2013

A Day Late OR 364 Days Early? (King Cake Cake Pops!)

King Cake Cake Pops
I know Mardi Gras was technically yesterday, but can you really blame me for wanting to keep the party going? I made these King Cake^2 Pops for a birthday celebration at work today. And based on 100% statistically sound exit polling, these treats would be a welcome offering year-round =p. The filling is a 6 Bittersweets original cake full of sour cream, raisins, cinnamon, nutmeg, and cream cheese. Dressed up in a slim candy coat and sparkly colors, these are my most party-ready cake pops yet! I suggest you grab on to any excuse you get to make these, whether it's Mardi Gras, a birthday, or even just Hump Day =).

Wednesday, November 14, 2012

Pumpkin Nut Streusel Muffins with Cream Cheese Filling

Pumpkin Spice Muffin with Cream Cheese Filling and Pecan Streusel
With all the treats I bake, I have to admit my standards are getting higher and higher. And considering the 7 pounds I've put on since starting this job, maybe that's really not a downside =p. Either way, where this is going is that I knew these muffins were winners when even I found myself going back for seconds (and barely resisting a third!). The blogosphere is awash in pumpkin muffins these days, but there's a great reason for that! Pumpkin's not only quintessentially fall in color and flavor, it's also packed with nutrients and keeps your baked goods incr-edibly moist! A hint of rum in my cream cheese filling and the crunch of pecan streusel set my pumpkin muffins apart from the pack. Give these a shot, and I guarantee you'll be going back for more...=p.

Pumpkin Nut Spice Muffins with Cream Cheese Filling [Printable Recipe]
Adapted from Annie's Eats
Makes 11 muffins

XIAOLU'S NOTES: Filling needs to chill for at least 1 1/2 hours, so plan accordingly. Cooled muffins can be sealed in an airtight freezer bag and frozen for up to 3 months. Thaw then reheat in an oven at 350 degrees F.

Filling
3 oz. cream cheese, softened [low-fat is fine]
1.5 oz. (Scant 1/3 cup) powdered sugar, sifted
1/4 tsp unsulphured molasses
1/3 tsp pure vanilla extract
Rounded 1/2 tsp dark rum (optional)

Topping
3 Tbsp sugar
3 Tbsp flour
3/4 tsp ground cinnamon
2 Tbsp unsalted butter, cold and cut into 6 pieces
2 Tbsp walnuts OR pecans, lightly toasted and finely chopped (optional)

Muffin Batter
1 1/2 cups (6.75 oz.) all purpose flour
1 Tbsp unsweetened cocoa powder
1/2 Tbsp ground cinnamon
1 tsp ground nutmeg
3/4 tsp ground cloves [1/3 to 1/2 tsp if freshly ground]
1/2 tsp ground ginger
Large pinch of ground cardamom
1/2 tsp salt
1/2 tsp baking soda
Scant 1/4 tsp baking powder

2 large eggs, room temperature
3/4 cup PLUS 2 Tbsp sugar
1/2 Tbsp unsulphured molasses
1 cup pumpkin puree
6 Tbsp vegetable oil
1/4 cup unsweetened applesauce
1/2 tsp pure vanilla extract

To make the filling, combine all filling ingredients in a medium bowl and mix well until blended and smooth. Transfer the mixture to a piece of plastic wrap and shape into a log about 1 inch in diameter. Smooth the plastic wrap tightly around the log, and place on a plate wide enough to hold the entire log straight and flat. Transfer to the freezer and chill until at least slightly firm, at least 1 1/2 hours.

To make the topping, combine the sugar, flour and cinnamon in a small bowl; whisk to blend. Add in the butter pieces and work into the dry ingredients with a fork or your fingertips until the mixture is coarse and crumbly. Add in chopped walnuts and mix to distribute evenly. Transfer to the refrigerator until ready to use.

To make the muffin batter, preheat the oven to 375 degrees F. Grease top of standard muffin pan, then line with 11 paper liners OR skip the liners and grease the cups. Sift dry ingredients flour through baking powder into a medium bowl and whisk to blend; set aside. In a separate large mixing bowl, combine ingredients eggs through vanilla. Mix on medium-low speed or by hand until blended. With the mixer on low speed, gradually add in the dry ingredients, mixing just until incorporated.

To assemble the muffins, fill the muffin cups just under full with batter, then sprinkle a small amount of the topping mixture over each. Next, remove the frozen log of cream cheese filling from the freezer, slice into 11 equal pieces, then quickly place a slice of the cream cheese mixture into each muffin cup.

Lower the oven temperature to 350 degrees F, then bake the muffins for 20 to 25 minutes, or until a toothpick comes out clean from the upper muffin part (avoid the cream cheese). Let muffins cool in pans for 5 minutes, then transfer them to a wire rack. Let cool COMPLETELY before serving (the cream cheese filling will be very hot!).

Wednesday, May 23, 2012

Sherlockian Cupcakes Part 2: Chocolate Toasted Marshmallow Cupcakes!

Chocolate Toasted Marshmallow Cupcakes
I hope these photos do a proper job of teasing you with all the delectable components of this cupcake =D. But believe it or not, this tastes even better than it sounds or looks. First there's my favorite dark chocolate cake to get things off on the right foot. Next comes some fluffy marshmallow filling with a delightful hint of smokiness from real, toasted marshmallows (I can't be the only one dreaming of campfire s'mores already, right?). Last but not least we have a perfect swirl of rich yet tangy chocolate frosting topped with more toasted mini marshmallows.


More Chocolate Marshmallow Cupcakes
Speaking of looks, you're gonna give me some weird ones when I explain why these cupcakes are "Sherlockian." See, there's an inside joke amongst the cast and writers of the BBC Sherlock TV series that Martin Freeman (AKA John Watson in the show) has a round face that's chiseled out of marshmallows. Now I was gonna carve Martin's face out of a huge marshmallow in tribute to Sherlock, but alas I couldn't find one large enough so these toasted marshmallow cakes had to do =p. Next time, folks, next time. 

P.S. - If you haven't watched Sherlock yet, what are you waiting for?! Those in the US can now watch you Season 1 on Netflix Instant and Season 2 on the Masterpiece PBS website for a limited time only.


Chocolate Toasted Marshmallow Cupcakes 2

Sunday, May 13, 2012

Sherlockian Cupcakes Part 1: Red Velvet Cupcakes with Tart Pomegranate Filling

As my regular readers know from my music, film, and TV-related posts, food is just one of my many passions. Sometimes I like to do more than mention those other interests in favorites posts. Sometimes I'm inspired to create themed treats by those other art forms. Previously, I was inspired by the David Usher song, "Black Black Heart" to create my Black Black Forest Heart Cupcakes. Today, it's the brilliant re-imagined, modern-day BBC Sherlock Holmes television series (a new favorite, but already in my top 3 shows of all time) that guides my artist's whisk.

I Believe in Sherlock Cupcakes!
Whether you're a devotee of the Arthur Conan Doyle originals or not, "Sherlock" is bound to captivate your imagination and thirst for adventure. The protagonists remain Sherlock Holmes and Dr. Watson, of course, but they are younger, more energetic, and more delightfully irreverent than you've ever seen them. In honor of this sharp-as-a-whip update, I've decided to reinvent on my classic red velvet cupcake with a tart pomegranate filling (inspired by my friend A's wedding dessert). In case it's not obvious enough, yes I am trying to kill 2 birds with with 1 post: introduce you to a new favorite TV show AND new favorite cupcake flavor. But if either one tickles your fancy, I'll still consider it a success =D.

For my readers in the U.S., if "Sherlock" sounds like something you'd like, you can watch Season 1 on Netflix Instant and Season 2 is currently airing on Masterpiece PBS (Sundays at 9 pm EST...the next new episode in 1 hour!).

Friday, April 27, 2012

Tart Lemon Cake for Mother's Day (Guest Post for Pure Joy Events)

Tart Lemon Layer Cake for Mother's Day Craft Photo Shoot
I'm lucky to live near 2 fabulously talented food and party blogger friends, Christine of Pure Joy Events and Heather of Chickabug. It was such a pleasure to collaborate with the 2 of them previously, so I was excited when Christine suggested we team up again for a special Mother's Day project! For our latest undertaking, Christine made this fabulous memo board of colorful clothespins to provide the perfect setting to show off memo to Mom cards custom-designed by Heather. And I added a measure of sweetness with my Tart Lemon Cake! Please head over to Pure Joy Events for the full cake recipe and to Chickabug for the Mother's Day memo board tutorial, FREE memo to Mom printable, plus the lemon cake recipe card. You can also find a plain-text printable version of just the cake recipe here.

Tart Lemon Layer Cake for Mother's Day Craft Photo ShootClothespins and Memos DARKER TEXT

Thursday, March 29, 2012

WANTED: The Perfect Carrot Cupcake (Round 2)

Back in November of last year, I shared with you that P's cousin K had offered me the honor of baking cupcakes for her wedding in October. I decided to start testing recipes almost a year early 'cause I'm sometimes *cough* be a bit *cough* of a procrastinator O=). While I enjoyed the simplicity of the first batch and had a LOT of fun fashioning realistic carrot toppers out of marzipan, the flavor of the cake itself didn't have quite as much OOMPH as I wanted. It was inevitable that there would be a Round 2...I did declare after all that "I [wouldn't] rest until [I'd] found the perfect carrot cupcake for K's wedding day!"

Round 1 had covered the plain and simple end of the Carrot Cake Spectrum, so the goal for Round 2 was to really explore the options when it came to add-ins and alternative prep methods. Early on I was intrigued by a unique recipe from The Silver Palate Cookbook that called for steamed and pureed carrots rather than raw, shredded ones! But what I wasn't taken with were the copious amounts of sugar, oil, and sweetened coconut in the original. Being the irrepressible tweaker you should know me as, I went directly to the cutting board and I think it's accurate to say I went BIG. By the end of this surgical session, I'd cut 1/3 of the sugar, 1/2 the fat, and 1/2 the coconut along with pinches of salt and baking soda.


Carrot Cake Cupcakes (Round 2!)
Having wrapped up Round 2, I can now declare these to be The Best Carrot Cupcakes I've Ever Eaten =D. A feast of flavors from freshly mashed carrot and crushed pineapple to toasted nuts and (subtly) textured coconut. Dense and moist but absent any oily mouthfeel or excessive calories. I credit the texture in no small part to the pureed carrots, and that's not the only benefit to this unusual way of preparing them. Even if there were no benefit as to taste, I'd pick pureed carrots for my cake anyday for the time it saves me from slaving over the box grater!

It's pretty obvious I'm really taken with this recipe, right? But the funny thing with The Best anything is that there might always be an even better version out there -- and you'll never discover it unless you keep an open mind! So if anyone's convinced their mom/granddad/friend/neighbor's carrot cake is the best thing since the invention of cake, please DO shoot me a message and I may test it out! I certainly have time for Round 3 as K's wedding's not for 6 months 8).

Wednesday, November 23, 2011

A Pretty Sweet (Potato) Cake for Thanksgiving!

Woohoo! Thanksgiving break is finally here and my bags are already packed for the long weekend of great food n' family ahead. Still, I just couldn't duck out without sharing one more fun, festive fall dessert for any of you still needing a last-minute Thanksgiving dessert.
Happy Thanksgiving!
I love sweet potatoes in just about any form. And I'm betting that many of you feel the same...especially around this time of year! Which is why I simply couldn't resist making this richly flavored sweet potato cake this Thanksgiving. You'll love how quickly this comes together. Plus it only dirties up a bowl and measuring cup. It's also quite friendly to guests on restrictive diets, since the cake is already egg and dairy-free. If any dairy is an issue, simply swap dairy substitutes into the frosting to make this a welcome Thanksgiving dessert for all =).

P.S. - I want to thank Oh Nuts! for the wonderful Jumbo Raw Georgia pecans they sent me for free to use in my holiday baking. These pecans were so fresh and yummy. I sampled one as I was measuring them out for this cake and ended up eating so many I had to get more for the recipe O:-). They're big, as the name suggests, and have a wonderful subtle sweetness that made them downright addictive.

Wednesday, November 16, 2011

Ruff(le)'s Up, Doc? (Carrot Cupcakes with Ruffled Frosting and Marzipan Carrots)

A few months back, P's cousin K asked me if I'd be willing to bake the cupcakes for her wedding (!!). This was the first time I'd been asked to contribute to someone's Big Day, and I was really touched by the request. And agreed right away, of course! K had her sights set on carrot cake from the start, which worked great for me. I loves me a client who knows what she wants =D. K's wedding doesn't actually take place until next October, but is it really ever too early to test run delicious carrot cupcakes? (Hint: the answer is "no!")

The weird thing about this carrot cupcake recipe is that I converted it into an all-apple recipe the first time I made it (that's just what I happened to need at the time). And I tell you what, the apple-fied version was so darn good that I couldn't resist re-converting it back to experience it in its full beta-carotene glory ^_^.

Carrot Cupcakes with Marzipan-Parsley Carrot Toppers
I also couldn't resist just a few tweaks here and there (swapping out some oil for the more flavorful melted coconut oil/butter, amping the spices up a touch, and so on...). What came out of the oven was to my mind the perfect basic carrot cupcake: delightfully moist but with no oily mouthfeel, packed with flavor from a balanced medley of spices, and boasting a subtle nuttiness and crunch from the toasted walnuts. Feel free to adapt this to your personal carrot-cake preferences! Like your carrot cake to have more nuts, no nuts, other nuts, coconut flakes, raisins, chocolate chips, whatever else? Go for it!

The only popular add-in that I'd expect any trouble from is pineapple chunks, since they'd add significant moisture to the batter. But I'm on a quest here, folks...I won't rest until I've found the perfect carrot cupcake for K's wedding day! And on the chance that the very best carrot cake contains pineapple, I'll be trying a recipe with pineapple in it next. Right now I'm eying this one, but please don't hesitate to speak up if you wanna share one better!

Sunday, September 4, 2011

Hellooo Fall! (Irresistible Spiced Pumpkin Cupcakes)

My friend C's birthday is in just a few days. Never one to miss a chance to bake, I offered her a dozen cupcakes in any flavor she wanted. Now had I been in her shoes I would've thrown out something crazy...like passionfruit mousse cupcakes with macarons on top! But C is apparently too sweet to do that. Well actually...she can be pretty hilariously snarky when she wants to be. So the truth is just that C really really loves pumpkin cake and asked me for exactly that. Too easy, right?

Pumpkin Cupcakes for Christin's Birthday
Well actually...there's no such thing as too easy when the results taste this fantastic! I immediately turned to Tartelette's delicious spiced pumpkin cupcake recipe, which I'd tried and loved before. It's got just the right amount of cinnamon and other fall spices to make me want the leaves to hurry up and reveal their glorious colors. I topped off these autumn beauties with generous swirls of my signature not-too-sweet cream cheese frosting. Happy (almost) Birthday, C!

Isn't fall baking just great? I want to hear all about what you can't wait to bake in the coming months! And my friends in the Southern Hemisphere, feel free to share your favorite spring treats, too!

P.S. - Since I've talked about the importance of analyzing your work and having others critique it, I'm going to share my thoughts about the above photo. My hope with the background and tray was to add additional texture and layers to the photo. Plus their cooler tones were meant to tone down the warmer orange of the pumpkin. An issue I had with this shoot was with trying to even out the lighting. Even in the final photo, the light coming from my window to the right is too strong. So the frosting of the bottom-most cupcake ended up a bit bright. To prevent this, I should have reflected more light from the left and/or used a black board to reduce the light from the window. Agree with me? Disagree? I'd love to hear it!


Spiced Pumpkin Cupcakes [Printable Recipe]
Cake slightly adapted from Tartelette
Makes 12 to 14 cupcakes

XIAOLU'S NOTES: I always use canned pumpkin for my baking due to its smooth texture and consistent thickness. If you really want to use a homemade puree, I recommend you drain it using cheesecloth or a coffee filter to ensure that it doesn't add too much liquid to the batter. This frosting recipe makes enough to frost 12 cupcakes fairly generously. If you prefer a thin layer of frosting, feel free to scale the recipe down by 1/3 or even 1/2.

1 cup PLUS 2 Tbsp all-purpose flour
1/2 tsp ground cinnamon
1/4 tsp ground ginger
1/8 tsp ground nutmeg
1 tsp baking powder
3/4 tsp baking soda
1/4 tsp salt
1 scant cup canned unsweetened pumpkin puree [1/2 of a 15 oz. can]
1/2 cup milk
1 tsp pure vanilla extract
6 Tbsp (3/4 stick) unsalted butter, softened
3/4 cup PLUS 2 Tbsp sugar
1 large egg, room temperature
1 large egg yolk, room temperature

Pipeable and Not-too-sweet Cream Cheese Frosting (Recipe below)

Preheat the oven to 350 degrees F. Grease the top of a standard 12-cup muffin pan (in case you get some “muffin top” action). Line pan with 12 baking liners. Sift the flour, spices, baking powder, baking soda, and salt into a medium bowl; set aside. In a separate bowl, whisk to combine pumpkin, milk, and vanilla; set aside also.

Using an electric mixer on medium-high, cream butter and sugar together until light in color and fluffy. Turn mixer down to low, and add egg and yolk. Beat well to combine. Next, add 1/3 the flour mixture, then 1/2 the pumpkin mixture, another 1/3 of the flour mixture, the remaining pumpkin mixture, and the last 1/3 of the flour mixture, mixing to combine after each addition. Fill baking liners about 3/4 full (I always use my large cookie scoop for this). If you've filled all 12 baking liners and still have more batter, you can fill standalone baking cups 1/2 full with batter. Bake 20 to 27 minutes OR until a toothpick inserted in the middle comes out clean (a few tiny crumbs are OK but there should be NO wet batter). Cool 3 minutes in pan, then remove from pans to wire racks to finish cooling completely. Pipe or spread on cream cheese frosting, and enjoy!

Pipeable and Not-too-sweet Cream Cheese Frosting
3/4 to 1 cup (1 1/2 to 2 sticks) unsalted butter, room temperature
Pinch of salt
1 1/4 to 2 cups (5 to 8 oz.) powdered sugar
1 tsp pure vanilla extract
8 oz. (1 block) cream cheese, cold and cut into 6 to 8 chunks

Sift powdered sugar into a small bowl. In a larger mixing bowl, cream the butter, salt, 1 1/4 cups of powdered sugar, and vanilla until thoroughly blended and fluffy. Add the cream cheese, a chunk at a time, beating after each addition (just enough to work it in until it’s smooth). Taste the frosting, adding and beating in more sugar as needed. Be careful to avoid overbeating or the cream cheese may start to break down and become gloppy. If not using immediately, chill until needed, then beat again until smooth just before using.

This recipe has been submitted to Happy Post Pumpkin Recipes over at Family Fresh Cooking.

Wednesday, July 13, 2011

Nut-Free Sunflower Seed Coconut Macarons with Pumpkin Filling (Guest Post for Food Wanderings)

Nut-Free Sunflower Seed Coconut Macarons
I've had some of the most fun of my life experimenting in the kitchen, so I was delighted when Shulie of Food Wanderings invited me to join a series of macaron guest posts on her blog. But this wasn't just about playing around and these weren't to be just any macarons. You see, Shulie's son is allergic to all tree nuts, including almonds. Being the loving mother she is of course, Shulie wanted to share the incredible deliciousness that is French macarons with her son and enlisted a number of bloggers for this mission. After some trial and error, what came out of my kitchen were these tasty Sunflower Seed Coconut Macarons with Pumpkin Filling. Please join me over at Food Wanderings to read my guest post and to check out all the incredible nut-free macaron posts there! If you want to head straight to the printable recipe, please click here. Thanks for letting me contribute to your delightful blog, Shulie!

Nut-Free Sunflower Seed Coconut Macarons

Monday, May 16, 2011

Birthday Rum N’ Raspberry Custard Cupcakes (Guest Post on Joylicious)

Rum N' Raspberry Custard Cupcakes for Joy!
When Joy of Joylicious emailed me some time ago to introduce herself and ask me to prepare a guest post for her birthday, I was beyond honored to accept her invitation. First, because she's an incredibly talented food photographer who's made her passion into a living! Second, because I had just fallen in love with her blog, which is brimming with recipes as fresh and healthy for you as they are delicious and pleasing to the eye. Now months later I'm proud to know Joy as a dear friend. Please join me in celebrating our birthday girl and gorgeous new bride with some Rum N' Raspberry Custard Cupcakes over on Joylicious! You can also get just the printable recipe here. My tutorial for the pom-pom cupcake toppers pictured is now available here.

Rum N' Raspberry Custard Cupcakes

Friday, April 22, 2011

My First Order!

Hi guys! Sorry for the longer-than-planned absence. I have a post in the works that's taking a few tries to get right, and of course I want to iron out the kinks before sharing the recipe with you. In the meantime, I wanted to say a few things to my wonderful readers...

First, thanks so much for your comments on my cake pops post! Clearly that's a dessert that provokes a big response from people whether positive or not 8). Please continue sharing your thoughts with me and feel free to tell me what you wanna see more of on 6 Bittersweets.

First Baking Order!
Next, I have some shameless self-promotion for you today ;p. The deal is, I finally created a Facebook page for my little blog. Won't you please show it some love? Or you could "like" it from my sidebar without even leaving this page.

On top of that, I've started selling some baked goods (cupcakes, cakes, cookies, etc.) locally in the D.C./Northern Va. area. In fact, I was so excited to finish my first order of 3 dozen red velvet cupcakes that I simply had to share them with you (pictured above)! If you or someone you know lives around here and would be interested in purchasing some scrumptious homemade baking, please email me at xiaolu6+info(at)gmail(dot)com!

Thanks a million -XL

Wednesday, February 23, 2011

Without Artifice (Velvet Cupcakes with Cinnamon Cream Cheese Frosting)

UPDATE: I've since come up with a better red velvet cake recipe that I'm satisfied with (after 7 tries) that I posted HERE.

I was completely surprised by the enthusiastic response to my last post, especially the food styling sketches I shared. Thanks, you guys! Sketching won't be to everyone's taste, but I do really find it helps me stay organized when I'd otherwise leave all preparation to the last second 8). I also have to confess I started sketching more as a way to kill time during my 1 1/2 hour public transit commute to school than out of pure devotion to photography. You never do know what circumstances will end up improving your skills! Now, as promised, I'm back with not only a freshly baked treat but a "behind-the-scenes" look at my (really quite simple) photo set-up. But first let me say a few things about these velvet cupcakes.

Velvet Cupcakes with Cinnamon Cream Cheese Frosting
Let's talk food coloring...I'm simply not a fan and try to avoid it most of the time. Yet I'm also a girl who demands her right to like pretty, colorful things from time to time. Is that worth a bottle or more of food coloring for a single recipe? Not for me...which is why this isn't my first time making "redless" velvet cupcakes. You're obviously welcome to your own views on the matter, though ^_^. Which is why you'll find directions for adding food coloring, should you desire it, in the headnotes to the recipe below.

Now it's on to flavor and texture...I'm by no means a true American Southerner or even a connoisseur of red velvets. But I do have an image of the "perfect" red velvet cupcake based on what I liked and didn't in the dozen or so I've sampled thus far. First and foremost, it needs to be moist and tender. It shouldn't taste like chocolate cake, yet there must be enough cocoa to make each bite flavorful. I also couldn't do without some tanginess, which should be subtle in the cake and more prominent in the cream cheese frosting.

While the original recipe I followed (the one pictured above) fell short of my red velvet ideal, my significantly tweaked version published below was greatly improved on all counts. I'm not the type to call anything "The Best" but this is by far the most delicious out of the 5 recipes I've tried! What I am still on the hunt for, however, is a recipe for fluffy but not supersweet cream cheese frosting (meaning no more than 2 1/2 cups of powdered sugar per 8 oz. of cream cheese/butter). Can ya please help a girl out? 8)

Set-up for Velvet Cupcakes Shot

Now as requested, this photo and those below are of the set-up I used to take the top photo in this post. I use a Canon EOS Digital Rebel XS camera most often with the Canon EF 50mm f/1.8 II lens. Both are on the lower end of the price range for dSLR equipment. Though I love my XS, I'd recommend starting with a slightly higher-end model if you plan to use it often. Regardless of the camera, I guarantee the 50mm lens is a great buy and much cheaper than most lenses of such high quality. FYI, my camera isn't pictured above since I had to use it to take the photo 8D.

What you can see are 2 white foam boards (available at most craft or art supply stores) and a round 40-inch 5-in-1 flexible reflector (mine is this one from Amazon) to bounce light back onto the food. In this shot I used the silver side of the reflector, but you could easily replace it with another foam board that's left white or covered in aluminum foil. When I actually took my food photos, I picked up the reflector and angled it downward to reflect the maximum amount of light onto the cupcake.

Set-up for Velvet Cupcakes Shot

I included the above photo to give you a clearer view of my window. It's quite tall (almost 5 feet) and almost twice as wide and faces west. If you look closely, you may see the seams of large pieces of white parchment paper that I've taped together then up across the entire window to soften the often-harsh natural light. You could use vellum paper (available at art supply stores) or a sheer white curtain for the same effect. I use one of the above materials to diffuse the light for practically all my food photos. Finally, I want to draw your attention to the styrofoam pieces below the window and next to the heating vent. Sometimes when the food or props look tilted in a photo despite adjusting my shooting angle, I use small pieces of styrofoam or balled up foil underneath to level things out.

Set-up for Velvet Cupcakes Shot

Finally, I included this shot to show you my tripod. Seriously I have the shakiest hands known to man, which have gotten worse due to some sleep problems I've been having. So believe me when I say that I NEED my tripod to get clear shots. Fortunately, even the cheap ones can greatly improve your photography. I have this one from Amazon. What you see above, though, is not only the tripod but also this 38-inch horizontal tripod arm extender. It's neither as crucial nor as affordable as my tripod, but I've found it really helpful for getting overhead shots or just squeezing into tight corners in my small apartment.

I hope this is interesting/helpful to some of you. As I've said before, I'm always happy to take your questions or suggestions about content you'd be interested in for future posts.

Velvet Cupcakes with Cinnamon Cream Cheese Frosting [Printable Recipe]
Loosely adapted from Cakeman Raven, Joy the Baker, and Martha Stewart
Makes 12 to 14 cupcakes

XIAOLU’S NOTES: It’s my personal decision to avoid this large an amount of food coloring, but you should feel free to make these red if you’d like. To do that, add 1 tablespoon of liquid red food coloring to the batter with the liquid ingredients. Speaking of buttermilk, I love its favor but rarely have it on hand, so I often use the following substitution. For 1/2 cup of buttermilk substitute, use 1 1/2 teaspoons of white or cider vinegar and add enough milk to make 1/2 cup total. Stir well and let sit for at least 5 minutes before using. While delicious, the cinnamon frosting actually overshadowed the cupcake a bit for me and reminded me more of a carrot cake, so I'm leaving the spice optional in the recipe.

1 cup MINUS 1 Tbsp all purpose flour [stirred, spooned, and leveled to measure]
2 Tbsp cornstarch
1 Tbsp PLUS 1 tsp unsweetened cocoa powder
1/2 tsp baking soda
1/2 tsp salt
3/4 cup PLUS 1 Tbsp sugar
6 Tbsp vegetable or canola oil
2 Tbsp (1/4 stick) unsalted butter, melted and slightly cooled
1/2 cup buttermilk
1/4 cup unsweetened applesauce
1 large egg, room temperature
1 large egg yolk, room temperature
1 1/2 tsp distilled white or apple cider vinegar
1 tsp pure vanilla extract

Cinnamon Vanilla Cream Cheese Frosting (Recipe Below)
12 chocolate-covered raisins, to garnish (optional)

Preheat the oven to 350 degrees F. Line a standard muffin pan with 12 baking liners [with 2 standalone baking cups OR another pan and 2 baking liners ready just in case].

Sift the flour, cornstarch, cocoa powder, baking soda, salt, and sugar into a large bowl; set aside. In a separate medium bowl, whisk together the oil, butter, buttermilk, applesauce, egg, yolk, vinegar, and vanilla until well combined. Then add the wet ingredients to to the dry, and gently fold them together, mixing just until combined and the batter has no large lumps (tiny lumps are fine).

Distribute batter evenly among baking cups, filling each about 2/3 full. When finished, slam the whole pan firmly downward from 1 to 2 inches above the counter to remove any large air bubbles. Bake for 16 to 22 minutes or until a toothpick inserted into the center of a cupcake comes out clean. Let cool for 5 minutes, then transfer cupcakes to a wire rack to finish cooling. Once cupcakes have cooled completely, pipe or spread on frosting. Top with chocolate-covered raisins, if using, and enjoy with friends!

Cinnamon Vanilla Cream Cheese Frosting
5 cups powdered sugar
1/2 tsp ground cinnamon (optional)
6 Tbsp (3/4 stick) unsalted butter, room temperature
1 1/4 cup (10 oz.) cream cheese, room temperature
1/2 tsp pure vanilla extract

Sift powdered sugar and cinnamon into a medium bowl; set aside.

Place butter and cream cheese in the bowl of an electric mixer fitted with the paddle attachment; beat on medium-high speed until light and creamy, about 1 minute. Add 1 cup of the powdered sugar mixture at a time, mixing until evenly combined between each addition. Before adding the last portion of sugar, scrape down the sides of the mixing bowl to ensure even mixing. Finally add vanilla, then beat on high speed for 1 to 2 minutes until smooth and fluffy.

Thursday, February 17, 2011

Pomegranate Almond Cream Cheese Danish

Fillings for Danish Pastry

Right before the New Year, Ryan from POM Wonderful contacted me to ask if I'd be interested in a free sample of their pomegranate juice. Um...did he really need to ask? Of course I'd love a sample! =) After years of oohing and ahing over the fantastic creations of my fellow bloggers, I was eager for the chance to make my own mark.

But in an ironic turn of events, the same creative posts that had inspired me were suddenly in the way. You see, the rest of y'all were so creative that every pomegranate idea I came up with had already been tried and blogged!! If you know me, though, you know I wouldn't give up that easily. Now it took days (and the noble sacrifice of several inspirational bottles of POM juice) to get there, but an untread path did finally open up.

The turning point was when I remembered that pomegranate juice was easily transformed into a deliciously tart jelly. I knew this because I'd made a bunch to give out as Christmas gifts years ago. Though thumbprint cookies and cupcakes were in the running, the idea of a hot-from-the oven homemade Danish pastry filled with zesty cream cheese and pomegranate jelly wouldn't let go of me. So here you have it-- my own small contribution to the grand library of pomegranate recipes. I'm actually pleasantly surprised that the flavors melded as well as I imagined. From the flaky buttery pastry to the sweet and tart fillings, the crunch of almond flakes to the finishing glaze, every bite contains something to savor.

Pomegranate Cream Cheese Almond Danish Pastry

Lastly, I wanted to share with you a little bit of my food styling and photography process. I'd actually promised my dear friend, Alicia of The Red Deer, that I'd take a photograph of my set-up. Sadly I ran out of time and light today but promise to get one from my next shoot! In the meantime, I thought I'd show you some sketches I made in preparation for today's shoot. Some people I know have amazing vision and can imagine a complicated scene all in their mind's eye. Let me tell ya, I am not one of those people. I also get flustered when in a rush (which happens most of the time I bake). So the solution that's worked for me is to sketch out a few general shots I'd like to get beforehand so I can think about colors and shapes and have props on hand as soon as the food is ready. I try to be spontaneous still, but this is really the more practical approach.

Now I'd love to hear if you guys have any food styling or photography tips of your own to share? Or you're welcome to ask any questions. I'm still a beginner, but the learning experience is so much more fun when others join in =).

Sketches for Pomegranate Jelly Cheese Danish Photos

I'm also sending this over to Susan at Wild Yeast for her weekly Yeastspotting event.

Pomegranate Almond Cheese Danish Pastries [Printable Recipe]
Adapted from Joe Pastry, Gourmet, The Pie and Pastry Bible, and Simply Recipes
Makes 18 danishes

XIAOLU'S NOTES: You can replace these fillings with a number of other things. Just aim for 2 to 3 teaspoons of 1 or 2 types of filling in each danish. Try other preserves, almond cream, poppyseed filling, pastry cream, or even something savory like sun-dried tomatoes! Also feel free to explore all the fun shapes out there.

Danish Pastry Dough (Recipe below)
Cream Cheese Filling (Recipe below)
1/4 cup Pomegranate Jelly (Recipe below)
1 large egg
2 Tbsp water
1/3 cup sliced almonds
1/2 cup powdered sugar
1 Tbsp water
2 tsp fresh lemon juice

Remove dough from the refrigerator; divide in half. Rewrap and chill one half as you work with the other. Let dough sit at room temperature for 15 minutes. Flour your counter, then roll the dough into a 12 x 9-inch rectangle (1/4-inch thick). Transfer to a cookie sheet, cover, and refrigerate for 30 minutes to relax the gluten. Meanwhile, repeat the above for the other half of the dough.

Put 1st dough back on the counter, flour the top, and roll into a 12-inch square (1/8-inch thick). Brush off excess flour. Use a ruler and sharp knife or pizza cutter to cut the dough into nine 4-inch squares. Cover squares, then repeat the above for the remaining dough.

Keep all squares covered except the one being worked on. To shape each pastry, bring 2 opposite corners of a square together to fold it in half into a triangle. Starting 3/4-inch inwards from each end of the base of the triangle, cut through both layers as if to make a smaller triangle BUT stop cutting 3/4-inch before the 2 cuts would meet. Now unfold the triangle back into a square. Turn the dough over, brush off any excess flour, then reinvert the dough. Combine egg and 2 tablespoons water and beat together lightly to form an egg wash. Brush the border of the pastry with egg wash. Lift each of the 2 unattached corners of the dough and slip one under the other, crossing them over and pulling them out to line up with the remaining edges below. Repeat the above for remaining squares. (Shaping the pastries is really simpler than it sounds. Refer to the photo below to help visualize the process.)

Photo courtesy of Amber * via Flickr

Pipe 1/2 teaspoon of pomegranate jelly (if too solid, heat in microwave at 10-second intervals until pipeable) and 1 teaspoon of cream cheese filling into the center of each twist. Sprinkle each with 3 to 4 sliced almonds. Arrange pastries on baking sheets, leaving at least 1 1/2 inches between them. Cover with lightly oiled plastic wrap and set in a warm spot to rise for about 2 hours (until almost doubled and very light to the touch).

Preheat the oven to 400 degrees F at least 20 minutes before baking. Five minutes before baking, place a pan with 1 inch of boiling water on the lowest shelf of the oven. Press down on the twists of each pastry to help maintain the shape during baking. Place pastries in the oven, then immediately reduce the temperature to 375 degrees F. Bake for 20 to 30 minutes or until golden brown.

While pastries are baking, prepare the sugar glaze. Combine powdered sugar, 1 tablespoon water, and lemon juice in a small bowl. The glaze should be about as thick as egg white; adjust with more water or powdered sugar as needed.

Transfer baked pastries to a cooling rack immediately and brush with glaze. Cool for 5 to 10 minutes. Enjoy your danish right away, store at room temperature for up to 2 days, or freeze for up to 3 months. To reheat, bake in an oven preheated to 300 degrees F for 5 minutes (8 minutes if frozen).

Danish Pastry Dough
3/4 cup warm milk, divided
1 1/2 tsp active dry yeast
1/4 cup sugar
2 1/4 cups (10 oz.) PLUS 1 Tbsp all purpose flour
3/4 tsp salt
1 large egg, room temperature
1 cup (2 sticks) unsalted butter, cool room temperature

Dissolve the yeast in 1/4 cup warm milk and let stand for 10 minutes, or until foamy. Combine yeast mixture with remaining milk plus ingredients from sugar down to the egg (EXCEPT 1 tablespoon of the flour) in the bowl of a stand mixer and, using the dough hook, mix about 5 minutes until the dough is smooth and uniform (it should be soft and somewhat sticky). Turn it out into a lightly oiled bowl, rotate the dough to coat it in oil, then cover loosely and let it ferment for 30 minutes at room temperature then 2 to 8 hours in the refrigerator.

Place the last tablespoon of flour on a large piece of plastic wrap then put the butter on top (1 stick on top of the other). Wrap plastic around the contents loosely and hit the butter with a rolling pin to make it flatter and softer. Next, as quickly as possible, knead the butter and flour together through the plastic wrap by using your knuckles (Avoid using other warmer parts of your hands that may melt the butter.). Form the butter mixture into a 5-inch square (3/4-inch thick at most) and chill it for 15 to 30 minutes, or until it is firmer but still malleable.

Roll the dough on a well-floured surface into a 10-inch square and lay the butter block diagonally in the center of the square. Lightly moisten the edges of the dough with water, then securely fold the corners tightly over the butter like an envelope, enclosing the butter completely. Brush off any excess flour and pinch edges of the dough together to seal them. Rewrap the dough in plastic and refrigerate for 30 minutes only.

With the rolling pin flatten the dough gently with uniform impressions and roll it from the center away from you to within 1/2 inch of the edge. Turn the strip 180 degrees and roll the dough again from the center away from you to within 1/2 inch of the end. Continue to roll the dough in this manner until it forms a 16 x 7-inch rectangle. (It is important not to roll over the ends in this first rolling to help the later formation of even layers of butter and dough.) Brush off any excess flour, fold the top quarter of the rectangle down to the center of the strip, and fold the bottom quarter of the rectangle up to the center, leaving about 1/2 inch between the 2 ends. Fold the top half of the dough over the bottom to close the dough like a book. This is the first "turn." Rewrap the dough in plastic and refrigerate for 20 to 40 minutes between each turn.

Do 2 more turns for a total of 3 turns, making sure to position the short side of the dough facing you and closed side to your left before each turn. You may also want to occasionally flip the dough over and to use a pastry scraper to even the edges. Rewrap the finished dough and refrigerate for at least 2 hours before using. (Dough can also be kept refrigerated for 2 to 3 days or frozen for up to 2 months.)

Cream Cheese Filling
4 oz. (1/2 cup) cream cheese
2 Tbsp sugar
1 Tbsp egg yolk
1/2 tsp pure vanilla extract
1/2 tsp lemon juice
1/2 tsp lemon zest
Scant 1/8 tsp salt
2 tsp all purpose flour

In a bowl, combine all ingredients and beat until well combined. Chill the filling, covered, for at least 1 hour and up to a day.

Pomegranate Jelly
Makes 3 to 3 1/2 cups

XIAOLU'S NOTES: I used bottled pomegranate juice, but follow these directions to make your own.

2 1/4 cups pomegranate juice [bottled OR fresh]
2 Tbsp lemon juice
1/2 package powdered pectin
2 1/2 cups granulated sugar

3 to 4 eight-ounce canning jars OR other sized jars with equivalent total volume

Prepare canning jars. Submerge clean, empty canning jars in boiling water for several minutes. Boil a few cups of water in a separate kettle and pour over lids in a small bowl to sterilize. Add pomegranate juice and lemon juice to a saucepan with at least 3 quart capacity. Add pectin, stir well, and cook over high heat. Bring to a boil, stirring constantly to prevent scorching. Reach a full rolling boil (one that can't be stirred down), add sugar, and stir well. Boil hard for exactly 2 minutes. Remove from heat. Let stand for a minute and skim off foam.

Fill jars to 1/2-inch of the top. Wipe rims with a clean towel. Screw on 2-piece lids.

Finish canning IF you plan to keep the jelly unrefrigerated. Place the filled jars, not touching, on a rack in a tall pot of boiling water. Water should cover tops of the jars by at least an inch. Boil for 5 minutes, then remove from the water. Let jars cool. Check seals, the lids should be sucked down (you'll hear a popping noise as the jelly cools). Once the jars reach room temperature, put them in the refrigerator for a few hours to complete the gelling. Each jar of jelly will last about 3 weeks once opened.

Sunday, November 7, 2010

Who's Afraid Of A Crack Or Two? (Blueberry Swirl Mini Cheesecakes)

I adore cheesecakes but don't bake them too often because of (a) the fat content and (b) fear of The Terrible Cracking (sounds like a Halloween tale, doesn't it?). Let's be really honest with each other...it's mostly (b) that's kept me away. But when my friend Yida (check out his kickass Halloween costume) requested blueberry cheesecake cupcakes for his birthday, it was time to get past (or around) the fear and I thought I'd found a great way to do just that.

Several sources told me mini cheesecakes were less prone to cracking, even without a water bath. You can bet I was excited 'bout that! Still, there was some contradicting advice floating about. The Martha Stewart recipe I adapted called for bathing the cupcakes ^_^, but Annie's Eats got gorgeous results skipping that step. Always wanting to see for myself, I baked some with a water bath and some without.

Blueberry Swirl Mini Cheesecakes

When the cakes in the water bath turned out slightly undercooked but the others rose high and sunk oh-so-low, I went in search of middle ground. Google led me to this page very helpfully explaining The Cracking/Sinking Phenomenon. The main culprits: over-beating, over-baking, and contraction as the cake cools. Shortening the mixing time and lowering the oven temperature without a water bath produced the results I was hoping for. Firm, delicious cakes without a tendency to cave in. Sure, there's still an occasional crack along the marbling, but people will be too busy wolfing them down to notice =).

Do you guys enjoy cheesecake as much as I do? I'd love to hear about your favorite variations. Plus any tips would be great, as I'm still very new to making them!

Blueberry Swirl Mini Cheesecake Cupcakes [Printable Recipe]
Adapted from Martha Stewart Cupcakes via Annie's Eats
Makes 14 cupcakes

XIAOLU'S NOTES: For a lovely almond-y twist, replace half the graham cracker crumbs with amaretti biscuit cookie crumbs and omit the extra sugar in the crust. Or use chocolate wafer crumbs and keep the sugar. You could also easily swap out the blueberries for almost any other berry or even other types of fruit. You'll want to adjust the amount of sugar according to the sweetness of the fruit you use. Have fun with it!

3/4 cup graham cracker crumbs
1 1/2 Tbsp unsalted butter, melted
1 1/2 Tbsp sugar

1/2 cup fresh or frozen blueberries
1 Tbsp sugar

1 lb. cream cheese, softened
1/2 cup PLUS 1 Tbsp sugar
Pinch of salt
1/2 tsp pure vanilla extract
2 large eggs, room temperature

Preheat the oven to 350 degrees F. Line 2 cupcake pans with 14 paper liners (or use 1 pan plus 2 standalone wrappers).

To make crusts: in a small bowl, combine the graham cracker crumbs, melted butter, and sugar. Stir together with a fork until well blended and all dry ingredients are moistened. Press 1 tablespoon of the mixture into the bottom of each cupcake liner. (A small glass or another standalone baking cup work well.) Bake until just set, about 5 minutes. Transfer to a cooling rack. Reduce oven temperature to 300 degrees F.

To make the fruit puree: combine the blueberries and sugar in a regular or food processor or using a stick blender in a measuring cup. Process until smooth, and set aside. If using frozen berries, boil the puree in a small saucepan for about 5 minutes to evaporate some of the water; then cool and set aside.

To make the cheesecake: beat the cream cheese on medium-high speed in the bowl of an electric mixer just until smooth. Blend in the remaining sugar until well incorporated. Mix in the salt and vanilla. Finally, beat in the eggs one at a time, mixing well after each addition.

To assemble: spoon 3 to 4 tablespoons of the cheesecake batter over the crust in each cupcake liner. Dot a 1/2 teaspoon of the berry puree in a few dots over the cheesecake filling. Use a toothpick or a skewer, chopstick, or thin knife to lightly swirl and create a marbled effect.

Bake until the filling is just set, about 20 to 30 minutes. (They will look puffed initially but will return to normal with time.) Transfer to a wire cooling rack and let cool to room temperature. Transfer to the refrigerator and let chill for at least 4 hours before serving.

Thursday, October 21, 2010

Guest Post: Cinnamon Swirl Cupcakes

Last fall I discovered the blog, Une-deux Senses, when Michelle made my Ferrero Rocher cupcakes, and I immediately fell in love with it's unique mix of delectable sweet and savory food, edgy fashion highlights, and spot-on music recommendations. With a sweet tooth like mine, it's been impossible to resist such gorgeous desserts as her open-faced blueberry pie and creme brulee cupcakes. So I'm beyond delighted to welcome Michelle here today to share these lovely cinnamon swirl cupcakes with us!

I love cupcakes, but then again, I think you'd be hard pressed to find a person who didn't! I've been oobering (if that's a word) over Xiaolu's numerous cupcake creations for ages. So when Xiaolu, the cupcake master, asked me if I was interested in doing a guest post, I was pretty flabbergasted - you should have seen my face! Me? The homely, little college blogger?

Une-deux Senses Photo 1

I make cupcakes, sure, but I don't think they compare much to Xiaolu's cupcakes - I mean she's a winner of Cupcake Hero for pete's sake! So when choosing what to write my guest post on, I knew it had to be something good, real good. The day I made these cinnamon swirl cupcakes, I fell in love and I knew they'd be the perfect thing for this little guest post.

Une-deux Senses Photo 2

At first glance, the ingredient list of these cupcakes seems a bit long, well, longer than I usually like my cupcake ingredient lists to be. But reading words like cinnamon, sugar and cream cheese quickly assuaged my fear. Let's just say, thank GOSH I made these cupcakes! They are now one of my all time favorites.

What I love about them is that they have this warm, home-y feel - like something your mom would make, something simple and comforting. The cake itself is super light and airy with a gorgeous swirl of cinnamon all throughout it and it's literally perfect. The cream cheese frosting though, is the killer but when is this ever not the case? I could eat tubs of cream cheese frosting and not feel guilty about it! But seriously, the combination of the cinnamon, airy cake and cream cheese frosting is beyond words.

Here's to Xiaolu and great cupcakes! Thanks for allowing me to share my love of all things flour + sugar + butter.

Une-deux Senses Photo 3

Cinnamon Swirl Cupcakes [Printable Recipe]
Yields: 15 cupcakes
Original recipe here.

For the cupcakes:
1 3/4 cups cake flour
1 cups sugar
1/2 tbsn. baking powder
1/4 tsp. salt
1/2 cup or 1 stick unsalted butter, diced, at room temperature
1/2 cup milk, divided
2 large eggs
1 large egg white
1 tsp. vanilla

For the filling:
3 tbsn. sugar
3 tbsn. light brown sugar
1 1/2 tsp. cinnamon
1 tsp. cocoa powder

For the frosting:
1 (8 oz.) package of cream cheese, softened
1/2 stick or 1/4 cup unsalted butter, softened
1 lb. powdered sugar
1 tsp. vanilla extract
vanilla bean seeds, from 1/2 a vanilla bean

To make the cupcakes, preheat the oven to 350 F. Line a cupcake pan with liners, set aside. Sift together the flour, sugar, baking powder and salt into the bowl of a stand mixer fitted with the whisk attachment. Add the butter and 1/4 cup of milk. Mix on medium speed until smooth, about 4 minutes, scraping down the sides of the bowl with a rubber spatula as needed. In another bowl, blend the eggs, egg white, remaining 1/4 cup milk and vanilla. Add to the batter in 3 additions, mixing for 2 minutes on medium speed after each addition. Scrape down the sides of the bowl in between additions.

To make the filling, mix all the ingredients together in a small bowl and set aside until ready to fill the cupcake tins. When ready to fill, place about 1 1/2 tbsn. of cake batter into each muffin liner. Sprinkle with about 1/2 tsp of filling, then top with 1 1/2 tbsn. more of cake batter over the filling. Smooth the surface with the back of a spoon then use a toothpick to drag through the batter to distribute the cinnamon filling. Bake for 18 - 20 minutes or until an inserted toothpick comes out clean. Cool completely before frosting. To make the frosting, use a mixer to blend all of the ingredients together until smooth and creamy. Pipe or spread onto the cupcakes. Top with coarse sugar and cinnamon if desired.

Une-deux Senses Photo 4

Sunday, September 19, 2010

Open (Your Mouth To) Sesame (Matcha Cupcakes)

Black Sesame Matcha Cupcakes
Some days it feels like my head's not screwed on all the way. I seem to muck up all sorts of tasks, even the ones that usually bring comfort through their familiarity. Like baking up a batch of cupcakes. This time they were to be black sesame matcha (green tea) flavored for September's caffeine-themed Cupcake Hero challenge. The first wave of trouble hit when I attempted an ambitious photo of the ingredients. As you'll see below, it turned out to require balancing skills beyond what I possess -- oops!

Well I cleaned up the mess and forged onward. So determined was I, in fact, that I ignored the fact that my batter looked thin enough for crepes... Only after pulling a gooey mess (yep, another one) out of the oven did it dawn on me that I'd forgotten to decrease the liquid when I halved the original recipe. As I dumped my rawcakes into the garbage, I couldn't help but wonder if my mind had gone on vacation without the rest of me. Have you guys had days like this, too?

Oops
It took 2 days for the shame to wear off, but I did try again and apparently second time's the charm. The cakes rose high and fluffy and were filled with the distinct nuttiness of sesame. The matcha cream cheese frosting was also a success. Tangy and just sweet enough to offset the bitter edge of green tea but firm enough to pipe, thanks to a new method using cold cream cheese. What a relief it'll be not to choose anymore between flavorful but goopy or thicker but tooth-ache inducing frosting!

Some of you may not be familiar with black sesame, so I'll leave you with a lil' background info. Personally, I don't feel it's very different from white sesame as whole seeds. Both are used primarily for their look and crunchiness. But when ground, black sesame has a richer and slightly more bitter flavor that I find delicious. I was introduced to it early on in Chinese treats like sweet rice dumplings (tang yuan) with a sesame filling and a pudding-like soup (zi ma hu) many Chinese believe to prevent gray hair (I doubt that works, but the seed is high in calcium, iron, copper, magnesium, phosphorus.). Now that I've also found these cupcakes and other creative uses for it (e.g., in panna cotta or macarons with nutella), black sesame will definitely be appearing frequently in my kitchen.

Black Sesame Matcha Cupcakes
Black Sesame Matcha Cupcakes [Printable Recipe]
Adapted from Delicious Coma
Makes 12 cupcakes

XIAOLU'S NOTES: I actually used 36 g of a pre-ground black sesame powder but still followed the same toasting and grinding process. Both whole and ground seeds are available at well-stocked Asian grocers. If you're able to find and use the powder, be sure to keep a close eye on it in the pan. The frosting recipe below made a little more than needed to frost the cupcakes you see in the photos. Scale the recipe up or down, if you usually prefer more or less frosting. This method makes for a firmer cream cheese frosting than is common and should be pipeable.

6 Tbsp (3/4 stick) unsalted butter, room temperature
3/4 cup sugar
1/4 cup black sesame seeds PLUS extra for garnish
1 large egg, room temperature
1/2 tsp pure vanilla extract
1/4 tsp salt
1 1/4 tsp baking powder
1 1/4 cups (155 g) all purpose flour
1/2 cup PLUS 3 Tbsp milk

Matcha Cream Cheese Frosting (Recipe below)

Preheat the oven to 375 degrees F. Line a standard muffin pan with 12 baking liners.

Toast the sesame seeds in a dry pan on the stove over medium heat, stirring them constantly, until they are fragrant (about 2 minutes). Crush toasted seeds with a mortar and pestle OR spice grinder until they are the texture of damp sand and set aside. Separately, sift the dry ingredients into a medium bowl; set aside.

Cream the butter and sugar in a large bowl until light and fluffy. Add the ground sesame seeds, egg, and vanilla and beat until combined. Gradually beat in half the dry ingredients. Add the milk and mix well. Lastly, add the remaining dry ingredients and mix until batter is well-combined and smooth.

Fill cupcake liners until they are about 2/3 full (I like to use my large cookie scoop for this). Lift the pan 1-inch above the kitchen counter and carefully slam it down to expel any large air bubbles in the batter. Bake for 14 to 18 minutes, or until a skewer inserted in the center comes out clean. Remove cupcakes from pan as soon as safely possible. Cool completely before frosting as desired. Sprinkle the top of each cupcake with extra sesame seeds.

Matcha Cream Cheese Frosting
1/2 cup unsalted butter (1 stick), room temperature
1 to 2 cups (4 to 8 ounces) powdered sugar, sifted (more if needed)
10 ounces cream cheese, cold and cut into small pieces
1/2 tsp pure vanilla extract
2 to 4 tsp matcha (green tea) powder, or to taste

Sift powdered sugar and matcha together into a small bowl. In a larger mixing bowl, cream the butter, powdered sugar mixture, and vanilla until thoroughly blended. Add the cream cheese, a chunk at a time, beating after each addition (just enough to work it in).

Wednesday, August 4, 2010

Mojito...(Yea You Guessed It) Cupcakes!

Mojitos on my mind...

My friend's boyfriend, Eric, had his birthday recently and threw a huge birthday bash. His friends are the reason I've heard of "icing." Let's just say they know how to party. A good strategy for getting everyone pumped up? Give your party a theme and have drinks to match. Skittles, in this case. Even as food-obsessed as I am, I'd never have thought to base a party around a candy. Guests were asked to dress head-to-toe in their favorite Skittles color (classic flavors only) and rewarded with Skittles-infused vodka shots. I'm pretty "girly" when it comes to drinks and prefer to taste the alcohol as little as possible. So I admit these shots tasted like rubbing alcohol to me, though with a fruity edge.

Mojito Cupcakes

One drink I can handle, even when made a bit stronger, is the Almighty Mojito. Seriously, how can you not love the taste of summer in a glass? I reckon you can't 8p. But I'm no bartender, plus vodka was clearly the poison of choice for the party. My thoughts predictably turned to that certain perfectly portable baked gift: The Cupcake. My starting point, a classic vegan recipe that produces wonderfully moist morsels. Without eggs or butter, the key mojito flavors of mint, lime, and rum could shine unhindered. Rounding things off, pretty swirls of cream cheese frosting with extra zing from a squeeze of lime juice. Thankfully, I was right to count on Eric's friends having a healthy appreciation for this classic cocktail. These and some red velvet cupcakes made by another friend were gone within the hour =).

Mojito Cupcakes! [Printable Recipe]
Adapted from VCTOTW and VeganYumYum
Makes 12 cupcakes

XIAOLU'S NOTES: You'll need about 4 limes total for this recipe, if you garnish with lime slices. Otherwise, you'll only need 2. For the frosting, know that cream cheese can become runny when overbeaten, so mix only as long as needed for each step.

1 cup milk or soymilk
1/2 C fresh mint, roughly chopped and bruised
Zest and juice of 1 lime (about 2 Tbsp juice)
2 tsp dark rum
1 1/4 cups all-purpose flour
2 Tbsp cornstarch
3/4 tsp baking powder
1/2 tsp baking soda
1/2 tsp salt
1/3 cup canola or other neutral oil
3/4 cup sugar
Lime Rum Frosting (Recipe below)
2 more limes sliced OR fresh mint leaves, to garnish

Combine milk and mint leaves in a small pot over medium heat until hot but NOT BOILING. Remove from heat and let steep for 10 to 15 minutes. Pass the milk through a strainer to remove mint leaves, but press on the leaves to extract as much flavor as possible. Set aside to cool.

Preheat oven to 350 degrees F. Line a regular 12-cup muffin pan with baking liners. Whisk the mint-infused milk and lime juice in a measuring cup and set aside for a few minutes to get good and curdled.

In large bowl, combine the sugar and lime zest and rub thoroughly to infuse the sugar with lime flavor. Add the milk mixture, oil, and rum, if using, and beat thoroughly. Sift in the flour, cornstarch, baking powder, baking soda, and salt, and mix until no large lumps remain [small ones are okay].

Fill cupcake liners two-thirds of the way and bake for 20 to 22 minutes. Transfer to a cooling rack, and let cool completely. Pipe or spread frosting on cupcakes and garnish with lime slices.

Lime Rum Cream Cheese Frosting
1/2 cup unsalted butter (1 stick), room temperature
8 ounces cream cheese, cold and cut into 6 chunks
Pinch of salt
2 tsp dark rum
1 Tbsp lime juice
1 1/2 to 3 cups powdered sugar, sifted
1 to 2 drops green food coloring, optional

Cream the butter, sugar, and salt together just until fully combined and smooth. Scrape down the sides and bottom of the bowl to ensure even mixing. Add the cold cream cheese a chunk at a time, waiting until each is incorporated before adding the next. Add the rum and lime juice and mix just until incorporated. Taste the frosting, adding more sugar if needed. Add the food coloring, if using, one drop at a time and combining thoroughly after each, until you have the color you want.

Sunday, July 18, 2010

Procrastinators Anonymous (Coconut Cupcakes with Pineapple Curd)

Coconut Pineapple Cupcakes
I can't believe I'm saying this again, but I missed yesterday's Cupcake Hero deadline! (Check out the round-up here) It makes no sense, but sometimes I'm a naughty procrastinator even about things that make me happy (cupcakes being high on the list ^_^). I think I'm ready to make a change. Anyone got any tricks for kicking this habit?

Meanwhile, I'm pleased to report tardy cupcakes taste just as yummy as on-time ones. This month's theme was coconut. Pineapple and coconut share a tropical vibe, right? So I subtly flavored my babycakes with coconut milk, then injected them with a luscious pineapple curd.

Coconut is supposed to be the star here. I know. But the pineapple filling simply stole the show. It's a great alternative to its tangy lemon cousin (and leftovers are delicious on toast or in a fruit parfait). Next time, I'll pipe the frosting around the edge only and pile on even more curd in the middle (mm mm mm).

Coconut Pineapple Cupcakes [Printable Recipe]
Adapted from Simply Recipes and The Craving Chronicles
Makes 20 cupcakes

XIAOLU'S NOTES: The pineapple curd recipe makes about twice what you need to fill the cupcakes. But it's so good you should have no trouble gobbling the rest up within 2 weeks. Halve the recipe if you want just enough for the cupcakes.

3/4 cup unsalted butter, room temperature
1 1/4 cup sugar
3 large eggs, room temperature
1 cup canned coconut milk [shake well before opening & measuring]
1 teaspoon pure vanilla extract
2 1/4 cups all purpose flour
1 teaspoon salt
1 teaspoon baking powder
Pineapple Curd Filling (Recipe below)
Coconut Cream Cheese Frosting (Recipe below)
1/2 to 1 cup coconut flakes, for garnish [you can use sweetened or not]

Preheat the oven to 350 degrees F. Line 2 standard muffin tins with 20 paper liners. In a large bowl, sift together the flour, salt, and baking powder.

In another larger bowl, cream the butter until light and fluffy. Add sugar and cream till light and fluffy again, scraping down the sides halfway through to ensure even mixing. Add the eggs, one at a time, beating for 30 seconds each to ensure mixing. Be sure to scrape down the sides after each egg to ensure even mixing.

Add half of flour mixture; mix on low speed just until blended. Add 1 cup coconut milk; mix just until blended. Add remaining flour mixture and mix on low speed [or by hand] just until blended; do not overbeat.

Fill liners about 1/2 to 3/4 full. Bake for 18-22 minutes, rotating the pan after the first 15 to ensure even baking. Check with a toothpick to see if the cupcakes are done. If the toothpick comes out of the cupcake clean, they're ready. Allow the cupcakes to cool for 1-2 minutes in the pan, then transfer to a wire rack to cool completely.

Transfer pineapple curd to a piping bag fitted with a long pointed tip OR a squeeze bottle. Insert tip into each cupcake and squeeze out a small amount of filling. [One sign when the cupcake is full and to stop is when the filling oozes from the top.] Finally, spread cream cheese frosting on top of the cupcakes, sprinkle with coconut flakes, and enjoy!

Pineapple Curd
Makes approximately 2 1/2 cups

NOTES: The mixture may seem like it’s not thickening as you whisk over heat, but don’t stop – it thickens very quickly right at the end. For a smoother curd, push through a fine mesh strainer before storing. Press plastic wrap against the top of the curd to prevent a film from forming in the fridge.

2 large eggs plus 2 yolks [or 6 yolks for a richer curd]
2 1/4 cups pineapple juice [I used canned]
3/4 cup sugar
5 Tablespoons cornstarch

Combine all of the ingredients in a saucepan. Cook over medium heat for about 5-10 minutes, whisking constantly, until mixture thickens. Remove from heat and cool. Store in an airtight container in the refrigerator for up to 2 weeks.

Cream Cheese Frosting
1/2 cup unsalted butter (1 stick), room temperature
8 ounces cream cheese, room temperature
a pinch of salt
1 1/2 to 3 cups powdered sugar, sifted

Cream the butter, cream cheese, and salt together, about 2-3 minutes. Scrape down the sides and bottom of the bowl to ensure even mixing.

Slowly add the powdered sugar; taste as you go adding more sugar until you have reached the desired sweetness and consistency.