Showing posts with label rum. Show all posts

Wednesday, November 14, 2012

Pumpkin Nut Streusel Muffins with Cream Cheese Filling

Pumpkin Spice Muffin with Cream Cheese Filling and Pecan Streusel
With all the treats I bake, I have to admit my standards are getting higher and higher. And considering the 7 pounds I've put on since starting this job, maybe that's really not a downside =p. Either way, where this is going is that I knew these muffins were winners when even I found myself going back for seconds (and barely resisting a third!). The blogosphere is awash in pumpkin muffins these days, but there's a great reason for that! Pumpkin's not only quintessentially fall in color and flavor, it's also packed with nutrients and keeps your baked goods incr-edibly moist! A hint of rum in my cream cheese filling and the crunch of pecan streusel set my pumpkin muffins apart from the pack. Give these a shot, and I guarantee you'll be going back for more...=p.

Pumpkin Nut Spice Muffins with Cream Cheese Filling [Printable Recipe]
Adapted from Annie's Eats
Makes 11 muffins

XIAOLU'S NOTES: Filling needs to chill for at least 1 1/2 hours, so plan accordingly. Cooled muffins can be sealed in an airtight freezer bag and frozen for up to 3 months. Thaw then reheat in an oven at 350 degrees F.

Filling
3 oz. cream cheese, softened [low-fat is fine]
1.5 oz. (Scant 1/3 cup) powdered sugar, sifted
1/4 tsp unsulphured molasses
1/3 tsp pure vanilla extract
Rounded 1/2 tsp dark rum (optional)

Topping
3 Tbsp sugar
3 Tbsp flour
3/4 tsp ground cinnamon
2 Tbsp unsalted butter, cold and cut into 6 pieces
2 Tbsp walnuts OR pecans, lightly toasted and finely chopped (optional)

Muffin Batter
1 1/2 cups (6.75 oz.) all purpose flour
1 Tbsp unsweetened cocoa powder
1/2 Tbsp ground cinnamon
1 tsp ground nutmeg
3/4 tsp ground cloves [1/3 to 1/2 tsp if freshly ground]
1/2 tsp ground ginger
Large pinch of ground cardamom
1/2 tsp salt
1/2 tsp baking soda
Scant 1/4 tsp baking powder

2 large eggs, room temperature
3/4 cup PLUS 2 Tbsp sugar
1/2 Tbsp unsulphured molasses
1 cup pumpkin puree
6 Tbsp vegetable oil
1/4 cup unsweetened applesauce
1/2 tsp pure vanilla extract

To make the filling, combine all filling ingredients in a medium bowl and mix well until blended and smooth. Transfer the mixture to a piece of plastic wrap and shape into a log about 1 inch in diameter. Smooth the plastic wrap tightly around the log, and place on a plate wide enough to hold the entire log straight and flat. Transfer to the freezer and chill until at least slightly firm, at least 1 1/2 hours.

To make the topping, combine the sugar, flour and cinnamon in a small bowl; whisk to blend. Add in the butter pieces and work into the dry ingredients with a fork or your fingertips until the mixture is coarse and crumbly. Add in chopped walnuts and mix to distribute evenly. Transfer to the refrigerator until ready to use.

To make the muffin batter, preheat the oven to 375 degrees F. Grease top of standard muffin pan, then line with 11 paper liners OR skip the liners and grease the cups. Sift dry ingredients flour through baking powder into a medium bowl and whisk to blend; set aside. In a separate large mixing bowl, combine ingredients eggs through vanilla. Mix on medium-low speed or by hand until blended. With the mixer on low speed, gradually add in the dry ingredients, mixing just until incorporated.

To assemble the muffins, fill the muffin cups just under full with batter, then sprinkle a small amount of the topping mixture over each. Next, remove the frozen log of cream cheese filling from the freezer, slice into 11 equal pieces, then quickly place a slice of the cream cheese mixture into each muffin cup.

Lower the oven temperature to 350 degrees F, then bake the muffins for 20 to 25 minutes, or until a toothpick comes out clean from the upper muffin part (avoid the cream cheese). Let muffins cool in pans for 5 minutes, then transfer them to a wire rack. Let cool COMPLETELY before serving (the cream cheese filling will be very hot!).

Wednesday, October 19, 2011

If You Want To Live and Thrive, Let the Spider Run Alive (Black Widow Chocolate Rum Cupcakes)

Black Widow Chocolate Rum Cupcakes
Are you getting in the spirit of Halloween yet? Please tell me you are! Here I can almost feel it coming in the air (tonight...hold on =p), which is just starting to get that real bite of cold. Still the chill comes and goes. And on days like this one when I bake, it still gets hot enough that I worry about my chocolate toppers melting before they can be appreciated in all their spooky glory...

If you're wondering what the post title's all about, it's just a quote I found while searching for a spider-related saying for these cupcakes. This one caught my eye right away...heck if I saw a Black Widow, I certainly wouldn't mess with it! There's just something extra creepy about that red hourglass marking, don't you think?

More Black Widow Cupcakes
So I've seen plenty of adorable spider cupcake ideas (like those featured over on McCormick's Kitchen PLAY), but I really wanted to make my version more realistic and creepy than those I'd come across ^_^. Since it's notoriously difficult to color homemade fondant a true black and I happened to have some black modeling chocolate on hand, I turned to this medium to make my crawly friends more dimensional and thus, my spidery vision start coming to life. Then melted chocolate, red candy melts, and a good blast of cold freezer air did the rest!

One thing that I failed to foresee was that the semisweet chocolate I used wouldn't be dark enough to match the black modeling fondant. That's why I've replaced semisweet with dark chocolate in the recipe below and also suggested that you even add a bit of black food coloring to make these truly black widows rather than "brown widows" as my boyfriend called mine hehe. Hope that you like these and you're having as much fun preparing for All Hallow's Eve as I am! And be sure to stay tuned for the next cupcake in my Halloween series -- it's so good you might even call it deadly...8p.

Black Widow Chocolate Rum Cupcakes [Printable Recipe]
Makes 12 to 14 cupcakes

XIAOLU'S NOTES: These can easily be converted into kid-friendly moist chocolate cupcakes by substituting the 3 tablespoons of rum with boiling water and simply omitting the rum from the ganache. The ganache needs to be used shortly after it's made. Toppers can be made in advance and stored at room temperature, but you should re-freeze the toppers for 10 to 15 minutes before moving them to the cupcakes since they (especially the spiders) are quite delicate. I made my spider toppers with semisweet chocolate and they turned out a bit too brown, so I definitely recommend using dark chocolate and even adding some black food coloring.

1 cup sugar
3/4 cup PLUS 2 Tbsp all purpose flour
6 1/2 Tbsp unsweetened Dutch-process cocoa powder
3/4 tsp baking powder
3/4 tsp baking soda
1/2 tsp salt
1 large egg, room temperature
1/2 cup milk [NOT skim]
1/4 cup vegetable oil
1 tsp pure vanilla extract
5 Tbsp boiling water [OR 1/2 cup IF omitting rum]
3 Tbsp dark rum
Rum Chocolate Ganache (Recipe below)
White Chocolate Spiderwebs (Recipe below)
Chocolate Spiders (Recipe below)

Heat oven to 350 degrees F. Grease tops of a cupcake pan and then line it with baking liners.

In a large bowl, sift together sugar, flour, cocoa, baking powder, baking soda and salt. Add egg, milk, oil and vanilla; beat on medium speed for about 2 minutes. Stir in boiling water and rum (batter will be thin). Pour batter into prepared cupcake liners, filling no more than 3/4 full. If there is batter left over, fill an additional 1 to 2 liners in another baking pan OR standalone baking cups with the remaining batter. Bake 18 to 23 minutes or until a toothpick or thin knife inserted into the center of one comes out clean. Cool 5 minutes, then remove from pans to wire racks to finish cooling. Make the ganache as you wait for the cupcakes to cool.

Dip each cupcake upside-down into the ganache up to the liner, lift cake out of chocolate, and let excess ganache drip off. Next, turn cupcake right-side up and place on wire rack to let ganache set. (If ganache begins to harden before all of the cupcakes are dipped you may heat for 5-second intervals in a microwave until chocolate is smooth again).

After 30 minutes, once ganache has partially set, center a white chocolate spiderweb and then a chocolate spider atop each cupcake. Enjoy!

Rum Chocolate Ganache
3 oz. bittersweet chocolate (chips or finely chopped bar)
1/3 cup heavy cream
1 tsp unsalted butter
2 tsp dark rum

Make ganache after cupcakes are mostly cooled off. Place chocolate in a small to medium bowl. Bring heavy cream and butter just to a boil. Pour hot cream mixture over chocolate and let sit for about 5 minutes. Begin stirring mixture and continue stirring until the mixture is uniform and smooth (may take about 5 minutes of stirring). Stir in rum. Use immediately.

White Chocolate Spiderwebs
Slightly adapted from Country Living

3/4 cup white chocolate chips

Microwave white chocolate chips in a bowl for 30 seconds and stir. Continue to microwave in 20-second intervals until almost melted. Stir again until chocolate is completely melted. Pour inside a zipper-lock bag with one tip snipped off to create an opening for piping.

Line a cookie sheet with parchment or wax paper. Slide the spiderweb template underneath paper. To make each web, use piping opening to trace white chocolate along design, making sure to connect all lines. Repeat process until you've created 12 to 14 toppers (depending on the number of cupcakes). Chill them in refrigerator for 10 minutes. Then, using a spatula, carefully remove webs from parchment.

Chocolate Spiders
Modeling Chocolate (Recipe below)
1/2 cup roughly chopped dark chocolate
Black oil-based or powder food coloring (optional)
Red royal icing or melted candy melts

Microwave chopped dark chocolate in a bowl for 30 seconds and stir. Continue to microwave in 20-second intervals until almost melted. Stir again until chocolate is completely melted. If desired, add black oil-based or powder food coloring (do NOT use liquid/gel coloring; if you do, the chocolate will clump together and you'll have to toss it!) a little at a time, stirring well in between additions, until the chocolate is the desired shade of black. Pour inside a zipper-lock bag with one tip snipped off to create an opening for piping.

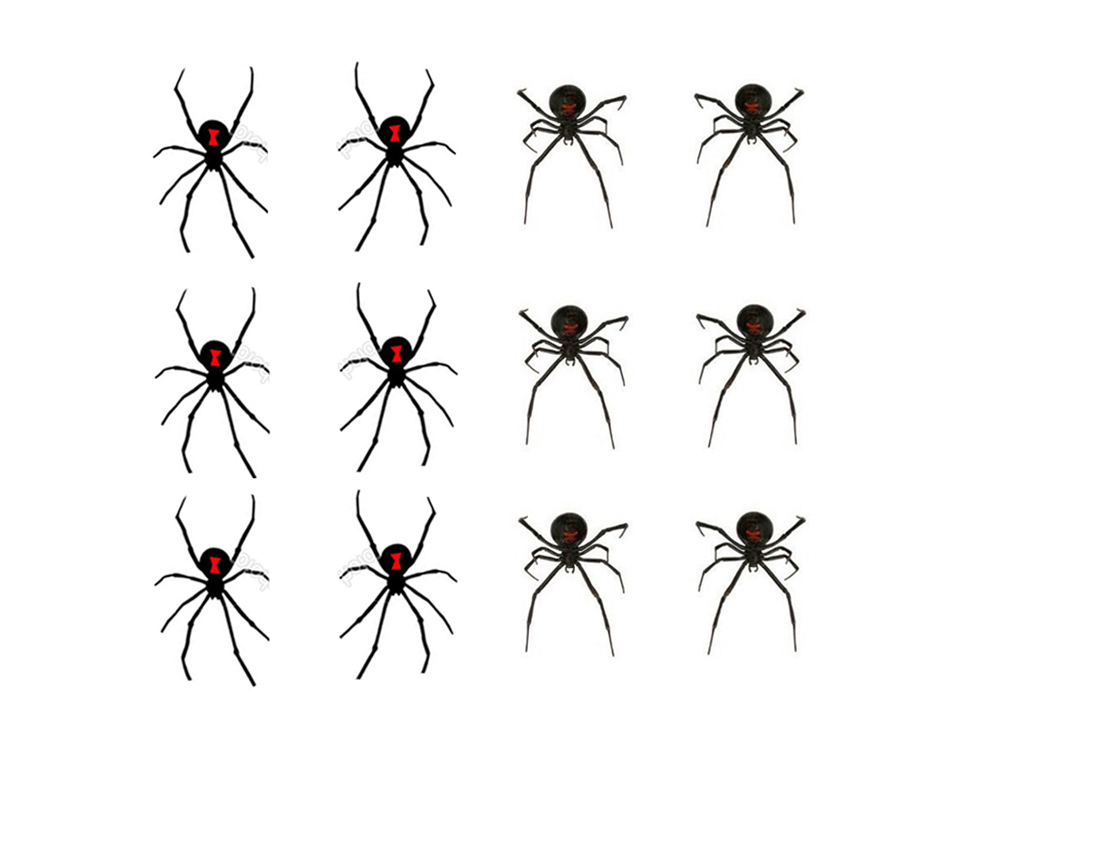
Line a cookie sheet with parchment or wax paper. Slide a spider template [I simply printed out some cartoony images of black widow spiders I found online; here's what I used] underneath paper OR you could pipe freehand IF you trust yourself to do this. To make each spider, first roll modeling chocolate into 12 to 14 balls about the size of large green peas. Pipe a small dot of melted chocolate on the parchment above the round area of a spider on the template, and press ball of modeling chocolate onto it to secure. Now pipe chocolate to trace along the rest of the design, forming the spider head and legs. Make sure to connect all lines. Repeat process until you've created 12 to 14 spider toppers (depending on the number of cupcakes). Now place red royal icing or red candy melts (melted the same way as the chocolate chips above) into a zipper-lock bag. Snip off a tiny bit of the tip for piping, then trace and fill in an hourglass shape on each modeling chocolate spider "abdomen." Chill spiders in refrigerator for at least 15 minutes. Then remove carefully from parchment just before transferring to cupcakes.

Modeling Chocolate
10 oz. semisweet chocolate (coarsely chopped chunks or chips)
1/3 cup light corn syrup
Black food coloring, as needed (such as McCormick Black Food Color)

In a shallow bowl, melt the chocolate in microwave (be careful so that the temperature does not exceed 100 degrees F) for 2 minutes; stir. If chocolate is not completely melted, return to microwave for 30 seconds at a time and stir until smooth. Add corn syrup to the chocolate and mix well (scrape all the corn syrup into the chocolate with a rubber spatula). Using a rubber spatula, stir and fold mixture, scraping the sides and bottom of the bowl well, until no shiny syrup is visible and the mixture forms a thick ball. Pour mixture onto a large sheet of wax or parchment paper and spread with the spatula until it’s about 1/2-inch thick; let it sit and stiffen, uncovered, for about 2 hours.

After that, knead black food coloring into the modeling chocolate 1 to 2 drops at a time until you get the desired shade. Use at once or store in an airtight container at room temperature for up to 1 month.

I'm submitting these Black Widow Spider Cupcakes to McCormick's Kitchen PLAY Contest as a conceptual adaptation of My Baking Heart's Spider Cupcakes. They're giving away ten $50 prizes to those who recreate any of the recipes in this month's Halloween-themed Progressive Party. If you're interested in entering, you can review the complete contest rules here. Deadline is October 31, 2011. Good luck!

Thursday, August 6, 2009

Not My Usual Banana Bread


Bananas have become one of my favorite ingredients to bake with in recent years. They're cheap, fairly healthy, and, when allowed to ripen sufficiently, provide amazing flavor. But for years before this, I'd largely avoided banana-flavored treats. Let's just say it took a long time to overcome the trauma of some close encounters with artificial "banana" flavoring. I'm so glad to have gotten over that though, because banana bread done right can do wonders for a bad (or good) day.

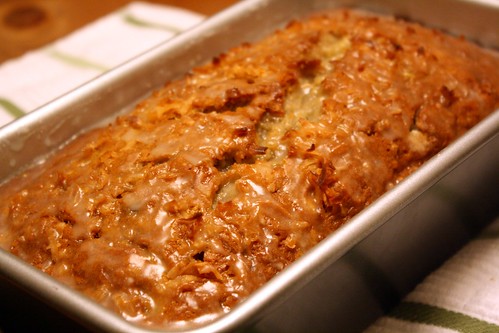
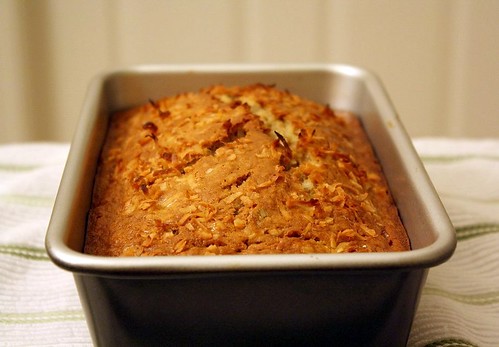
I was lucky enough to find a great banana bread recipe on my first attempt a few years back. The Very Moist Banana Nut Bread recipe (with minor variations) from Recipezaar has since become a regular in my baking repertoire and is always gobbled up wherever I take it. While that remains my go-to recipe, I really enjoyed trying an unconventional twist from Cooking Light. Their Coconut Banana Bread with Lime Glaze has already gotten plenty of coverage in the food blogosphere, but a good recipe deserves all the attention it can get. Plus, I was itching to upload my first photos taken with the new camera. There hasn't even been time for me to try any setting other than full auto, but that's what next week's vacation is for (so close I can taste the freedom!!). But getting back to the food, you can find the full recipe with my notes after the jump.

The key flavors (left) and lemon glaze (right)

Coconut Banana Bread with Lime (or Lemon) Glaze [Printable Recipe]
Adapted from Cooking Light

*My comments/changes in italics

2 cups all-purpose flour
3/4 teaspoon baking soda
1/2 teaspoon salt
1 cup granulated sugar
1/4 cup butter, softened
2 large eggs
1 1/2 cups mashed ripe banana (about 3 bananas)
1/4 cup plain low-fat yogurt
3 tablespoons dark rum
1/2 teaspoon vanilla extract
*I also added 1/4 teaspoon of coconut extract
1/2 cup flaked sweetened coconut
Cooking spray
1 tablespoon flaked sweetened coconut
1/2 cup powdered sugar
1 1/2 tablespoons fresh lime or lemon juice *I used lemon juice and added 1 teaspoon of rum

Preheat oven to 350°.

Lightly spoon the flour into dry measuring cups, and level with a knife. Combine the flour, baking soda, and salt, stirring with a whisk to combine.

Place granulated sugar and butter in a large bowl; beat with a mixer at medium speed until well blended (about 1 minute). Add the eggs, 1 at a time, beating well after each addition. Add banana, yogurt, rum, and vanilla; beat until blended. Add flour mixture; beat at low speed just until moist. Stir in 1/2 cup coconut. Spoon batter into a 9 x 5-inch loaf pan coated with cooking spray; sprinkle with 1 tablespoon coconut. Bake at 350° for 1 hour or until a wooden pick inserted in center comes out clean. *Mine took 65-70 minutes to bake through.

Cool 10 minutes in pan on a wire rack; remove from pan. Combine powdered sugar and juice, stirring with a whisk; drizzle over warm bread. Cool bread completely on wire rack. *I did remove mine from the pan to cool for a while but put it back for lack of a better container.

UP NEXT: Snickerdooooodlez!