Friday, August 26, 2011
Start Your Day Super (Cinnamon Teff Waffles with Blueberry Compote)
These shouldn't be viewed as cure-alls or eaten to the exclusion of other healthy foods. But as part of a healthy, balanced diet with minimally processed food, these superfoods will help you control your weight, prevent or fight illness, and extend your lifespan. That was more than enough incentive for me to do my part in promoting 2 of these "superfoods," cinnamon and blueberry. Please head over to City of Hope's Facebook page to check out my Cinnamon Teff Waffles with Blueberry Compote and learn more about their incredible work. If you just need to grab the printable recipe quickly, click here.
Monday, June 27, 2011
6 Bittersweets Turns 2! (Raspberry Tres Leches Cake and Mango Mascarpone Macarons)
I've never been one to make much ado over my birthday, but I do like to gather friends around for a fun and relaxing evening. Plus, any opportunity to bake a celebration cake is not to be missed...especially on the one day of the year when I have full control over the menu (mwahaha! ^_^). And what a menu it turned out to be! P and I prepared the main dishes and desserts, while friends contributed the rest. Not having set a theme for the meal, we got quite an eclectic mix of dishes but all so yummy that I wouldn't have done it any other way.
For the curious among you, here's what we ate: Spinach Salad with Strawberries and Candied Pecans (even better with mandarin oranges instead of strawberries), Baked Pizza Dip, Grilled Chicken Yakitori Skewers, Spicy Sriracha-Grilled Tofu, Otsu Sesame Noodle Salad with Grilled Eggplant, Mapo Tofu, and Dirty Rice from Bojangles (yes, very random). As scrumptious as all that was, my favorite part of the meal was its sweet ending.
As a kid I hated having a summer birthday because all my school friends would be on family vacations by the time I threw my party. Now that I'm all grown up, I've done quite the 180°, delighting in all the fresh fruits and veggies available this time of year. Nothing speaks summer! louder to me than fresh fruit and cream. As proof you can find my previous iterations of this divine combination here, here, and here.
To mix it up this year, I expanded on the "cream" portion with not only heavy cream but a trifecta of cream, sweetened condensed milk, and caramelized cinnamon evaporated milk in this irresistable Tres Leches Cake. The filling of sugared raspberries is a fresh twist on the Spanish classic, adding just the right amount of tartness to counter the sweet n' creamy sauce.
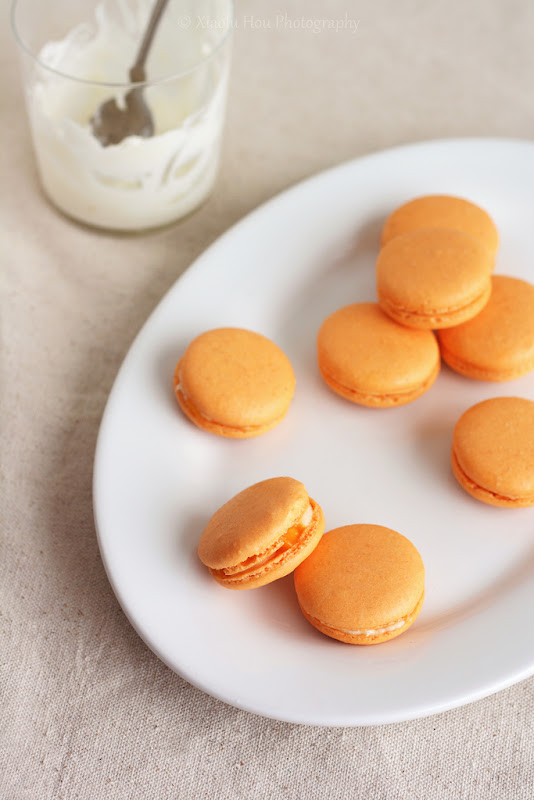
Knowing certain guests didn't fancy raspberries, I made a second dessert of Mango Mascarpone-Filled Macarons. This was my first time filling macarons with mascarpone and I must say I love it! Not only did it taste fantastic but it was fantastically easy to prepare: just whisk with fork...no mixer required! When you then add in a topping of juicy, ripe diced mangoes, how could it not be good? And as far as I'm concerned, it was ALL good: the food, the company, the beginning of my 27th year of life... Thank you, my lovely readers, for adding to the wonder of it all!
P.S. - I'm submitting these macarons to this month's MacTweets challenge: Fruit!
Tres Leches Cake with Raspberries [Printable Recipe]
Adapted from Sunset
Makes 10 to 12 servings
XIAOLU'S NOTES: Evaporated goat milk (Meyenberg is a popular brand) is sold in many grocery stores. I couldn't find it in mine, however, so I substituted regular evaporated milk and the cake was still fabulous. Look in the baking aisle, near the condensed milk. The cake and tres leches sauce (prepare while cake bakes) can both be made a day ahead; reheat tres leches sauce before drizzling over cake. You can chill the completed cake for up to 3 days (garnish with raspberries just before serving).
Cake
1 1/3 cups all purpose flour [stirred, spooned, and leveled to measure]
1 tsp baking powder
1/4 tsp salt
6 large eggs
1 cup granulated sugar
6 Tbsp (3/4 stick) unsalted butter, melted
Tres Leches Sauce
1 can (12 oz.) evaporated goat milk (see Notes)
1/4 cup sugar
1 stick cinnamon (about 2 inches)
1/8 tsp baking soda MIXED WITH 2 tsp water
2/3 cup canned sweetened condensed milk
1 1/4 cups light cream
2 Tbsp rum [optional]
Filling and Frosting
2 cups fresh raspberries, divided
1 1/2 Tbsp granulated sugar
2 cups whipping cream
2 tsp pure vanilla extract
6 Tbsp powdered sugar, sifted
Preheat oven to 350 degrees F; position rack in center of oven. Cut a large parchment circle about 13 inches in diameter and place it atop the base of a 9-inch springform cake pan (at least 2 inches deep). Place the pan's rim back on top of the base and lock it in, securing the edges of the parchment paper. Now butter and flour the bottom and sides of the pan, and set aside.
For cake: Sift flour, baking powder, and salt together; set aside. Select a large stainless steel bowl (at least 10-cup capacity) that can nest comfortably in a large pot. Fill pot halfway with water and bring to a boil over high heat, then reduce heat to a gentle simmer. In bowl, combine eggs and sugar. Set bowl over water; with a handheld mixer, beat eggs and sugar at high speed until pale and thick enough to fall from a spoon in a wide ribbon, about 10 minutes. [If you have a stand mixer but no handheld, combine eggs and sugar in your metal mixer bowl. Set bowl over water, and whisk continuously by hand until the mixture is very warm and foamy. Then remove the bowl from heat and attach it to your stand mixer. Mix until pale and thick enough to fall from a spoon in a wide ribbon, about 10 minutes.]
Remove bowl from heat. Add sifted flour mixture to egg mixture and immediately fold in gently but quickly. Add melted butter and fold in gently until no streaks remain. Scrape batter into prepared pan. Bake on center rack until cake is evenly browned, just begins to pull from pan sides, and springs back when lightly touched in the center, about 35 to 40 minutes. Set pan on a cooling rack and let cool 5 minutes. Run a thin knife between pan and rim. Remove rim and let cake cool completely.
For tres leches sauce: In a large pot (at least 6-qt. capacity) over high heat, combine goat milk, sugar, and cinnamon stick. Bring mixture to a boil. Stir in baking soda mixture (sauce will foam up) and reduce heat to medium. Simmer, stirring occasionally, until sauce turns a caramel color and reduces to 3/4 cup, 10 to 12 minutes.
Remove sauce from heat; discard cinnamon stick, and stir in condensed milk, whipping cream, and rum. Use warm.
With a long, serrated knife, cut cake in half horizontally. Lift off cake top and set, cut side down, on a flat plate.
Transfer cake bottom off the pan base onto a cake stand or other serving platter. Poke cake bottom all over with a toothpick, being careful not to poke all the way through. Slowly spoon enough warm tres leches sauce (slightly less than 1 cup) over cake bottom to saturate well but not cause it to ooze. Let stand until cool, about 10 minutes.
For filling: Reserve 1/2 cup of raspberries to go on top of the cake, then put remaining fruit in a bowl and mix gently with granulated sugar. Set aside. In a chilled bowl, use a mixer to whip cream until it holds medium stiff peaks and is thick enough to spread. Add vanilla and powdered sugar; mix well.
Scoop about 1 2/3 cups whipped cream onto cake bottom and spread evenly, leaving a 1/2-inch border around the edge. Dot with sugared raspberries, pushing them down into cream. Carefully transfer the cake top, cut side down, onto the base and make sure they are aligned. Poke top all over with a toothpick as before, then slowly spoon slightly less than 1 cup of sauce evenly over cake top to saturate.
Now smoothly frost top and sides of cake with remaining whipped cream, then use a clean towel to wipe any stray frosting or sauce from around the base. Cover cake without touching (invert a large bowl over it) and chill at least 2 hours. Cover and chill reserved raspberries if held longer than 2 hours. Cover and chill remaining tres leches sauce.
Uncover cake and decorate with reserved raspberries. Serve with remaining tres leches sauce.
Mango Mascarpone Macarons [Printable Recipe]
Makes about 25 to 30 macarons
XIAOLU'S NOTES: Please do not try to convert this recipe to volume measurements if you don't have a scale (I use and love this one). This recipe is very sensitive and will not work if the measurements are not exact. Please also note that every oven is different and you'll figure out what works best for yours over time (see this post for great information on ovens and macarons). Since mine has major hot spots, I bake on 2 stacked pans for insulation if using parchment paper. If you're uncertain of your ability to pipe uniformly-sized macarons, like me, simply trace 1 1/4-inch circles on your parchment paper, flip the paper over, and pipe on the other side, using the outlines as your guide OR print (choose "fit to page") and slide this template under your parchment as a guide but don't forget to remove before baking! See my first macaron post for helpful videos of the whole macaron-making process!
125 g almonds [not roasted or salted]
170 g powdered sugar
1/4 tsp amchoor (Indian dried green mango) powder [optional]
Large pinch of salt
35 g granulated sugar
2 g egg white powder [optional, to stabilize batter in humid weather]
Splash of white or cider vinegar [to clean utensils/stabilize meringue]
90 to 95 g egg whites [about 3 large egg whites]
Orange food coloring (powder or gel) [optional]
5 oz. mascarpone cheese, cool room temperature
1 Tbsp heavy cream
2 Tbsp powdered sugar, sifted
1/2 cup finely diced ripe mangoes
Microwave fresh egg whites 10 to 15 seconds in the microwave on medium-low heat (I set my microwave to 40%).
Combine the almonds, powdered sugar, mango powder, and salt in a food processor, and pulse on and off until the nuts are finely ground (about 1 to 2 minutes). Sift the powder to remove any large chunks that remain. Put those chunks back into the food processor and pulse again for another 30 to 60 seconds. Sift again. You will probably have some slightly chunkier almond bits. Hopefully they're no more than a tablespoon or so, in which case you can throw them out.
Weigh out and mix your granulated sugar and egg white powder in a small bowl until uniform; set aside. Add splash of vinegar then a splash of water to the bowl that will be used for whipping the egg whites. Swirl liquid around the bowl, then use a clean paper towel to wipe the bowl dry. Use the same paper towel to wipe down your beaters. Now using a handheld or stand mixer, whip the egg whites on medium-low speed until foamy, then turn the speed up to medium to medium-high and gradually add the sugar mixture. Now add orange food coloring, if using, until the desired shade is reached (color will lighten once fully whipped). Continue whipping until you obtain a glossy meringue (it'll look like shaving cream, hold stiff peaks, and stay in place if you turn the bowl upside-down; but don't overbeat your meringue or it will be too dry).
Add all of the nut mixture to the meringue and fold together. Use both a folding motion that scrapes the bottom of the bowl (to incorporate the dry ingredients) and a gentle pressing motion, to deflate the meringue against the side of the bowl. Slow down after all the dry ingredients have been incorporated, and continue folding the mass carefully until you obtain a batter that looks somewhat glossy and flows from the spatula in a thick ribbon. Test the batter by spooning a small amount of the batter on a plate: if the top flattens on its own within about 20 seconds, it’s ready to pipe. If there is a small peak, give the batter 2 to 3 more folds and test again. The peak shouldn’t disappear immediately either or it’s already overmixed.
Fill a pastry bag fitted with a 1/3 to 1/2-inch wide plain tip (I like Ateco #805 or 806) with half of the batter. (When your bag is too full, the pressure causes the batter to rush out in a way that’s difficult to control, making for sloppy macarons.) Pipe tiny blobs of batter onto the 4 corners and center of 2 baking sheets, then line baking sheets with parchment paper OR line with silicone mats. Pipe small rounds (slightly larger than 1 inch wide) straight down and about 1 inch apart onto the baking sheets. Pick up each sheet with both hands and slam it firmly straight downward on the counter 2 to 3 times. This will to force out any large air bubbles. Immediately pop any bubbles that rise up but don't break with a toothpick. Do NOT do this once a few minutes have passed because you'll mess up the shell that's forming.
Preheat the oven to 285 to 300 degrees F. Let the macarons sit out for 25 to 90 minutes to harden their shells a bit (to prevent tops from cracking during baking). Test if they're ready by touching the top and side of one shell lightly. It should feel dry and not stick to your finger at all. Bake one pan at a time for 15 to 25 minutes, depending on the size of the macarons. After the first 10 minutes of baking, rotate the pan and place a large piece of foil loosely over the macarons to prevent browning (If I’m baking on 2 stacked pans, I also remove the bottom pan at this point to make sure the macarons will be completely cooked on the bottom and not sticky). Let cool completely before trying to move the shells.
Once cool, remove the shells from the silicone mat or parchment and flip them over. If you have trouble removing them, freeze the macarons for about 10 minutes, then quickly peel them off before they have a chance to warm up and get sticky again.
To prepare the filling, combine the mascarpone, powdered sugar, and heavy cream and mix well. To fill, spoon or pipe about 1 teaspoon of mascarpone mixture onto half the macaron shells, sprinkle with diced mangos, then top with a similarly-sized top shell. For the best flavor and texture, store in the refrigerator for at least 1 hour before eating so flavors are allowed to mature, but they are best if eaten within 2 days. Bring to cool room temperature before eating.
Saturday, June 4, 2011
Rhubarberric Macarons (Guest Post for Journey Kitchen)
Monday, May 16, 2011
Birthday Rum N’ Raspberry Custard Cupcakes (Guest Post on Joylicious)
Saturday, April 9, 2011
A Lotta (Scharffen Berger) Chocolate Part 1: Chocolate Chunk Challah and French Toast
One is via the possibility that our disconnect btween speech and action is due to hidden commitments we have that have stronger sway over our actions than those overt ones. You could be secretly committed to being right/in control, to avoiding past pains, or even just allowing yourself some time to be lazy/selfish. What do you guys think? Do you see merit in this concept and some truth of it in examples in your own life? I think I do.
The other (and maybe more interesting to you ;p) reason I bring up commitments is this. About 3 months ago, I asked my dear readers for a little help with a contest. The prize was a huge Scharffen Berger gift basket and I proclaimed that "I'd love to have all that chocolate to use in treats for my friends, family, and all of you." Well, guess what...I WON and it's time for me to make good on my commitment to make y'all some fantastic chocolatastic treats! Fortunately this is an easy promise to keep since I love chocolate, baking, and sharing both with you guys =D.
What I have planned is a "Lotta Chocolate" series that will span about 4 or 5 posts and feature some less common ways of utilizing this versatile ingredient. And yes, that means you won't be seeing any brownies or chocolate chip cookies in it. But I hope you'll trust me not to lead you astray (though how wrong could you go with chocolate anyway, eh?).
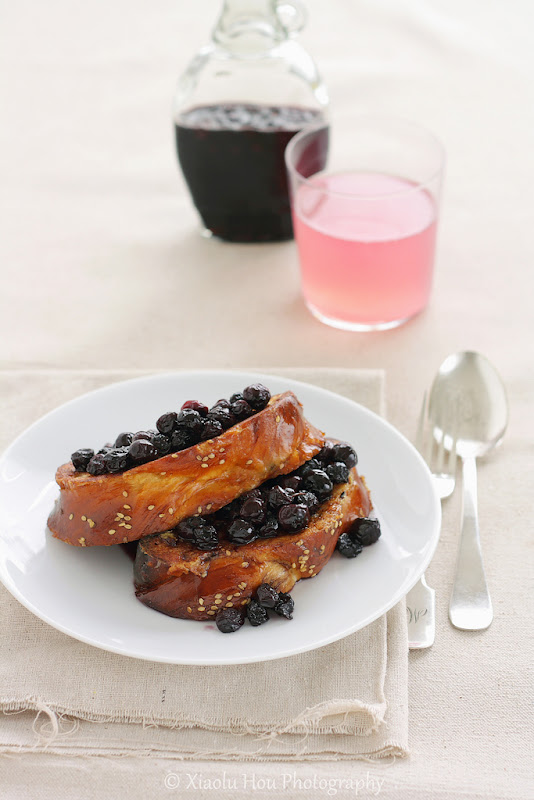
Today I present to you a treat taken from the Scharffen Berger chocolate cookbook, itself, a rich slightly sweet challah bread studded with unexpected chunks of semisweet chocolate. While delicious in its own right, I knew this challah would be even more amazing as French toast. I even "discovered" some blueberries from last summer in the freezer, which were easily transformed into my favorite, blueberry syrup. Honestly, you guys, this couldn't have turned out any better than it did! Between the juicy blueberries in syrup, rich creamy toast, and pockets of melted chocolate, I was in brunch heaven. Won't you join me? ^__^
P.S. - If you enjoy this post and my site in general, I'd be honored if you'd nominate me for Saveur Magazine's 2011 Best Food Blog Awards (nominations close April 22) =D.
P.P.S. - Almost forgot, I'm sending this over to Susan at Wild Yeast for her weekly Yeastspotting event.
Chocolate Chunk Challah Braided Bread [Printable Recipes]
Adapted from The Essence of Chocolate by John Scharffenberger and Robert Steinberg
Makes 2 loaves
XIAOLU'S NOTES: If you're not familiar with 4-strand braids (which I wasn't), watching someone do it is really helpful, much more so than photos or written directions in my opinion. This is a good one I found on Youtube. My bread was overbaked, especially the bottom, so I recommend starting to check for doneness at 25 minutes and NOT using a dark baking pan. Lastly, I love the look of tall challah, so next time I plan to make one braid slightly smaller than the other and to stack the smaller braid atop the larger one for baking like this.
1 1/4 cups lukewarm water, divided
1/2 cup plus 1 Tbsp sugar, divided and more for sprinkling
2 1/2 tsp active dry yeast
4 1/2 to 5 1/2 cups all purpose flour, divided [scoop and sweep measurement]
1 3/4 tsp salt
6 Tbsp canola (or other flavorless) oil
2 Tbsp honey
3 large eggs, divided
4 oz. semisweet chocolate (preferably 62%), cut into chip-size chunks
1 Tbsp sesame seeds
In a small bowl, combine 1/4 cup of the water, 1 tablespoon of the sugar, and the yeast. Stir to dissolve. If it does not foam in 10 to 15 minutes, discard and start with fresh yeast.
In the large bowl of an electric mixer, combine 1 1/2 cups of the flour, the remaining 1/2 cup of sugar, salt, oil, honey, 2 eggs, yeast mixture, and remaining 1 cup of water. Beat at low speed, scraping bowl periodically. Add 3 more cups of flour, then switch to dough hook and knead at low speed, scraping the bowl from time to time, until an elastic dough forms. Only if the dough seems too sticky, add more flour a few tablespoons at a time JUST until dough is no longer sticky but still is soft. Let rest 10 minutes.
On a lightly floured board, shape dough into a 7 x 10-inch rectangle. Press the chocolate pieces into the dough and fold dough in half over the chunks. Seal edges and tuck under; let rest 10 more minutes.
Lightly oil a large bowl. Form the dough into a ball by tucking edges under, and place in the bowl, turning to coat with oil. Cover with a kitchen towel and let rise 45 minutes to 1 hour, until doubled in bulk.
Lightly oil 2 baking sheets. Turn dough out onto a lightly floured board, punch down and divide into 8 equal pieces. Cover half the pieces with a kitchen towel, and roll the remaining 4 pieces into 15-inch ropes. Pinch the ropes together at one end, and set that end near the short side of one baking sheet opposite from you. Braid the ropes by continuing to weave the right-most strand over, under, then over the strands to its left (see notes above for video link). Pinch strands together at the end, and tuck both ends under slightly. Cover the 1st loaf with kitchen towel, and use the same procedure to braid the the remaining 4 ropes on the other pan.
Whisk remaining egg to make an egg wash and brush top of each loaf, being careful not to let egg run down to baking sheet (it can burn). Let rise until doubled, 45 minutes to 1 hour. Twenty minutes into this rise, preheat the oven to 375 degrees F.
Once loaves have doubled in size, brush them with egg one more time, and sprinkle with sesame seeds or sugar. Bake 25 to 35 minutes, or until top is glossy and brown, rotating the pans halfway through. If tops brown too quickly, cover loosely with foil. Cool completely on racks, then wrap well so loaves are airtight and store at room temperature or freeze if not eating immediately.
Challah French Toast with Blueberry Syrup/Compote
Adapted from Bromberg Bros. Blue Ribbon Cookbook and pictures and pancakes
Serves 4 to 6
XIAOLU'S NOTES: If your challah is taller than mine, you may need to use fewer slices or make more of the batter and syrup so there's enough for all 8 slices. This french toast is delicious with regular challah, but I really enjoyed the combination of chocolate and blueberry. And the chocolate could be a wonderful surprise for guests digging into the final product.
1 cup maple syrup
1 1/2 to 2 cups blueberries
4 large eggs
1 cup milk
2 Tbsp sugar
1 tsp pure vanilla extract
1/4 tsp ground cinnamon
Pinch of salt
8 (1-inch) slices challah bread, homemade (see above) or store-bought
4 tsp unsalted butter, or more as needed and to serve
In a small saucepan, combine maple syrup and 1 cup blueberries. bring to a boil and simmer until blueberries release their juices. remove from heat and stir in remaining 1/2 to 1 cup of blueberries. Set aside.
In a large bowl, whisk together the eggs, milk, sugar, vanilla, cinnamon, and salt. Pour the custard into a wide, shallow dish. Soak each slice of bread in the liquid, turning to coat on both sides, until the bread is saturated but not falling apart, 3 to 5 minutes.
Heat a large skillet over medium heat. Melt 1 teaspoon of butter in the pan. Working in batches, cook challah until golden brown, 2 to 3 minutes per side. Repeat with the remaining challah, adding butter if needed.
Divide the toast among individual plates and serve topped with blueberry maple syrup and butter, if desired.
Sunday, November 7, 2010
Who's Afraid Of A Crack Or Two? (Blueberry Swirl Mini Cheesecakes)
Several sources told me mini cheesecakes were less prone to cracking, even without a water bath. You can bet I was excited 'bout that! Still, there was some contradicting advice floating about. The Martha Stewart recipe I adapted called for bathing the cupcakes ^_^, but Annie's Eats got gorgeous results skipping that step. Always wanting to see for myself, I baked some with a water bath and some without.
When the cakes in the water bath turned out slightly undercooked but the others rose high and sunk oh-so-low, I went in search of middle ground. Google led me to this page very helpfully explaining The Cracking/Sinking Phenomenon. The main culprits: over-beating, over-baking, and contraction as the cake cools. Shortening the mixing time and lowering the oven temperature without a water bath produced the results I was hoping for. Firm, delicious cakes without a tendency to cave in. Sure, there's still an occasional crack along the marbling, but people will be too busy wolfing them down to notice =).
Do you guys enjoy cheesecake as much as I do? I'd love to hear about your favorite variations. Plus any tips would be great, as I'm still very new to making them!
Blueberry Swirl Mini Cheesecake Cupcakes [Printable Recipe]
Adapted from Martha Stewart Cupcakes via Annie's Eats
Makes 14 cupcakes
XIAOLU'S NOTES: For a lovely almond-y twist, replace half the graham cracker crumbs with amaretti biscuit cookie crumbs and omit the extra sugar in the crust. Or use chocolate wafer crumbs and keep the sugar. You could also easily swap out the blueberries for almost any other berry or even other types of fruit. You'll want to adjust the amount of sugar according to the sweetness of the fruit you use. Have fun with it!
3/4 cup graham cracker crumbs
1 1/2 Tbsp unsalted butter, melted
1 1/2 Tbsp sugar
1/2 cup fresh or frozen blueberries
1 Tbsp sugar
1 lb. cream cheese, softened
1/2 cup PLUS 1 Tbsp sugar
Pinch of salt
1/2 tsp pure vanilla extract
2 large eggs, room temperature
Preheat the oven to 350 degrees F. Line 2 cupcake pans with 14 paper liners (or use 1 pan plus 2 standalone wrappers).
To make crusts: in a small bowl, combine the graham cracker crumbs, melted butter, and sugar. Stir together with a fork until well blended and all dry ingredients are moistened. Press 1 tablespoon of the mixture into the bottom of each cupcake liner. (A small glass or another standalone baking cup work well.) Bake until just set, about 5 minutes. Transfer to a cooling rack. Reduce oven temperature to 300 degrees F.
To make the fruit puree: combine the blueberries and sugar in a regular or food processor or using a stick blender in a measuring cup. Process until smooth, and set aside. If using frozen berries, boil the puree in a small saucepan for about 5 minutes to evaporate some of the water; then cool and set aside.
To make the cheesecake: beat the cream cheese on medium-high speed in the bowl of an electric mixer just until smooth. Blend in the remaining sugar until well incorporated. Mix in the salt and vanilla. Finally, beat in the eggs one at a time, mixing well after each addition.
To assemble: spoon 3 to 4 tablespoons of the cheesecake batter over the crust in each cupcake liner. Dot a 1/2 teaspoon of the berry puree in a few dots over the cheesecake filling. Use a toothpick or a skewer, chopstick, or thin knife to lightly swirl and create a marbled effect.
Bake until the filling is just set, about 20 to 30 minutes. (They will look puffed initially but will return to normal with time.) Transfer to a wire cooling rack and let cool to room temperature. Transfer to the refrigerator and let chill for at least 4 hours before serving.
Saturday, October 30, 2010
That Bloody Rat's Got My Cupcake! (Red Berry Chocolate Cupcakes)
It's the first time I've filled cupcakes simply with jam, and I quite enjoyed the taste. The "bloody" color and oozy consistency also make any red berry jam or preserve a good topping for this time of year. To be frank, these chocolate strawberry rats take a bit of time and effort to make. So I really didn't have the time/patience left to mix up a frosting anyway ;p.
It takes a few tries to get used to the rat-assembly procedure, so don't worry if you feel clumsy at first. I was impressed with the results, both the appearance -- I certainly had never associated strawberries with rats before! -- and the taste -- chocolate-coated things are generally yummy.
Of course I do realize I'm posting this the day before Halloween (my bad!), and some of these ingredients may take time to track down. If you're looking for some equally impressive Halloween cupcakes with only easy-to-find ingredients, be sure to check out the creepy crawly, mummy, and owl cupcakes from my previous posts.
So do you have big plans for this Sunday? I'd love to hear all about your creative costumes and treats. Happy early Halloween, everyone!
Bloody Red Berry Chocolate Rat Cupcakes [Printable Recipe]
Adapted from VCTOTW via CHOW and Karen Tack via Redbook
Makes 12 cupcakes
XIAOLU'S NOTES: I recommend having extra sliced and slivered almonds for the rats so that you can pick the best-shaped ones.
1 cup soy milk [or regular milk]
1 teaspoon apple cider vinegar
3/4 cup granulated sugar
1/3 cup canola oil
1 teaspoon vanilla extract
1/2 teaspoon almond extract, or more vanilla extract
1 cup all-purpose flour
1/3 cup cocoa powder, regular or Dutch-processed
3/4 teaspoon baking soda
1/2 teaspoon baking powder
1/4 teaspoon salt
3/4 cup strawberry or raspberry jam/preserves
Strawberry Chocolate Rats (Recipe below)
12 4-inch pieces of black licorice lace
Preheat oven to 350 degrees F and line a muffin pan with baking liners.
Whisk together the soy milk and vinegar in a large bowl, and set aside for a few minutes to curdle. Add the sugar, oil, vanilla extract, and almond extract, if using, to the soy milk mixture and beat until foamy. In a separate bowl, sift together the flour, cocoa powder, baking soda, baking powder, and salt. Add in two batches to wet ingredients and beat until no large lumps remain (a few tiny lumps are OK).
Fill liners 3/4 full with batter. Bake 18 to 20 minutes, until a toothpick inserted into the center comes out clean. Transfer to a cooling rack and let cool completely.
Stir berry jam well, and heat in the microwave for 5 to 10 seconds. Transfer jam to a piping bag fitted with a long pointed tip OR a squeeze bottle. Insert tip into each cupcake and squeeze out a small amount of jam into the cupcake. Then pull the tip out of the frosting and squeeze a little more on top of the cupcake in several (bloody XD) blobs. Place a strawberry chocolate rat on top of each cupcake. Insert one end of a 4-inch piece of black licorice into the cupcake directly behind the rat, then insert the other end into the cupcake on one side of the rat. Lastly and most importantly, enjoy sharing your creepy creations!
Strawberry Chocolate Rats
12 large strawberries, stems removed
1 cup (6 oz.) chocolate chips
2 tsp shortening (use a brand without trans fat like Spectrum)
15 chocolate wafer cookies (1 package of Nabisco brand is 40 cookies)
24 sliced almonds
24 slivered almonds
24 red/yellow and 12 brown candy-coated chocolate-covered sunflower seeds
Place chocolate wafer cookies in a food processor fitted with steel blade, and process until cookies are finely ground. Transfer crumbs to a small bowl and set aside.
Line a cookie sheet with parchment or wax paper. Trim a small piece from one side of each strawberry so they can rest horizontally on the paper. Insert 2 sliced almonds -- about 1 inch from pointed end of strawberry and about 1 inch apart -- to make the ears of the rat.
Place chocolate chips into a heatproof bowl, and microwave for 30-second intervals, stirring well after each interval, until the chocolate is completely smooth. Be careful not to burn the chocolate! Stir in the shortening and mix until smooth.
Insert a fork into the large end of a strawberry (Angle the fork upwards into the strawberry so it won't slip off when you're tapping the fork later.). Holding strawberry on the fork over the bowl of melted chocolate, spoon chocolate over strawberry to coat. Allow excess chocolate to drip off, tapping fork lightly. Sprinkle with chocolate wafer cookies crumbs to coat. Tap fork lightly again to remove excess crumbs. While still holding the strawberry up on the fork, add red/yellow candies for the eyes, slivered almonds for the teeth, and brown candies for the nose. Use another fork or spoon to transfer strawberry to prepared cookie sheet. Repeat with the remaining 11 strawberries. If the chocolate starts to solidify as you're working with it, you can microwave it again at 10-second intervals until it softens again. Refrigerate (or freeze at least 5 minutes if you're in a hurry to use them) rats until ready to serve.
Thursday, October 28, 2010
Meringue-Kissed Plum Raspberry Pots (Guest Post On Une-deux Senses)
Monday, September 27, 2010
Girl Meets Torch (Bruléed Oatmeal)
The motto of my absolute favorite food magazine is "special made simple" (I'm sure many of you immediately knew which one I meant XD). It's a wonderful approach to cooking, and I always look forward to new ways of applying it. But I also find the reverse mentality, "simple made special," equally if not more appealing. The perfect example of this can be found in my new favorite breakfast: Bruléed Oatmeal.
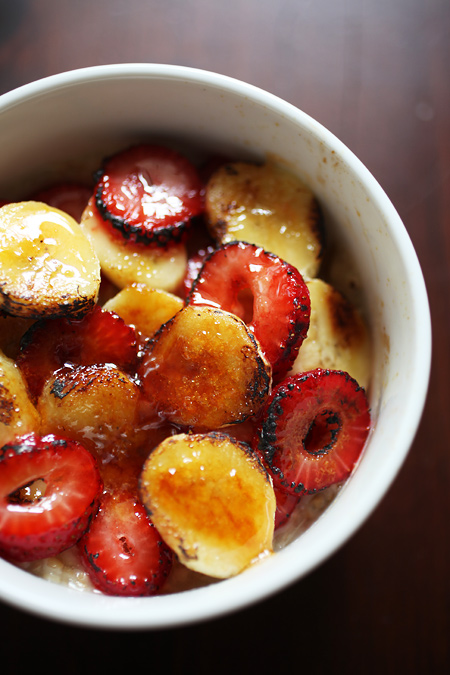
I happened upon this brilliantly easy method on the blog, à la mode*, while hunting for creative uses for my kitchen torch. Oddly enough, I'd bought one not to make classic creme brulée but to fulfill a cupcake vision. The idea to brulée breakfast has certainly breathed new life into my neglected tool. With just a few sprinklings of sugar and blasts of heat, I can regularly transform run-of-the-mill breakfasts into treats worth getting up for. Please do make sure you have enough gas in your torch. That way you'll get more drool-inducing results like this instead of the light browning in my photo.
For those of you who also own a kitchen torch, what uses have you found for it other than creme brulée?
Strawberry Banana Oatmeal Brûlée [Printable Recipe]
From à la mode*
Serves 1
XIAOLU'S NOTES: I actually doubled the recipe for the bowl of oatmeal in the photo, but the fruit doesn't keep well so I suggest you make only as much as you'll eat right away. Almost any fruit can be substituted here. Just don't expect the fruit to taste cooked, since the torch is really just there to caramelize the sugar into crunchy goodness! Please be careful not to overheat the edges of the bowl or bowl may crack, and be careful handling the bowl afterwards; it will be hot! Rick from à la mode* says that a torch works the best for this, but that about 20-30 seconds under the broiler should also work. If you try this, check first that your bowl is oven-safe.
1 portion of oatmeal, cooked and lightly sweetened
3-4 fresh strawberries, sliced
1/2 banana, sliced
1 Tbsp sugar
Add cooked oatmeal to a heat-proof bowl. Over top, arrange sliced banana and strawberries cut side up, to expose flat surfaces. Sprinkle evenly with sugar. Light torch and heat sugar till golden brown, making sure to pass torch slowly back and forth over fruit.
Tuesday, August 17, 2010
Inspired By Ispahan (Raspberry Rose Lychee Cupcakes)
My friend Mar's birthday and the deadline for Cupcake Hero's raspberry challenge were just days apart this month. And she even gave me free reign over what treat to make her. Call me silly, but I took this a sign from the baking powers that be. It was finally my time to try the trio of flavors (raspberry, rose, and lychee) made famous by Pierre Herme's Ispahan macaron cookie. Not too innovative on my part. But one could do worse than to trust the signature of one of the greatest pastry chefs alive =p. After perusing my favorite blogs for their renditions, I combined a few elements from each and added some touches of my own.
The birthday girl, some friends and I were actually heading up to NYC to celebrate. Baking was left until departure day for the sake of freshness, but what a tight schedule it turned out to be! I ended up packing the cupcakes with one hand while slinging my bags over the other shoulder then running to my friend's car. As soon as we arrived in New York, we went on an insane but fun food/bar-hop until 5 am.
Needless to say, we didn't get to the cupcakes that night. But they're sturdier than their delicate appearance suggests. Even over a day later, they remained quite delicious. At first bite, my brain was pretty confused to be tasting something it's more used to smelling. But once we got over that small hurdle, I understood the popularity of this combination. Juicy lychees and tart raspberries act as a delectable foil to the fragrant rose flavor. While the cool custard tames the sweetness. If you have extra filling, please try spooning it over the cakes as you eat them. Take my word for it, you won't regret it.
Lychee Rose Cupcakes with Raspberry Filling [Printable Recipe]
Adapted from Tartelette, Une-deux Senses, and The Baker's Dozen Cookbook
Makes 12 cupcakes
XIAOLU'S NOTES: The raspberry custard filling can be made up to 1 week in advance and refrigerated covered until ready for use. The recipe below makes extra, which would be delicious to serve alongside the cupcakes, use in a parfait, or use to fill some other baked good. Alternately, you can halve the recipe.
3/4 cup self-rising flour
1/2 cup all purpose flour
2 Tbsp ground almonds
1/2 cup (1 stick) unsalted butter, softened
3/4 cup PLUS 2 Tbsp sugar
2 large eggs, room temperature
6 Tbsp milk
1 1/2 Tbsp rosewater
12 whole lychees or 24 halves if big (canned is fine)
Raspberry Custard Filling (Recipe below)
Buttercream Frosting (Recipe below)
Fresh raspberries, to garnish
Preheat oven to 350 degrees F. Line a standard muffin pan with 12 baking liners. In a small bowl, combine the flours and set aside.
In a large bowl, on medium speed using an electric mixer, cream butter until smooth. Add the sugar gradually and beat until fluffy, about 3 minutes. Add the eggs, one at a time, beating well after each addition.
Add the dry ingredients in 3 parts, alternating with the milk and rose water. Do not overbeat. Using a flexible spatula, scrape down the batter in the bowl to make sure the ingredients are well blended.
Carefully spoon half the batter into the liners, place one lychee in the center of each and top with the remaining batter, leaving a 1/2-inch space to the top for the cupcake to rise. Bake for 20–25 minutes, or until a cake tester inserted in the center of the cupcake comes out clean. Cool completely.
Once cool, cut a cone in each cupcake and spoon in 2-3 teaspoons of the raspberry custard filling. Replace the cone and spread or pipe on buttercream frosting. Kick back and enjoy!
Raspberry Custard Filling
Makes about 1 3/4 cups
1 1/4 cups milk
3 large egg yolks [save whites for the frosting]
4 to 6 Tbsp sugar
1/4 cup all purpose flour
3/4 tsp pure vanilla extract
1/2 cup fresh raspberries, mashed
In a non-reactive medium saucepan, heat the milk over medium just until bubbles form around the edges but it's not yet boiling.
In a medium bowl, beat the egg yolks (or whole egg and yolk) and sugar until pale yellow. Beat in the flour. On low speed, gradually add in half of the hot milk, beating constantly. Pour the mixture into the saucepan.
Cook over medium heat, stirring constantly, until the pastry cream comes to a full boil, making sure it doesn't scorch. Remove from heat.
Strain the pastry cream through a wire sieve into a medium bowl (to get rid of any egg or flour lumps). Press plastic wrap directly on the surface of the pastry cream and poke a few holes in the plastic for steam to escape. Refrigerate until chilled, at least 2 hours. Fold the mashed raspberries through the pastry cream just before filling the cupcakes.
Swiss Meringue Buttercream Frosting
3 large egg whites, room temperature
3/4 cup sugar
1 tsp pure vanilla extract
14 Tbsp unsalted butter, cool room temperature and cut into 10 pieces
1- 2 drops of food coloring (optional)
Combine the sugar and egg whites in the stainless steel bowl of an electric mixer. Place the bowl over a pot of boiling water making sure the bottom does not actually touch the water. Whisk constantly until the mixture reaches 160 degrees on an instant-read thermometer (I just whisked by hand and cooked it until the sugar was completely dissolved and the top became foamy). Be careful not to curdle the egg whites, remove from heat if this starts happening.
Remove the bowl to your stand mixer and beat on high speed with the whisk attachment for at least 3 minutes, until the mixture holds glossy, marshmallow-esque peaks and the bowl is completely cool (Very important - the frosting's consistency will be off otherwise).
With mixer on medium-low, add butter 1 tablespoon at a time, beating well after each addition (about 10 seconds between each addition). Increase speed to medium-high; continue beating until frosting appears thick, at least 3 minutes. (You'll hear a distinct slapping sound and visibly see the buttercream go from soupy to a cohesive, pipeable consistency.) Reduce speed to low, add the vanilla and food coloring (if using), and continue beating 1 minute to incorporate the additions and reduce air bubbles.
Friday, July 30, 2010
"Two Pies" Turned Into A Berry Tart
My mom lives a mere 40 minutes from me, so we have dinner every 2 weeks or so. Like many gene-sharing people, we often have difficulty communicating. Throw in an extra language, and it's double the trouble. Mom called me the night before our dinner to ask that I bring "2 pies." I couldn't understand why 4 people needed so much dessert. Between her repeated proclamations that it was "only 2 pies!" And moments away from a fight I realized she was saying "vegetable side dish" in Chinese, which just happened to sound like "pie." As tension dissolved into laughter, we settled on a compromise of 1 vegetable dish and 1 pie.
Now, "what to bring?" was the question left on my mind. Fresh, succulent summer fruit and cream came the immediate answer (yes, I talk to myself ^_^). Hardly what pops up when most people think of "comfort food." But waist-deep in the middle of a sticky D.C. summer, that's exactly what this magical and refreshing duo is for me. And since we'd already swapped veggies for pastry, I figured no one would pick the nit between tart and pie. Fortunately for my figure, the "cream" in the latest evolution of this pairing turns out to be rich yet low-in-fat Greek yogurt and light sour cream. What's more, 3 varieties of nuts bring complex texture and flavor to the crust, but also heart-healthy unsaturated fats, omega-3 fatty acids, and fiber. What's not to love? And let me assure you that 1 measly tart was more than enough for 4 diners, including seconds. 8p
Fresh Berry Tart with Toasted Nut Crust [Printable Recipe]
Slightly adapted from Vegetarian Times
Serves 8
XIAOLU'S NOTES: I loved this combination of nuts, but feel free to substitute other nuts for 1 or all of the types in the recipe. Buy 1 orange for this recipe and you'll have more than enough zest and juice. If you don't have Greek yogurt, you can make a substitute from a cup of regular yogurt by draining it over a strainer lined with cheesecloth/paper towel/coffee filter for several hours. Make sure to measure the 1/2 cup for the recipe after you drain the yogurt. I always "make" my own brown sugar using white sugar and molasses, about 1 1/2 T molasses per cup of white sugar. That's one less ingredient in my overcrowded [as in, constantly on the verge of avalanche] pantry, and no problems with hardened old brown sugar.
Crust
1/4 cup each almonds, pecans, and hazelnuts
3/4 cup whole-wheat flour
1/4 cup sugar
1/4 tsp salt
6 T cold unsalted butter, diced
1 large egg yolk
Preheat oven to 350 degrees F. Coat 9-inch tart pan with cooking spray or a flavorless vegetable oil. Spread nuts on baking sheet, and toast in oven 12 to 15 minutes, or until browned.
Pulse nuts, flour, sugar, and salt in food processor until nuts are ground to powder. Add butter, and pulse until mixture resembles coarse meal. Add egg yolk, and pulse until moist clumps form.
Press dough into bottom and sides of prepared pan, about 1/4-inch thick, and pierce with fork. [If the dough is too soft to press, freeze it at 5 minute intervals until it's easier to handle. I pressed the dough with a floured juice glass.] Freeze crust for 30 minutes.
Adjust oven temperature to 400°F. Bake crust 12 to 14 minutes, or until golden. Let cool.
Filling
1/2 cup light or regular sour cream
1/2 cup plain Greek yogurt
2 to 3 T light brown sugar
1 tsp vanilla extract
1/4 tsp grated orange zest
1 1/2 to 2 cups blueberries
1 cup raspberries
1 T orange juice
Whisk together sour cream, yogurt, brown sugar, vanilla, and orange zest in small bowl. Toss berries with orange juice in separate bowl.
Spread sour cream mixture in crust with spatula. Spoon berries over top a little at a time, until sour cream mixture is evenly covered.
Refrigerate 30 to 60 minutes before serving.
Wednesday, July 14, 2010
A Sweet Ending (Strawberry N' Cream Cupcakes)
Armed with a pile of cards the weekend before, I began preparing thank you notes to each of them. And along with those, cupcakes inspired by the quintessential summer dessert, strawberry shortcake. Recalling last year's strawberry cake, I couldn't help but make a number of tweaks to bring out this cupcake's full potential. For me, a sprinkling of mint and Kirsch added just the right amount of depth to the filling, but it's completely optional.
In the end, I was really happy I chose to say goodbye in person, and everyone seemed to enjoy my parting gift =D. My eyes misted over quite a few times throughout the day. Despite all the times when I wasn't sure I'd make it from one day to the next, I knew I'd genuinely miss this place and the personal connections I'd made. Which brings me to a question I'd like to ask of you all. I really want to stay in touch with my work friends, including older attorneys, but have never been much good at it. Do you have any tips from your own job/life transition experiences?
Strawberry N' Cream Cupcakes [Printable Recipe]
Makes 24 cupcakes
XIAOLU'S NOTES: These cupcakes are what I'd call "delicate beauties" that need to be devoured quickly lest they wilt in the heat. They'll keep, if chilled, for a couple days after assembly. You can also make the components and chill them until ready to serve. You'll have a good amount of filling and frosting left over, but fortunately they're good on their own, too!
Vanilla Cupcakes (Recipe below)
Whipped Cream Frosting (Recipe below)
2 quarts strawberries, hulled [reserve the 12 smallest & prettiest and slice the rest]
1/2 cup sugar, or more to taste
2 tsp freshly squeezed lemon juice
2 Tbsp fresh mint, finely minced (optional)
2 tsp pure vanilla extract
2 Tbsp Kirsch (optional but highly recommended)
Toss strawberries several times in a bowl with sugar, lemon juice, mint, vanilla, and Kirsch (if using) until very syrupy and set aside. Make whipped cream frosting (see below).
Use a paring knife to cut a shallow cone in the middle top of the cupcake. Spoon some strawberries with syrup over top, allowing it to absorb into cupcakes. Top each with a dollop of cream frosting and a strawberry half. Enjoy!
Vanilla Cupcakes
Adapted from Amy Sedaris
3/4 cup unsalted butter, room temperature
1 1/2 cup sugar
2 large eggs, room temperature
2 tsp pure vanilla extract
2 1/2 cups all purpose flour
2 1/2 tsp baking powder
1/4 tsp salt
1 1/4 cup milk
Preheat oven to 350 degrees F. Grease the tops of 2 standard muffin tins, then line with 24 paper liners. In a medium bowl, sift together the flour, baking powder, and salt. Set aside.
In a different larger bowl, cream butter and sugar together until light and fluffy. Add the eggs and mix until combined into the batter. Then add the vanilla and mix again. Finally alternately beat in dry ingredients and milk. Fill liners until they are about 2/3 full (I like to use my large cookie scoop for this). Bake for 16 to 20 minutes or until golden brown. Let cool completely.
Whipped Cream Frosting
8 oz. cream cheese, room temperature [reduced-fat is fine]
1/2 cup sugar
1 tsp pure vanilla extract
Pinch of salt
2 cups heavy cream
Place cream cheese, sugar, vanilla, and salt in bowl of standing mixer fitted with whisk attachment [or use a large mixing bowl and hand-held mixer]. Whisk at medium-high speed until light and fluffy, 1 to 2 minutes, scraping down bowl with rubber spatula as needed. Reduce speed to low and add heavy cream in slow, steady stream; then increase speed to medium-high and beat until mixture holds stiff peaks, 2 to 2 1/2 minutes more, scraping bowl as needed (you should have about 4 1/2 cups).
Friday, July 9, 2010
Catching Up On A Few Birthdays
What could I make this year to outdo a cake decked out with whipped cream and the season's ripest berries, not to mention one that had saved my fledgling site from the black hole that (I imagine) swallows up abandoned blogs? How about my favorite dessert re-born in a tropical mango paradise? Yes, please! Now beauty and foodgasms can't always come cheap (at least not when you've invited mascarpone, cream, and exotic fruit to the party). But if you've ever believed a word out of my mouth, believe this: this cake is worth every penny.
Sweet and tart, juicy and fragrant, cool and creamy...all the flavors and textures meld perfectly to make every bite a revelation. Other than slicing the mangoes, assembly is fast too. Plus you won't even lose your summer cool, as there's no baking involved. Our 1st blog birthday (and my 25th) was joyous indeed, thanks to this remarkable treat as well as to every one of you lovely readers out there. So much has changed in just a year, and I wouldn't have made it this far without your encouragement. Truly, you all inspire me.
Alright, everyone, you can come out of hiding now. I'm done with all the sappiness ^__^. Now please go make this cake. Like right now. Bring it to a party or throw a party so you'll have an excuse to make it. Whatever it takes to get this deliciousness in your mouth ASAP. And while you're doing that, I'll be here planning all sorts of exciting things to share with you in the coming year :).
Mangomisu Cake [Printable Recipe]
Adapted from delicious. magazine
Serves 8 to 10
XIAOLU'S NOTES: Be sure to let the cake chill completely before attempting to unmold it. I did this too early, so the edges got messy. I ended up putting a cake ring back around the cake, freezing it, and smoothing the edges at the end. As a substitute to Grand Marnier, I boiled down the juice of 2 more oranges to about half the original volume and added 2 tablespoons of dark rum at the end. Since I used the soft type of ladyfingers, I brushed syrup on the ladyfingers instead of dipping them. I include directions for both types below.
500 g [16 to 18 oz.] mascarpone cheese
600 ml [2 1/2 cups] heavy cream
3/4 cup powdered sugar [or more to taste]
2 medium egg yolks
1 vanilla bean, split, seeds scraped [or 2 tsp vanilla extract]
1/2 cup Grand Marnier [see note above]
Juice of 2 medium oranges
300g [about 2 packages] savoiardi (ladyfinger sponge biscuits)
[see note above]
3 large mangoes, peeled and sliced lengthwise 1 cm [1/3-inch] thick
[I used 6 small mangoes and the amount was perfect]
Raspberry Sauce [recipe below]
Line the base of a 22cm [9-inch] springform cake pan with plastic wrap or baking paper. Place the mascarpone, heavy cream, powdered sugar, egg yolks and vanilla seeds in the bowl of an electric mixer and beat on high speed until very thick and well combined.
Combine the Grand Marnier and orange juice in a separate bowl. Dip half the ladyfingers into the juice mixture and layer in the base of the cake pan [or layer then brush the ladyfingers with juice mixture if using the soft variety of ladyfingers]. Spread with one-third of the mascarpone mixture, and top with one-third of the mango slices. Repeat the process, then top with the remaining mascarpone mixture, reserving the remaining mango slices to serve. [I decorated the top with mango slices right away with no problem.] Cover the cake and chill for 2 hours or until firm.
To serve, carefully remove the sides and base of the cake pan and transfer the mangomisu to a platter. Decorate with curls of the reserved mango, then slice and serve with raspberry sauce.
Raspberry sauce
1/4 cup (55g) sugar [or more to taste]
2 T water
2 cups fresh or frozen raspberries
Juice of 1 lemon [I also added 1/2 tsp lemon zest]
Place the sugar and water in a small pan over medium heat, stirring to dissolve the sugar. Cool slightly, then add the berries and lemon juice [and zest, if using]. Whiz in a food processor until smooth or mash well with a spoon, then pass through a strainer, making sure to push as much liquid through as possible. Chill until ready to serve. (You can make the sauce in advance and store it, covered, in the fridge for 3-4 days).
Thursday, June 17, 2010
Rhubarb Raspberry Sour Cream Pie
This rhubarb raspberry streusel pie is one of the several recipes+photos I've had ready to go for a while. But the time and energy to give it proper introduction has been MIA. Yet it'd be a bona fide crime for you all to miss out on this creamy yet crunchy, sweet n' tart treat that's just perfect for the season.
So this is my peace offering, and I sure hope you'll be back to see what else I've got in the works. Very (food) nerdy of me, but you simply can't imagine how excited I am that a student schedule will allow me more daytime hours for baking/cooking and (equally important) photographing the products of my labor. For the fellow working bloggers out there, do you confine your blogging activities to the weekend or settle for artificial light? Personally, the more food photography I take and see, the stronger my preference for natural light. Guess going back to school is a good thing (for more than that reason 8p).
Rhubarb Raspberry Sour Cream Pie [Printable Recipe]
Adapted from Allrecipes
Serves 8
XIAOLU'S NOTES: I found the melted butter in the streusel to be too much, so I added almost double the amount of flour but only used half of the streusel since I didn't want overwhelming sweetness. I suspect Greek yogurt might work as a healthier alternative to sour cream and will try that next time.
1 (9 inch) unbaked pie crust
3 cups chopped fresh rhubarb
1 cup raspberries [if using frozen, let thaw and drain]
1 large egg
1 teaspoon pure vanilla extract
1 1/4 cups white sugar
1 cup sour cream
1/3 cup all-purpose flour
1/4 teaspoon dried ginger powder
1/2 cup all-purpose flour
1/2 cup brown sugar
1/4 cup unsalted butter, melted
1/4 teaspoon cinnamon
pinch of salt
Preheat the oven to 450 degrees F.
Press the pie crust into a 9 inch pie pan. Spread rhubarb and raspberries in an even layer in the bottom of the crust. In a medium bowl, whisk together the egg, vanilla, white sugar, sour cream, 1/3 cup of flour, and ginger powder until smooth. Pour evenly over the rhubarb.
In a small bowl, mix together 1/2 cup of flour, salt, brown sugar, and cinnamon. [If the pie crust starts warming up, put the filled pie in the refrigerator while you prepare the streusel.] Stir in melted butter until the mixture is crumbly. Sprinkle evenly over the top of the pie.
Bake for 15 minutes in the preheated oven, then reduce the heat to 350 degrees F. Continue to bake for 40 minutes, or until the edges have puffed, and the topping is golden. The center may still be slightly jiggly. Cool completely before slicing and serving.
Sunday, March 7, 2010
Raspberry Lemonade Bars
That first encounter was back in fall '09, but the vibrant colors and fun flavors of these bars would continue haunting me until I threw up my white flag and ran straight for the kitchen. Now I promise I won't make any puns about surrender being so (so) sweet. I'm not that cheesy, after all...
But in all seriousness, you really should try these for yourself. The vibrant pink color will garner plenty of attention. Then the sweet tart fruity flavors will surely take everyone who tries them back to childhood summers and maybe even running their own lemonade stand. Isn't it interesting that our favorite desserts often have a tie to the past? I'd love to hear if you have one that brings back particularly wonderful memories.
One last thing -- on a completely unrelated note -- I've been searching for a round white tray with raised edge like this, rectangular white tray with no edge like this, and vintage cooling rack like this. I'd be so grateful if someone could point me in the right direction. Thanks in advance!
Raspberry Lemonade Bars [Printable Recipe]
Adapted from Sophistimom
Makes one 8x8" pan or 16 2" squares
XIAOLU'S NOTES: I iz lazee, so I simply melted the butter and stirred in the dry ingredients. It still tasted great but lacked the pleasant sandiness that I associate with lemon bar bases. Feel free to go either way depending on how much washing you're willing to do afterward 8). A friend made these with lime instead of lemon and reported it was great!
Crust
9 tablespoons unsalted butter (1 stick plus 1 tablespoon)
[I reduced to 1/2 cup and melted it]
1/4 cup (50 g) sugar
1 cup (100 g) unbleached all purpose flour
1/4 teaspoon salt
[I added a few pinches of lemon zest]
Filling
1 1/2 cups (287 g) sugar [I reduced to 1 1/4 cups]
3 large egg whites
1 large egg [I simply used 2 eggs and NO whites]
2/3 cup (150 mL) fresh lemon juice (from 2-3 lemons)
2 tablespoons lemon zest (from 2 lemons)
2/3 cup (65 g) unbleached, all-purpose flour
Pinch of salt
1 cup (150 g) frozen raspberries, defrosted
1 tablespoon powdered sugar [I used a few more]
Preheat oven to 350 degrees F (180 degrees Celsius). Line a 8×8″ square baking pan with a strip of parchment paper (8×14″) that covers the bottom and overlaps on either side. (This is so after it cools, you can pull out the entire pan of bars and cut them neatly. You can omit this step completely, though, in which case you need to butter the pan well.)
Cream butter, sugar, and salt with an electric mixer. Mix in flour until just incorporated. Flour hands and press dough into 8×8″ square baking pan, so that it comes up about a 1/2 inch around the sides.
Bake for 20-25 minutes, or until slightly golden brown. While it cools, prepare the filling.
Whisk sugar, eggs, lemon juice and zest, flour, and salt in a large bowl. Pour raspberries into a sieve and press through to extract all the pulp and juices. Whisk into lemon mixture and pour into crust. Bake for 30-35 minutes until filling is completely set. Let cool completely. (I help mine along in the freezer for about an hour.) Using the overlapping edges of parchment paper, gently lift the dessert from the pan. Cut into 16 squares. Dust generously with confectioner’s sugar.
Saturday, November 14, 2009
Blackberry Kuchen
Oh blackberry kuchen, could I have fallen any harder for you? It had seemed a lost cause to drag myself out of bed this dreary Friday morning. That is, until I remembered you sitting so prettily in the fridge. Just waiting for my curious fork. For my eyes to widen as taste buds registered your delightfully tangy sweetness, your unexpected creaminess. I'm still rather embarrassed at how a squeal of delight escaped right then.
And while we're having our little chat, let me just say sorry for ever doubting your potential. With a measly 4 tablespoons of butter and low-fat yogurt, your ingredient list didn't quite scream "fabulous!" Oh but you were, and it's ironic now that you've made me giddier than most cakes with 2-3 times the fat. You were a hit with my coworkers too and sadly disappeared faster than I could say "seconds." But no matter. I expect to bring you back within the week to meet my mom. Yes, you're that good. But do try not to let it go to your head. Yours truly, Xiaolu.
Blackberry Kuchen [Printable Recipe]
Adapted from Better Homes and Gardens: New Baking Book via How To Eat A Cupcake
Makes 1 9-inch cake (up to 12 servings)
XIAOLU'S NOTES: I think any berries or cherries or even peaches would work well in place of the blackberries. Though the directions say not to grease the pan, I lined the base in parchment and might lightly grease the sides next time to ensure a clean release.
1 cup all-purpose flour
1/2 cup sugar
1/8 teaspoon salt
1 teaspoon baking powder
1/4 cup butter, melted
2 large egg whites (save the yolks for the filling)
1 teaspoon pure vanilla extract
2 cups fresh or frozen blackberries or raspberries (I used frozen blackberries)
Filling
2 large egg yolks (saved from egg whites used for base)
1 large egg
2 Tbsp all-purpose flour
1/2 cup sugar
1 1/2 cups plain low-fat yogurt [use Greek yogurt for a firmer custard]
1 1/2 tsp lemon zest (from about 1/2 a lemon)
a pinch of salt
1 tsp pure vanilla extract
1/4 tsp almond extract (optional)
Preheat the oven to 350 degrees F. If using frozen berries, thaw at room temperature 15 minutes; drain.
For the filling, place egg and yolks in a large mixing bowl then mix well. Sprinkle with 2 tablespoons flour and stir again until smooth. Add 1/2 cup sugar, yogurt, lemon zest, salt, and vanilla and almond extracts. Mix until evenly incorporated; set aside.
In a medium mixing bowl, sift together 1 cup flour, 1/2 cup sugar, salt, and baking powder. Add butter, egg whites, and 1 teaspoon vanilla. Gently stir everything together by hand until mixed well. (Mixture will be like soft cookie dough.) Spread onto the bottom of an ungreased 9-inch springform pan; sprinkle berries on top. Pour the filling prepared earlier over the berries.
Bake the kuchen for about 55 minutes or until center appears set (slightly wobbly) when shaken gently. Cool in the pan on a wire rack for 15 minutes; undo the clasp on the side of the pan and remove the ring. Cover the kuchen and chill it in refrigerator for 4 to 24 hours.
To serve, remove the pan bottom. Transfer to a platter.
Saturday, August 15, 2009
Muffin WIN
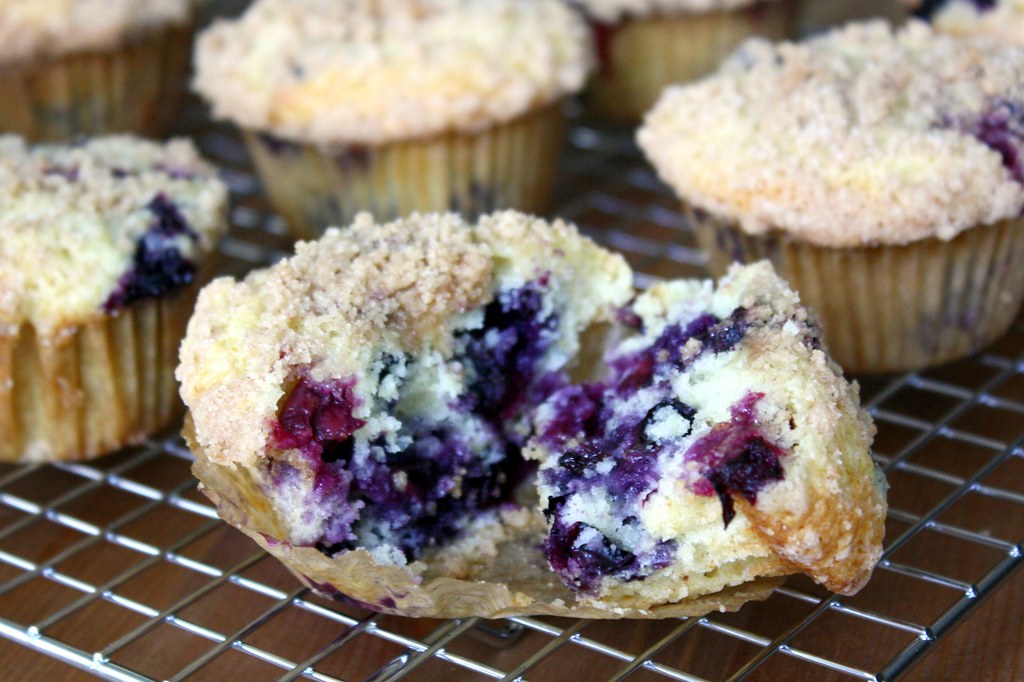
So I'm back and refreshed from a wonderful week at the beach! We actually got in so recently that there's still sand in my ears =), but I couldn't wait a second longer to gush about these scrumptious muffins that I'd brought with us. Although it's not documented here, I've had quite the bumpy history with from-scratch muffins. Sure, I've had some moderate success recently and discovered that recipes with bananas somehow manage to survive even my muffin misfortune. But I struggled on in search of THE berry muffin recipe that could live up to the ideal in my mind: sweet but not tooth-achingly so, bursting with fresh berry flavor, and possessing a tenderness reminiscent of cake, yet with enough substance to get me through an entire morning.
Well call off the search 'cause I FOUND IT. Just in time too. With the specter of one-too-many-rubbery-muffins-past looming over me, I'd begun to doubt that I'd ever conquer this classic breakfast treat. Oh boy did perseverance pay off, and who knew victory would taste so sweet...and tender? I made a few tweaks to make the original recipe even better, I dare say. If anyone else out there is, like I was not so long ago, desperate for their first unequivocal muffin success, please give this one a spin. You won't regret it. Nor will you be able to stop eating them while simultaneously patting yourself on the back (I particularly pride myself on this kind of multitasking). And in case you don't inhale them all the first day (unlikely), these keep well for several days. Just be sure to cool them completely before storing or the topping will get soggy.
S'About Time Blueberry Muffins [Printable Recipe]
Adapted from To Die For Blueberry Muffins posted on Allrecipes
Makes 12 muffins
XIAOLU'S NOTES: I've read that frozen blueberries will work as well, but that you have to toss the frozen fruit in a light coat of flour before gently folding into the batter to prevent the color from bleeding during baking.
2 1/4 cups (10 oz.) all-purpose flour
1 cup sugar
Slightly rounded 1/2 tsp salt
1 Tbsp baking powder
1/3 cup vegetable oil
2 large eggs, room temperature
1/2 cup yogurt (thin out with milk if too thick) OR buttermilk
1/2 Tbsp lemon or orange zest
1 tsp pure vanilla extract
1 1/2 cups fresh blueberries
1/4 cup sugar
1/3 cup (1.5 oz.) all-purpose flour
3 Tbsp butter, cubed
1 tsp ground cinnamon
Preheat oven to 400 degrees F. Grease muffin cups or line with muffin liners.
To Make Crumb Topping: Mix together 1/3 cup sugar, 1/3 cup flour, 3 T butter, and 1 teaspoon cinnamon. Mix with fork, and set aside.
To Make Muffin Batter: Sift together 2 1/4 cups flour, 1 cup sugar, salt, and baking powder into a medium to large mixing bowl. Mix dry ingredients to combine thoroughly and make a well in the center. Place vegetable oil into a 1 cup measuring cup; add the eggs, yogurt or buttermilk, zest, and vanilla. Pour the liquid ingredients into the flour mixture and mix very gently just until combined. Gently crush about a third of the blueberries with your hands or a spoon, then lightly fold all the berries into the batter.
To Assemble and Bake: Fill muffin cups right to the top (I like to use my 2 oz. cookie scoop for this), and sprinkle with crumb topping mixture (I was pretty generous in application and still had a little left over). Bake muffins for 20 to 25 minutes in the preheated oven, or until a toothpick inserted into the center comes out clean. Transfer to a wire rack and let cool for about 5 minutes before removing from pan.