Showing posts with label on-a-stick. Show all posts

Saturday, October 1, 2011

Simplicity At It's Best (Cherry Pistachio Goat Cheese Balls)

There are few things better than a relaxing week at the beach amidst the heat of summer. And if it's with a family that knows how to have fun and enjoys good food and drink as much as I do, then so much the better! Of course I'm referring to my beach week in Emerald Isle, NC back in August with P's Dad's family. Though I'd met almost everyone there before, this was actually the first opportunity I'd had to really get to know them.

Not only did I learn more about them, but they also got to know more about me. Including, surprisingly enough, my love of cooking and baking. Since the house they rented came with a fully stocked kitchen, I made them a bevy of treats including Oreo brownies, guacamole, tomato vodka pasta, and cheddar scallion biscuits.

Cherry Pistachio Goat Cheese Balls
In return they impressed me with an assortment of delights such as shrimp ceviche, fish tacos, apple pear and blueberry pie (using fruits straight from Uncle R's farm!), and a cranberry pistachio goat cheese log. The cheese log idea from P's awesome cousins, K and L, especially stuck with me with its ease of preparation and impressive presentation and taste. Sadly I can't bring the beach (or this wonderful family) to you, but I'm convinced this simple, elegant, and very tasty appetizer is the next best thing 8).

P.S. - If you're a US resident, don't forget to enter my giveaway of 100 custom-designed postcards (can also be used as invitations/holiday cards)! Only one more day to enter.

Cherry Pistachio Goat Cheese Balls [Printable Recipe]
Serves 6 to 10

6 oz. goat cheese, cool room temperature
3/4 cup tart dried cherries OR cranberries, finely chopped
1/2 cup shelled pistachios, lightly toasted and finely chopped
Large pinch of salt, optional
8 to 10 toothpicks, optional
Crackers, to serve

Add 3 tablespoons of chopped dried cherries to the goat cheese and mix in just until incorporated. Combine the remaining cherries and chopped pistachios in a medium-sized shallow bowl or deep plate. If pistachios aren't already salted, add a large pinch of salt to the mixture to taste. Divide goat cheese cherry mixture into 8 to 10 evenly-sized balls. Roll each ball in cherry pistachio mixture until well covered, and transfer to serving plate. Put a pick into the center of each ball, if desired. Serve immediately with your favorite crackers or refrigerate until ready to serve (up to 1 day).

Monday, August 22, 2011

Cookies N' Cream Cake Pops (Guest Post for White Magazine)

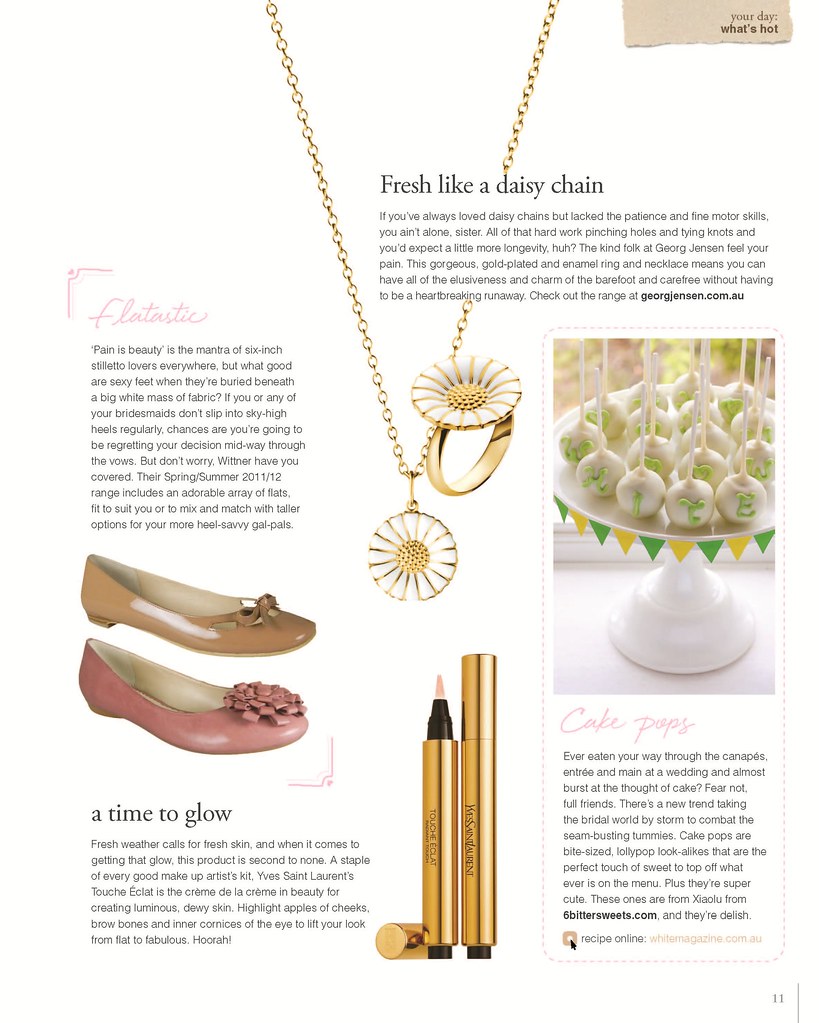
UPDATE: I just received a scan of my photo and mention in the hard copy of White Magazine! This is the first time I've been published anywhere, and I keep having to pinch myself. Here's the proof that it's really happening =D!

Cookies N' Cream Cake Pops
Months ago, I was stunned to receive in my inbox a request to guest post for the gorgeous Australian wedding magazine, White. Of course I eagerly accepted and decided to share not only the recipe for my popular Cookies N' Cream Cake Pops...but also a little peek into the role of food in my relationship with P. Now that White's latest issue is out, I'm happy to finally be able to debut my guest post =D. Please head over to White's Facebook page to check out my full Cookies N' Cream Cake Pops post with recipe! If you need to jump straight to the recipe, you can find it here.

Cookies N' Cream Cake Pops

Friday, May 6, 2011

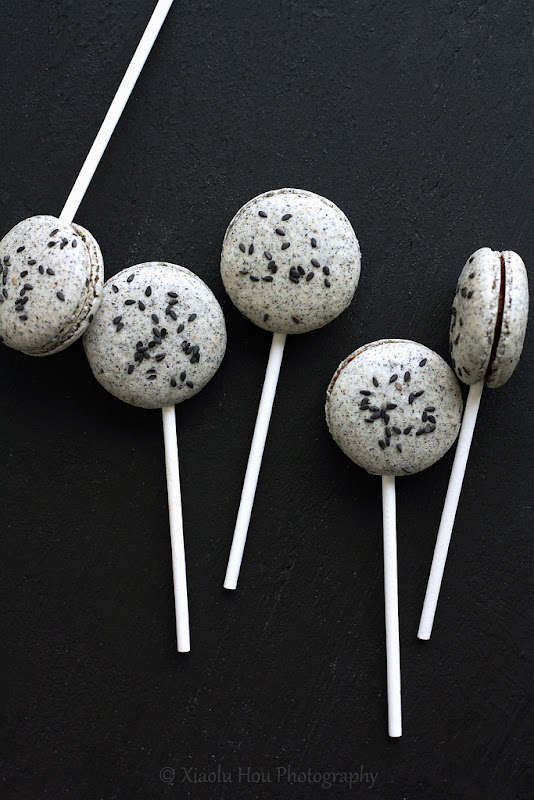
You Might Call Me Hooked... (Black Sesame Macaron Pops with Mochi Filling)

Black Sesame Macaron Ingredients
I think anyone who knows me well would tell you that I have what some would call an "addictive personality." No, thankfully I don't mean any illegal substances or alcohol! But I can become intensely interested (let's not use the O-word here...;p) with things very quickly and often develop an unlimited capacity to read or watch about that thing. For example, my boyfriend P will often walk in on me completely engrossed in a TV show and ask what it is. My reply? "Oh I'm not sure I just came across it 5 minutes ago," which of course leaves him totally perplexed. Or in middle school when I discovered that the huge company Proctor & Gamble made so many of our household products, I became so curious in them that I read a 300+ page book about the history of the company.

But anyway, the real point here is that no one should be surprised that after finally baking my first successful macarons, I caught the Mac Bug bigtime ^_^. Both before and after that batch, I've poured over countless tutorials from fellow bloggers, YouTube videos, and basically any piece of helpful information on the process that I could get my hungry eyes and greedy hands on hehe. But as I learned in my previous attempts, there's no education like rolling up your sleeves and getting in the kitchen. Especially after I remembered the black sesame seeds still stashed in my freezer, it didn't take long for another mac creation to materialize.

Black Sesame Macarons with Chocolate Mochi Fillings
Since I already gushed over the addictive flavor and health benefits of black sesame in my black sesame matcha cupcake post, I'll spare you this time and just send you over there for the details. It delights me that the sesame in these macarons is impossible to miss with respect to appearance, flavor, and fragrance -- as it should be! Still, I couldn't help adding a bit of sesame powder to even the chocolate filling for a double dose of deliciousness (even if it upset the Chinese traditionalist in me just a tad ;p). Finally I had one more Asian twist up my sleeve: a chewy mochi center!

This unusual mix of French and Asian flavors, of crisp, moist, and chewy textures was definitely a risk for me. Especially for what was only my second date with lovely Mr. Macaron, but it definitely paid off! These have been a real hit with my friends, both Chinese and not. Some found them so addictive that my pleas to wait 24 hours before eating them were beyond futile. But that's really not something to complain about =D!

Black Sesame Macarons Bitten
Lastly, many of you left comments to my Snickers Macarons post saying you were still afraid to try these persnickety French treats (I may be paraphrasing haha). I just want to encourage you all to just take the leap! I was just like you for years, thinking that if I just read another post or watched another video I'd finally be ready. But honestly you just have to jump in and do it, and it's not nearly as scary as you think. Yes, there will be imperfect batches (or you may be one of those lucky people who get it on the first try!) but they will still be delicious and impress your friend I promise. In fact I actually underbaked this batch a smidge and got shorter "feet" than I'd have liked, but now I see it as a valuable lesson and look forward to improving the next batch! I hope more of you will join me in my macaron explorations and can't wait to hear about your successes!

Black Sesame Macaron Pops with Mochi Filling and Ganache
[Printable Recipe]
Fillings adapted from Bonbini and Evan’s Kitchen Ramblings
Makes about 25 to 35 macarons

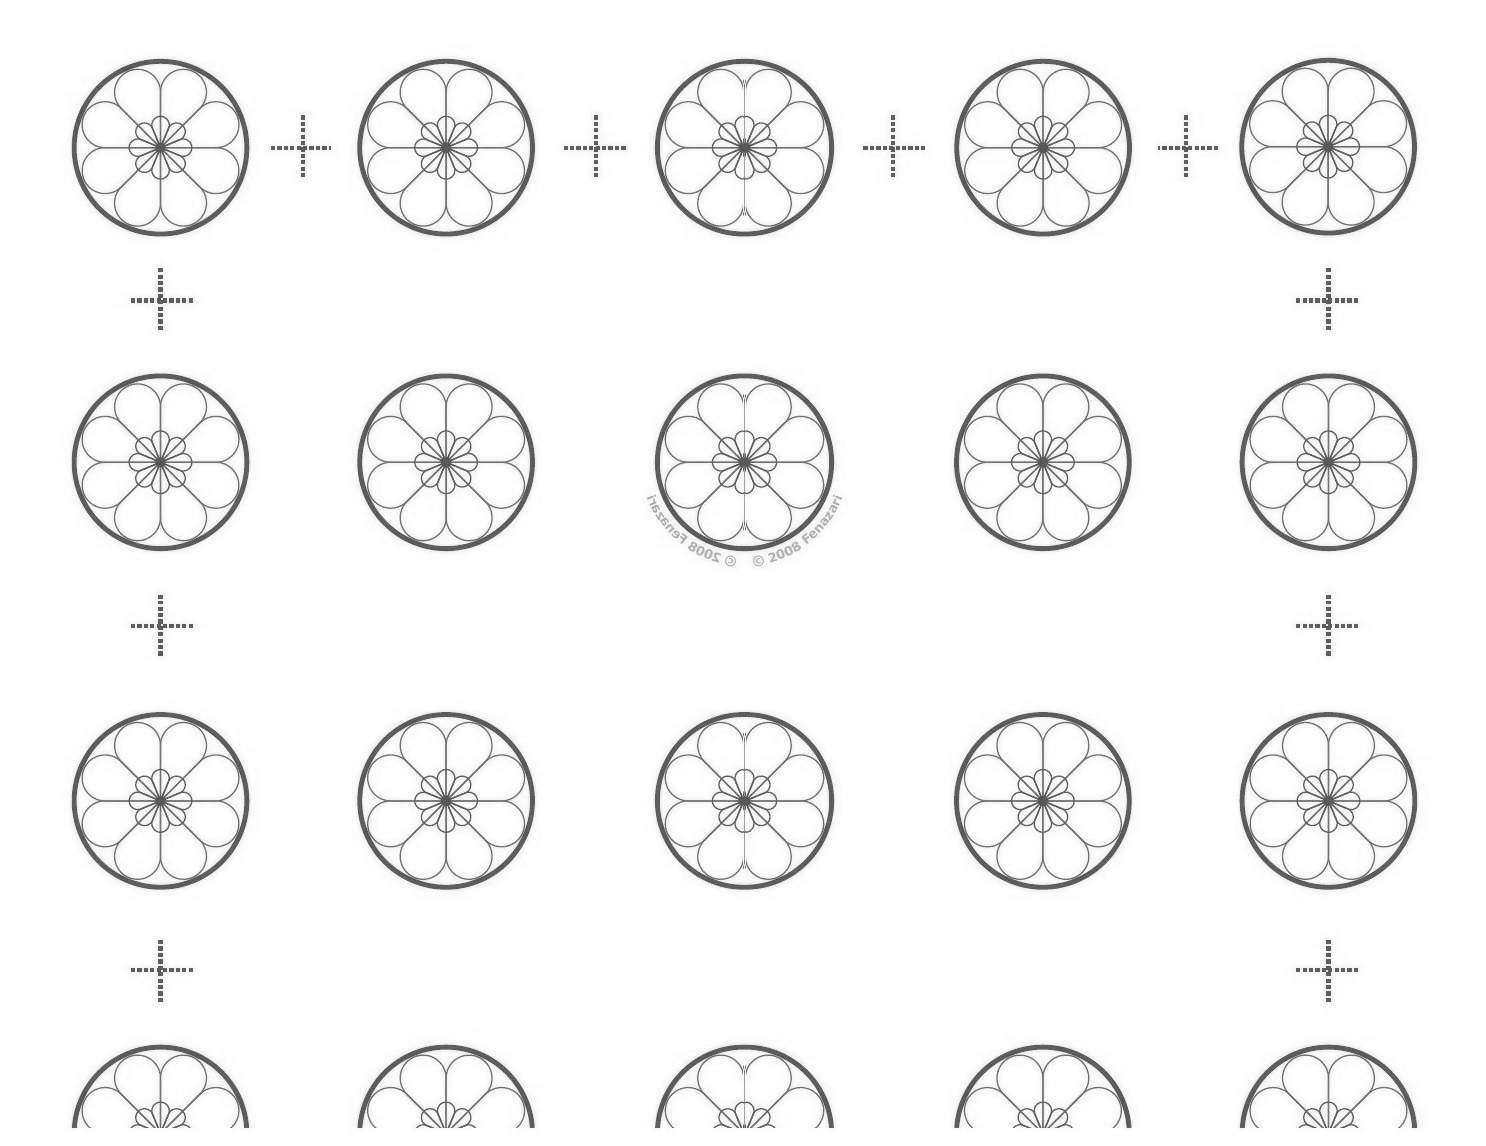
XIAOLU'S NOTES: Please do not try to convert this recipe to volume measurements if you don't have a scale (I use and love this one). This recipe is very sensitive and will not work if the measurements are not exact. Please also note that every oven is different and you'll figure out what works best for yours over time. Since mine has major hot spots, I bake on 2 stacked pans for insulation (see this post for great information on ovens and macarons). If you're uncertain of your ability to pipe uniformly-sized macarons, like me, simply trace 1 1/4-inch circles on your parchment paper, flip the paper over, and pipe on the other side, using the outlines as your guide OR print (choose "fit to page") and slide this template under your parchment as a guide but don't forget to remove before baking! Macarons are best after having been refrigerated for 24 to 48 hours, according to French pastry master, Pierre Herme, "An osmosis takes place between the garnish and the biscuit. When freshly baked this is hard and crisp, but it absorbs some humidity from the filling and its inside becomes more tender while the crust on the surface stays intact" (quote via Not So Humble Pie). So even if you accidentally overbake the shells by a few minutes, maturing the macarons in the fridge for at least 48 hours should undo most of the damage =). See my first macaron post for helpful videos of the whole macaron-making process!

85 g almonds [not roasted or salted]
40 g black sesame seeds
145 g powdered sugar
Pinch of salt
40 g granulated sugar
3 g egg white powder [optional, to stabilize batter in humid weather]
95 to 100 g egg whites [about 3 large egg whites]
1/8 tsp cream of tartar or 1/4 tsp lemon juice [optional, to stabilize meringue]

1/2 cup Black Sesame Ganache (Recipe below)
25 to 35 Pieces of Mochi Filling (Recipe below)
25 to 35 4-inch lollipop sticks

Microwave fresh egg whites 10 to 15 seconds in the microwave on medium heat.

Combine the almonds, sesame seeds, powdered sugar, and salt in a food processor, and pulse on and off until the nuts are finely ground (about 1 to 2 minutes). Sift the powder to remove any large chunks that remain. Put those chunks back into the food processor and pulse again for another 30 to 60 seconds. Sift again. You will probably have some slightly chunkier almond bits. Hopefully they're no more than a tablespoon or so, in which case you can throw them out.

Weigh out and mix your granulated sugar and egg white powder in a small bowl until uniform; set aside. Using a handheld or stand mixer, whip the egg whites on medium-low speed with cream of tartar until foamy, then turn the speed up to medium to medium-high and gradually add the sugar mixture until you obtain a glossy meringue (it'll look like shaving cream, hold stiff peaks, and stay in place if you turn the bowl upside-down; but don't overbeat your meringue or it will be too dry).

Add all of the nut mixture to the meringue and fold together. Use both a folding motion that scrapes the bottom of the bowl (to incorporate the dry ingredients) and a gentle pressing motion, to deflate the meringue against the side of the bowl. Slow down after all the dry ingredients have been incorporated, and continue folding the mass carefully until you obtain a batter that looks somewhat glossy and flows from the spatula in a thick ribbon. Test the batter by spooning a small amount of the batter up, then dropping it back down on itself. If it melts back into the rest of the batter within 30 seconds, it's ready for piping (this page has a nice photo of this test). If not, fold 2 more strokes and test again.

Fill a pastry bag fitted with a 1/3 to 1/2-inch wide plain tip (I like Ateco #804 or 806) with half of the batter. (When your bag is too full, the pressure causes the batter to rush out in a way that’s difficult to control, making for sloppy macarons.) Pipe tiny blobs of batter onto the 4 corners and center of 2 baking sheets, then line baking sheets with parchment paper OR line with silicone mats. Pipe small rounds (slightly larger than 1 inch wide) straight down and about 1 inch apart onto the baking sheets. Pick up each sheet with both hands and slam it firmly straight downward on the counter 2 to 3 times. This will to force out any large air bubbles. Immediately pop any bubbles that rise up but don't break with a toothpick. Do NOT do this once a few minutes have passed because you'll mess up the shell that's forming.

Preheat the oven to 320 degrees F. Let the macarons sit out for 25 to 90 minutes to harden their shells a bit (to prevent tops from cracking during baking). Test if they're ready by touching the top and side of one shell lightly. It should feel dry and not stick to your finger at all. Bake one pan at a time for 5 minutes in the middle shelf of your oven. Now lower the temperature to 300 degrees F and continue baking another 10 to 15 minutes, depending on the size of the macarons. Turn oven back up to 320 degrees F and let it come to temperature again before baking the next batch. Let cool completely before trying to move the shells.

Once cool, flip the shells over. If you have trouble removing them from parchment paper, pour a couple of drops of water under the paper while the sheet is still a bit warm, and the macarons will lift up more easily due to the moisture. Don't let them sit there in it too long or they will become soggy.

Fill the shells (spooning or piping) with 1 teaspoon of ganache, top with a mochi round, add another small dollop of ganache (just enough to cover the mochi because the macaron shell will cause the mochi to dry and harden if they touch directly), and a similarly-sized top shell. For the best flavor and texture, store in the refrigerator for 24 to 48 hours before eating (see notes above for detailed explanation) but they are best if eaten within 5 days. Bring to room temperature before eating.

Black Sesame Ganache
1/3 cup heavy cream
3 oz. semisweet chocolate, roughly chopped
2 tsp honey or light corn syrup
1 Tbsp ground black sesame powder
Pinch of salt

In a small saucepan over medium high heat, bring the cream to a boil. Meanwhile, place chopped chocolate into a small heatproof bowl. Remove cream from heat, pour over chocolate and let stand 5 minutes. Add honey or corn syrup, sesame powder, and salt, then stir everything together until smooth. Set aside until it cools down and thickens a bit (chilling in the fridge or freezer is fine).

Mochi Filling
2/3 cup glutinous rice flour [like Mochiko brand]
Slightly rounded 1/3 cup powdered sugar
2/3 cup PLUS 2 Tbsp water, divided
Cornstarch, for dusting

Put water and 1/4 cup powdered sugar in a microwave-safe bowl and mix well until sugar has dissolved. Add glutinous rice flour to the bowl and mix well until uniform. Put the bowl in the microwave and heat the dough on high heat for 2 minutes. Stir. If the dough pulls away from the side of the bowl, add the remaining 2 tablespoons of water until combined. If not, return bowl to the microwave and heat in 20-second intervals until the dough pulls away from the sides of the bowl, then mix with the remaining water.

Dust a flat pan and your hands with cornstarch. Carefully transfer the hot mochi from the bowl to the pan. Let cool slightly until you can handle the mochi with your hands. Keep your hands well dusted in cornstarch. Cut small pieces of mochi and roll them in your hands so that you end up with about 25 to 35 fairly flat 3/4-inch rounds.

Saturday, April 16, 2011

International Incident Party! (Boston Cream Pie Cake Pops)

Boston Cream Pie Cake Pops...
This has a "vintage" feel mostly because I ran low on light! 8)
Is anyone else sick of hearing that this or that treat is going to be "the next cupcake"? The sweets I've heard mentioned most are cake pops, French macarons, whoopie pies, and now even regular pies. I mean I know what what people mean when they say it (i.e., "the next big thing"), but please just let each treat have it's own identity! Plus I'm pretty sure actual cupcakes ain't goin' away anytime soon 8).

Partly due to my aversion to fads plus just plain lack of interest, I'd neither tasted nor made cake pops until last month. Then one rainy night right after a particularly painful chemistry exam, I really needed some sugary cheer. Thats when I caved to the adorable pink "birthday cake pops" at Starbucks. Big mistake...after struggling to even bite through the overly thick candy coating, my taste buds balked to be assuaged with greasy, tooth-achingly sweet mush that had long lost any resemblance to real cake.

Boston Cream Pie Cake Pops In Progress...
Was this what all the fuss was about? was my first thought. But the funny thing is (and this will tell you something of my personality) rather than put me off from cake pops forever, this experience made me suddenly determined to redeem what was actually a pretty great idea for parties and/or for using leftover cake. I was on a mission, ladies and gentlemen, to save the cake pop from my own worst judgment! It seemed to be fated, then, when Penny of Jeroxie announced her latest blog event, the International Incident Cake Pops Party, the very next week. Now I had some serious motivation to try my own cake pops at home.

So it's nearly impossible to mention cake pops without mentioning Bakerella. While I'm not certain she "invented" the treat, she's the one person most responsible for their ever-increasing popularity as far as I can tell. My first stops in formulating my own recipe were naturally her blog and very helpful video tutorial.

Other than the usual goal of creating cute n' tasty treats, I had several others in mind: to avoid (1) an overly mushy/greasy/sweet filling, (2) flavorless cake, and (3) excessive coating. My solution was to make cake and frosting from scratch and only dip my pops once in each coating. By going homemade, I held more control over the flavor and sweetness of my filling. While the appeal of storebought mix and frosting is understandable, you can't expect great taste from such ingredients. The last and trickiest part of cake pops for me was the texture. Too little frosting and the pop falls apart, too much and it's got the mouthfeel of gooey paste. Considering the variation of moistness in cakes, I highly recommend adding a little frosting at a time until it feels right over dumping in a whole can.

Fail Pops =p
Fail Pops: before I figured out the best dipping method =p
Now for the fun part...the flavor! My inspiration for these pops was Boston Cream Pie, which is not a pie but a yellow cake with pastry cream and chocolate glaze. I had a lot of fun figuring out how to incorporate a soft filling into the pop. While you obviously won't get the same lovely texture contrasts as in the original cake (which I highly recommend you try), I'm really pleased with how my cake pops turned out. The filling is creamy, not too sweet, and as flavorful as the yellow cake that went into it. The chocolate coating is a ganache and thus a little softer than melted chocolate, which makes it a bit more reminiscent of glaze. And the pastry cream filling adds a bonus surprise, allowing you to experience 3 textures in one bite-size treat.

Lastly, please don't forget to check out the cake pops of all the other International Incident partyers by clicking on the thumbnails at the bottom of this post below the recipe.
Also remember to nominate your favorite blogs for Saveur Magazine's 2011 Best Food Blog Awards (nominations close April 22; finalists to be announced April 26)!


P.S. - I finally created a Facebook page for my little blog. I'd be honored if you'd check it out and "like" it =D

Boston Cream Pie Cake Pops [Printable Recipe]
General procedure adapted from Bakerella
Makes 45 to 50 lollipops

XIAOLU'S NOTES: Honestly it's fastest and easiest to use your hands to work with the cake mixture, so wash 'em up and dig in! =D Though I was hoping to achieve a more cake-like texture to these pops, I eventually realized that a certain amount of "mushing" is required to make the pop adhere to the stick and itself. If you've never tried cake pops before, please be prepared for a creamy, truffle-like consistency inside. Do NOT use water-based liquid or gel coloring as this will cause the chocolate to clump up.

Moist Yellow Cake (Recipe below or use your favorite)
1/2 cup (1 stick) unsalted butter, room temperature, as needed
1/2 cup powdered sugar, sifted and as needed

Pastry Cream Filling (Recipe below)
1 lb. white chocolate chips
1 Tbsp trans fat-free shortening (such as Earth Balance)
1 tsp canola or vegetable oil
Cream/brown/yellow oil-based or powder food coloring (optional)
6 oz. semisweet chocolate, roughly chopped
1/4 cup heavy cream
1 tsp unsalted butter
1 Tbsp light corn syrup

About 45 to 50 lollipop sticks
Styrofoam block, to hold cake pops upright while drying

Transfer pastry cream to freezer. After cake has cooled completely, crumble it into a large bowl, removing any overcooked/crusty pieces. Try to roll the mixture into a quarter-size ball. If the ball isn't moist enough to hold together, you'll need to add some buttercream. Make the buttercream by beating the butter with an electric mixer until light and fluffy. Add the powdered sugar and mix in thoroughly. Now add buttercream 1 to 2 tablespoons at a time to the cake mixture, incorporating it into the crumbs completely between each addition, until the mixture is moist enough to hold together in a ball.

Line 2 large baking pans with parchment paper, and take the pastry cream out of the freezer. Make round "bowls" out of about 1 tablespoon of the cake mixture (make the middle hole with your fingertip) and fill the middle with a scant teaspoon of cold pastry cream. Press another 1/2 tablespoon of cake mixture to make a "lid" for the "bowl." Cover the cream-filled cake ball with the cake piece, press edges together, and roll/press the cake ball to make an approximately 1 1/2-inch diameter cake ball. Repeat until the remaining cake mixture has been used up.

Place white chocolate chips and shortening into a heatproof bowl and microwave at 30-second intervals, stirring between each, until it's completely melted. Add cream/brown and yellow food coloring a little at a time, mixing thoroughly between each, until you have a light yellowish-tan cake color. Mix in the vegetable oil. Dip the tip of your lollipop sticks in a little melted chocolate and insert into the cake balls (about halfway in). Place in the freezer for 15 to 20 minutes to firm up so they won't melt when dipped in the hot chocolate.

Once firm, carefully hold a cake pop sideways (but angled slightly upward) just above the melted chocolate, and quickly pour 3 large spoonfuls of melted chocolate over the ball, then rotate the ball to the opposite side and do the same. Now check if any spots are still uncoated and pour large spoons of chocolate over them. Once covered, softly tap the stick against the edge of the bowl for about 10 to 15 seconds until the excess chocolate drips off. Don’t tap too hard or the cake ball will fall off, too! And do NOT rotate the stick or the coating won't be as smooth anymore. Stick cake pops straight down into a styrofoam block to dry or place down onto a parchment-lined pan with the sticks pointing straight up. Do NOT refrigerate as this will lead to condensation on the coating (freezing is fine).

Meanwhile, place heavy cream in a small saucepan and bring to a boil. Place chopped semisweet chocolate in a heatproof bowl. Pour boiling cream over the chocolate and let stand 5 minutes. Stir the mixture until smooth and shiny. Add butter and corn syrup and mix well. Allow to cool for 10 to 15 minutes. Dip the cake pops diagonally into the chocolate, then hold over the bowl for a few seconds to allow excess to drip off. Place cake pops back in styrofoam block or on parchment-lined pan. Let cake pops cool completely or freeze, then enjoy at cool room temperature with friends!

Moist Yellow Cake
Makes a 2-layer 9-inch cake

2 1/4 cups all purpose flour
1 1/2 cups sugar
3 1/2 tsp baking powder
1 tsp salt
1 cup PLUS 1 Tbsp milk
1 tsp apple cider vinegar
1 1/2 Tbsp canola or vegetable oil
1/2 cup (1 stick) unsalted butter, softened
1 3/4 tsp pure vanilla extract
3 large eggs, room temperature
3 large egg yolks, room temperature

Preheat oven to 350 degrees F. Cut parchment paper to fit the bottom of two 9 x 1 1/2-inch round pans. Grease the pans lightly with oil or cooking spray, then place the paper in the pans and grease the paper.

Sift the flour, sugar, baking powder, and salt into a large mixing bowl. Add the milk, vinegar, oil, butter, and vanilla to the flour mixture and beat with on medium to medium-high speed for 1 to 2 minutes, scraping the sides of the bowl as needed. Add the eggs and yolks and continue beating an additional 2 minutes. Divide batter evenly between the prepared pans.

Bake for 22 to 30 minutes or until a toothpick inserted near the center of a cake comes out clean, or until cake springs back when touched lightly in the center. Cool cakes on wire racks for 15 minutes; remove from pans and cool completely.

Pastry Cream Filling
Adapted from Bakewise
Makes about 1 cup

2/3 cup milk [not skim]
1/4 cup heavy cream
3 1/2 Tbsp sugar
1/8 tsp salt
2 Tbsp PLUS 1 tsp cornstarch
2 large egg yolks
3/4 tsp pure vanilla extract
1 Tbsp unsalted butter

Add milk and cream to a medium saucepan. Heat over medium heat until the liquid starts to produce steam. In medium heatproof bowl, combine the sugar, salt, and cornstarch and stir until evenly combined. Drizzle the hot liquid mixture into the sugar mixture, whisking immediately and continuously. Return to the saucepan and cook over medium heat until the mixture thickens, stirring constantly.

In a medium bowl, stir together the egg yolks. Whisk about 1/4 cup of the hot mixture into the yolks, then add the yolks to the saucepan. Bring everything to a boil, stirring continuously and scraping the bottom, until the custard thickens and becomes smooth. Make sure to bring the entire mixture to a good boil; otherwise, the enzymes in the egg yolks will break apart the starch and the custard will become soupy instead of thick.

Pour the custard into a bowl and cover. Stir in vanilla and butter, mixing until butter is completely melted and mixed in. Once it has cooled to room temperature, transfer to the refrigerator and chill for at least 2 hours.