Not sure how many of you follow me on Twitter, but I've been yappin' about macarons a lot lately and posted this teaser image for a future post last week. Little did I know at the time, but successful macarons would elude me for over a week. So those of you who saw that image had plenty o' time to figure it out! If you put 2 and 2 together and guessed my next post would be Snickers macarons, you get brownie points from me today! =D
 Similar to my first successful souffles, which took me 5 attempts to attain, the 5th time was the charm for my triumph over macarons (Here's some evidence of my failed attempts...I really hope this doesn't become a pattern!). And I must divide credit among my Twitter friends Stella of Bravetart, Kaitlin of Whisk Kid, Josie of Daydreamer Desserts, Steph of Desserts for Breakfast, Mardi of eat.live.travel.write., and of course the Macaron Queen herself, Helene of Tartelette for their invaluable advice helping me to troubleshoot each failed batch until I got it right this morning. Thank you so much, ladies!
While you probably expect I got frustrated with all these failures (and I did at times), I actually got very invigorated by the learning process. The aggravating yet oddly fun thing about macarons is that there are so many ways to go wrong 8). When each batch came out with a new set of problems, (after the initial wailing) it was fun to play detective, teasing out causes to each symptom. I learned a lot, the most important being that 3 factors really make or break French macarons: properly whipping up the egg whites to stiff peaks, knowing when to stop mixing the batter, and knowing your oven (especially any major hot/cold spots). Each of my failed attempts resulted directly from a failure to do one of the above, and once I figured them out I got the results I wanted. On the flip side, humidity and heat are NOT the great saboteurs of macaron success you've heard them to be. It was warm and humid (rainy with no AC!) all 5 times I baked them but hottest and wettest on the day I succeeded 8).
 If you'll remember, this is the second in a series of chocolate posts that began with my chocolate chunk challah french toast. Plus I'm submitting these to this month's MacTweets challenge: "Decadently Chocolate." Macarons may not be such an unusual way to feature chocolate, but Tartelette's idea to transform a common candy bar into a fancy macaron drew my curiosity enough to warrant a try (or 5 in this case =p). And in the end, I was very impressed. These adorable treats combine the best of both worlds: the classic taste of Snickers bars with the delicate texture and portion-control (ha!) of macarons. Do you love chocolate, Snickers, and/or macarons? If the answer is yes, I really recommend you try these soon!
Now I've probably scared you with all this talk of failed macarons and the recipe below will look impossibly long at first glance, but please rest assured that it's really not so hard. Macaron-making is simply a process that requires hands-on familiarity to perfect, and if you focus on the 3 key things I listed above, you'll have it down in no time. To give you a head's start, I've included some helpful videos below (not my own!) and lots of useful tips in the body of the recipe (which is why it's so long!). Once you've run through the process once or twice, you won't even look at directions anymore 'cause it'll be second nature. And if you learn anything from my experience, I hope it's to try try and try again! While I'm a beginner myself, I'd be happy to answer any macaron questions you may have via Twitter or email.
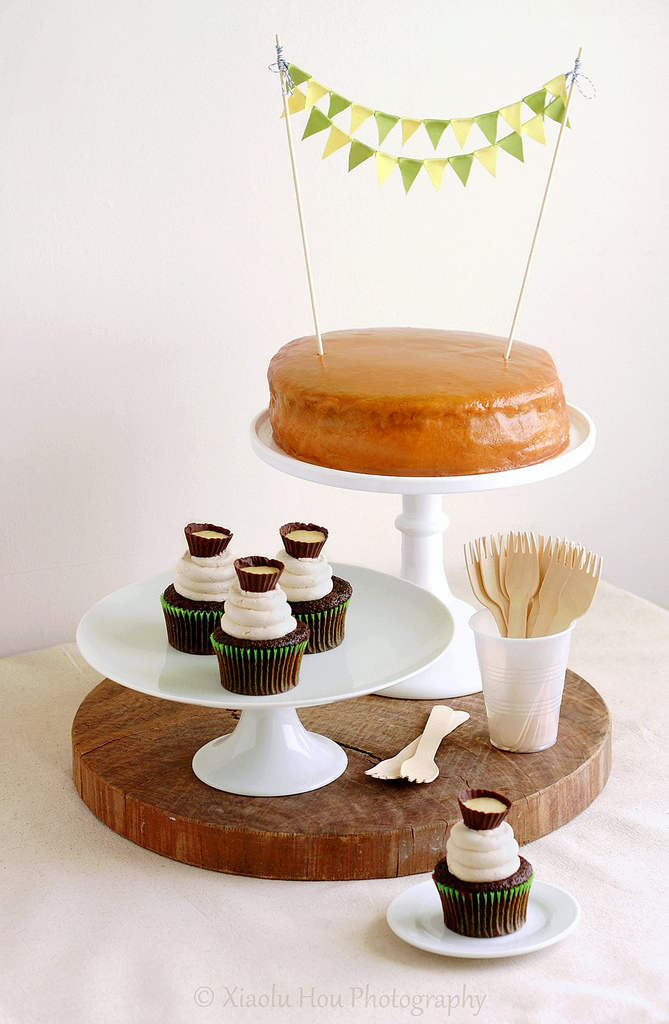
P.S. - If anyone's interested in this banner, you can print it on PDF HERE, preferably in color on card stock paper. Simply cut it out and glue/tape it to some wood skewers. Enjoy!
Snickers Chocolate Peanut Caramel Macarons [Printable Recipe]
Adapted from Tartelette, Daydreamer Desserts, and Not So Humble Pie (a great macaron troubleshooting post)
Makes about 25 to 35 macarons
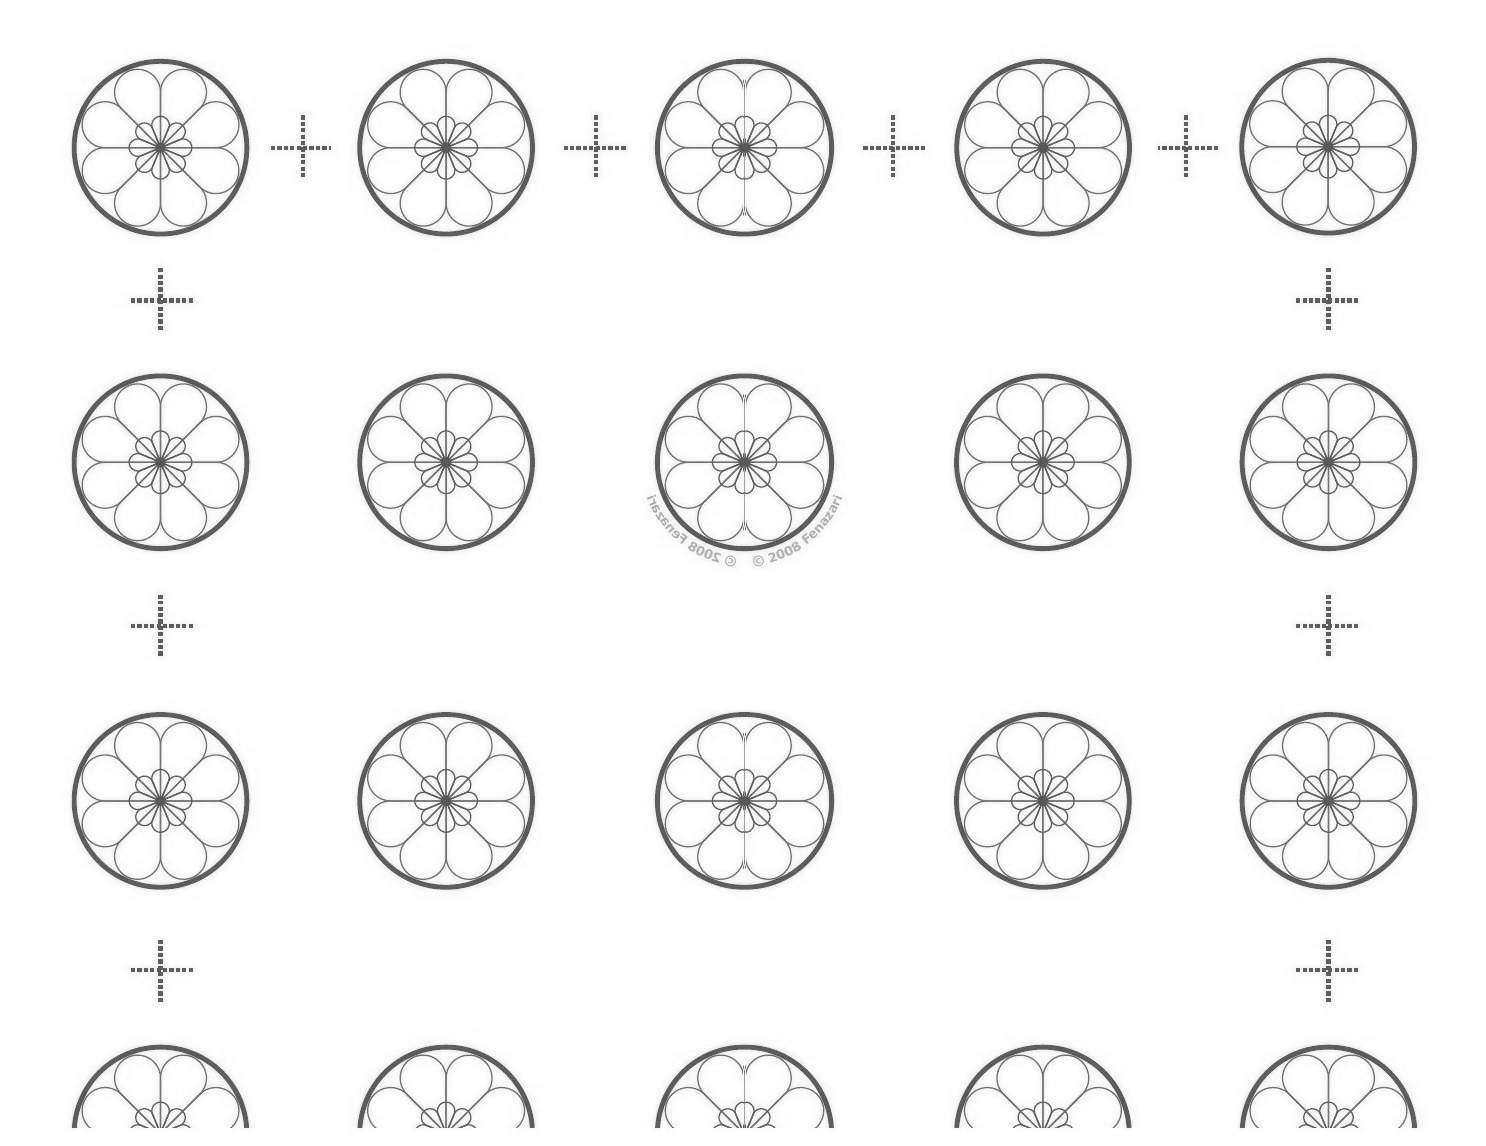
XIAOLU'S NOTES: Please do not try to convert this recipe to volume measurements if you don't have a scale (I use and love this one). This recipe is very sensitive and will not work if the measurements are not exact. Please also note that every oven is different and you'll figure out what works best for yours over time. Since mine has major hot spots, I bake on 2 stacked pans for insulation. If you're uncertain of your ability to pipe uniformly-sized macarons, like me, simply trace 1 1/4-inch circles on your parchment paper, flip the paper over, and pipe on the other side, using the outlines as your guide OR print (choose "fit to page") and slide this template under your parchment as a guide but don't forget to remove before baking! Macarons are best after having been refrigerated for 24 to 48 hours, according to French pastry master, Pierre Herme, "An osmosis takes place between the garnish and the biscuit. When freshly baked this is hard and crisp, but it absorbs some humidity from the filling and its inside becomes more tender while the crust on the surface stays intact" (quote via Not So Humble Pie). So even if you accidentally overbake the shells by a few minutes, maturing the macarons in the fridge for at least 48 hours should undo most of the damage =).
65 g almonds [not roasted or salted]
60 g peanuts [not salted]
15 g cocoa powder
160 g powdered sugar
Pinch of salt
55 g granulated sugar
2 g egg white powder [optional, to stabilize batter in humid weather]
100 g egg whites [about 3 large egg whites]
1/8 tsp cream of tartar or 1/4 tsp lemon juice [optional, to stabilize meringue]
Milk Chocolate Ganache (Recipe below)
Marshmallow Peanut "Nougat" (Recipe below)
About 1/3 cup caramel sauce OR dulce de leche (Recipe below)
About 25 to 35 peanut halves
Separate your eggs 2 to 5 days before, and store the whites in a covered container in the fridge. Bring the egg whites to room temperature before proceeding with the recipe. OR just microwave fresh egg whites 10 to 15 seconds in the microwave on medium heat.
Combine the almonds, peanuts, cocoa powder, powdered sugar, and salt in a food processor, and pulse on and off until the nuts are finely ground (about 1 to 2 minutes). Sift the powder to remove any large chunks that remain. Put those chunks back into the food processor and pulse again for another 30 to 60 seconds. Sift again. You will probably have some slightly chunkier almond bits. Hopefully they're no more than a tablespoon or so, in which case you can throw them out.
Weigh out and mix your granulated sugar and egg white powder in a small bowl until uniform; set aside. Using a handheld or stand mixer, whip the egg whites on medium-low speed with cream of tartar until foamy, then turn the speed up to medium to medium-high and gradually add the sugar mixture until you obtain a glossy meringue (it'll look like shaving cream, hold stiff peaks, and stay in place if you turn the bowl upside-down; don't overbeat your meringue or it will be too dry).
Add all of the nut mixture to the meringue, and fold in. Use both a folding motion that scrapes the bottom of the bowl (to incorporate the dry ingredients) and a gentle pressing motion, to deflate the meringue against the side of the bowl. Slow down after about 25 strokes, and fold the mass carefully until you obtain a batter that flows like magma or a thick ribbon. The whole process should not take more than 50 strokes. Test the batter by spooning a small amount of the batter up, then dropping it back down on itself. If it melts back into the rest of the batter within 30 seconds, it's ready for piping (this page has great photos of this test). If not, fold 2 more strokes and test again.
Fill a pastry bag fitted with a 1/3 to 1/2-inch wide plain tip (I like Ateco #804 or 806) with half of the batter. (When your bag is too full, the pressure causes the batter to rush out in a way that’s difficult to control, making for sloppy macarons.) Pipe tiny blobs of batter onto the 4 corners and center of 2 baking sheets, then line baking sheets with parchment paper OR line with silicone mats. Pipe small rounds (slightly larger than 1 inch wide) straight down and about 1 inch apart onto the baking sheets. Pick up each sheet with both hands and slam it firmly straight downward on the counter 2 to 3 times. This will to force out any large air bubbles. Immediately pop any bubbles that rise up but don't break with a toothpick. Do NOT do this once a few minutes have passed because you'll mess up the shell that's forming.
Preheat the oven to 275 to 300 degrees F. Let the macarons sit out for 25 to 60 minutes to harden their shells a bit (to prevent tops from cracking during baking). Test if they're ready by touching the top and side of one shell lightly. It should feel dry and not stick to your finger at all. Bake one pan at a time for 15 to 20 minutes in the middle shelf of your oven, depending on the size of the macarons. Let cool for 15 to 30 minutes before trying to move the shells.
Once cool, flip the shells over. If you have trouble removing them from parchment paper, pour a couple of drops of water under the paper while the sheet is still a bit warm, and the macarons will lift up more easily due to the moisture. Don't let them sit there in it too long or they will become soggy.
Fill the shells with 1/2 to 1 teaspoon of ganache, then 1/2 to 1 teaspoon of caramel sauce, top with a peanut, a 3/4-inch circle of flattened marshmallow nougat, and a similarly-sized top shell. For the best flavor and texture, store in the refrigerator for 24 to 48 hours before eating (see notes above for detailed explanation) but they are best if eaten within 5 days. Bring to room temperature before eating.
Milk Chocolate Ganache
3 oz. milk chocolate, roughly chopped
4 Tbsp heavy cream
In a small saucepan over medium high heat, bring the cream to a boil. Remove from heat, drop in the milk chocolate and let stand 5 minutes. Stir the chocolate into the cream until smooth. Set aside until it cools down and thickens a bit (chilling in the fridge or freezer is fine).
Marshmallow Peanut "Nougat"
3/4 cup marshmallows
2 Tbsp smooth peanut butter
In a heavy saucepan over medium low heat, melt marshmallows and peanut butter until smooth. Let cool. Once cooled you will be able to pull the "nougat" and from the saucepan and cut pieces to flatten in the palm of your hands and sandwich within the macarons.
Dulce de Leche
Adapted from Cooking for Engineers
Makes about 1 3/4 cups
14-oz. can sweetened condensed milk (NOT evaporated milk)
Heavy cream, as needed
MICROWAVE METHOD:
Pour into large (preferably 2 1/2-qt. capacity) microwave-safe bowl. Heat on medium for 2 minutes. Whisk and repeat until appears curdled (around 7 to 10 minutes total, depending on your microwave oven). To use as a caramel sauce, simply stop heating at this point and stir the dulce de leche until smooth. For a thicker candy-like caramel, continue heating for another 2 minutes or so and stir until smooth again while still hot.
PRESSURE COOKER METHOD:
Peel the label off the can of sweetened condensed milk. Put it in a pressure cooker with enough water to come 2/3 up the can. Do NOT open the cans at all. The can won't explode because the pressure cooker equalizes the pressure, but please still proceed with caution and follow the manufacturer's directions for operating the pressure cooker safely! Close the pressure cooker, and bring it up to full pressure. Turn the heat down to maintain the pressure for 20 (lighter) to 30 (darker and thicker) minutes. Turn off the heat and and let the pressure cooker cool slowly. Once the cooker is completely cool, open the lid and remove the can with tongs. Do not open the can while it is still warm. If there’s any pressure left in the can, it could spray and burn you with hot caramel. Wait until the can has completely cooled before opening it. Remove cooled caramel from can. If too thick for your liking, stir in 2 tablespoons of warm heavy cream at a time until desired consistency.
PREVIOUSLY: Chocolate Chunk Challah Bread French Toast
While you probably expect I got frustrated with all these failures (and I did at times), I actually got very invigorated by the learning process. The aggravating yet oddly fun thing about macarons is that there are so many ways to go wrong 8). When each batch came out with a new set of problems, (after the initial wailing) it was fun to play detective, teasing out causes to each symptom. I learned a lot, the most important being that 3 factors really make or break French macarons: properly whipping up the egg whites to stiff peaks, knowing when to stop mixing the batter, and knowing your oven (especially any major hot/cold spots). Each of my failed attempts resulted directly from a failure to do one of the above, and once I figured them out I got the results I wanted. On the flip side, humidity and heat are NOT the great saboteurs of macaron success you've heard them to be. It was warm and humid (rainy with no AC!) all 5 times I baked them but hottest and wettest on the day I succeeded 8).
Now I've probably scared you with all this talk of failed macarons and the recipe below will look impossibly long at first glance, but please rest assured that it's really not so hard. Macaron-making is simply a process that requires hands-on familiarity to perfect, and if you focus on the 3 key things I listed above, you'll have it down in no time. To give you a head's start, I've included some helpful videos below (not my own!) and lots of useful tips in the body of the recipe (which is why it's so long!). Once you've run through the process once or twice, you won't even look at directions anymore 'cause it'll be second nature. And if you learn anything from my experience, I hope it's to try try and try again! While I'm a beginner myself, I'd be happy to answer any macaron questions you may have via Twitter or email.
P.S. - If anyone's interested in this banner, you can print it on PDF HERE, preferably in color on card stock paper. Simply cut it out and glue/tape it to some wood skewers. Enjoy!
Snickers Chocolate Peanut Caramel Macarons [Printable Recipe]
Adapted from Tartelette, Daydreamer Desserts, and Not So Humble Pie (a great macaron troubleshooting post)
Makes about 25 to 35 macarons
XIAOLU'S NOTES: Please do not try to convert this recipe to volume measurements if you don't have a scale (I use and love this one). This recipe is very sensitive and will not work if the measurements are not exact. Please also note that every oven is different and you'll figure out what works best for yours over time. Since mine has major hot spots, I bake on 2 stacked pans for insulation. If you're uncertain of your ability to pipe uniformly-sized macarons, like me, simply trace 1 1/4-inch circles on your parchment paper, flip the paper over, and pipe on the other side, using the outlines as your guide OR print (choose "fit to page") and slide this template under your parchment as a guide but don't forget to remove before baking! Macarons are best after having been refrigerated for 24 to 48 hours, according to French pastry master, Pierre Herme, "An osmosis takes place between the garnish and the biscuit. When freshly baked this is hard and crisp, but it absorbs some humidity from the filling and its inside becomes more tender while the crust on the surface stays intact" (quote via Not So Humble Pie). So even if you accidentally overbake the shells by a few minutes, maturing the macarons in the fridge for at least 48 hours should undo most of the damage =).
65 g almonds [not roasted or salted]
60 g peanuts [not salted]
15 g cocoa powder
160 g powdered sugar
Pinch of salt
55 g granulated sugar
2 g egg white powder [optional, to stabilize batter in humid weather]
100 g egg whites [about 3 large egg whites]
1/8 tsp cream of tartar or 1/4 tsp lemon juice [optional, to stabilize meringue]
Milk Chocolate Ganache (Recipe below)
Marshmallow Peanut "Nougat" (Recipe below)
About 1/3 cup caramel sauce OR dulce de leche (Recipe below)
About 25 to 35 peanut halves
Separate your eggs 2 to 5 days before, and store the whites in a covered container in the fridge. Bring the egg whites to room temperature before proceeding with the recipe. OR just microwave fresh egg whites 10 to 15 seconds in the microwave on medium heat.
Combine the almonds, peanuts, cocoa powder, powdered sugar, and salt in a food processor, and pulse on and off until the nuts are finely ground (about 1 to 2 minutes). Sift the powder to remove any large chunks that remain. Put those chunks back into the food processor and pulse again for another 30 to 60 seconds. Sift again. You will probably have some slightly chunkier almond bits. Hopefully they're no more than a tablespoon or so, in which case you can throw them out.
Weigh out and mix your granulated sugar and egg white powder in a small bowl until uniform; set aside. Using a handheld or stand mixer, whip the egg whites on medium-low speed with cream of tartar until foamy, then turn the speed up to medium to medium-high and gradually add the sugar mixture until you obtain a glossy meringue (it'll look like shaving cream, hold stiff peaks, and stay in place if you turn the bowl upside-down; don't overbeat your meringue or it will be too dry).
Add all of the nut mixture to the meringue, and fold in. Use both a folding motion that scrapes the bottom of the bowl (to incorporate the dry ingredients) and a gentle pressing motion, to deflate the meringue against the side of the bowl. Slow down after about 25 strokes, and fold the mass carefully until you obtain a batter that flows like magma or a thick ribbon. The whole process should not take more than 50 strokes. Test the batter by spooning a small amount of the batter up, then dropping it back down on itself. If it melts back into the rest of the batter within 30 seconds, it's ready for piping (this page has great photos of this test). If not, fold 2 more strokes and test again.
Fill a pastry bag fitted with a 1/3 to 1/2-inch wide plain tip (I like Ateco #804 or 806) with half of the batter. (When your bag is too full, the pressure causes the batter to rush out in a way that’s difficult to control, making for sloppy macarons.) Pipe tiny blobs of batter onto the 4 corners and center of 2 baking sheets, then line baking sheets with parchment paper OR line with silicone mats. Pipe small rounds (slightly larger than 1 inch wide) straight down and about 1 inch apart onto the baking sheets. Pick up each sheet with both hands and slam it firmly straight downward on the counter 2 to 3 times. This will to force out any large air bubbles. Immediately pop any bubbles that rise up but don't break with a toothpick. Do NOT do this once a few minutes have passed because you'll mess up the shell that's forming.
Preheat the oven to 275 to 300 degrees F. Let the macarons sit out for 25 to 60 minutes to harden their shells a bit (to prevent tops from cracking during baking). Test if they're ready by touching the top and side of one shell lightly. It should feel dry and not stick to your finger at all. Bake one pan at a time for 15 to 20 minutes in the middle shelf of your oven, depending on the size of the macarons. Let cool for 15 to 30 minutes before trying to move the shells.
Once cool, flip the shells over. If you have trouble removing them from parchment paper, pour a couple of drops of water under the paper while the sheet is still a bit warm, and the macarons will lift up more easily due to the moisture. Don't let them sit there in it too long or they will become soggy.
Fill the shells with 1/2 to 1 teaspoon of ganache, then 1/2 to 1 teaspoon of caramel sauce, top with a peanut, a 3/4-inch circle of flattened marshmallow nougat, and a similarly-sized top shell. For the best flavor and texture, store in the refrigerator for 24 to 48 hours before eating (see notes above for detailed explanation) but they are best if eaten within 5 days. Bring to room temperature before eating.
Milk Chocolate Ganache
3 oz. milk chocolate, roughly chopped
4 Tbsp heavy cream
In a small saucepan over medium high heat, bring the cream to a boil. Remove from heat, drop in the milk chocolate and let stand 5 minutes. Stir the chocolate into the cream until smooth. Set aside until it cools down and thickens a bit (chilling in the fridge or freezer is fine).
Marshmallow Peanut "Nougat"
3/4 cup marshmallows
2 Tbsp smooth peanut butter
In a heavy saucepan over medium low heat, melt marshmallows and peanut butter until smooth. Let cool. Once cooled you will be able to pull the "nougat" and from the saucepan and cut pieces to flatten in the palm of your hands and sandwich within the macarons.
Dulce de Leche
Adapted from Cooking for Engineers
Makes about 1 3/4 cups
14-oz. can sweetened condensed milk (NOT evaporated milk)
Heavy cream, as needed
MICROWAVE METHOD:
Pour into large (preferably 2 1/2-qt. capacity) microwave-safe bowl. Heat on medium for 2 minutes. Whisk and repeat until appears curdled (around 7 to 10 minutes total, depending on your microwave oven). To use as a caramel sauce, simply stop heating at this point and stir the dulce de leche until smooth. For a thicker candy-like caramel, continue heating for another 2 minutes or so and stir until smooth again while still hot.
PRESSURE COOKER METHOD:
Peel the label off the can of sweetened condensed milk. Put it in a pressure cooker with enough water to come 2/3 up the can. Do NOT open the cans at all. The can won't explode because the pressure cooker equalizes the pressure, but please still proceed with caution and follow the manufacturer's directions for operating the pressure cooker safely! Close the pressure cooker, and bring it up to full pressure. Turn the heat down to maintain the pressure for 20 (lighter) to 30 (darker and thicker) minutes. Turn off the heat and and let the pressure cooker cool slowly. Once the cooker is completely cool, open the lid and remove the can with tongs. Do not open the can while it is still warm. If there’s any pressure left in the can, it could spray and burn you with hot caramel. Wait until the can has completely cooled before opening it. Remove cooled caramel from can. If too thick for your liking, stir in 2 tablespoons of warm heavy cream at a time until desired consistency.
PREVIOUSLY: Chocolate Chunk Challah Bread French Toast